
User Manual - Billing
Billing Module
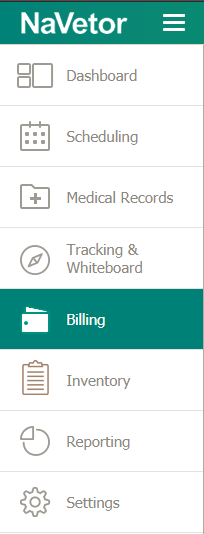
Billing module is intended to create estimates, record and process invoices, payments and deposits. It can be accessed from the Navigation button at the top left of the screen.
Billing module contain sections for:
- Charge Estimate
- Create Charge Estimate
- Estimate History
- Invoice
- Invoice
- Create Invoice
- Payment
- New Payment
- Client Payment
- Deposit
- New Deposit
- Refund
- Credit
- Client Credit
- Add Client Credit
Charge Estimate
Charge Estimate is mainly requesting price estimates on in-patient and out-patient procedures. This helps create a positive patient experience, through understanding financial expectations before services occur. Creating Charge Estimates facilitates an understanding of costs associated with different treatment options, and allows the patient to begin payment or make payment plans before billing turns into debt. The software uses the practice’s own claims data and managed care contracts to generate high- and low-cost estimates, including discounts based on different aspects.
Charge Estimate can be created from two different areas of the application:
- The billing Module
- The Plan screen in the EMR module
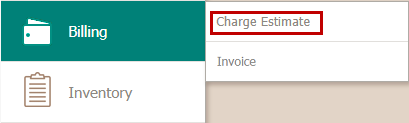
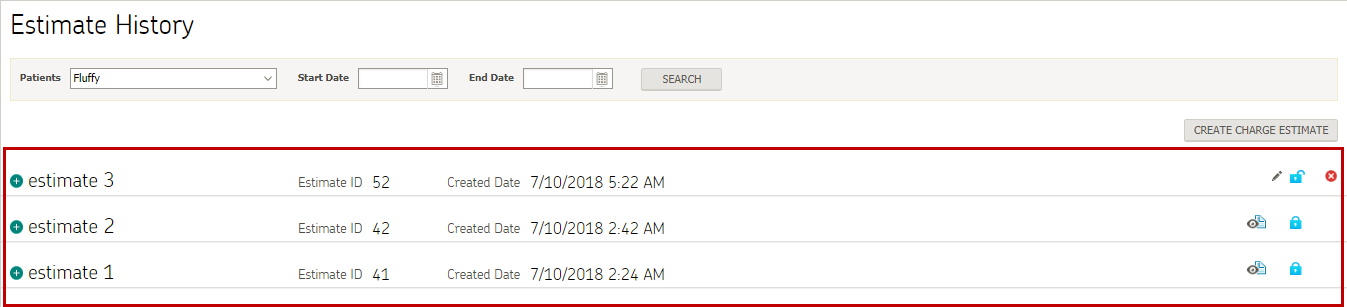
To access Charge Estimate through billing module: Click
Billing > Charge Estimate.
User is navigated to charge estimate page, displaying estimate history.

User can select an estimate from the existing list of charge estimates or create a new charge estimate.
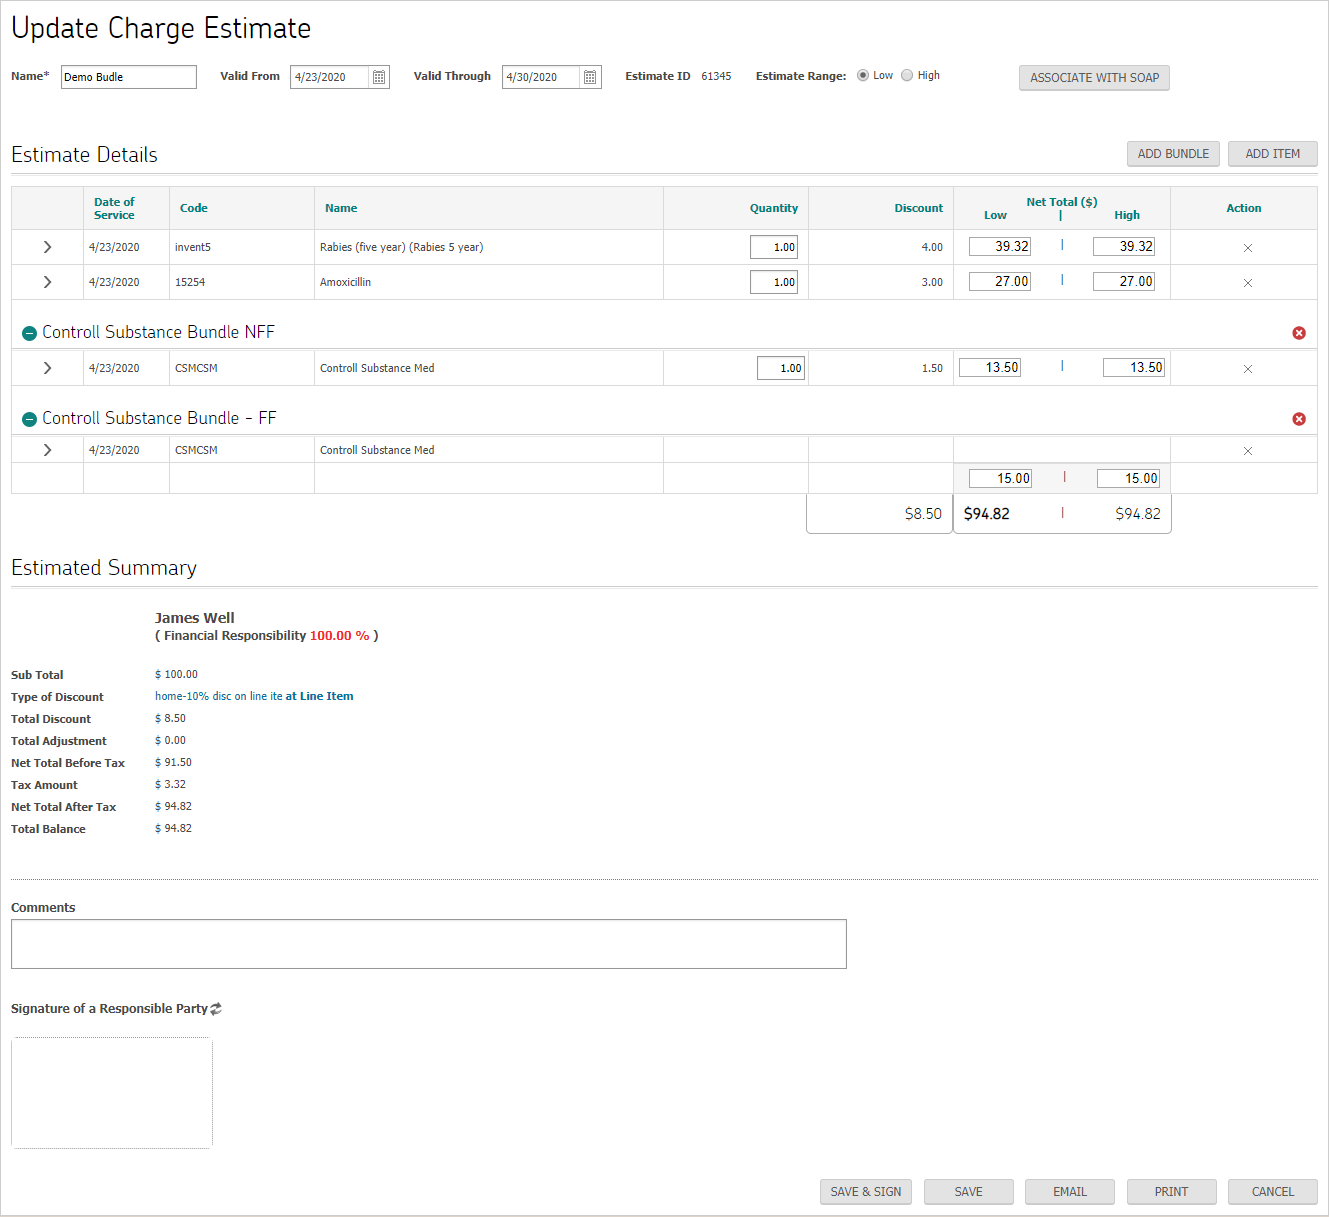
Create new charge estimate
To create a new estimate, click on create charge estimate button on listing page

User should specify following information on create charge estimate page
- Name of Estimate
- Validity date range
- Estimate range (low/high)
- Enter billable entities via bundles or individual items
- Edit/Override item price for low and high (if allowed from setting)
- Add any comments
- Seek approval from client
- Associate with SOAP
- Save and sign charge estimate
Upon entering mandatory information, user can click on save button, charge estimate will be added to listing page. User can update this estimate by selecting from the list and making necessary changes.
However, once signed, charge estimate cannot be updated.
Add Bundle(s)
User clicks on add bundle button, a list of all existing bundles is displayed in a popup.
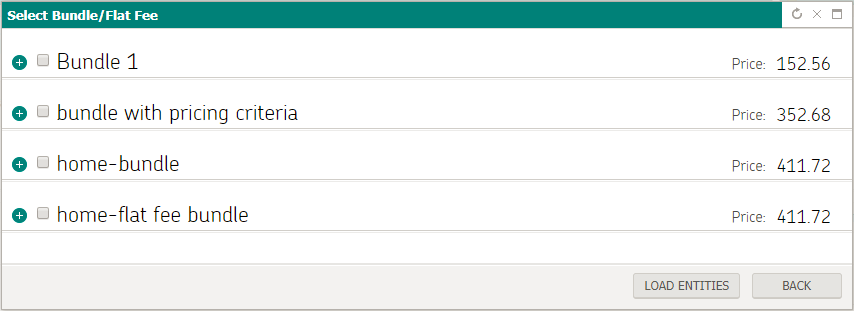
User can select multiple bundle(s) and click on load entities button, invoice details section will be populated with all billable entities contained in selected bundle(s).

Add Item(s)
User clicks on add item button on charge estimate screen, a list of all existing inventory items is displayed in a popup.
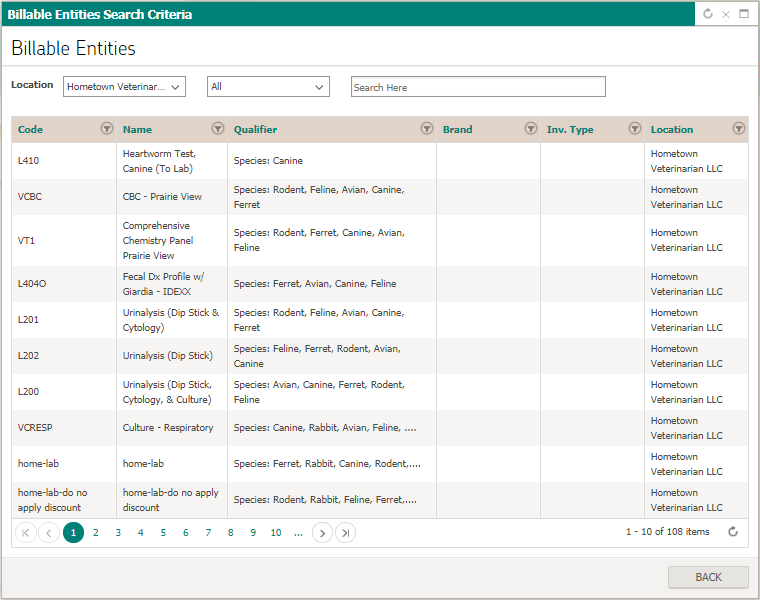
User clicks on the item(s) to be added. They will immediately reflect on Charge Estimate screen.
Once user is done adding items/bundles to charge estimate, it can be saved by clicking on save button. User can still make changes to this charge estimate by opening in edit mode. However, if user clicks on save and sign button, charge estimate will be saved and no changes can be made to it. It will open in read only mode.
Edit charge estimate
To use an existing one, user selects an estimate from estimate history listing page.

Upon selecting a charge estimate, following screen is displayed
 Notes:
If a charge estimate is signed,
- It cannot be edited or deleted. It can only be viewed.
If a charge estimate is unsigned,
- It can be edited or deleted.
User can make necessary changes and click on ‘save’ or ‘save and sign’ button, changes will be updated on charge estimate.
Once user is done adding items/bundles to charge estimate, it can be saved by clicking on save button. User can still make changes to this charge estimate by opening in edit mode. However, if user clicks on save and sign button, charge estimate is saved and no changes can be made to it.
The newly created/updated charge estimate will appear on Estimate History screen.
Associate charge estimate with SOAP
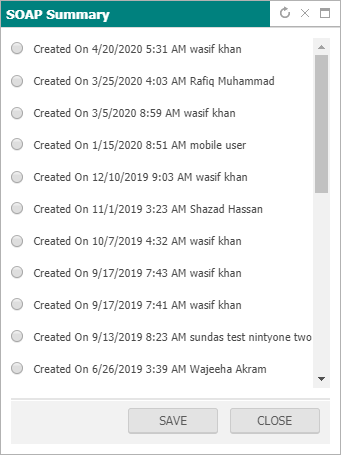
Once a charge estimate is saved/signed, user can associate with a SOAP by clicking on the button.
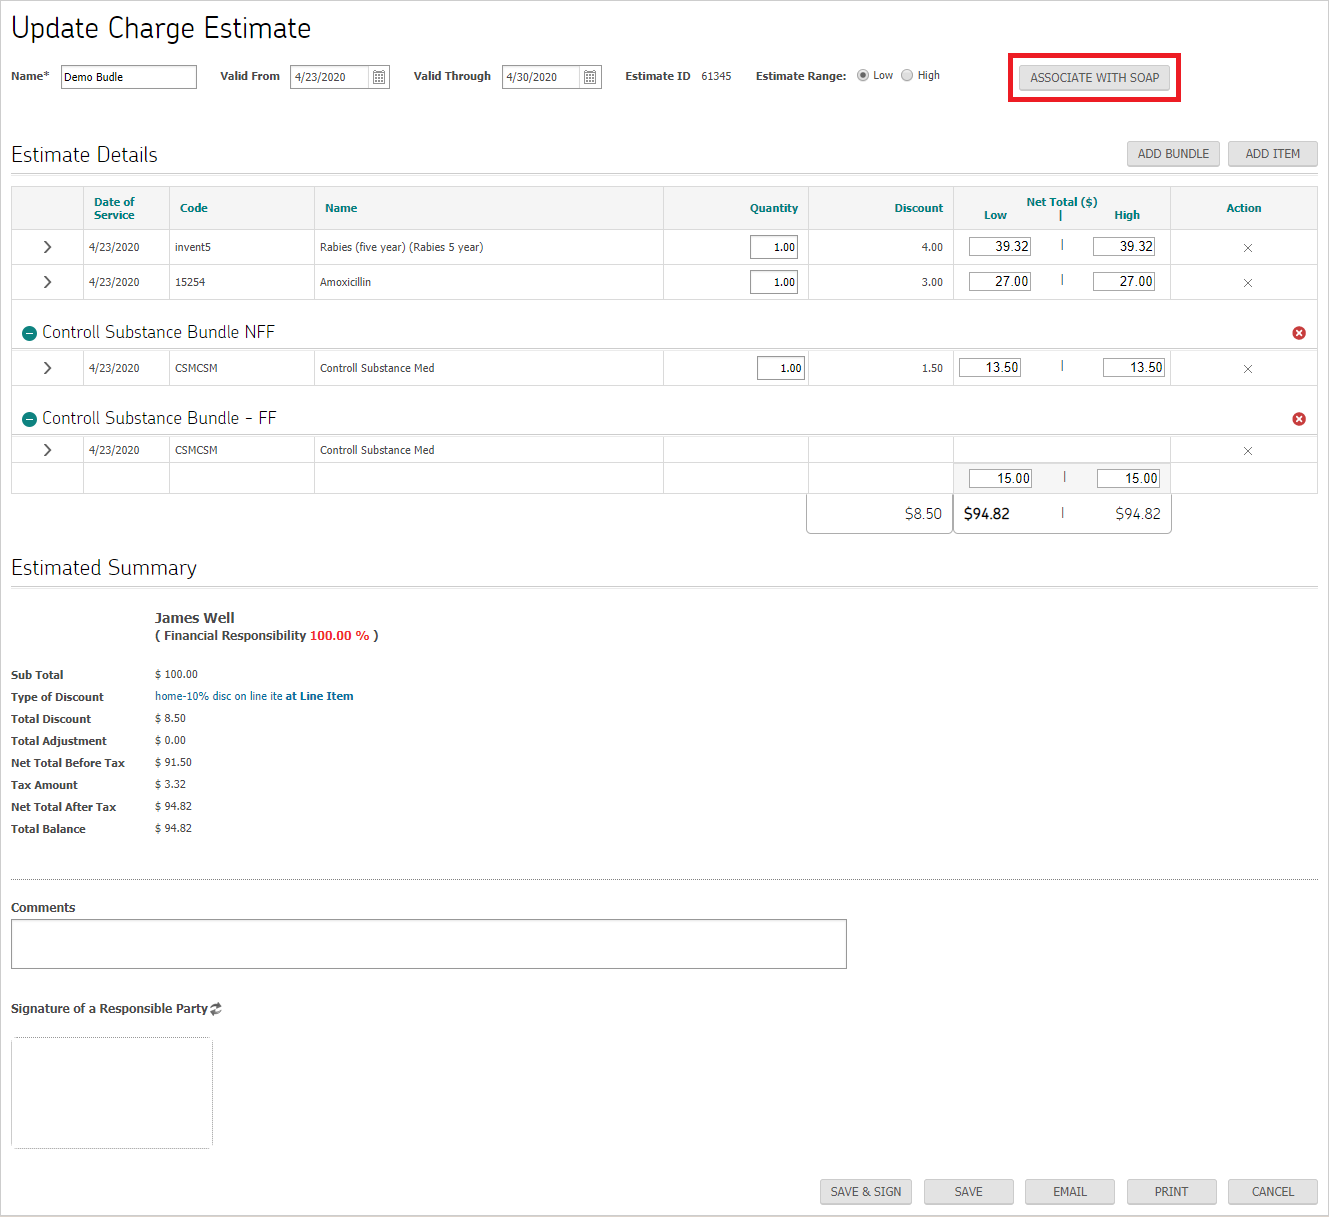
Upon clicking, system will show a popup screen to select the desired SOAP to which user wants to associate charge estimate.
Charge estimate from SOAP Note Screen
A charge estimate can be created or updated from SOAP Note screen also
Medical Records > Clinical > SOAP note
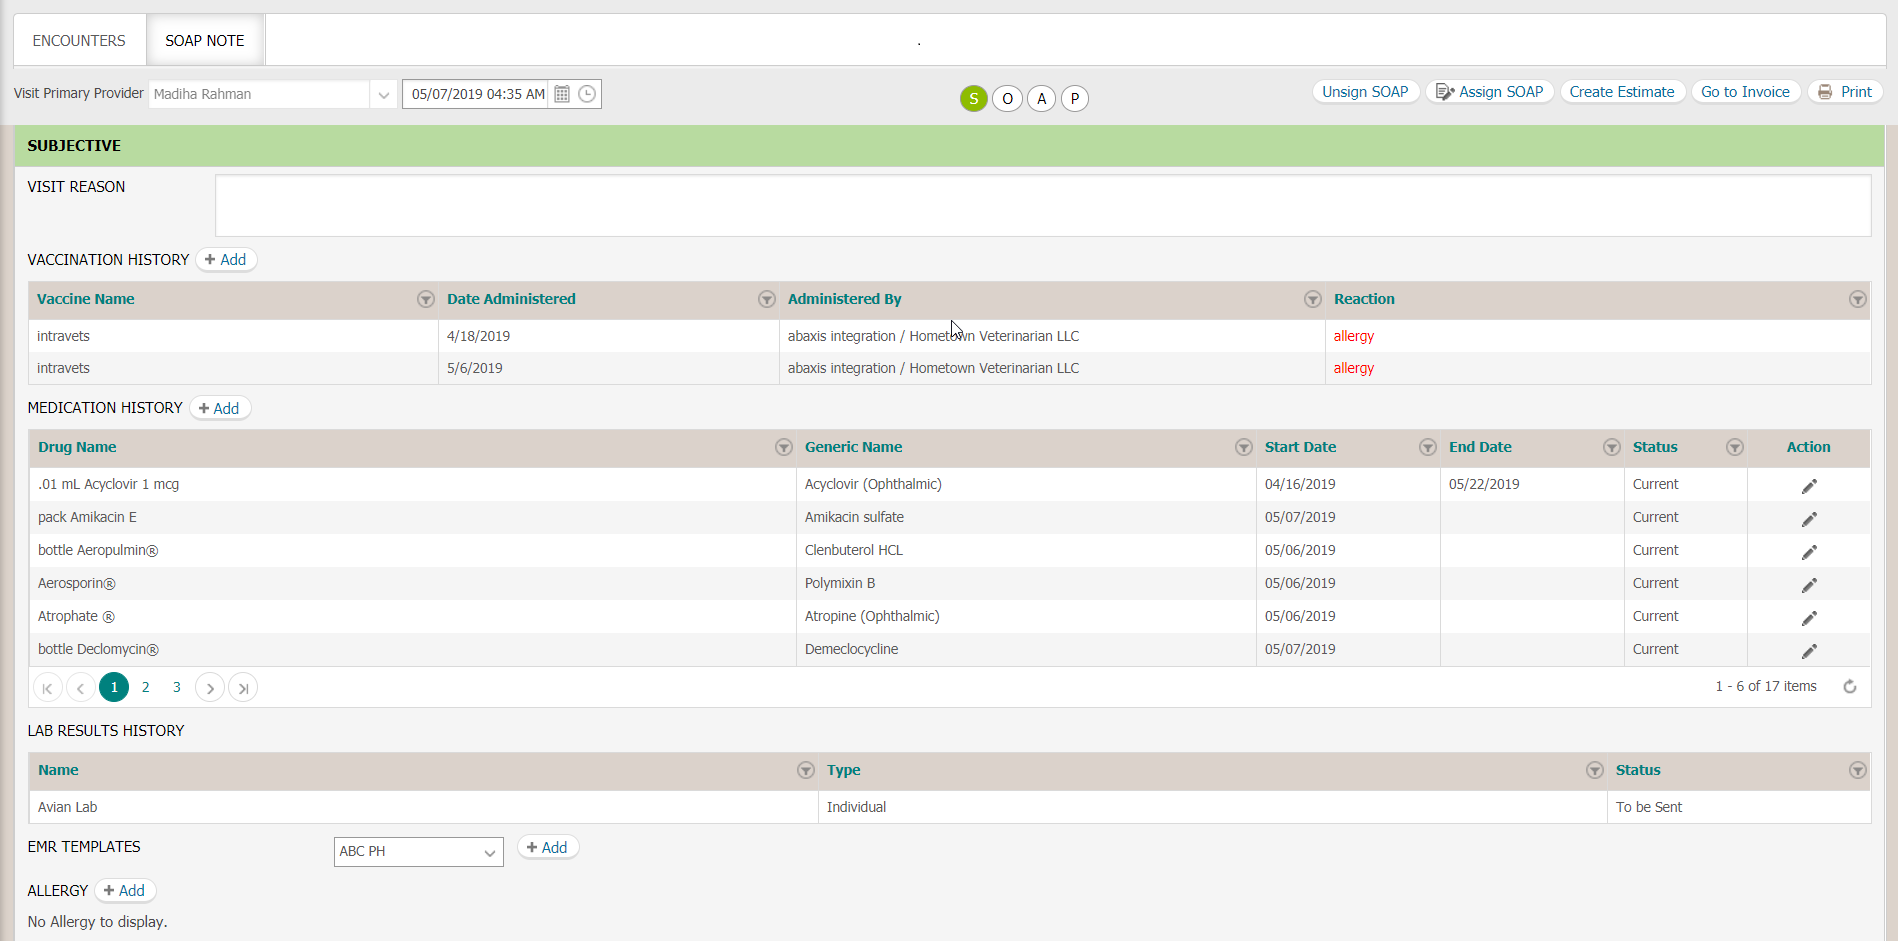
User clicks on create estimate button for prescribed orders. All relevant orders are added to the charge estimate and user is navigated to the create Charge Estimate screen.
User can follow the same steps mentioned in the Create New / update Charge Estimate section to make any changes/updates if required. Same workflows as already discussed above.
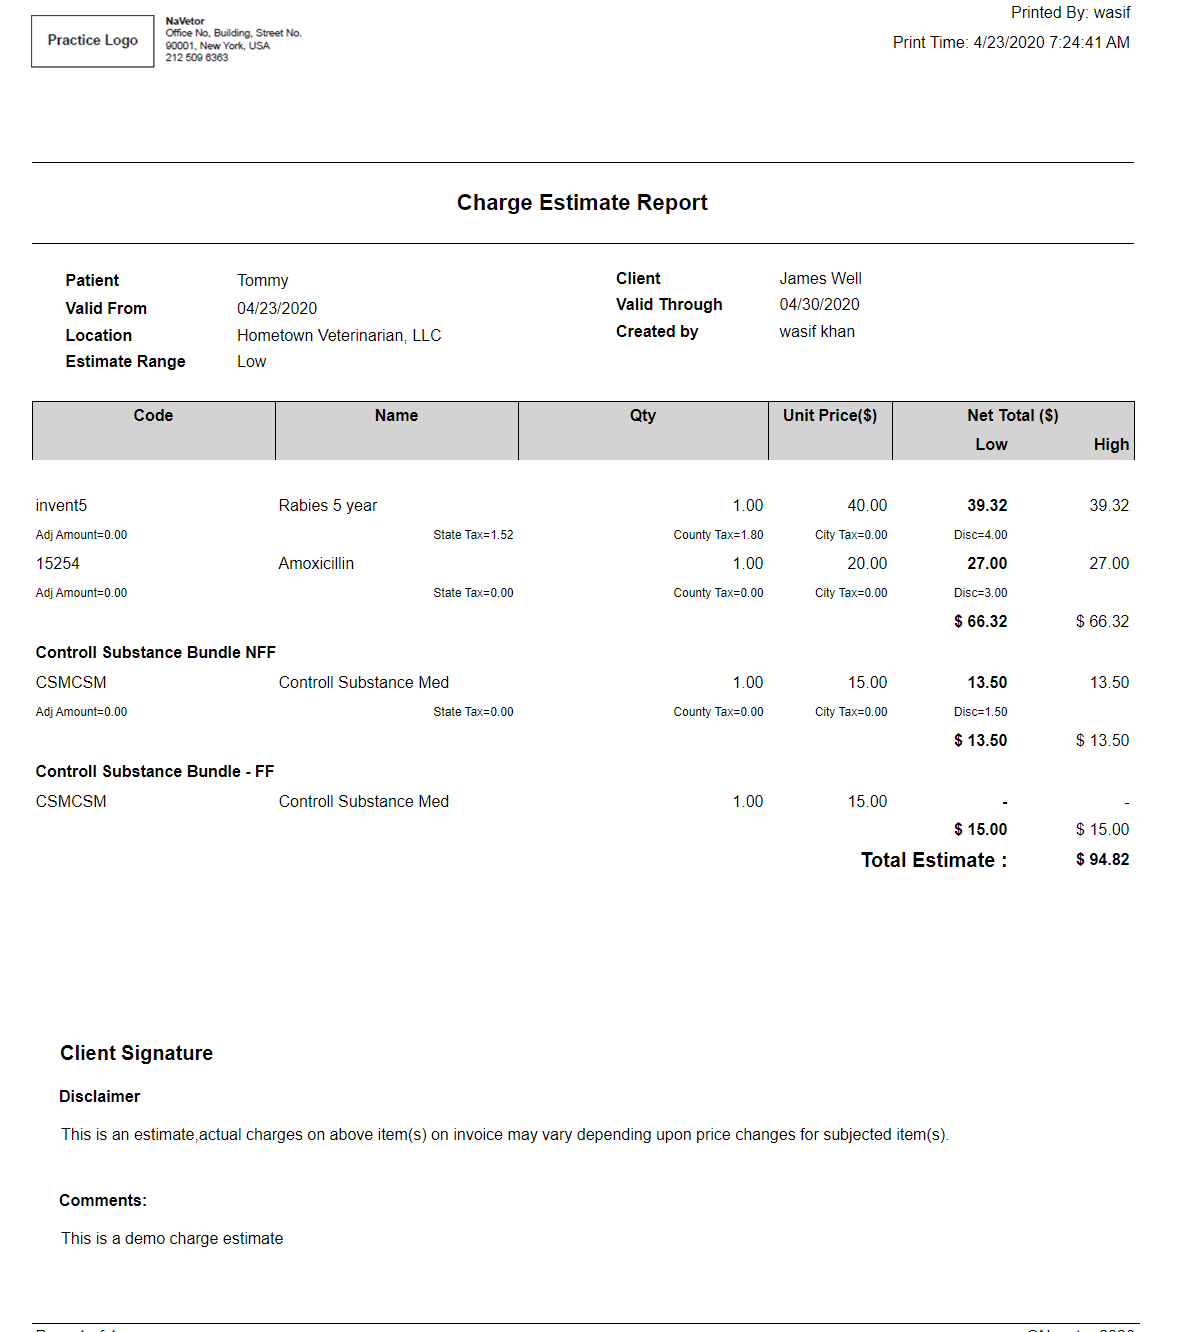
Disclaimer on Charge Estimate
After configuring charge estimate through practice settings, when user print charge estimate configured text will display in disclaimer section otherwise system will show default disclaimer.
Print Charge Estimate
User can print charge estimate once it is saved by clicking on print button. If user include comments in setting comments against each line item (if any) and invoice comments will be displayed as in following screen.
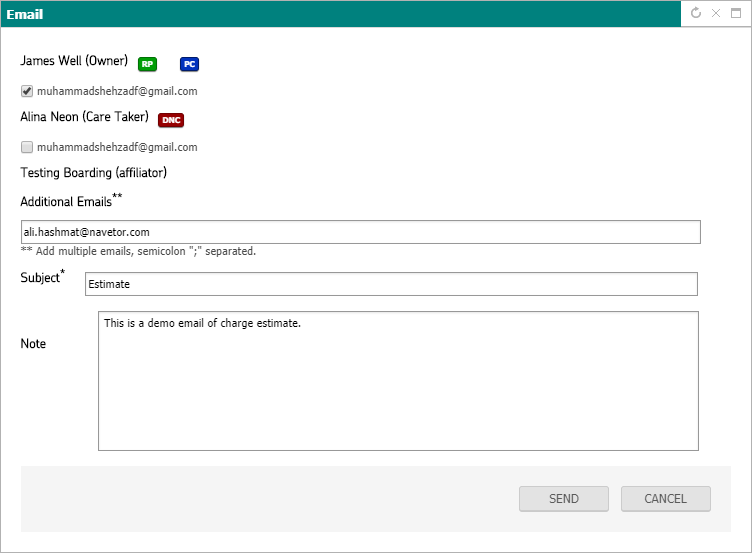
Email Charge Estimate
User can send email of charge estimate once it is saved by clicking on email button. After clicking email button system will open a popup where user can select email to whom s/he wants to send email. User can also edit Subject and Body of the email.
Invoice
Invoice contains patient’s financial records maintaining invoices for services rendered, payments against invoices and deposits if any by patient for later adjustments to clear invoices. It contains three sections:
- Invoice
- Payment
- Deposit
- Refund
- Credit
- Client Credit
To access invoice, user navigates to billing > invoice

Invoice
Upon clicking invoice tab, patient’s invoice will be displayed as default landing page
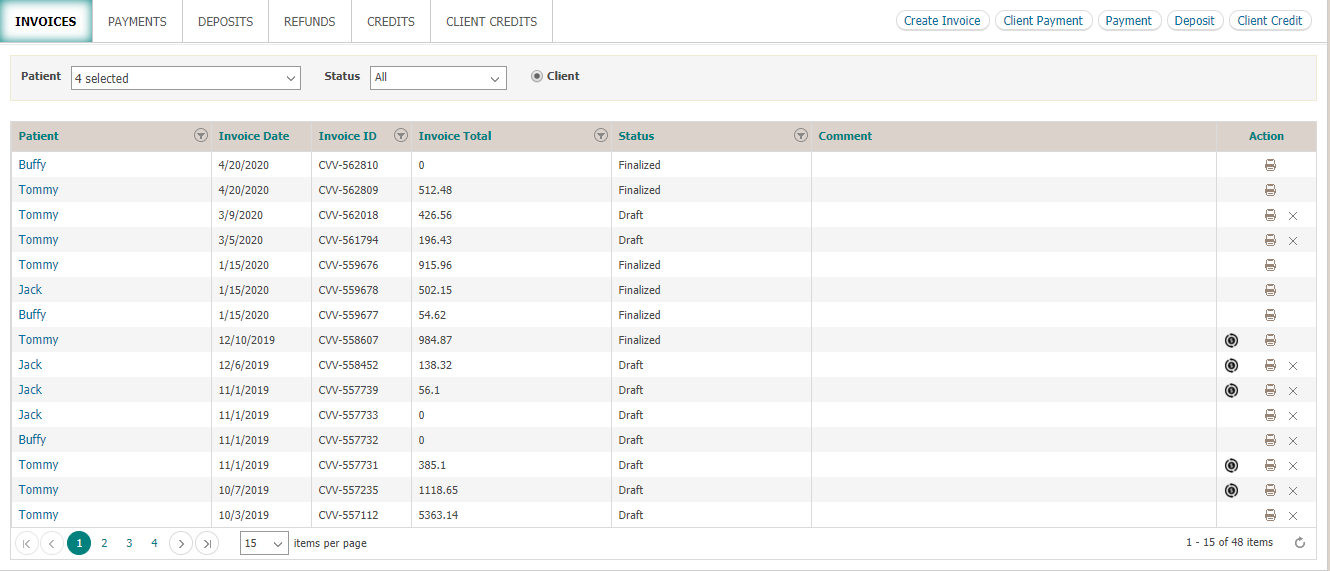
User will be able to view all patient associated invoices under “invoice” tab. Search filters are available to facilitate user in order to view any specific invoice(s).
1. View Existing Invoice
User can view an existing invoice by clicking on patient’s name for that particular invoice. If the status of selected invoice is draft, then user can make changes to existing invoice by adding bundles, items, associating it with an encounter, add a comment against a billable entity applying adjustments, making a deposit/payment or marking it as finalized and print label for any medication on invoice. User can also print rabies certificate on invoice finalization if rabies vaccine item is added to it.
If user marked an invoice as finalized then to make changes in the invoice, user needs to mark is as Unfinalized by click  button. This button will be available only against those invoices which are finalized. Upon Unfinalizing an invoice the status of invoice will be changes to draft.
Note.
- User will not be able to post any payments against finalized invoices.
- If the practice allow user “Change Price” from setting then user can also update price of each item s/he want to change. Further details are available in setting module.
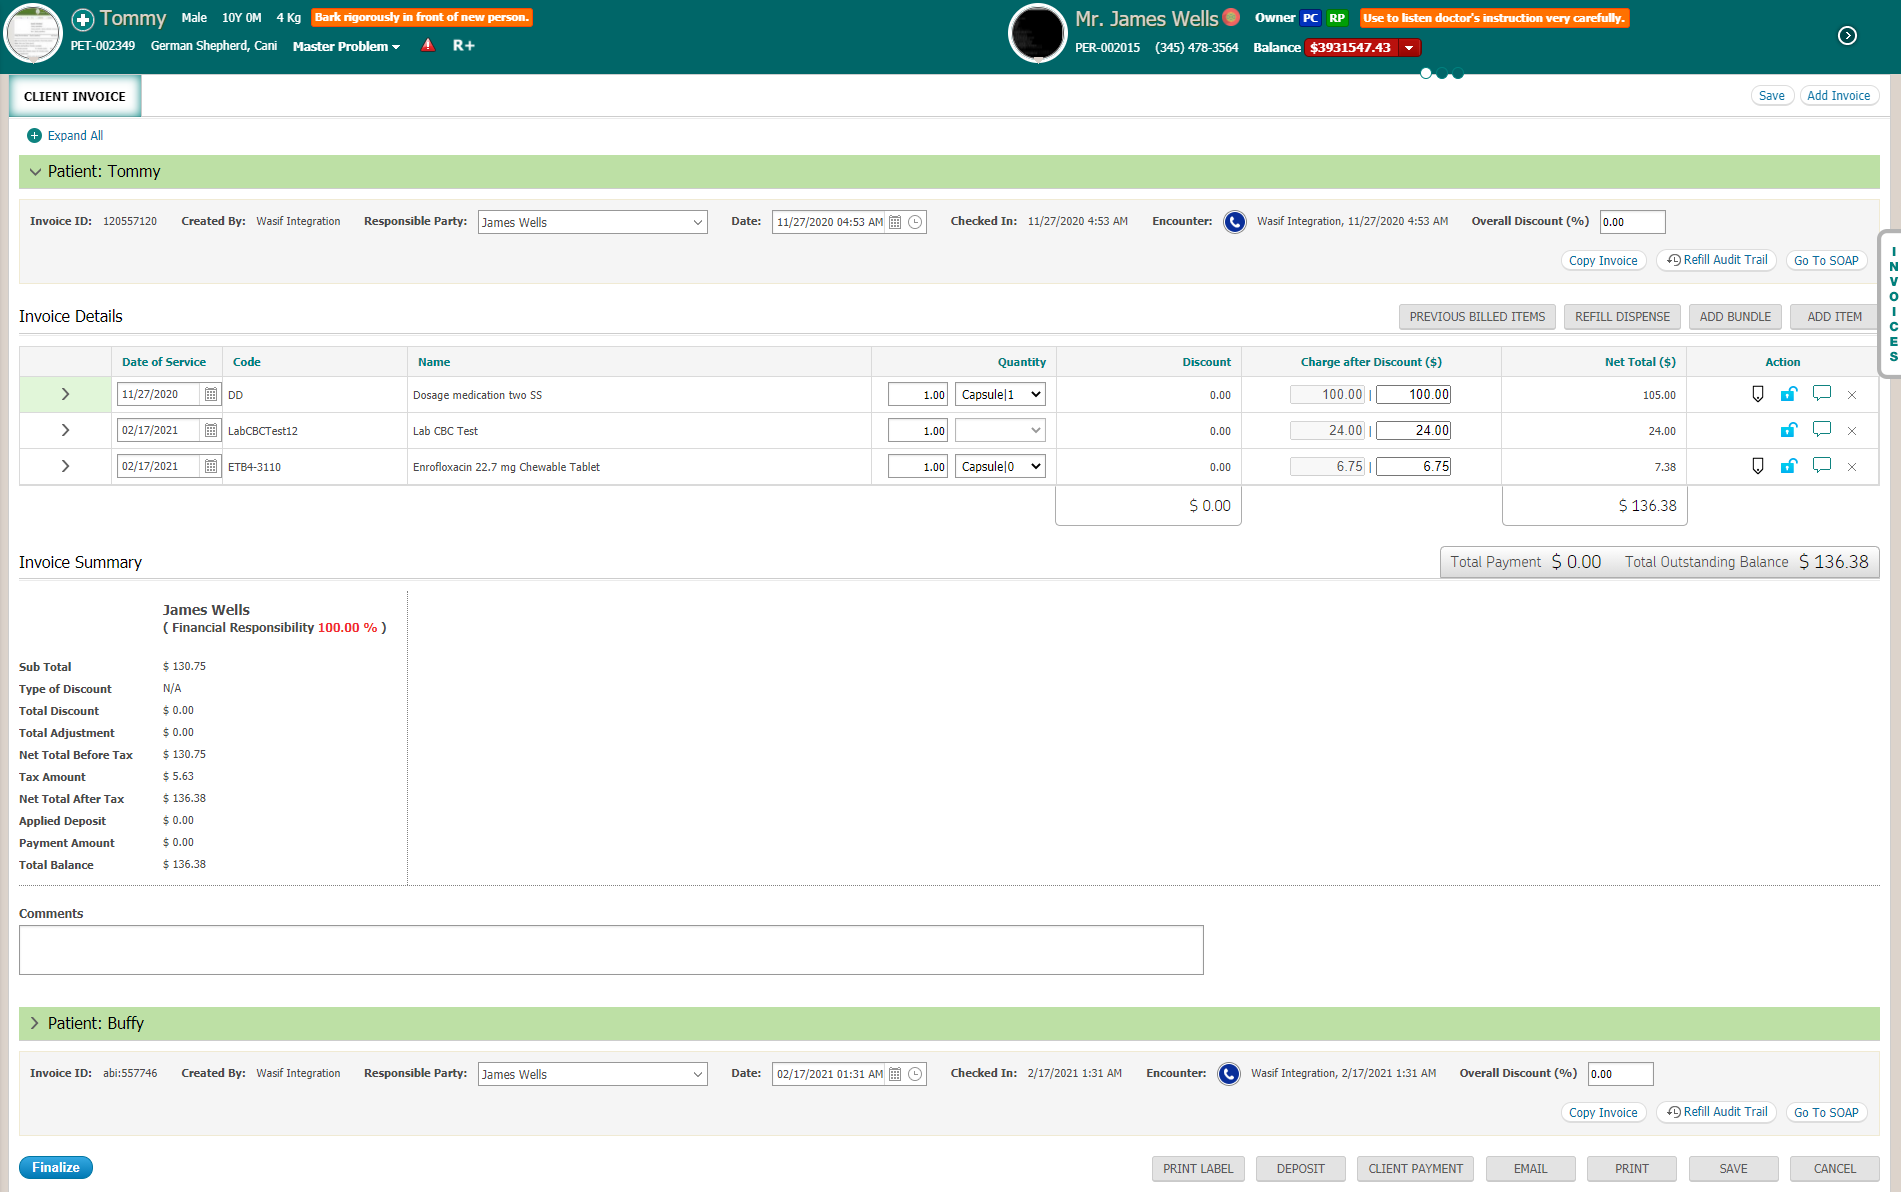
Associate with encounter button is only displayed for those invoices that do not have an encounter associated to it. User has an option to associate only telephonic encounters in such cases. Upon clicking this button, telephonic encounters will be listed
Once user is done making necessary changes, user can click on save button or post a payment/deposit against the invoice.
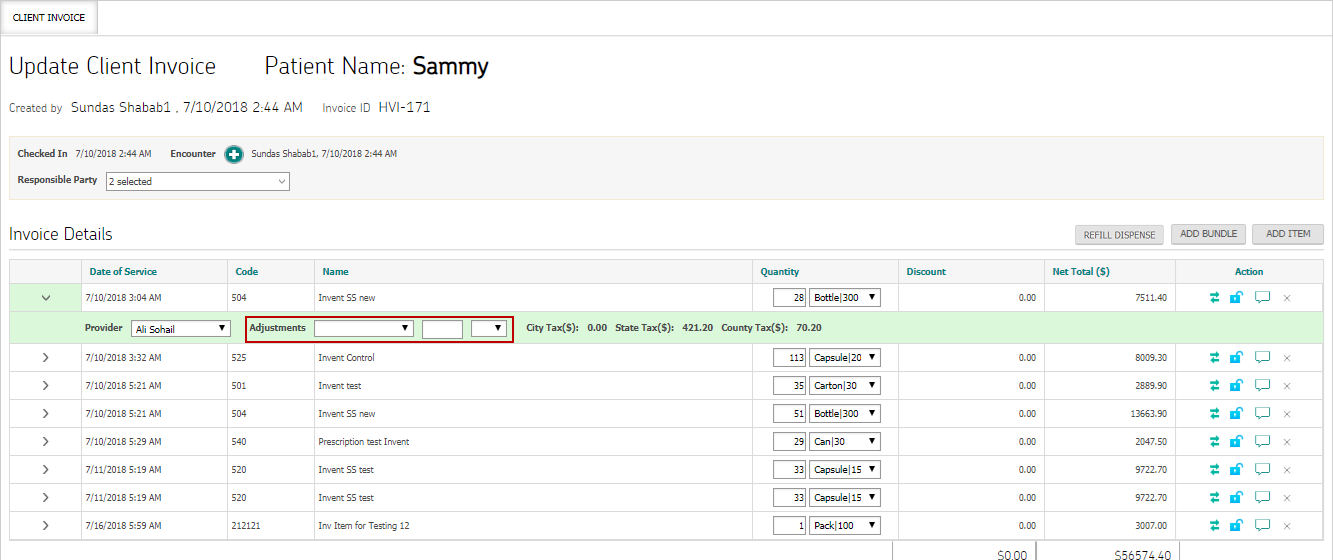
User can apply line item level adjustments on invoice. Upon clicking adjustment dropdown, the adjustment types displayed are fetched from Settings > Billing > adjustment types
On clicking save button, user will be navigated back to “Invoice” tab.
On clicking finalize button, invoice status will be changed to “finalized” and no further payments can be made.
Payment methods:
On payment screen, when user select any invoice from dropdown which have unsaved items or in draft state.
System will not add amount in total of unsaved items due to which an alert will display.
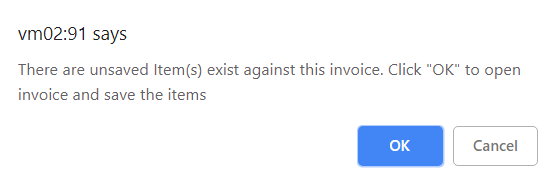
Before making payment for those invoice user must have to save all those unsaved items.
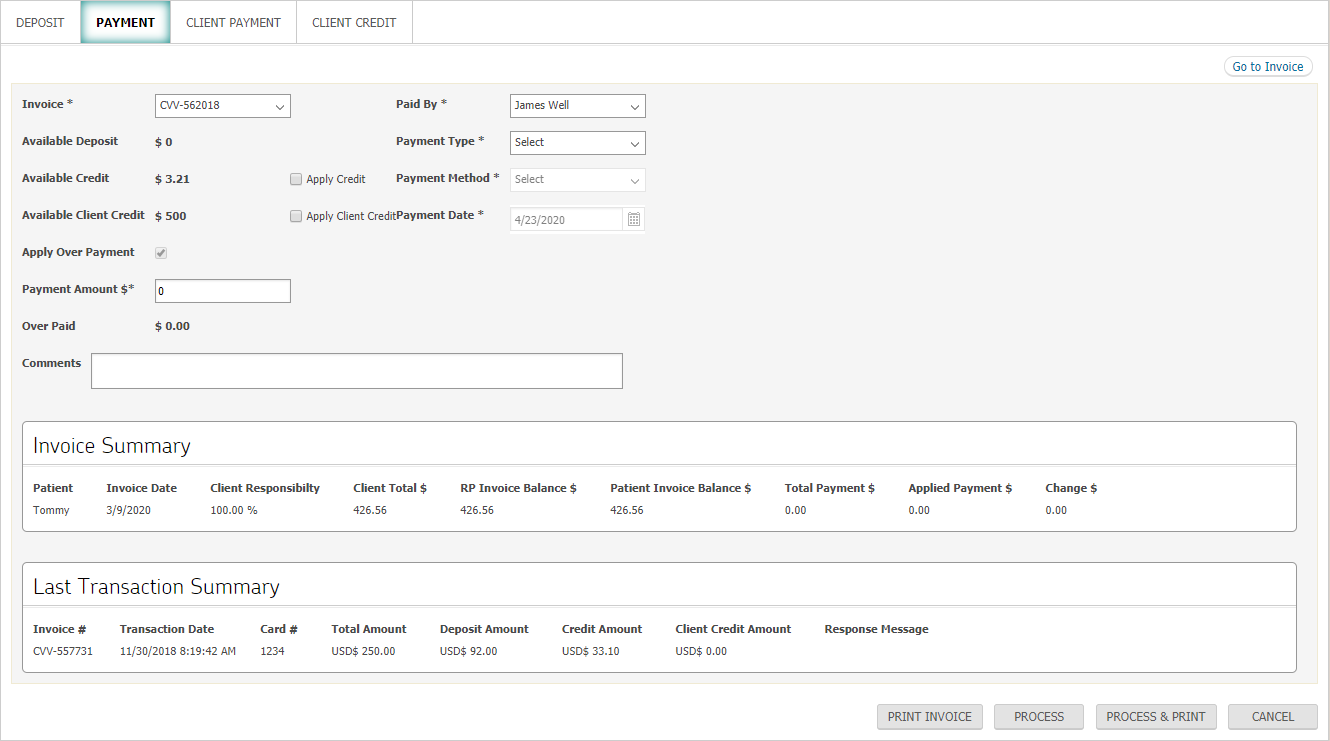
If user click payment button on invoice, user will be navigated to payment screen with invoice # and paid by prepopulated from invoice. User can make a payment via following methods:
- ACH
- Cash
- Check
- Debit Card
- Credit Card
- For credit card payment method, user can save “card on file” on consent of client for future payments usually recurring that are made monthly. For this, “keep card on file” checkbox should be marked. This is only applicable when payment types are EMV or host pay as shown in following screen
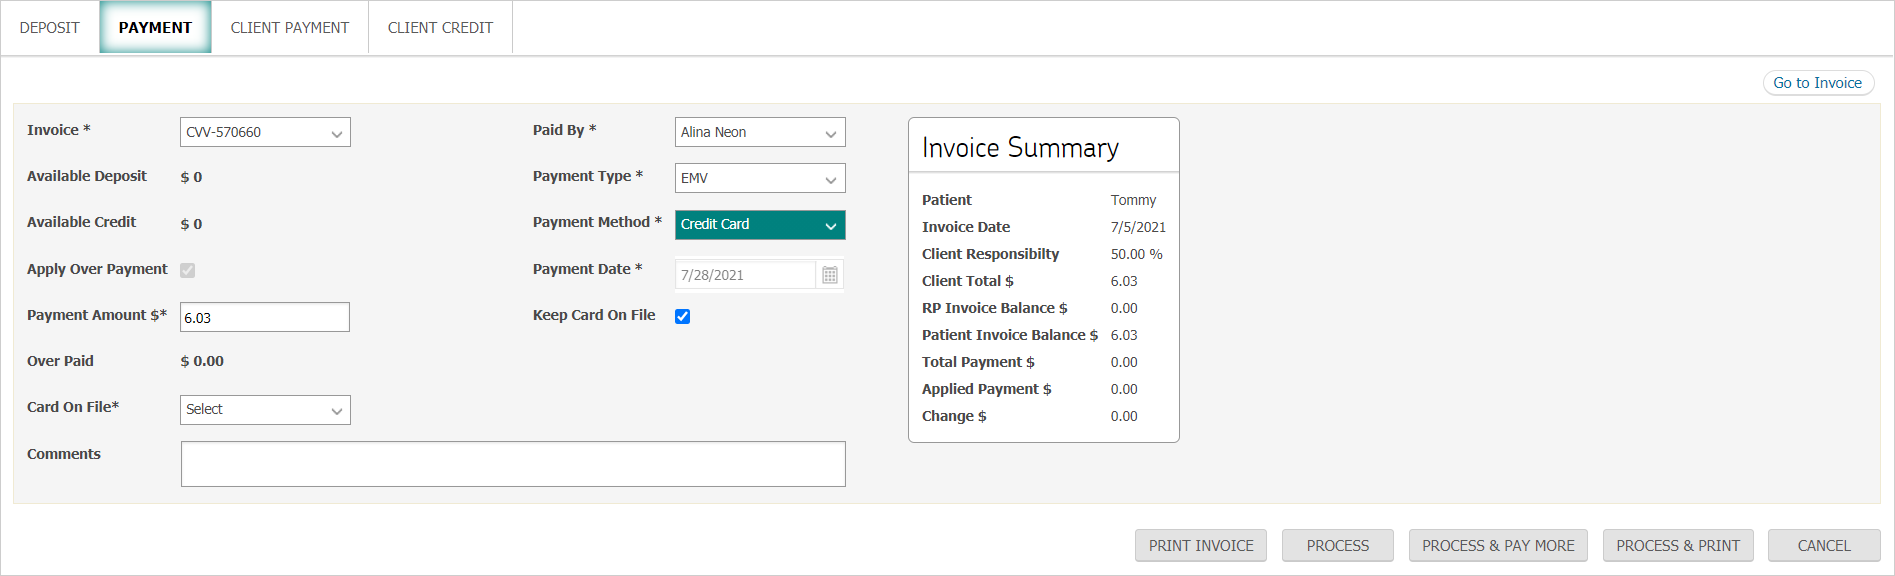
- Once transaction is successfully processed, user can simply select the “card on file” from respective dropdown on above screen.
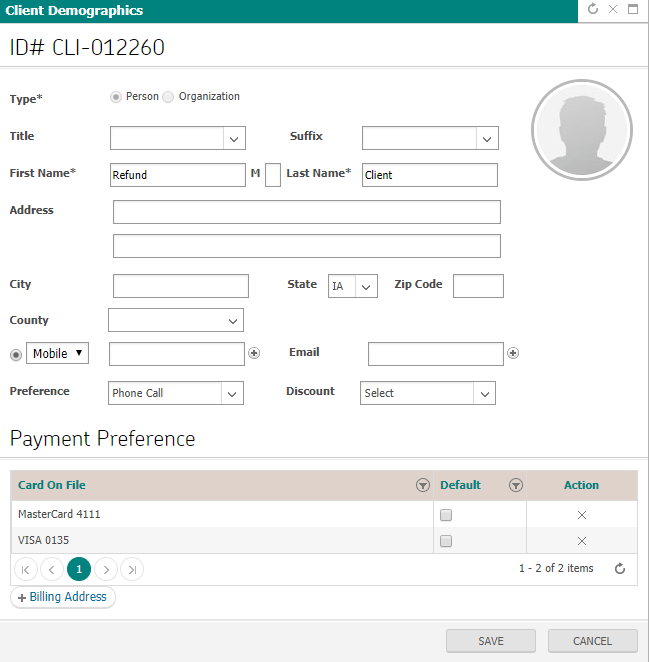
- “Card on file” information is configured and stored under payment preference section on client demographics popup. User can also specify default card to be used for future payments
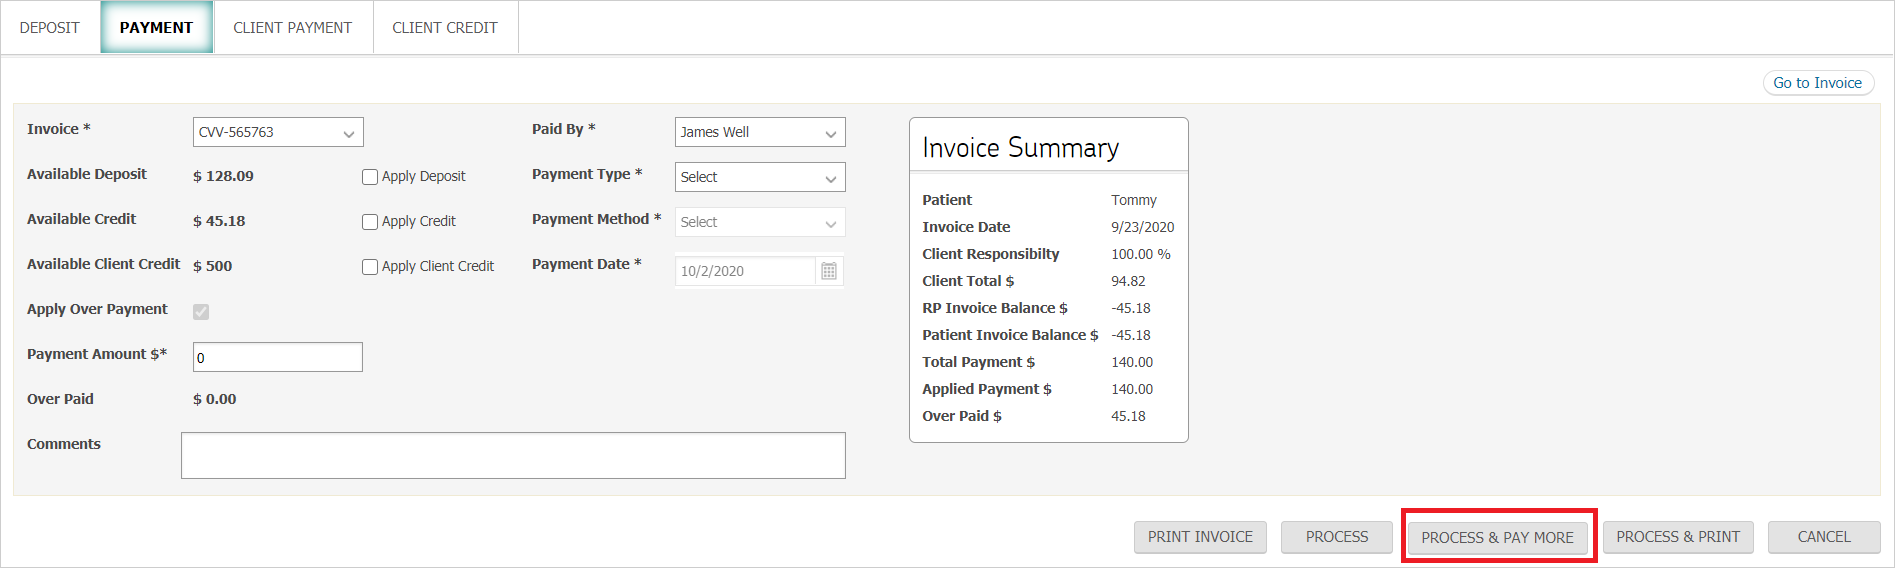
User can also have different processing options on payment of invoice(s).
- Print Invoice: On clicking that button system will open invoice print in new tab through which user can print when required.
- Process: On clicking that button, if user configured for email invoice in practice settings then system will open email popup once the payment is successful.
- Process & Pay More: On clicking that button, system will remain on the payment screen after successful payment. Therefore, that user can make another payment.
- Process & Print: On clicking that button system will open invoice print in new tab after successful payment.
Payment Types:
Payment types are applicable on ACH, credit card and debit card payment methods. User can select payment type from following possible values at the time of making a payment
- CareCredit
- EMV
- External
- Host Pay
For ACH:
“External” and “Host Pay” payment types are applicable.
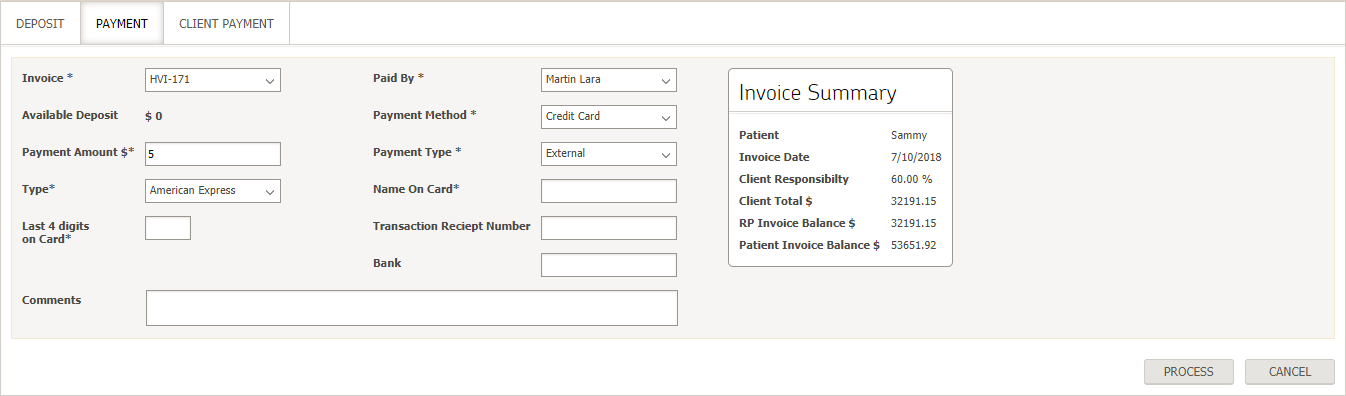
If payment type selected is external, user will have to manually enter details on following screen
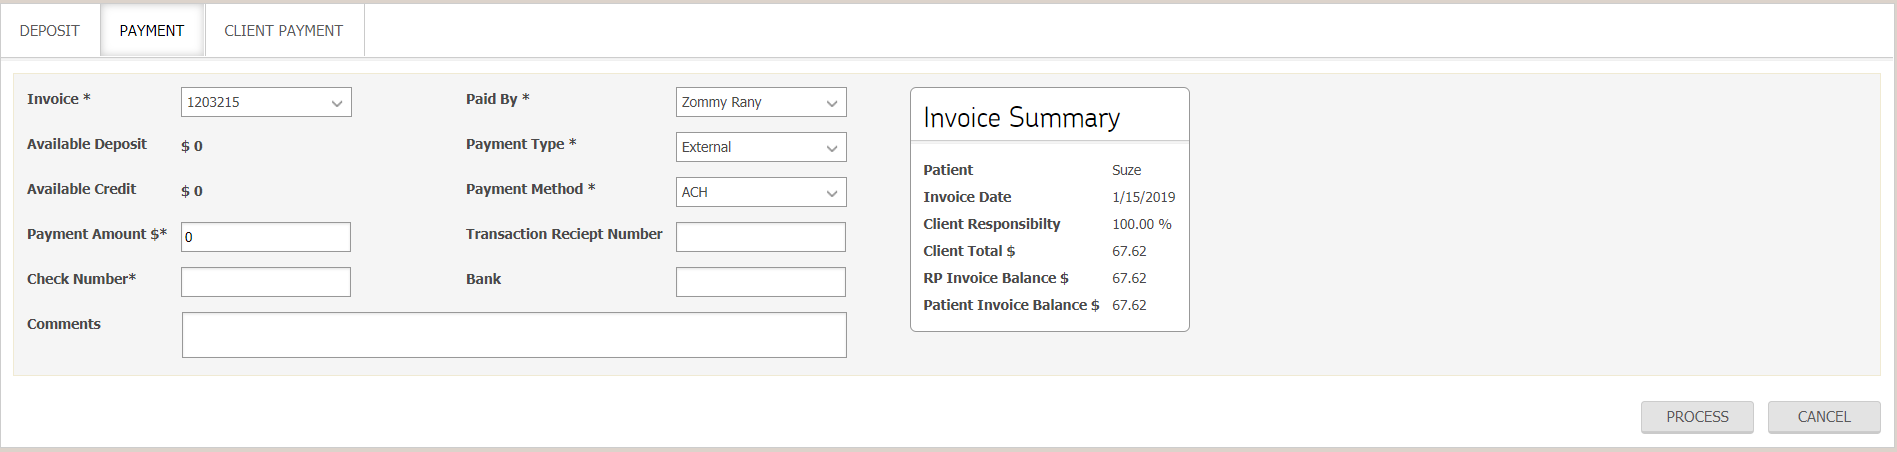
User must enter necessary fields before clicking on process button for payment to be completed. Payment is recorded under payment tab of client.
If payment type selected is Host Pay, user will have to manually enter details on following screen and click on process button
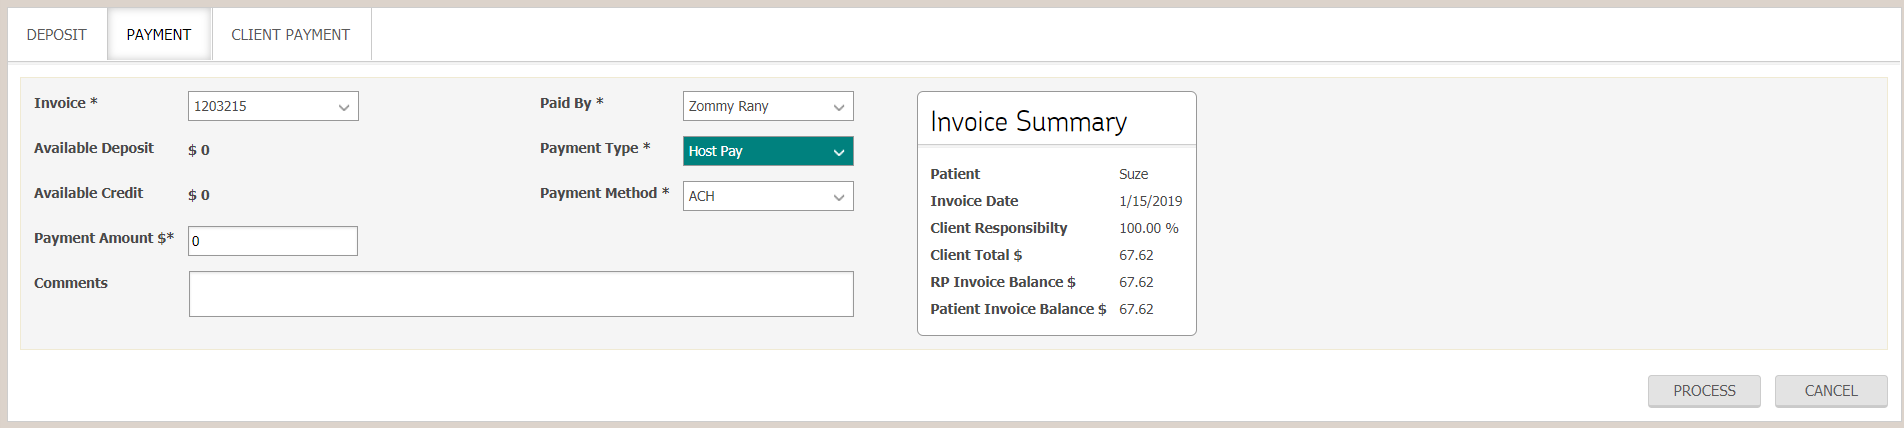
Upon clicking process button, a new page will open displaying required details as shown in following screen
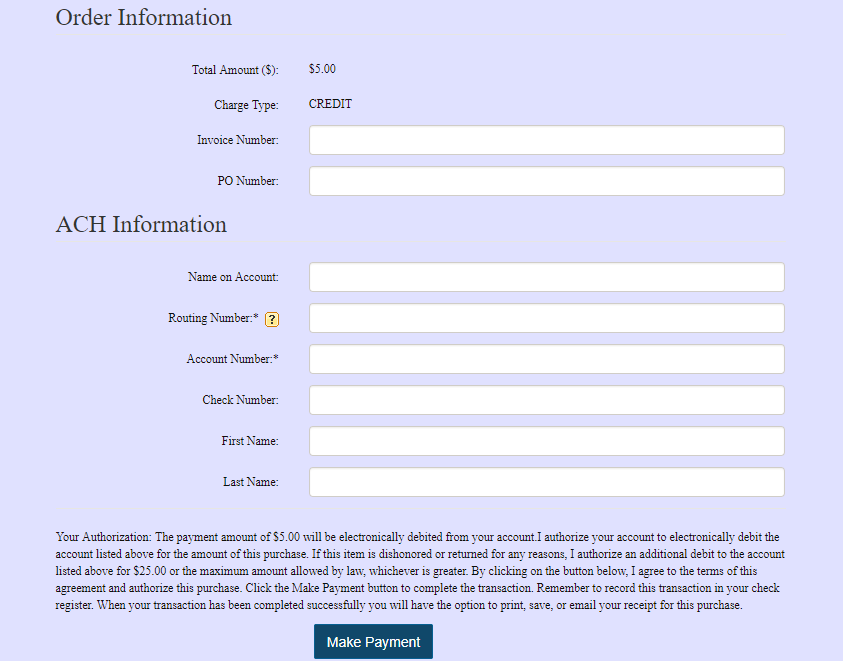
User must enter necessary fields before clicking on “make payment” button for payment to be completed. Payment is recorded under payment tab of client.
For Cash:
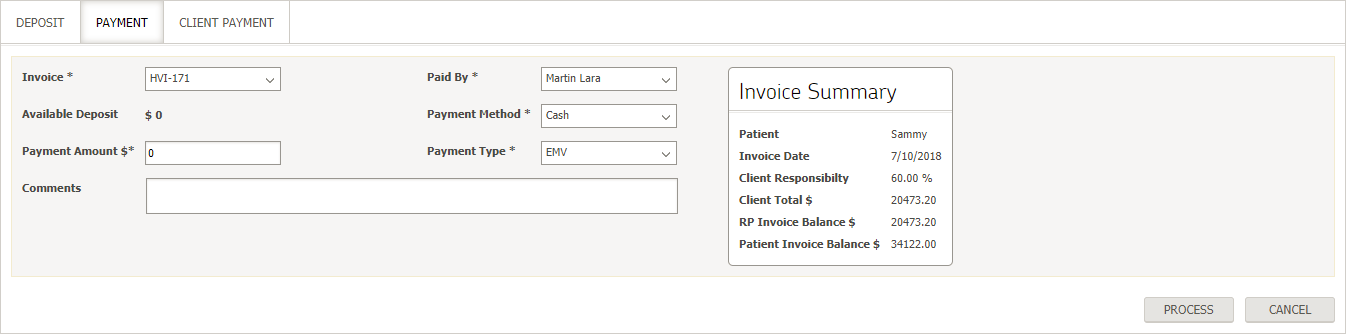
User must enter necessary fields before clicking on process button for payment to be completed. Payment is recorded under payment tab of client.
For Check:

User must enter necessary fields before clicking on process button for payment to be completed.
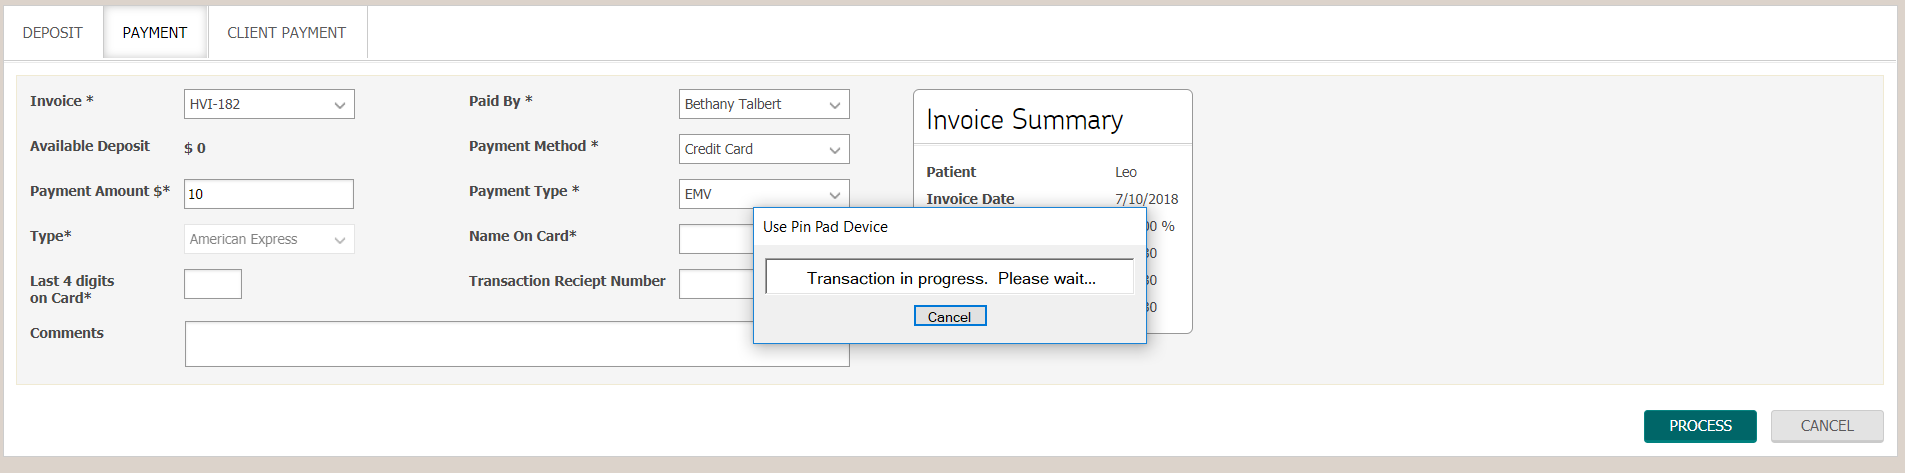
For Credit Card/debit card:
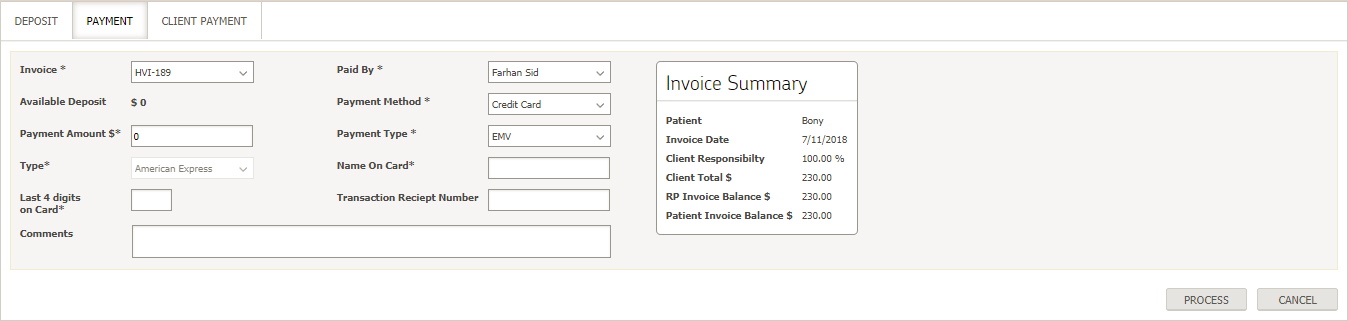
If EMV payment type selected, then user, upon clicking process button will be required to swipe credit card for card related information to be populated in its respective field in order to complete payment.
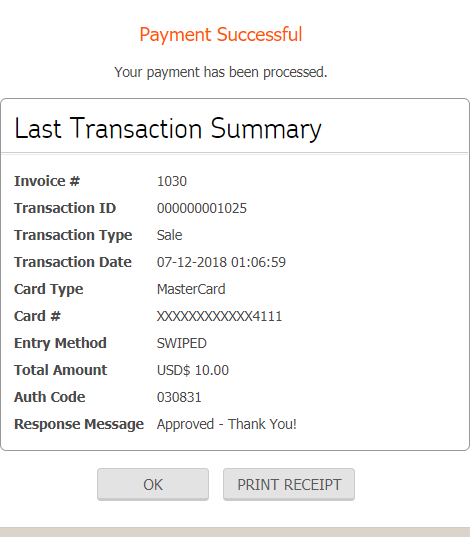
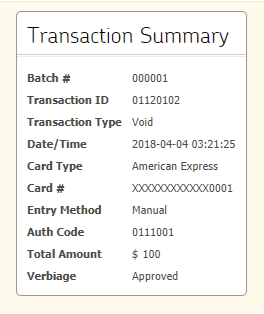
Once card is validated and transaction approved, payment success and transaction summary is displayed
If “external” payment type selected, then user will be required to manually enter card details before clicking on process button as shown in following screen
If “host pay” payment type selected, then following screen is displayed

Upon clicking process button, a new page will open displaying required details as shown in following screen
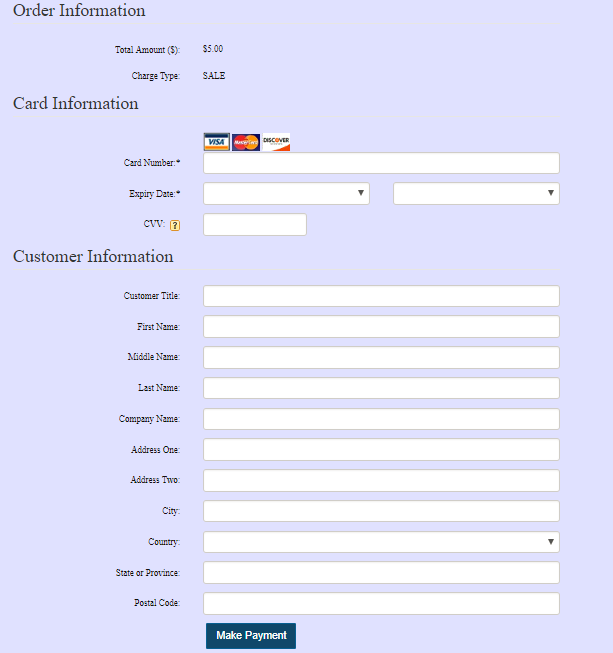
User must enter necessary fields before clicking on “make payment” button for payment to be completed.
Transactions via these payment methods are recorded under payment tab of concerned client.
Deposit methods:
On clicking deposit button, user will be navigated to deposit screen with Paid By field prepopulated. User can simply enter necessary details and click on deposit button to post a deposit. Following are the deposit methods similar to payment methods.
- ACH
- Cash
- Check
- Credit Card
- Debit Card
Note:
Deposit methods are similar to payment methods with same implementation.

User must provide necessary details before clicking on process button for transaction to be completed. Each transaction is recorded under deposit tab.
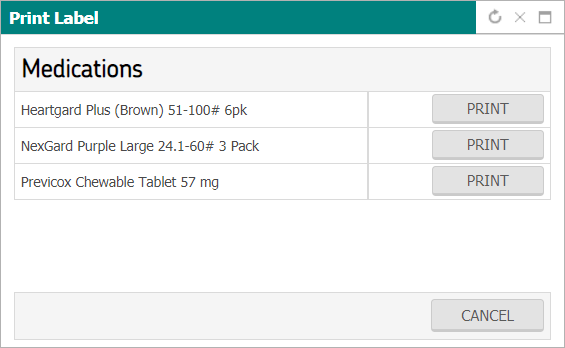
Print Label:
On clicking “print label” button, a popup will open displaying all medications. User can select labels that are to be printed.
Print Rabies Certificate:
Print rabies certificate becomes available only when an invoice containing rabies vaccine item is finalized as shown in following screen

Upon clicking on this button, a list of available certificates is displayed.
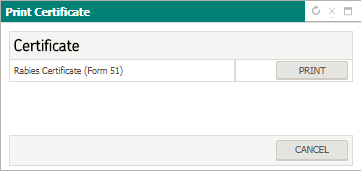
On clicking print for ‘rabies certificate (form 51)’, then the system will navigate to edit form for rabies certificate where user can verify the details and can update if required.
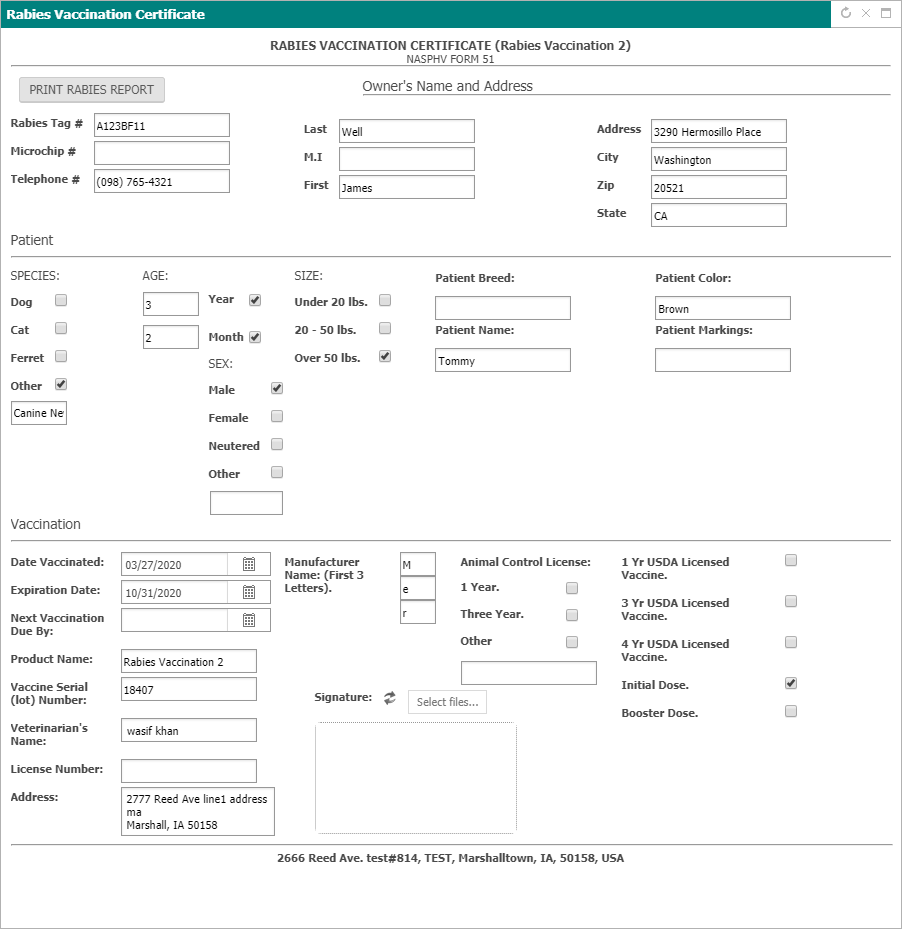
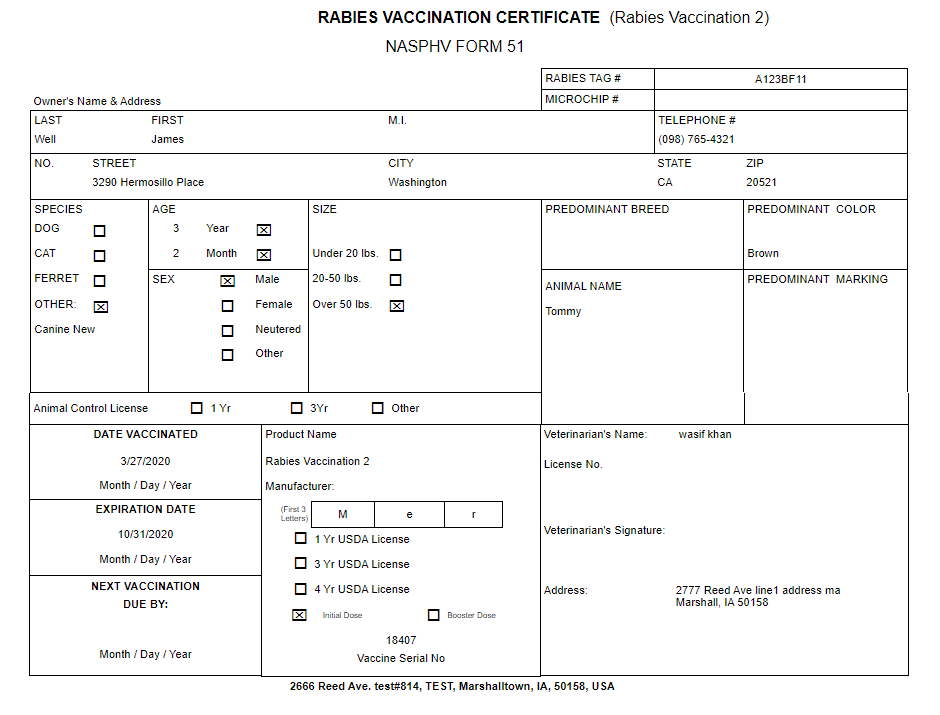
On clicking print rabies report button, rabies vaccination certificate is displayed.
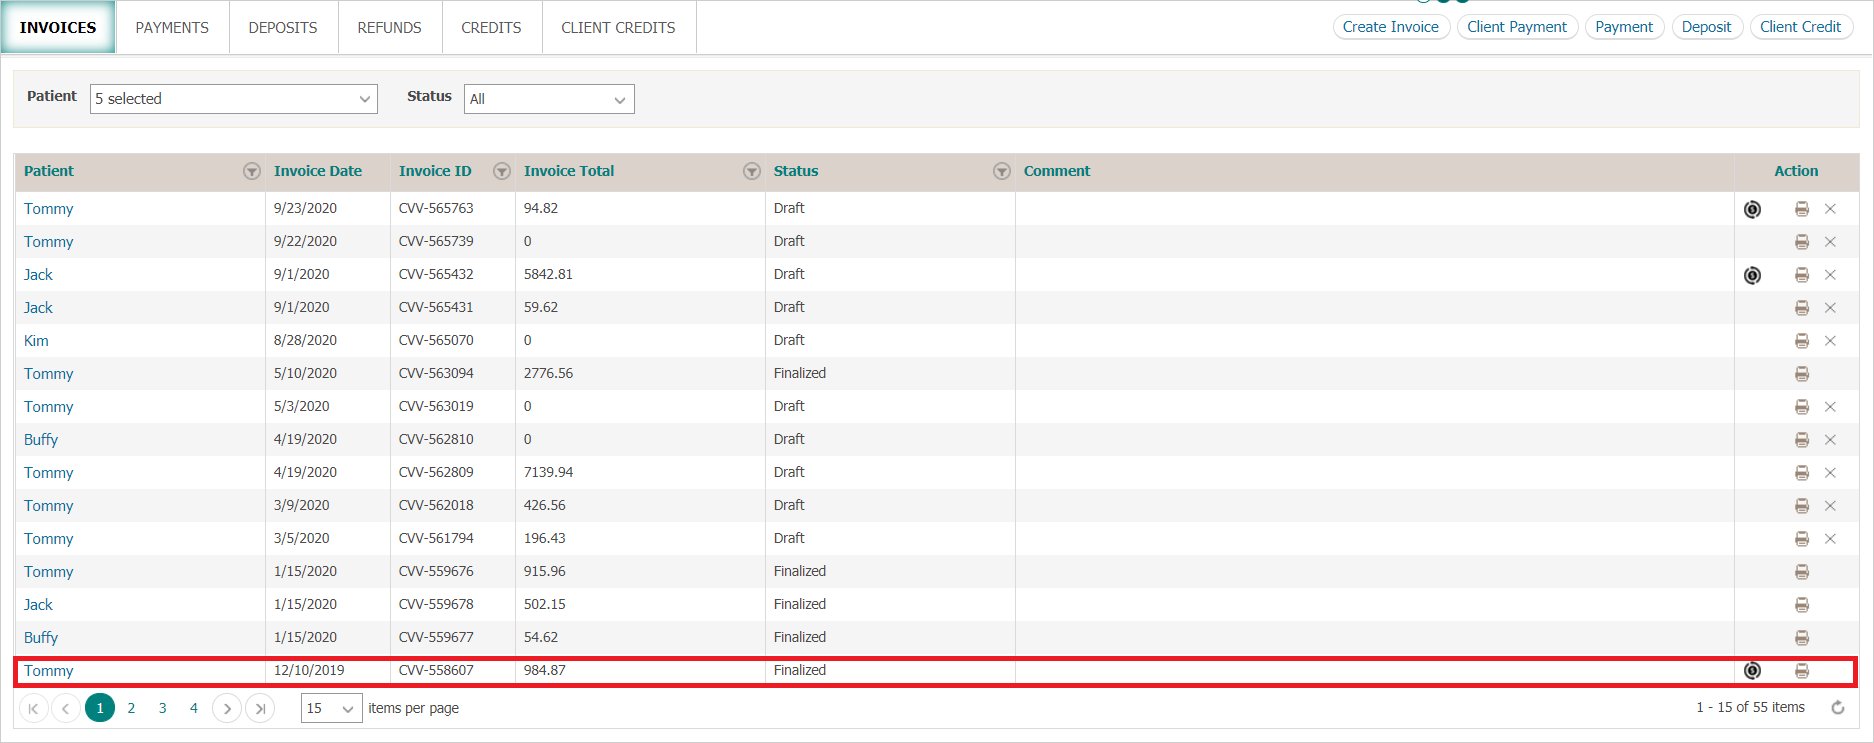
2. Refund Invoice
If status of invoice is “draft” and at least one payment has been made against it, then user can perform refund transaction if required by clicking on “refund” icon under action column as shown in following screen
Note:
Refund transactions are performed against an invoice rather than payment(s) against that invoice

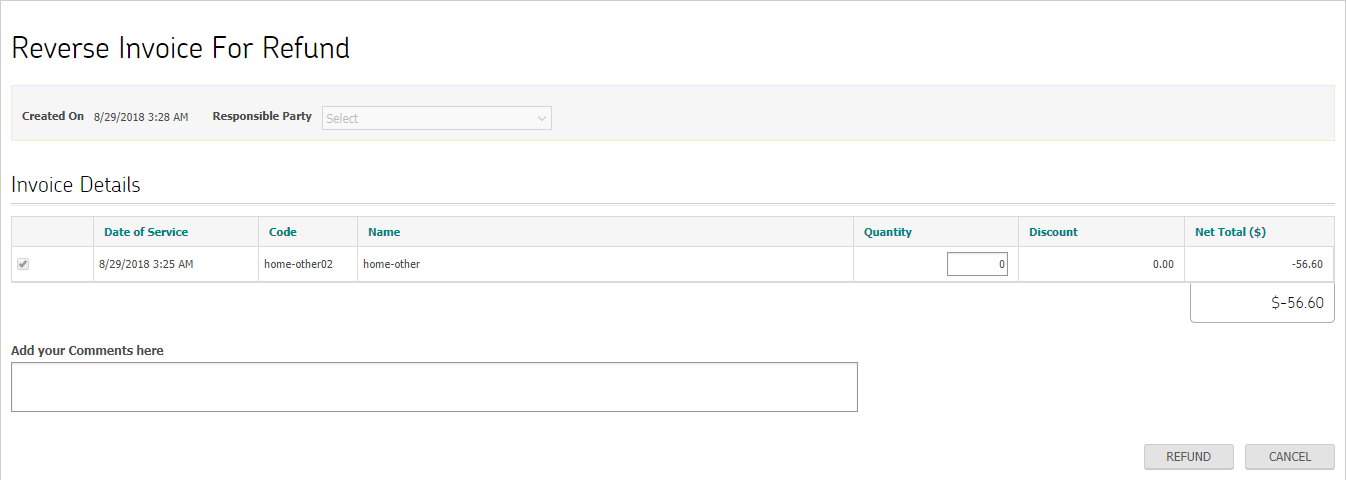
Upon clicking, a reverse invoice containing actual invoice contents is displayed as shown in following screen
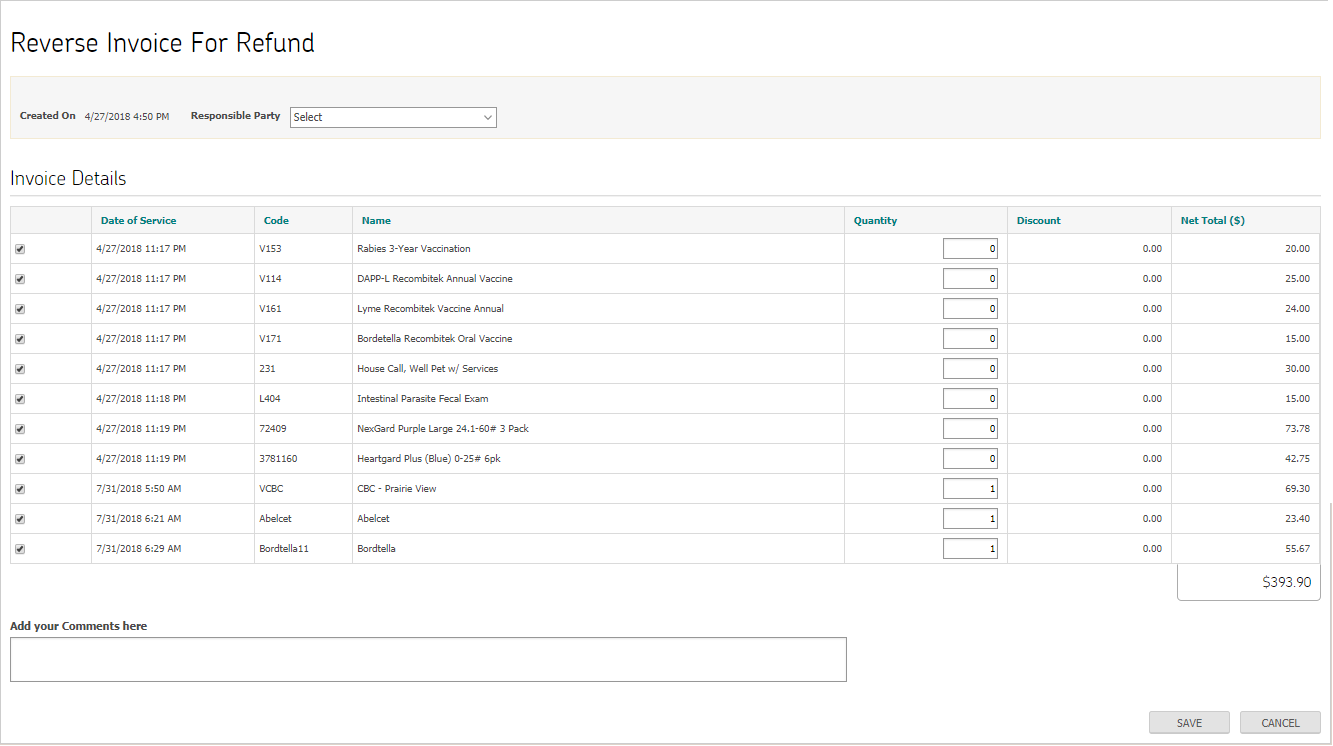
User can make necessary changes, upon clicking save button, user is navigated to payment screen to complete refund transaction as shown in following screen
Note:
Payment methods are explained above.

Once payment is processed it can be viewed under payment tab.
Reverse invoice can be viewed under refund tab. Incase payment failed as a consequence of some error in transaction, user can perform it again by clicking on refund button, user will be navigated to payment screen again.
3. Delete Invoice
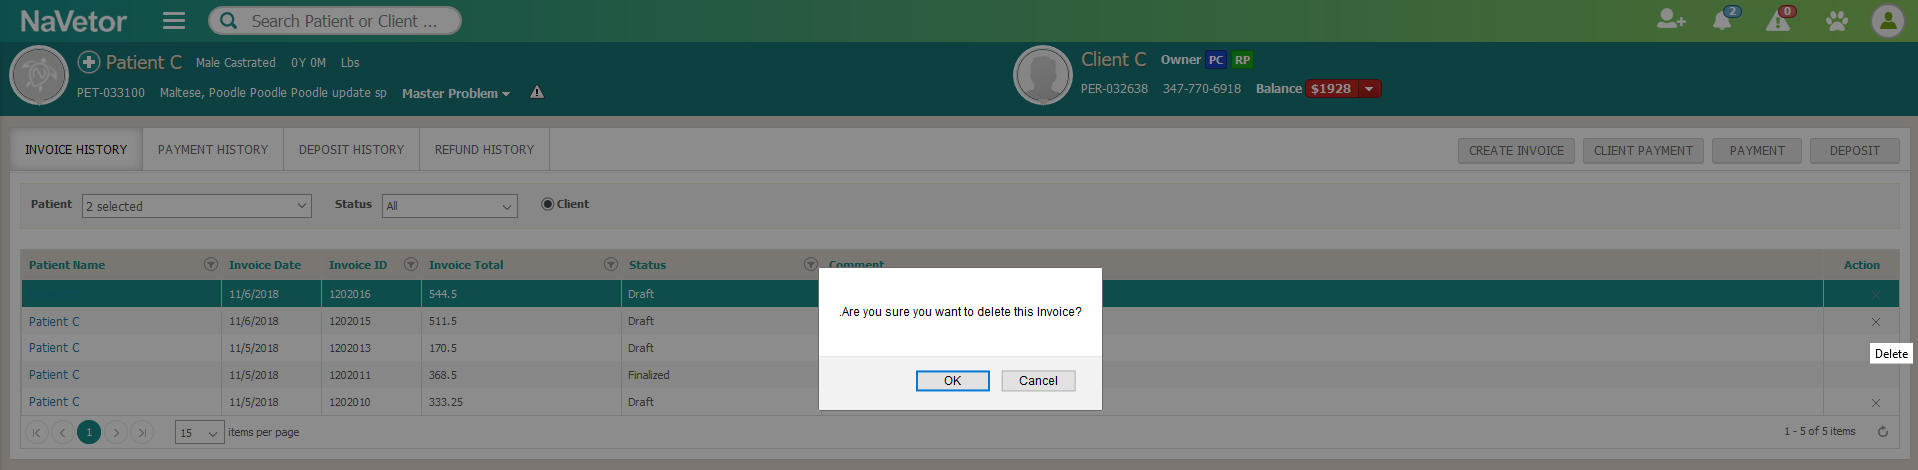
If status of invoice is “draft”, then user can perform delete invoice if required by clicking on “delete” icon under action column as shown in following screen
Note:
Delete invoice are performed against an invoice rather than payment(s) against that invoice

Upon clicking, a confirmation popup window will appear as shown in following screen to make sure that user wants to delete that invoice
Note:
Once the user click “OK” button, the invoice will be deleted from the system and will not revert back
4. Create New Invoice
User can create a new invoice by clicking on create invoice button

Upon doing so, client invoice screen will be displayed
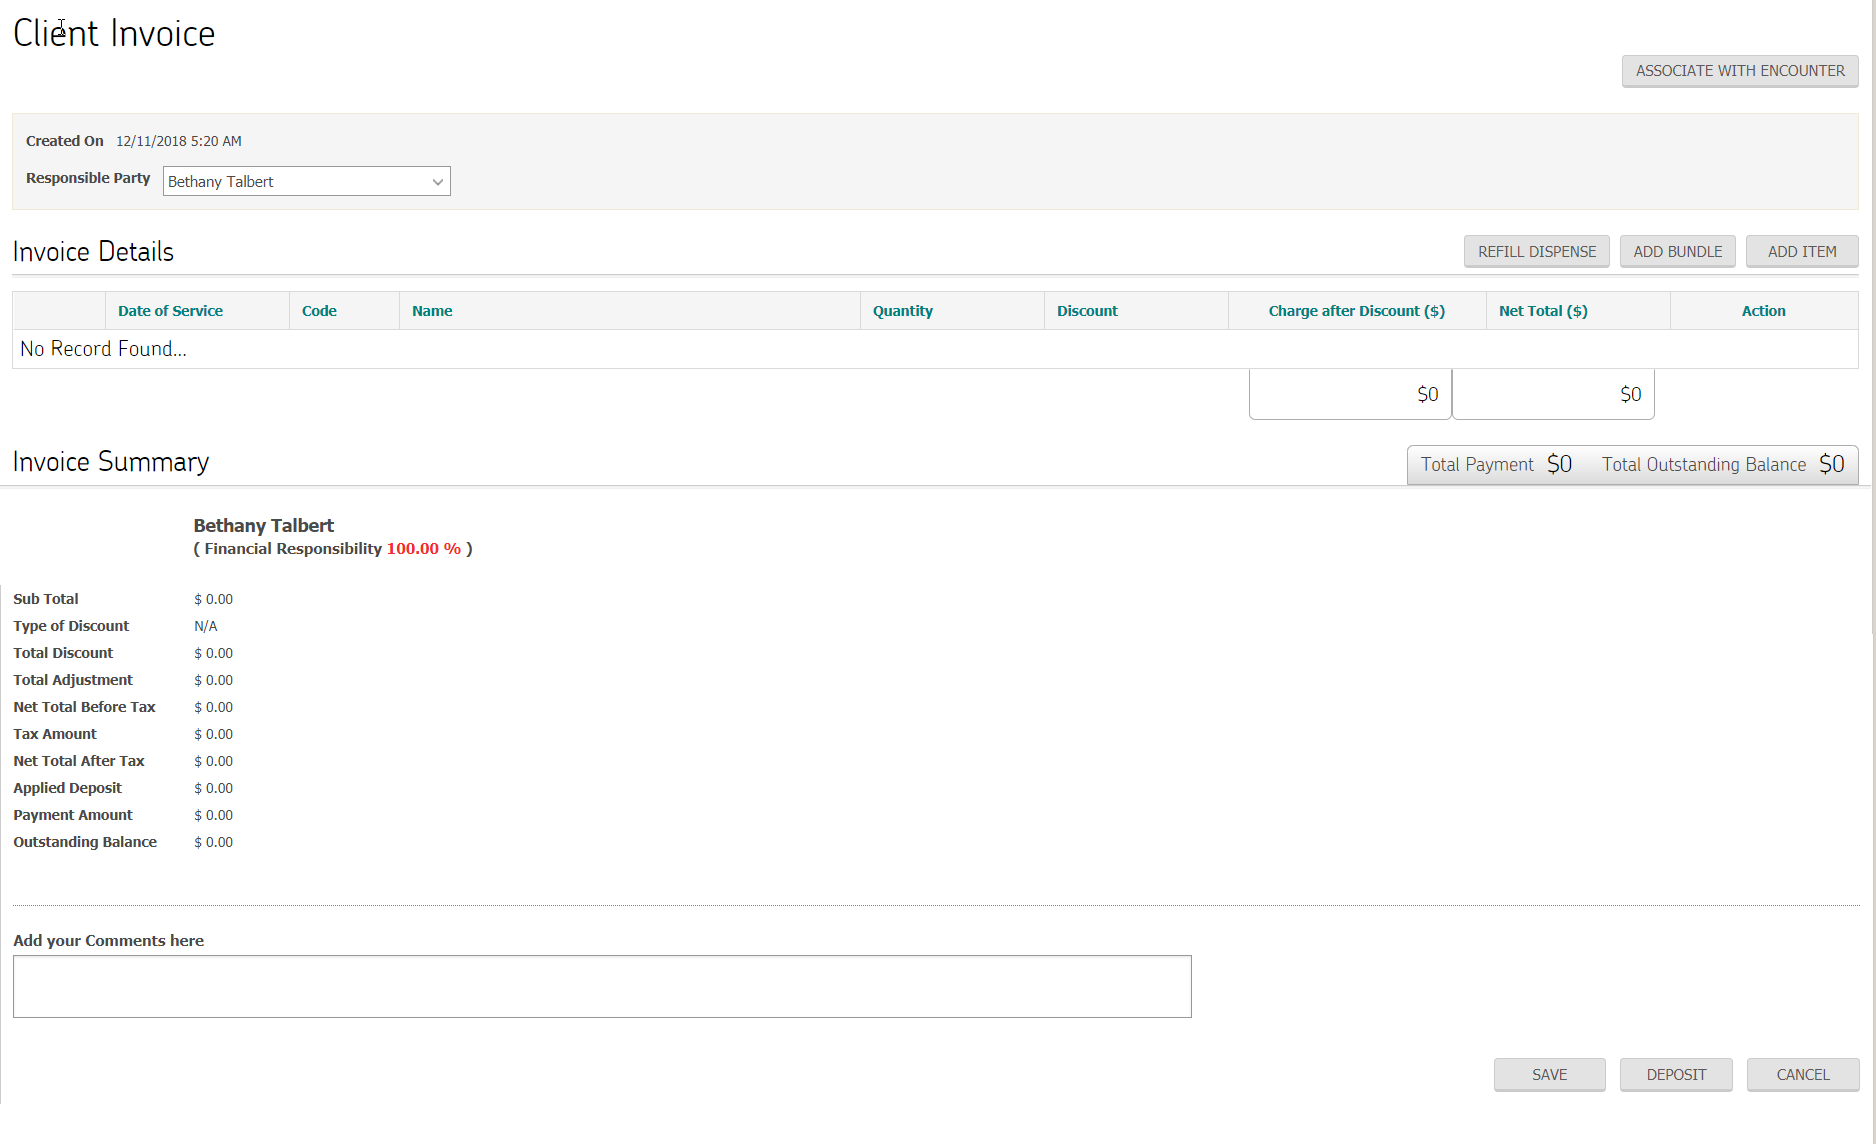
User enters the necessary details by following the same steps as mentioned above. Invoice will be created upon clicking on save button.
Payments
1. View Payments
To view payment, user navigates to payment tab
Under this tab, all patient’s payment records are tracked and maintained in a grid. To view a particular payment against an invoice of a patient, user clicks on client name. User can make payment against Unpaid Invoices and Unpaid Fees. User can also select client credit available to consume against a client.

2. Void Payments
A payment against an invoice can be set as void only for transactions made through credit card/ACH payment methods having payment types as EMV/Host pay. All payments can be tracked under payment tab as shown in following screen
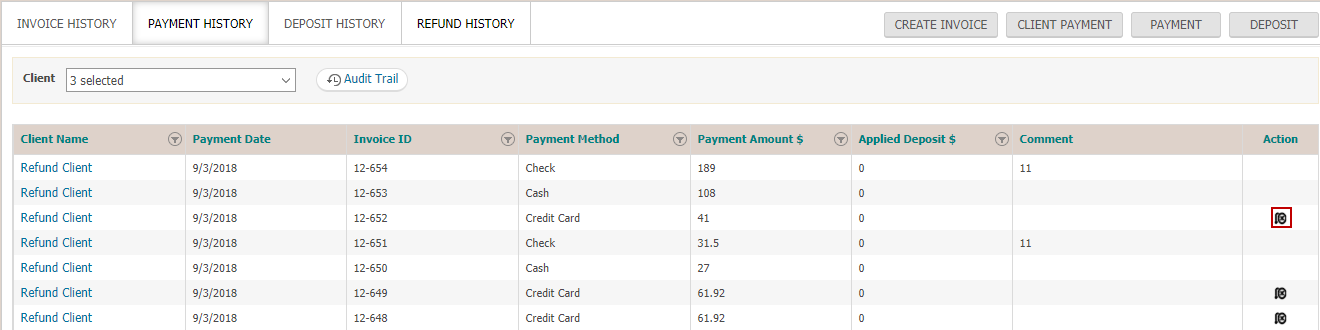
Upon clicking on void icon, system prompts user
![]()
Upon clicking ok, payment transaction is set as void by the system and summary is displayed as below
3. Create New Payment
To create a new payment, user clicks on payment button
Upon doing so, user is navigated to payment tab. Invoice dropdown contains all pending invoices, paid by is populated with client name and payment method is set to default as cash.
Note:
Payment methods and types discussed in detail in above section.
- User can choose whether to adjust all available client’s deposit, partial or none of it for making payment.
- Deposit adjustment is enabled by clicking on “Apply Deposit” checkbox.
- A new field Deposit amount will appear where user can either manually specify a value less than or equal to available deposit or simply click on apply all for all available deposit to be auto populated in relevant field.
User enters necessary details and clicks on process button to post payment against an appointment. Payment will appear under payment listing page.
4. Multiple Invoice Payment
When user open payment screen against an invoice then system will allow user to make multiple payments.
On payment screen for an invoice then there will be a button name “Process & Pay More”. When user add payment details and click “Process & Pay More” button then system will not navigate from the screen whereas system will show prompt about payment success. In case of payment through open edge, system will show receipt on new tab and will remain on the same screen whereas updated invoice summary displayed.
5. Client Credit for Payment
When user select client credit for invoice payment or multiple invoice through client payment then system will not show prompt if the client credit is more than payment amount.
After completing payment through client, credit system will allow user to make payment from remaining client credit for future invoice.
Deposits
1. View Deposit
To view deposit, user navigates to deposit tab
Under this tab, all patient’s deposits are tracked and maintained in a grid. To view a particular deposit, user clicks on client name

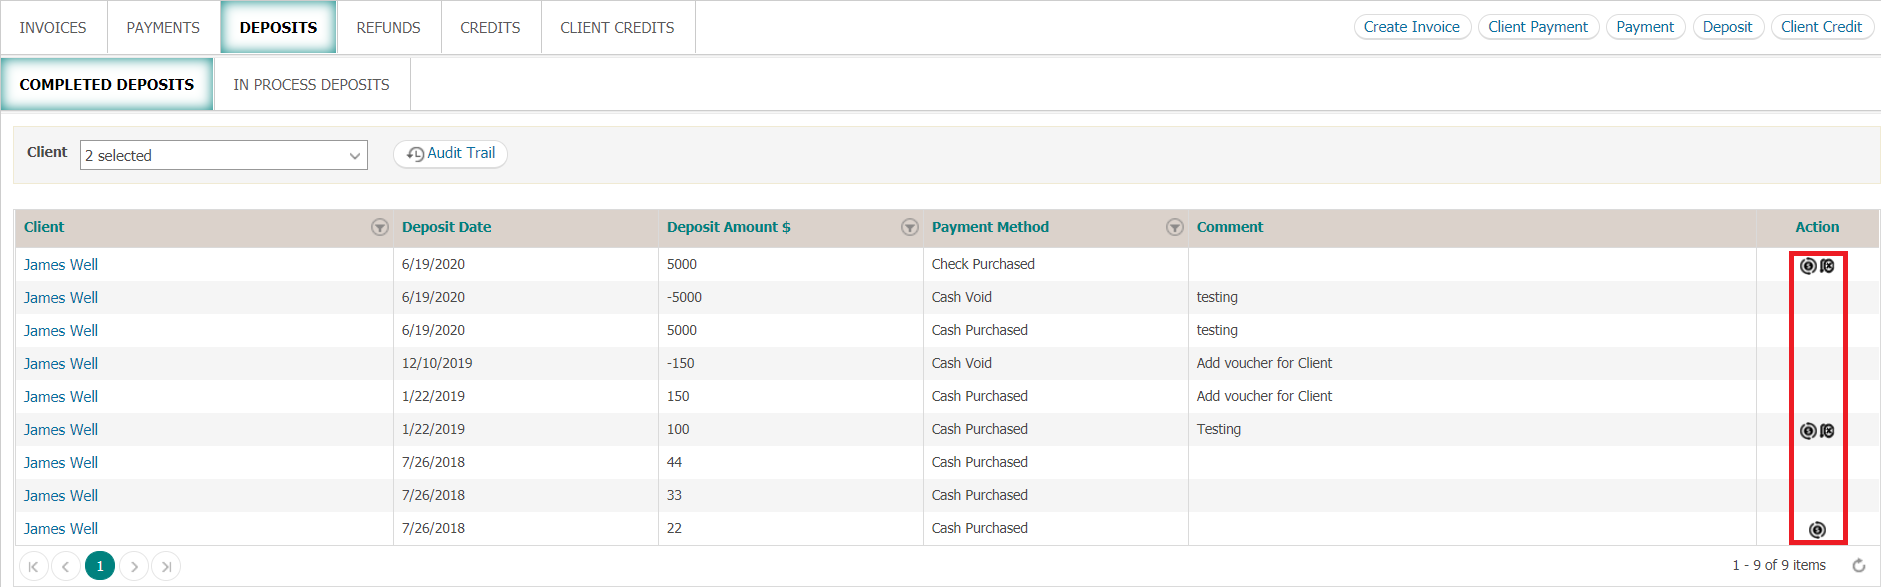
2. Void Deposit
A deposit can be set as void only for transactions made through credit card/ACH deposit methods having payment types as EMV/Host pay. All deposits can be tracked under deposit tab as shown in following screen

Upon clicking on void icon, system prompts user
![]()
Upon clicking ok, deposit transaction is set as void by the system and summary is displayed as below
3. Create New Deposit
To create a new deposit, user clicks on deposit button
Upon doing so, user is navigated to deposit tab. Paid by dropdown is populated with client name.
Note:
Deposit methods work similar to payment methods as already discussed above.
User enters necessary details and clicks on save button to make a deposit. It will appear under deposit listing page.
4. Refund Deposit
On deposit screen there will be an icon for refund for those deposit, which were not voided.
Once the user clicks, refund icon then system will open a popup screen with following options.
- Available Deposit (total available deposit which client can use for payment)
- Deposit Amount (then amount against which user clicks refund icon)
- Refund Amount (auto filled with maximum refund amount or user can add lesser amount than the auto filled amount)
- Payment Type & Method (can be same as deposit method or can make payment through external [Check/Cash])
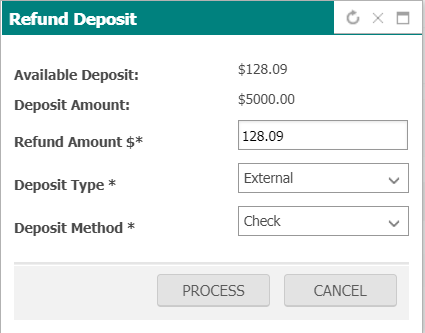
Refund amount should be less or equal to the smaller amount of either available deposit or deposit amount in case user enter amount more than that then system will prompt. After entering valid amount when user clicks “Process” button then system will process refund in same payment method the deposit was added or through cash/check with external payment type. Then after successful refund, system will show the reverse entry in the deposit list without an action button.
5. Client Payment
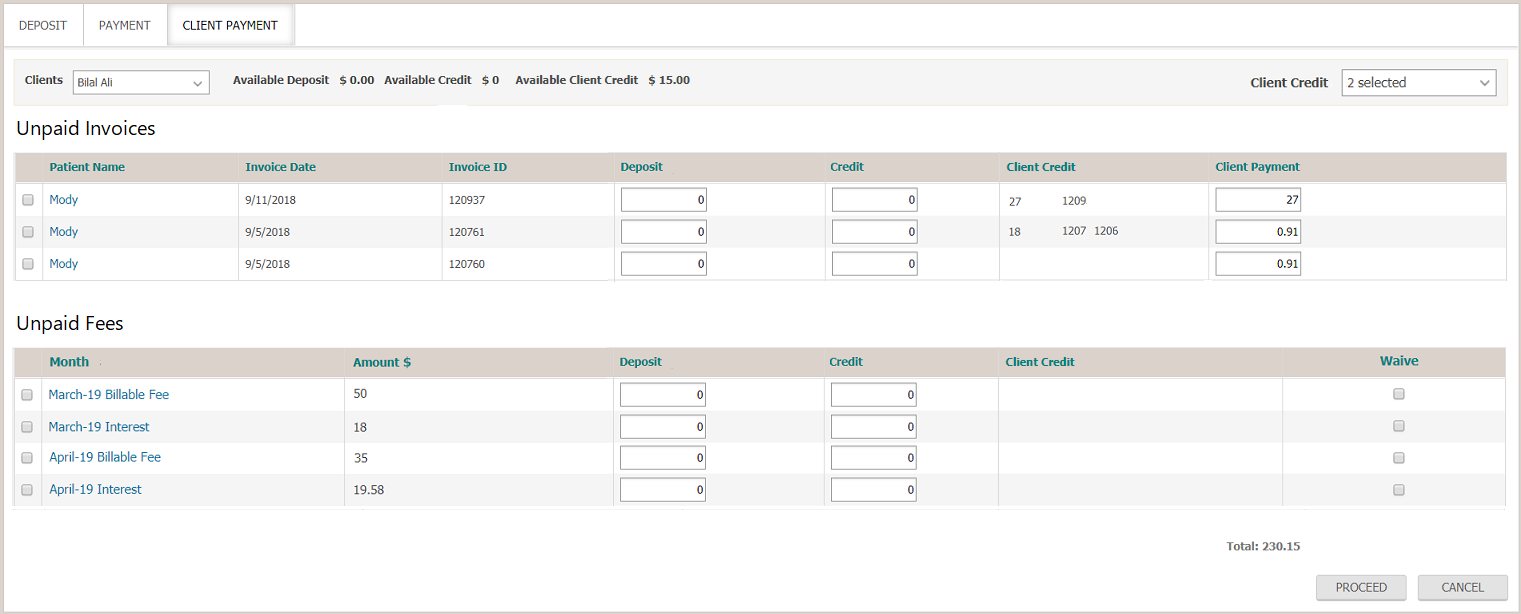
For a client to make payment for multiple outstanding invoices, user clicks on client payment button
Upon doing so, list of all invoices with outstanding dues for that particular client are displayed in a list.
The invoice which have unsaved items available, against them system will show  icon and invoice ID will be a hyperlink through which user can open invoice and save items on it before making payment.
User can post payments against each invoice and click on “proceed” for payment to be finalized. Upon click, user will be navigated to payment screen as already discussed above in payment section. Those invoice which have icon will not be include when user clicks on proceed button.

User can set preferred payment method and type, proceed accordingly. If payment method is credit card for two invoices adding up to $100, following will be the transaction summary if request approved upon clicking process button.
Refund
1. Refunds
To track refund against invoice, user navigates to refund tab
This listing page contains all reverse invoices for which refund request initiated. User can view a particular reverse invoice by selecting from the list, following screen is displayed
In case payment of refund transaction is not successfully processed, refund button will appear at the bottom of reverse invoice. User can perform the payment transaction by clicking on refund button and performing necessary actions to complete the transaction successfully.
Credit
1. Credit
To track credit user can click on the tab “Credit”.
Credit tab will show list of the credits which are available. User can only view the list of credits and can consume the credit on client payment or payment screens.
2. Multiple Invoice Refunds
When user make a refund against an invoice then system should allow making another refund for that invoice.

After making a refund when user click again refund icon for that invoice then system should show the remaining quantity of the items which were not refunded. The net total of the items in the refund invoice will based on available quantity for refund and similarly the discount will displayed as per the quantity of the item.
In case there are multiple payments available against an invoice then after processing refund invoice, then system will show select payments option from where user can select single or multiple.
User can refund with same or external (cash/check) as payment method in case single or multiple payments have same payment method used. User can refund with External (cash/check) in case selected payments having different payment method. User can refund with same or External (cash/check) in case of single payment selection.
Client Credit
1. Client Credit
To track client credit user can click on the tab “Client Credit”.
Client Credit tab will show list of the client credits which are either consumed or available. User can only delete available client credit if required.
2. Add Client Credit
After clicking the Client Credit button, a screen will open where client name field will have a drop down and list of all clients associated with the patient selected in banner.

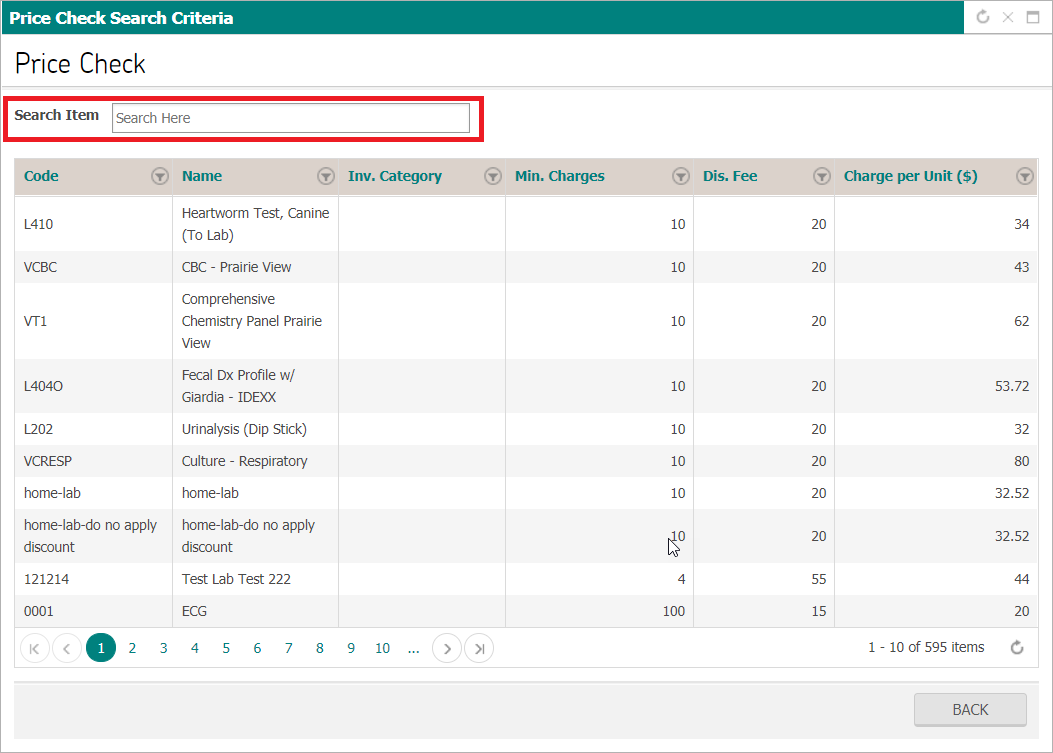
Price Check
Application banner contain price check feature, through which user can view price of different inventory item by clicking on ![]() icon.
icon.
A popup window will appear, where user can find item by entering name of an item, or navigate between pages.
© 2018 NaVetor - All Rights reserved. No reproduction or redistribution without written authorization of TPI
User Manual - EMR
Medical Records
EMR module enables user to create, edit and save SOAP / progress notes per patient and per visit, allowing the user to record medical charting notes and records. Medical Records are template driven and allows the users to create customized templates and multiple types of notes.
Medical Records (EMR) contain sections for:
- Clinical
- Prescriptions
- Lab Work list
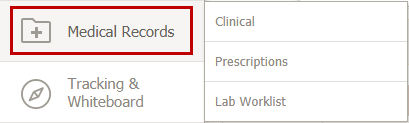
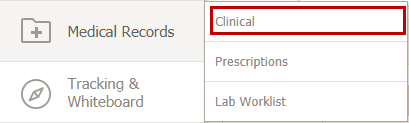
Clinical
The Clinical section provides the complete clinical overview of the patient and allows the user to add and/or view SOAP notes of various visits of the patient. The SOAP note captures all details including history of the present illness, vitals, diagnosis and treatment.
To go to the Clinical section:
Select a Patient > Medical Records > Clinical
This will open up the Encounters screen. All the SOAP notes, documents and letters are drawn against encounters that are listed in a chronological order.
Encounter Tab
The Clinical Overview enables the user to view the various patient visits along with the current and past SOAP notes for a patient. The Clinical Overview also enables user to associate Letters, Simple Notes and attach files with visit. The user is able to clearly identify the different Encounters and SOAP notes of a patient.
If required, the user can also create Phone, Email, Fax and Note Encounter.

The user is able to view brief summaries of diagnosis, procedures, prescriptions and diagnostics for each patient visit & SOAP note.
Select a patient and then Go to: Medical Records > Clinical
All the relevant patient information is displayed under the Encounters tab. Individual encounters are chronologically arranged along with the SOAP note, progress notes, addendum and other documents attached with each of them.
- Encounters screen displays the list of all SOAP notes, Addendums, Letters and uploaded Files as sub-headers created for a patient under the related patient encounter headers.
- The list of Patient Encounter Headers appears in the chronological order in which they were created with the most recent first.

Phone Note
The Clinical Overview enables the user to create a one click phone note along with the past SOAP notes for a patient.

Through this, user can generated a SOAP note without any visit for that patient.

Components of the Clinical Overview tab
Encounter Header

Encounter Header shows a list of all the visits that the patient has made with the practice and their statuses with the help of labels of encounter i.e. out-patient, in-patient or day patient.
Following details will be shown on Encounter Header:
- Date and Time of Admission (If In-Patient or Day-Patient)
- Date and Time of Discharge (If In-Patient or Day-Patient)
- Date and Time of Check-In (If Out-Patient)
- Date and Time of Check-out (If Out-Patient)
- Name of the Primary Provider
- Visit Reason
- Create Encounter button

- Encounter Summary

Expanding the encounter tab will reveal all the documents such as SOAP note, Progress Notes and Letters attached with that particular encounter. The name of the provider, diagnoses, descriptions and date/time of document creation are also mentioned.

SOAP Note Header
Following details will be shown on SOAP Header:
- Status icon
- Primary Provider
- Visit Reason and active Diagnosis (If Out-Patient)
- Active Problems and Diagnosis (If In-Patient)
- Date and Time of SOAP creation
- Create Addendum icon(if SOAP note is signed)
- Delete icon(if user have permission)

Addendum Header
Following details will be shown on Addendum Header
- Addendum status icon i.e. if signed then locked, if unsigned then unlocked
- Date and Time of Addendum creation
- Name of user who created Addendum
- Name of Active problems

Note: Addendum icon  appears on the right corner of a signed SOAP note header.
Letter Header
Letter Header contains following details:
- Letter status icon i.e. if signed then closed enveloped, if unsigned then open enveloped.
- Date and Time of Letter creation
- Name of the user who created letter
- Primary Provider
- Name of the Letter

Note
Header of Simple Note contains following details:
- Simple Note icon
- Date and Time of Simple Note creation
- Name of user who created Simple Note
- Name of Simple Note

Upload
Uploaded File header contains following details:
- Upload icon
- Date and Time of uploading
- Name of user who uploaded File
- Uploaded File name

For an encounter that has an uploaded attachment to it, an attachment icon will appear for that particular encounter in its respective node.

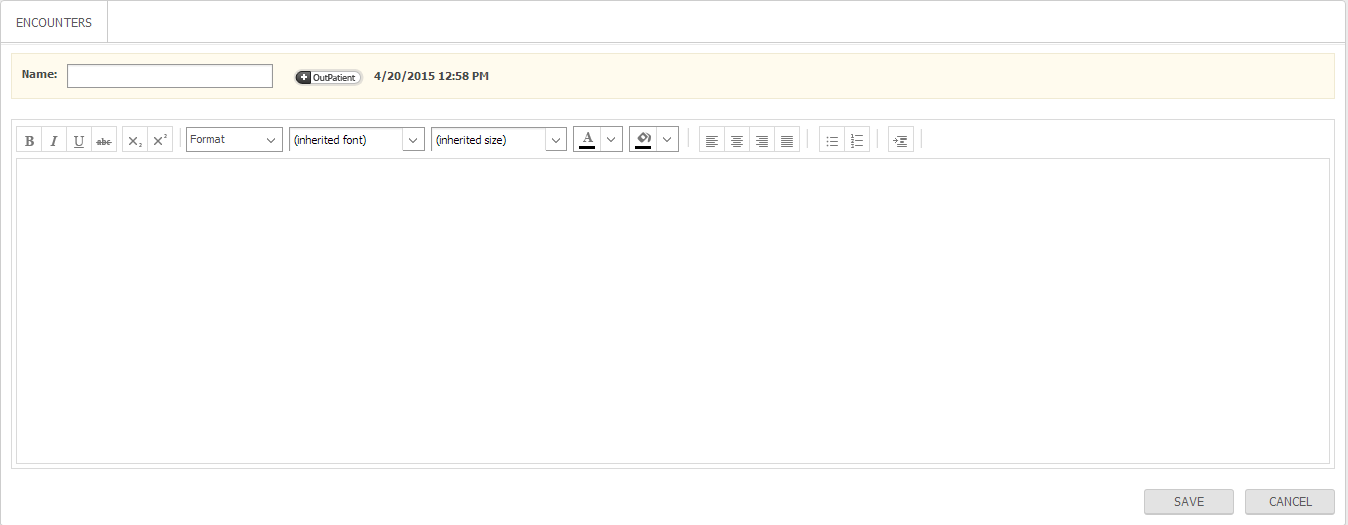
Create Encounter
Navetor Application provides flexibility to providers if they want to create Phone, Fax and Email Encounters if and when required.

By clicking on the Create Encounter icon, the user will be able to see list of encounter types.
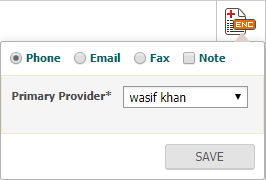
A new Encounter header will be created on clicking save button. Following details will be shown on Encounter header
- Date and Time of Encounter creation
- Name of user who created Encounter
- Encounter Type icon
- Add new Document Link
- Encounter summary link
- Delete icon

+ Document
The user has the option to create a new document. It can be a letter, SOAP note, Note or any upload. To create a new document, simply click on  . The following drop down menu will appear:
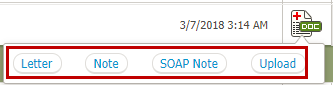
User can create different types of documents. By clicking on +Document, System loads list of documents types. Once user selects desired document type and performs create action, System creates Header of selected document on Clinical Overview.
Letter
When the user selects Letter from the drop down menu, the following screen will appear.
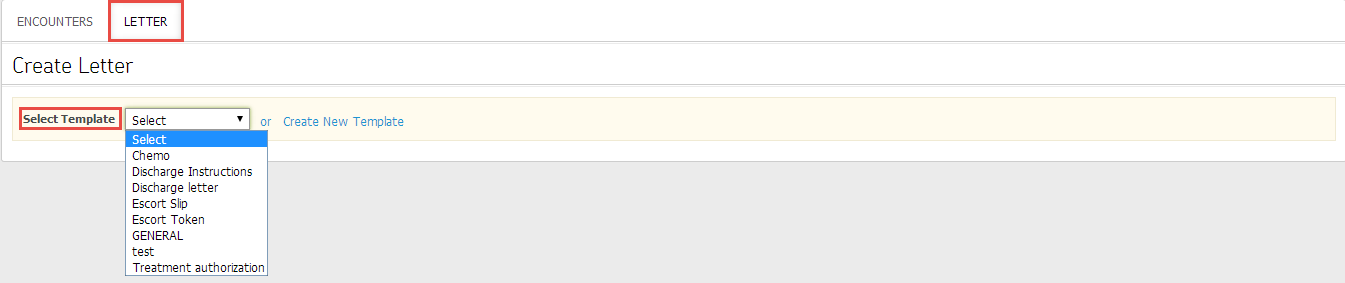
Here, the user can click on any appropriate template. The screen will refresh:
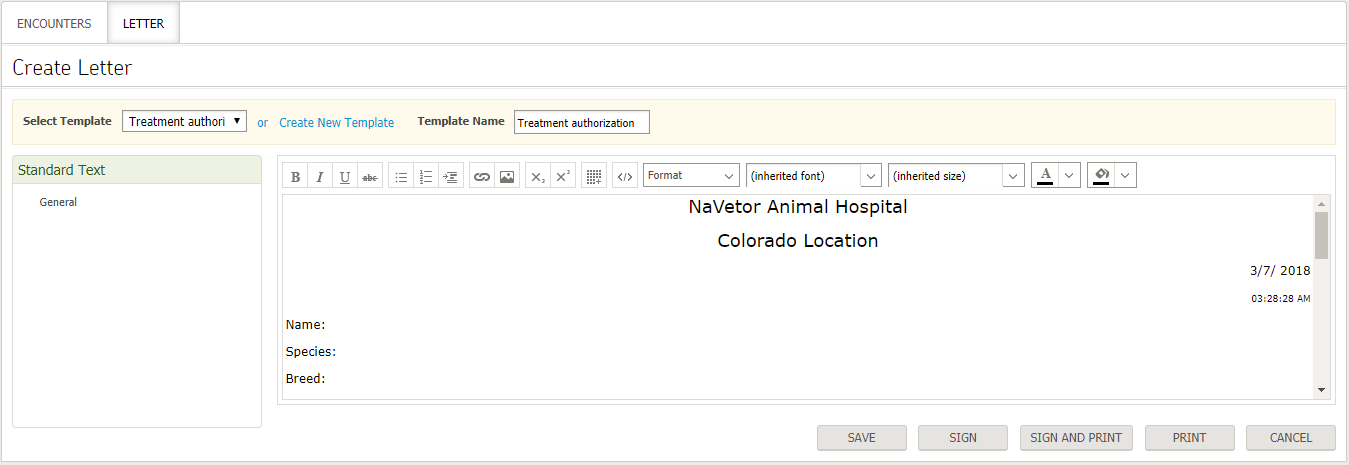
The body of the letter will be auto filled depending on the fields of letter template. For example, the Letter Template has lab test field of medical so when the user selects letter, System auto pulls the names of lab tests from the latest SOAP/Addendum.
Once the letter is signed, then user can email letter template to the patient’s primary contact. A user cannot edit a document once it is signed.
System also shows standard text options if ‘Standard Text’ option is selected while creating letter template. Standard text section consists of large blocks of static text that are commonly used across the hospital.
Note:
User can create letter template from ‘Add Letter’ screen as well as from Settings module by navigating to:
Settings > EMR > Letter Template
SOAP Note
A new SOAP header will be created once the user follows the workflow needed to create a new SOAP Note.
Simple Note
A new Note header will be created when the user chooses to create a new Simple Note.
Upload
User can upload files by performing upload action. There is a limitation of size i.e. user cannot upload file which is more than 10 MB and user can add 10 files at a time through this upload popup.

System also provides flexibility to users to enter alternative file name and that alternative name will be shown on Clinical Overview.
User can view uploaded file by clicking on uploaded file name from clinical overview.
User can also upload file as ‘Consent’ by selecting consent option. If uploaded document is consent, System will show consent label on uploaded file header.
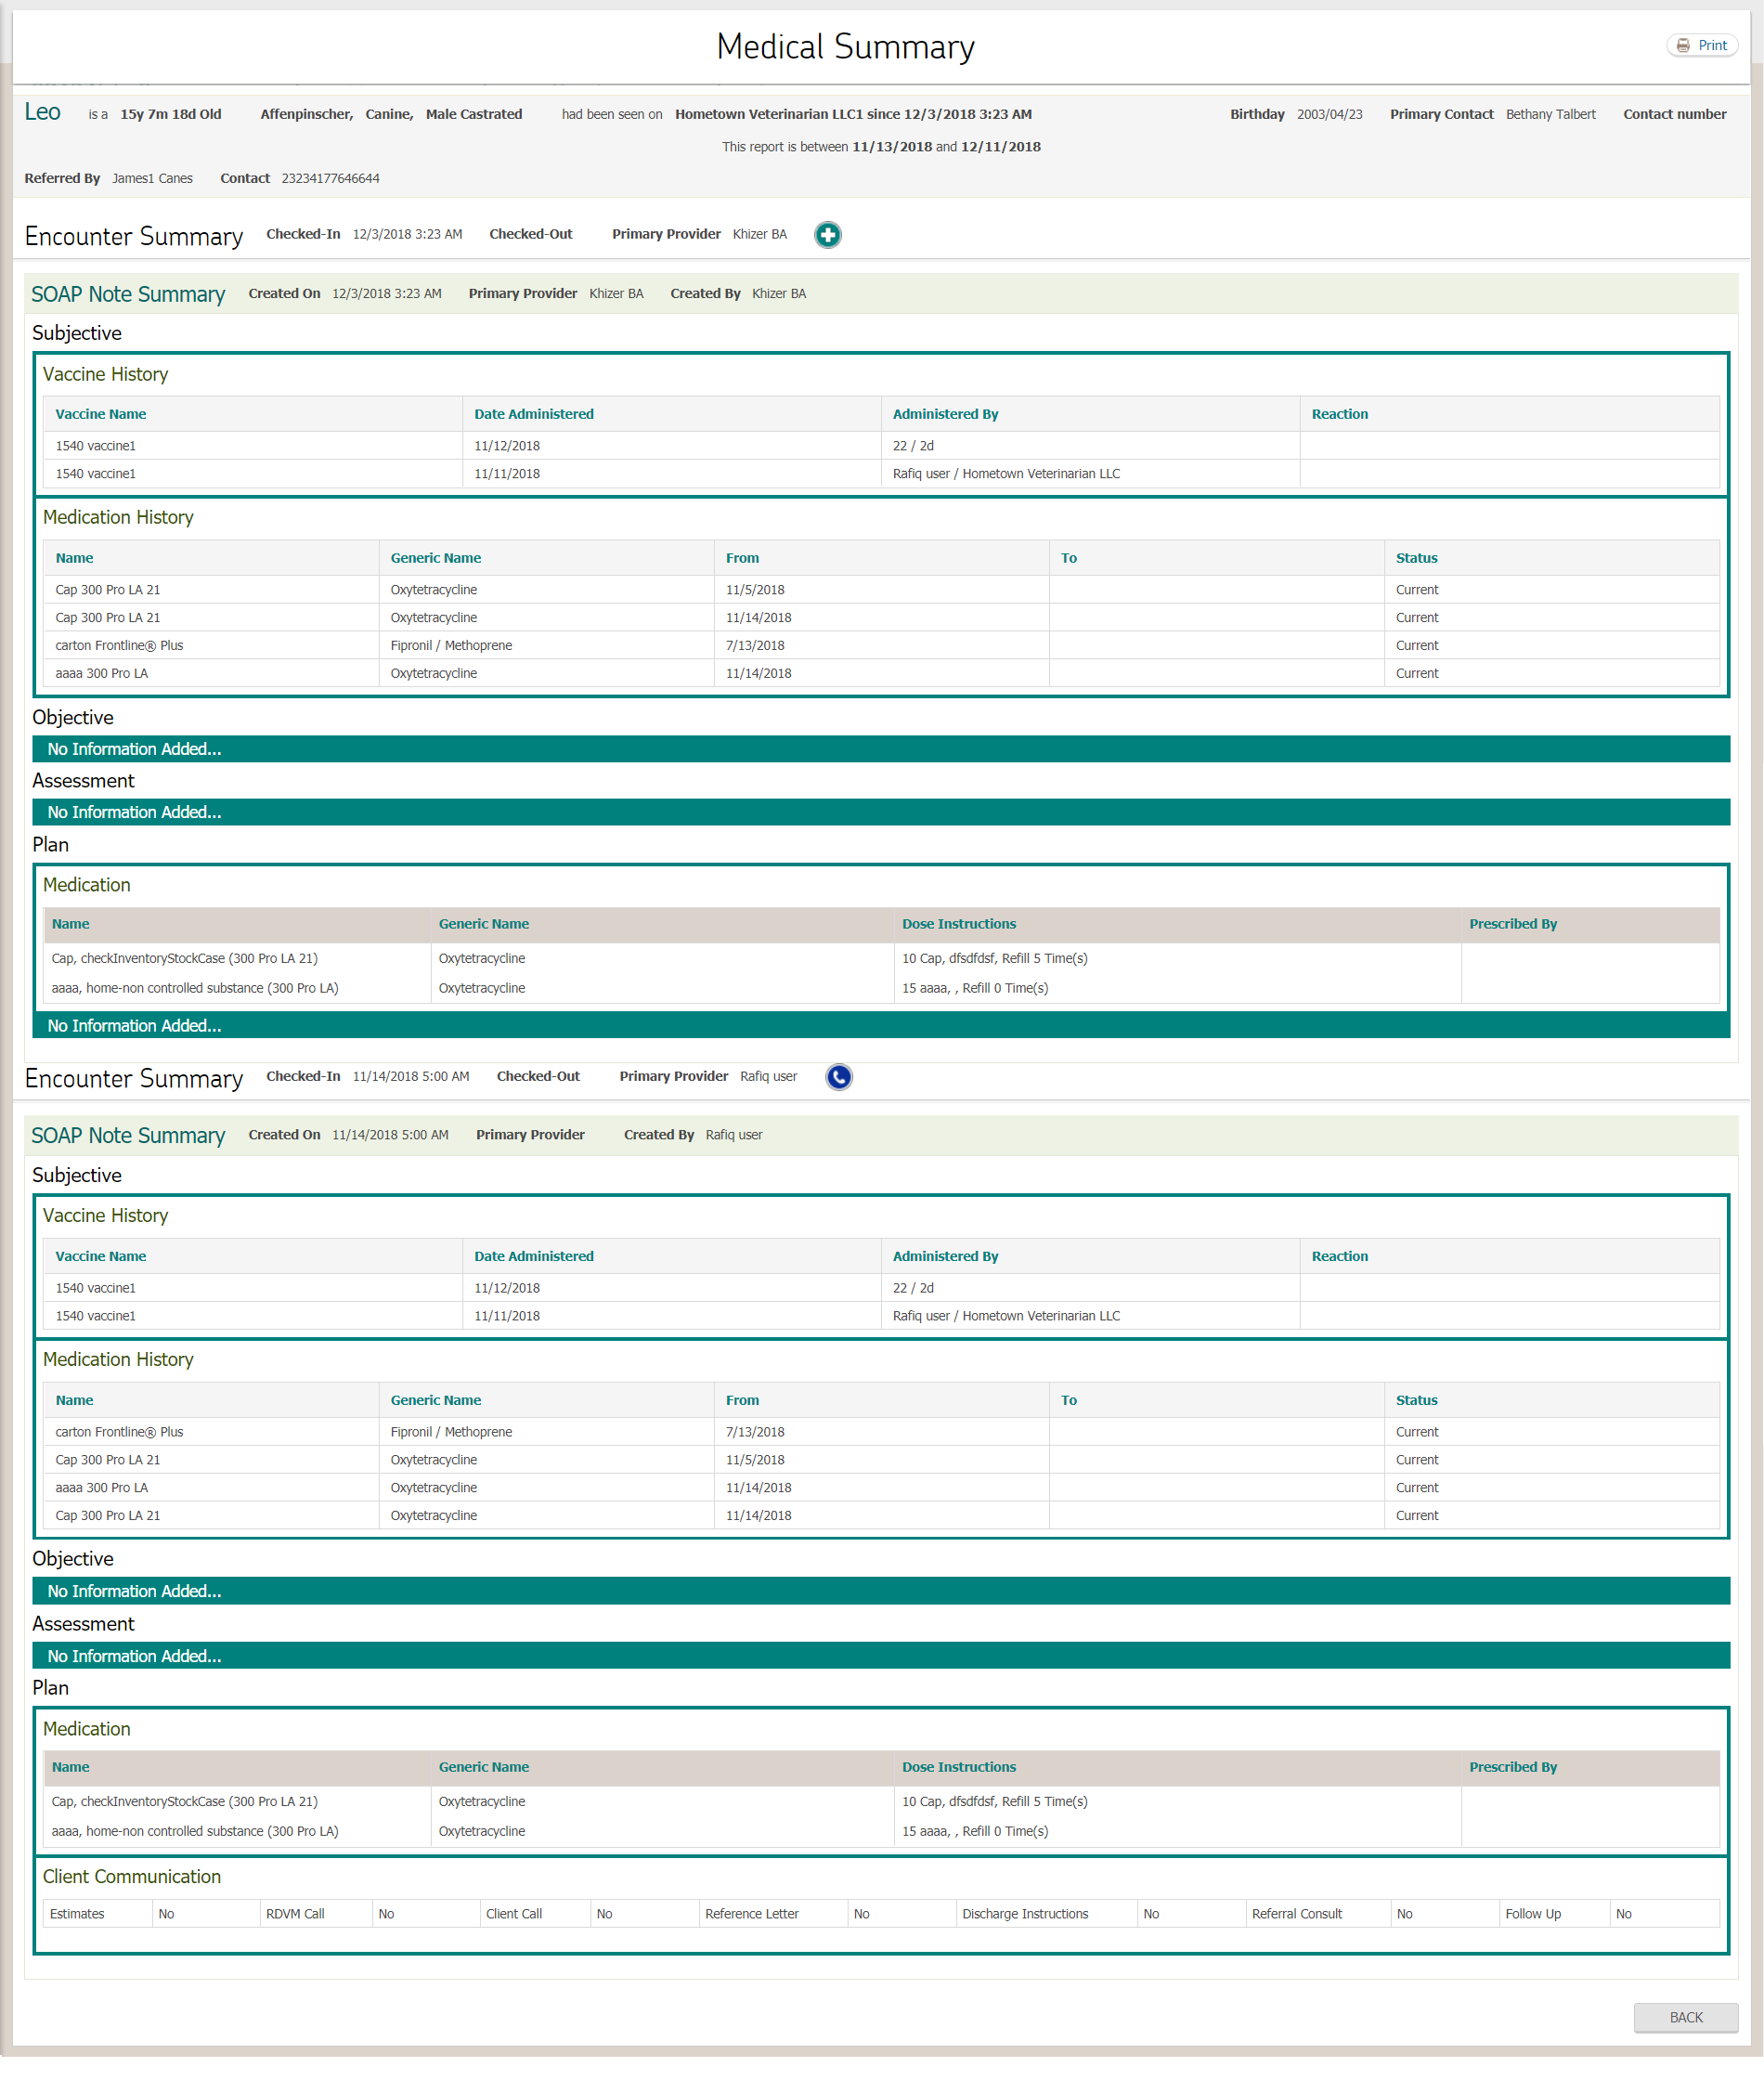
Summaries
Navetor Application provides three different levels of summaries to users i.e. SOAP/Addendum Summary, Encounter Summary and Complete Medical Summary
SOAP/Addendum Summary
User can view SOAP/Addendum Summary by performing Summary action placed on SOAP Note header. Complete summary of data which is recorded in entire SOAP with primary information of patient will be shown in SOAP/Addendum summary. User can also print and sign (lock) SOAP summary.
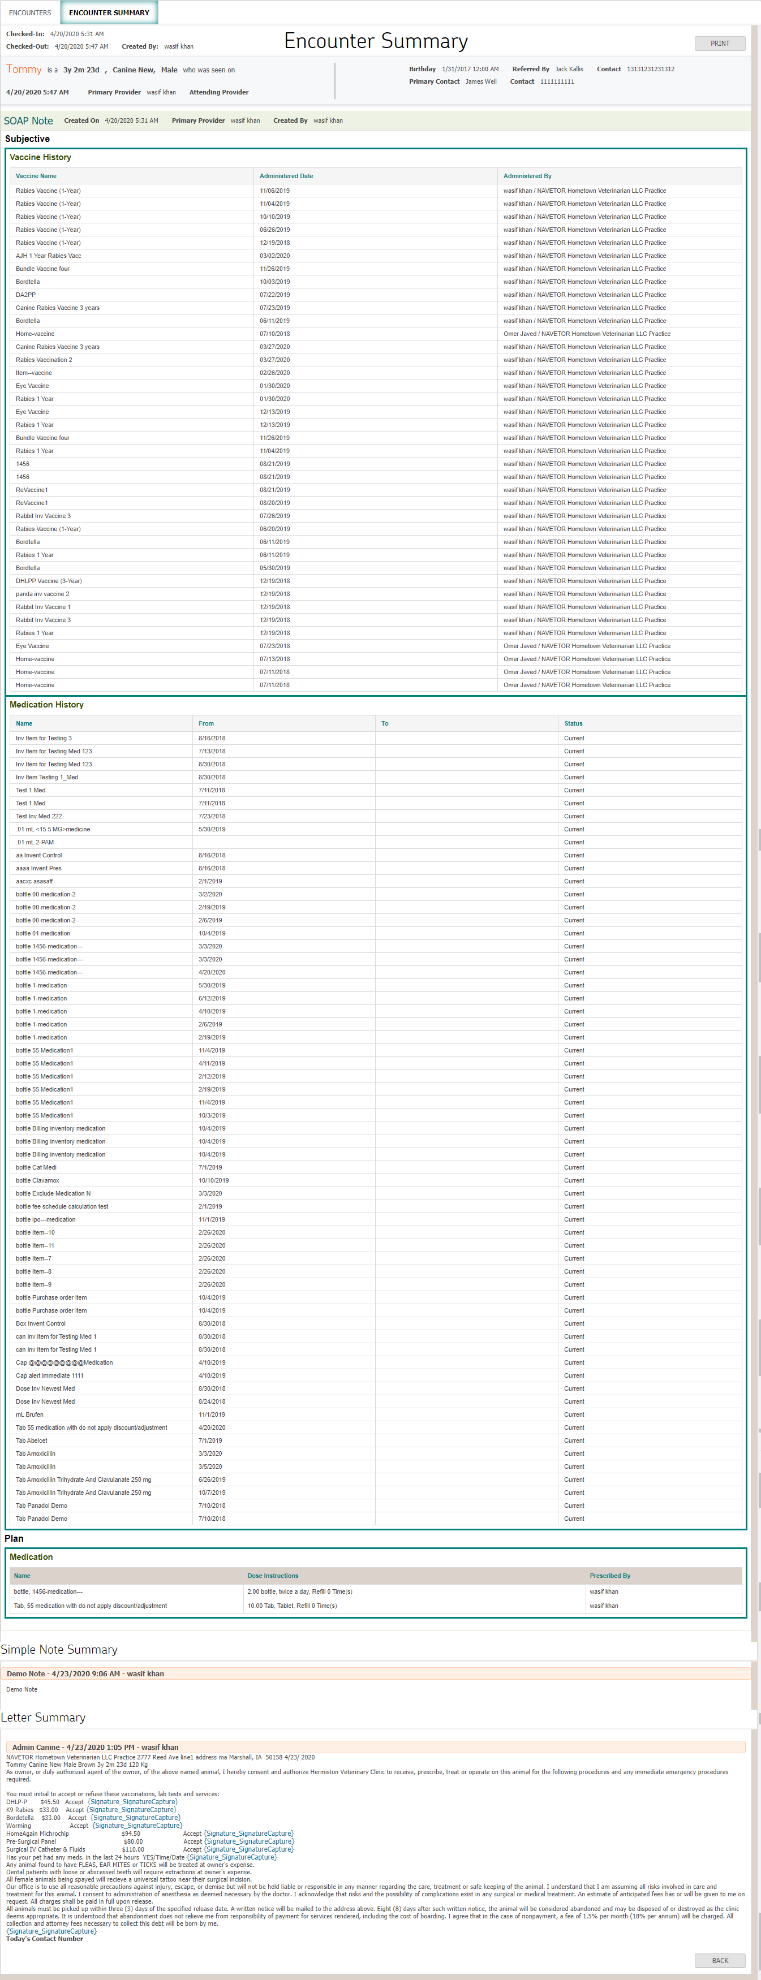
Encounter Summary
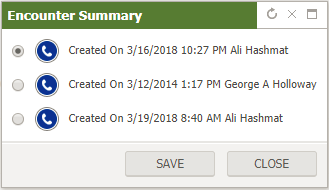
User can view encounter summary by performing encounter summary action placed on each encounter header.

Encounter Summary contains summary of following documents:
- SOAP(s) / Addendum Note(s)
- Letter(s)
- Simple Note(s)
- Uploaded File(s)
Encounter summary also contains primary information of encounter. User can also print whole encounter summary.
Medical Summary
User can view complete medical summary of patient by clicking on present on the right corner of the Encounter section header.

Navetor application provides flexibility to user to view medical summary within specified date range. User can also select if he/she wants to see summary of only SOAPs/Addendums/Simple Notes/letters
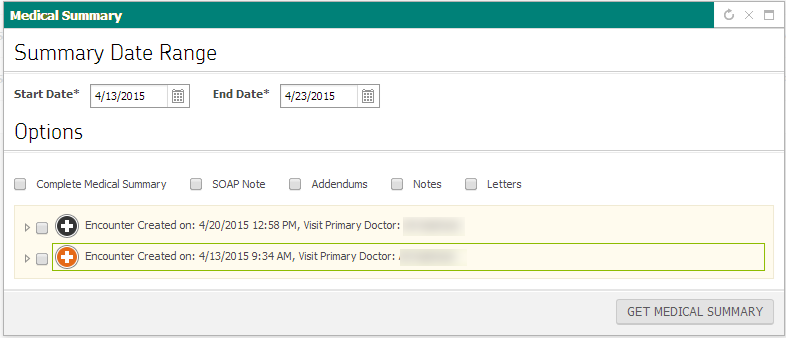
After selecting the date range, the user can click on the Get medical summary button; the system loads medical summary according to selection. User can also print medical summary.
Single Page SOAP Note
The Subjective section captures and displays the list of visit reasons, previous medications along with their status i.e. Current or Past, allergies, notes and other history of patient.
To Access Subjective of SOAP Note:
Click on Medical Records > Clinical, then select any SOAP Note

SOAP Banner
There is a banner on each tab of SOAP, containing following details:
- Visit Primary Doctor
- Save
- Current Date and Time with Navigation buttons for SOAP Note
- Assign SOAP: User can assign SOAP to other users or user groups when required
- Sign/UnSign SOAP
- Create Estimate
- Go to Invoice
- Visit Attending Doctor (If In-Patient or Day-Patient)
- Visit Attending Technician (If In-Patient or Day-Patient)
- Visit Status icon
Sign SOAP button
- User clicks on
 button, Systems locks SOAP.
UnSign SOAP button
- User clicks on
 button, Systems unlocks SOAP and if the invoice has been finalized then it will revert to draft state.
Note: The users can use this icon to append document and attachments with the signed SOAP note.
- Once SOAP is signed then the data recorded in the SOAP note can only be viewed and not edited.
HISTORY
The History part of SOAP contains four main sections i.e. Vaccination History, Medication History, Lab Results History and Allergy.

Vaccination History
This section will display all administered vaccines of patient.

User can add an internal/external vaccine already administered on patient by clicking on add vaccine button, following popup will be displayed
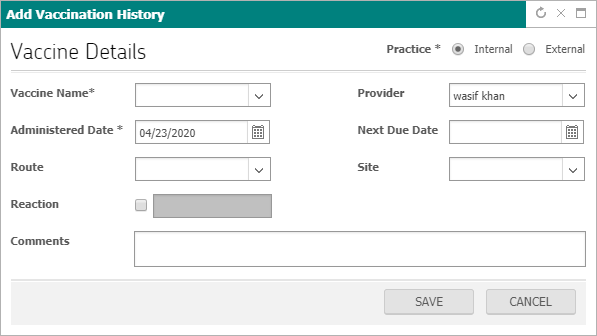
User must enter necessary details before clicking on save button. Upon clicking, vaccine will be added under vaccination history section of patient.
Medication History
User can enter current or past medications by performing clicking on the 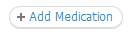 icon.
icon.
Enter the drug Brand Name (type in one or more letters of the brand name and select from the list that appears), generic name, Form of drug and its Strength in their respective fields. Select the Start Date and End Date via the calendar icon. Select the Status (Current/Past) of the medication.
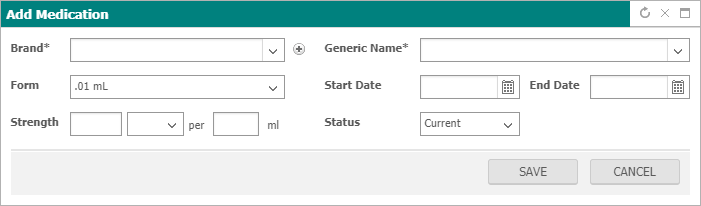
The saved medication will appear in the Medication History section.

Note:
- Medications saved from Plan section of SOAP will auto appear here. All the new SOAP notes will auto contain updated medication history table.
When user clicks on the History tab, screen will refresh and following window will appear.
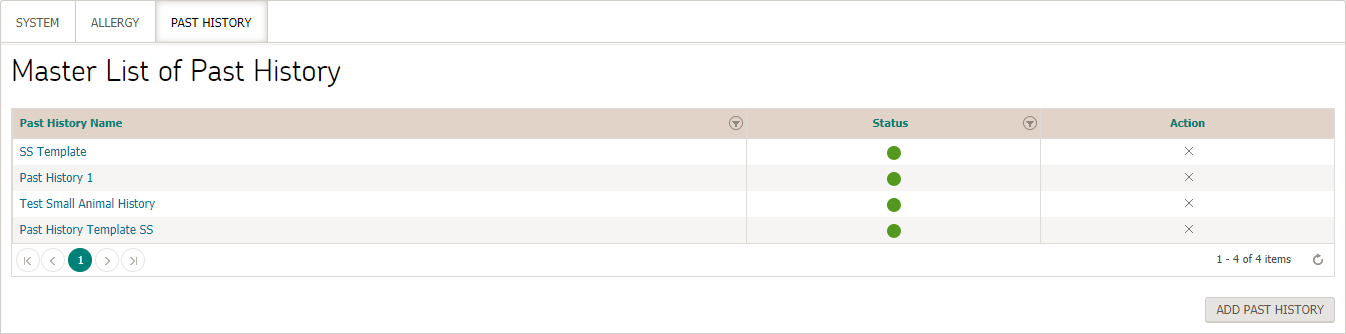
By clicking on highlighted blue link, user can update Past History Section of SOAP note
Each of the Past Histories appears as different sections along with the default templates associated with them.
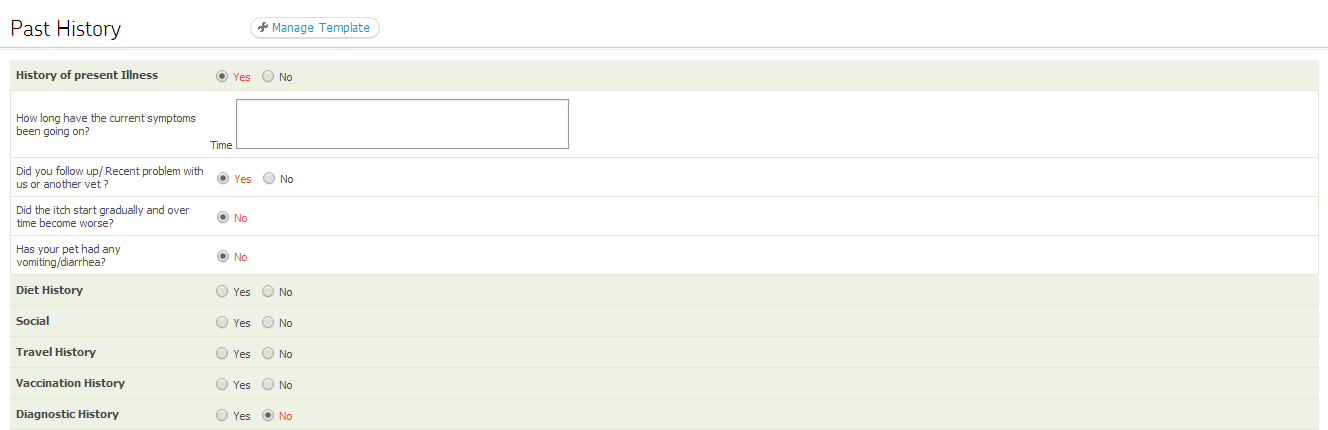
The user fills out the templates for desired Past Histories. If there is no template defined for the selected Past History, the system displays a Notes text box, and the user can add text for the Past History. In general, the Past Histories appear as a list of Questions in the template. The user answers each Question. Based on the Answer selected, the user may be displayed another question adjacent to it, if a follow-up Question was defined in the Settings Module. The user can also change/manage the template if required, as outlined below.
Click on  . A pop-up window appears to View, Use or Copy the template for this Past History. The system displays templates previously created in the Settings Module based on the combination of selected History, Practice, Location and Provider.
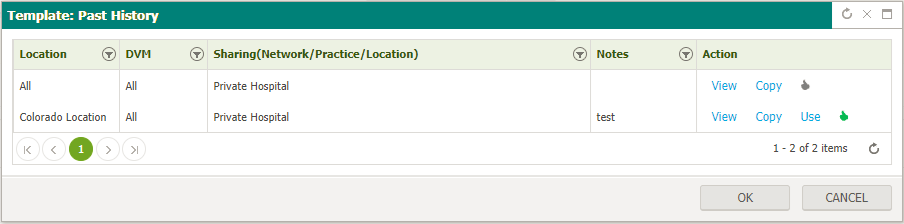
Click on Use link to use template for this Past History. User can also click on the icon to set the template as default template for this Past History.
Allergy
User clicks on  button to enter allergy details
Medical Records > Clinical > SOAP note > Subjective > Add allergy
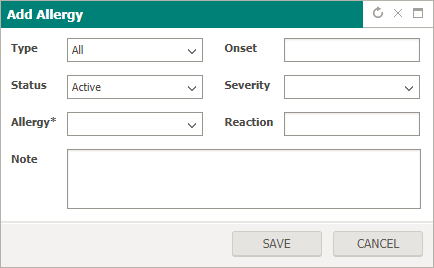
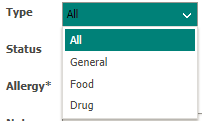
User selects the appropriate allergy Type from the drop-down menu.
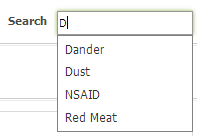
User searches for the allergy in the search box available. Enter one or more letters of the allergy you want to Search for and select from the results that appear.
After selecting an allergy, the user fills out its details in the fields that appear. Enter the Onset Date, and select allergy Status and Severity from their respective dropdown menus. Enter details of Reaction and Notes in the respective fields.
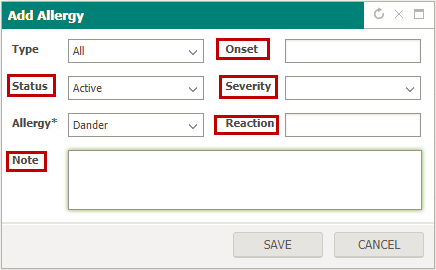
Click on save button once all the details are entered on “Add Allergy” popup. It will added to grid under allergy section.
If the system determines that the allergy is a duplicate of an allergy already added to the patient visit, the system displays a warning: “This allergy is already added to patient visit,” and will not add the duplicate allergy.
Users having rights can add allergies from Settings module (Settings > EMR > History > Allergy)
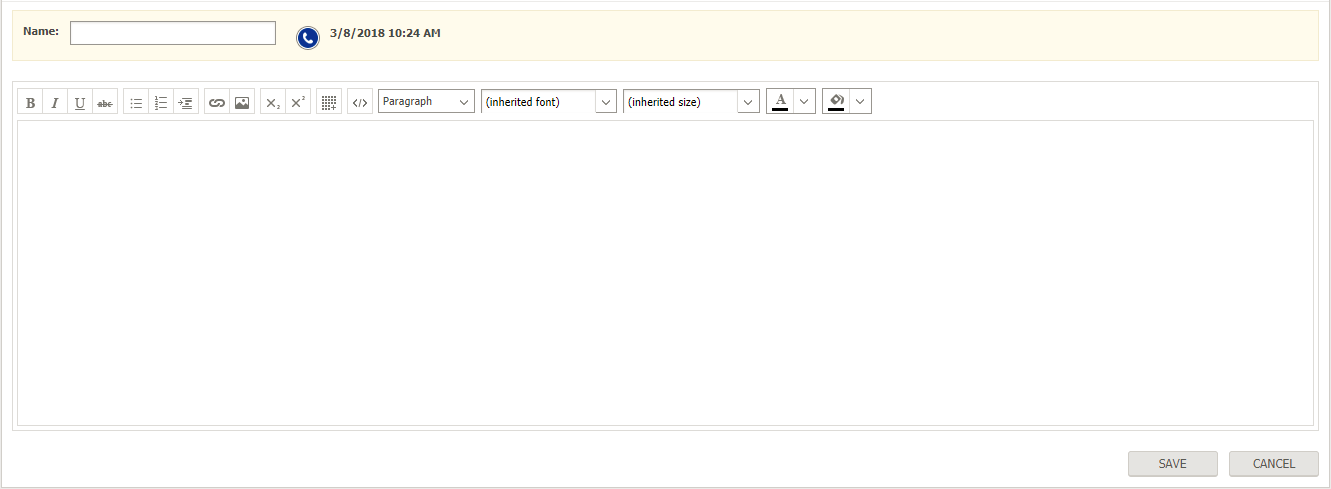
Notes
Rich text field is given for notes. User can add/edit notes, if SOAP is not signed.
SUBJECTIVE
The Subjective section captures and displays the visit reason and past history template. Whereas user can add text with different font styles in visit reason through rich text editor.
To Access Subjective of SOAP Note:
Click on Medical Records > Clinical, then select any SOAP Note

Visit Reason
By default visit reasons are the same ones that were documented when a patient was checked-in. Whereas user can add text with different font styles in visit reason through rich text editor.
Past History Templates
In past history user can select any template and add details in the template to save for reference.
OBJECTIVE
The Objective part of SOAP contains six main sections i.e. Vitals, Weight Chart, General Template, Physical Exam, System Exams and Notes.
To access Vitals screen:
Click on Medical Records > Clinical, then select any SOAP Note.
This will take you to the Encounters tab. Expand the encounter for which you wish to see the SOAP note and then click navigation icon “O” for objective then system will scroll down to following screen.
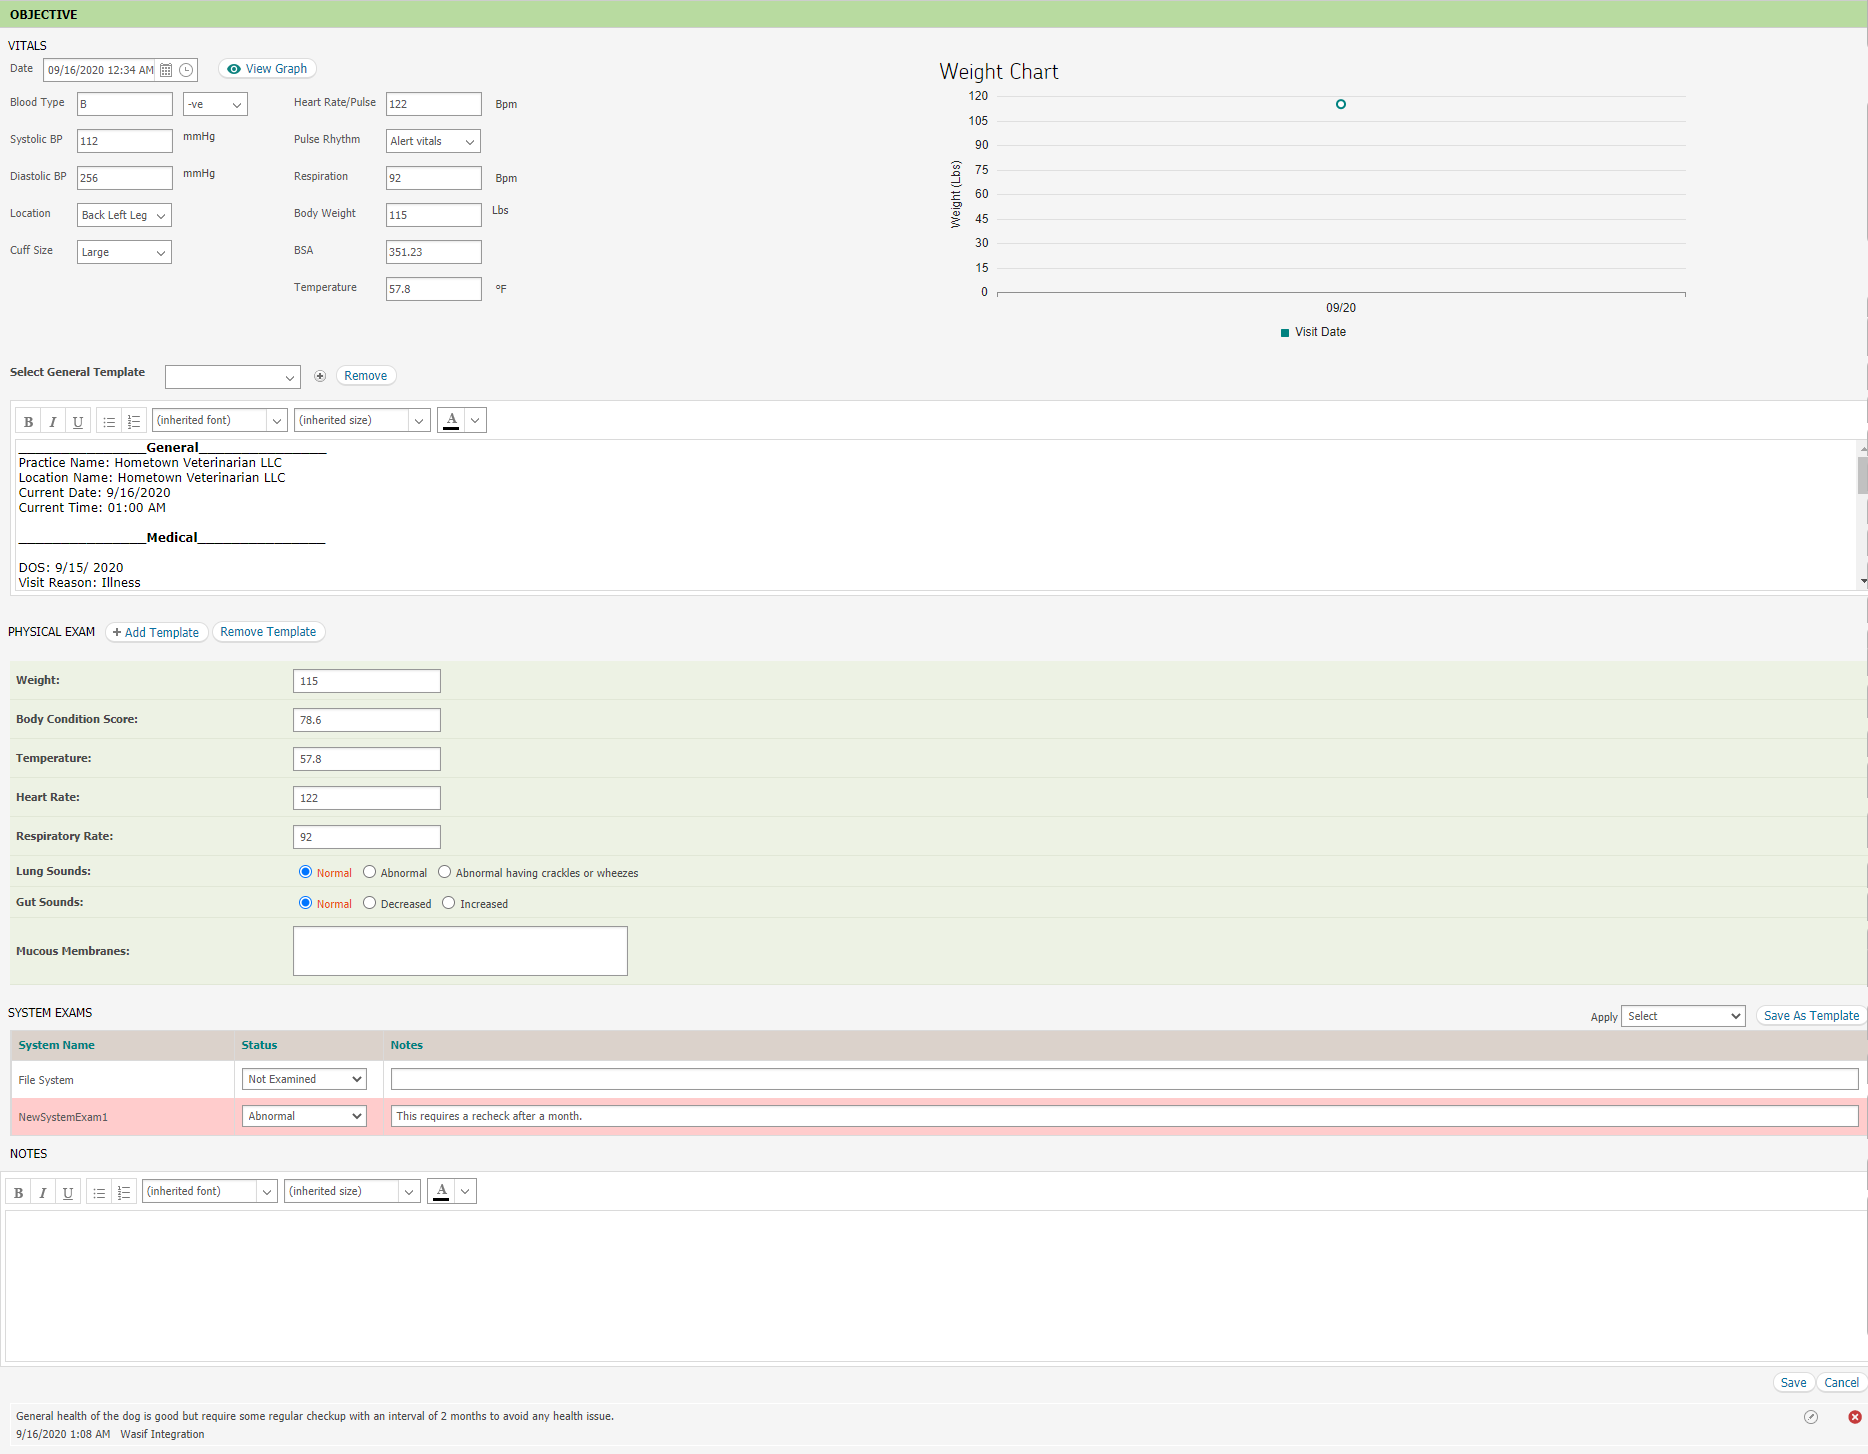
Vitals
The Date and Time are entered automatically. If you need to change these, click on  and on
  and make your selections.
Note:
- You can click to discard all changes.
- Click present against Weight, Pulse, Respiratory Rate, Blood, Temperature and Blood Pressure to view the respective vitals graph. Then click Cancel to return to the Add Vitals screen.
- Save button in vitals section will not appear until user has not entered vital ranges of selected patient’s specie in settings module i.e. Settings > EMR > History > Vitals
Weight Chart
The weight chart will show the weight graph of the patient from all the visits.
General Template
In this user can select any template to add the information, whereas user can add information in different style through rick text editor.
Physical Exam
In physical exam user can add template to fill desired information as per the template and can remove and select new when different information needs to add.
System Exam
The systems marked as common in the master list of system exams in the settings module appear in the system exam section by default.
- A dropdown is displayed against the name of the each system which represents the result of the system exam.
- Then user can change the result of the examination by selecting the appropriate result from options displayed - Normal (N), Abnormal (A) and Not Examined.
- After selecting the result from the options, the text field be enable where user can add comments against that exam where required.
Notes
User can also add notes through rich text editor to add any general suggestion or information.
ASSESSMENT
The Assessment part of SOAP contains three main sections i.e. Problems, Diagnosis and General Assessment.
To access Assessment screen:
Click on Medical Records > Clinical, then select any SOAP Note
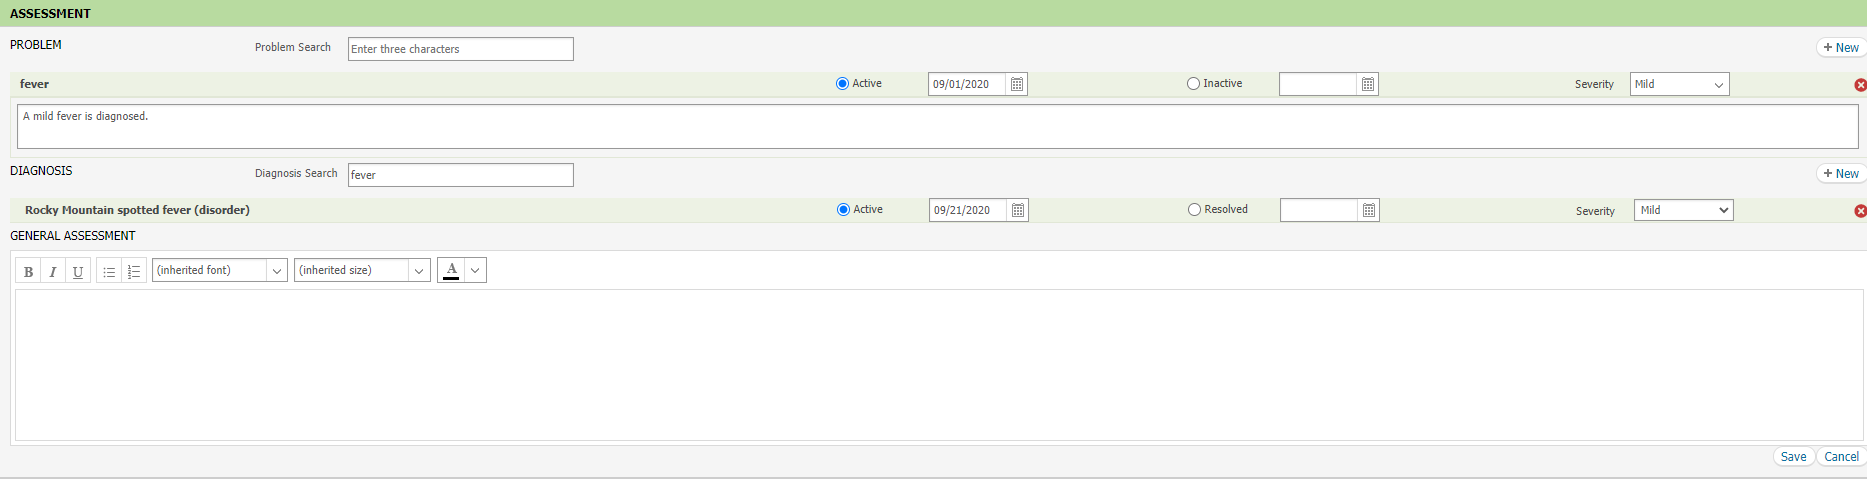
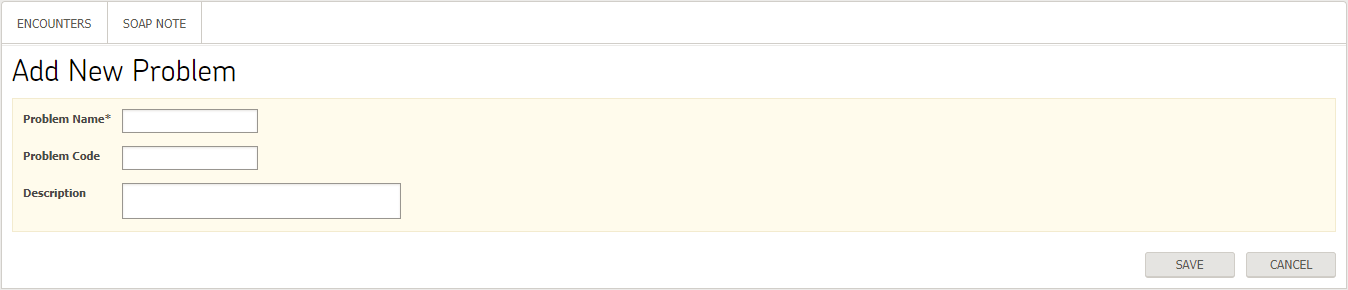
Problems
User can add a problem by typing relevant keywords in the Problem Search field and selecting the appropriate option from the matching results displayed.

Similarly user can specify severity, status and any comments relevant to the problem being added. Select the status (Active, Inactive, Resolved or Redefined) and Severity (Mild, Moderate or Severe) of the Problem from respective dropdowns.

User can also add a new Problem to the master list by clicking on the  button.
User can delete problem from SOAP/Addendum by clicking on  action button
Note:
- Active Problems will auto carry forward to new SOAPs/Addendums.
- Resolved and Redefined statuses will be shown only if problems are auto carried.
Diagnosis
User can add a diagnosis by clicking on  button
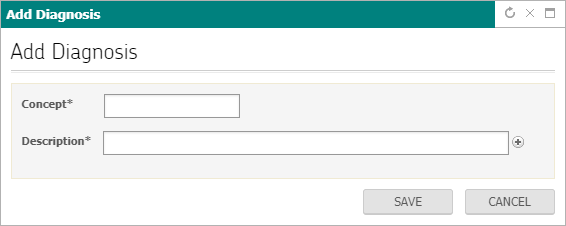
User can add a diagnosis by using diagnosis search field, same way as they do for problems. Diagnoses can be searched and selected for different diagnosis standards. User can configure diagnosis standards from Location Profile.
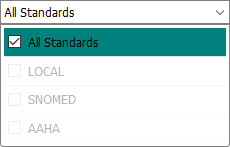
Search results populates after entering at least three characters. System shows Concept name, Description and Name of Standard in description. User can select appropriate option from the dropdown menu.
Similarly user can specify circling behavior and severity relevant to the diagnosis being added. Select the circling behavior (Definitive Diagnosis or Differential Diagnosis) and Severity (Mild, Moderate or Severe) of the diagnosis from respective dropdowns.
User can also add a new Problem to the master list by clicking on the button

User can delete diagnosis from SOAP/Addendum by clicking on the action button.
Note:
- Active Problems will auto carry forward to new SOAPs/Addendums.
General Assessment
User can add general assessments in rich text editor with desired font and style.
Upon adding assessment details, user clicks on add button for it to be added.
User can remove the added comment by clicking on action button

PLAN
To Access Plan screen:
Click on Medical Records > Clinical, then select any SOAP Note
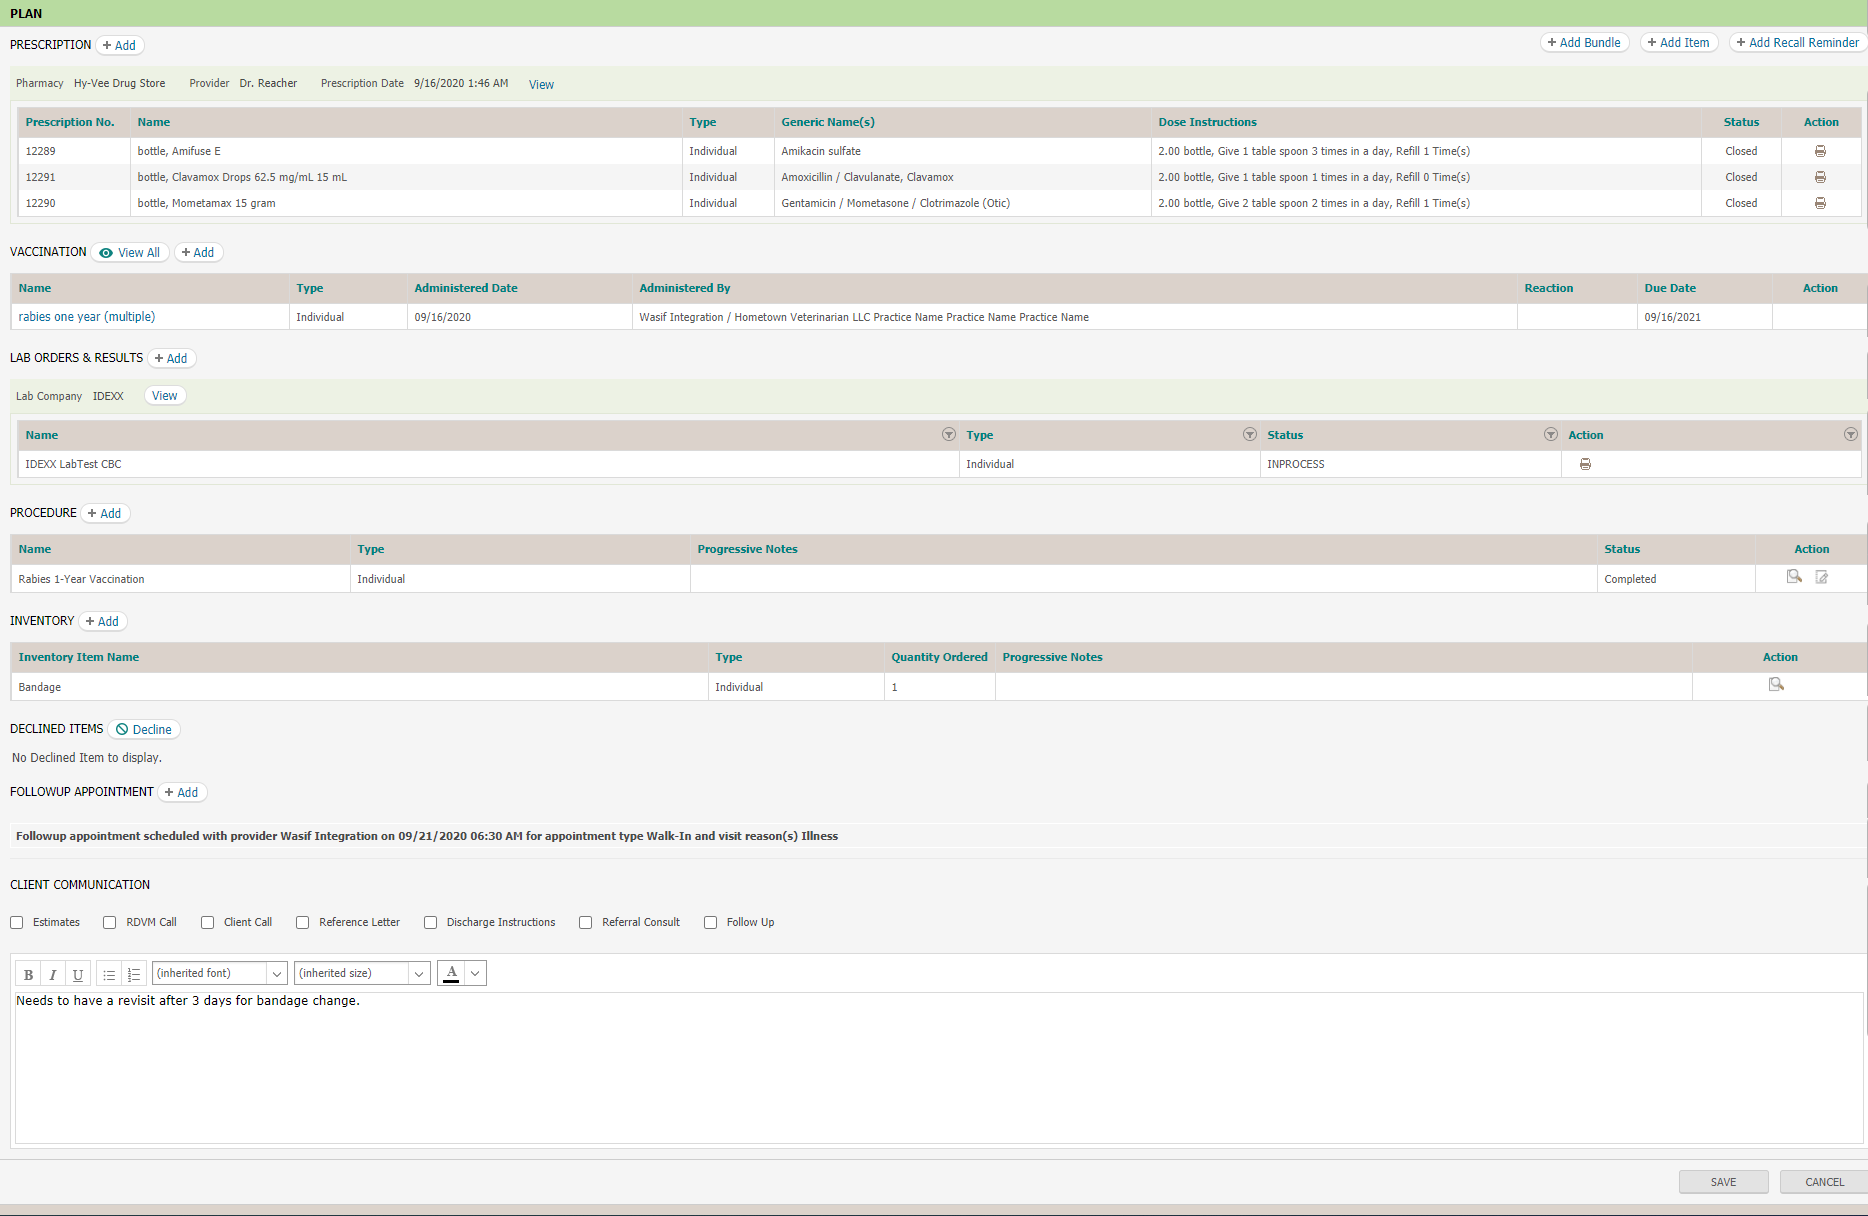
There are several entities in Plan section, such as:
- Prescription (RX)
- Vaccination
- Lab Orders & Results
- Procedure
- Inventory
- Declined Items
- Attachment
- Images
- Followup Appointment
- Client Communication
Prescription
Prescription section displays the Medications prescribed by the provider to the patients in this SOAP Note.
Vaccination
The vaccination section displays the list of vaccinations prescribed to the patient in this SOAP Note.
Note:
- Click on
 to add a new prescription to the SOAP Note.
 - Click on
 to update the prescription.
 - Click on
 to delete the prescription.
Edit and Delete functionality is only available for medications added from “in house” pharmacy.
Adding/Updating a Prescription/Medication (RX)
Navigate to Add Rx (Medication Prescription):
EMR > Clinical > Prescription (Rx) section > Add Medication button
Following screen appears.
Note:
Add Medication screen contains following fields if selected pharmacy is In House.
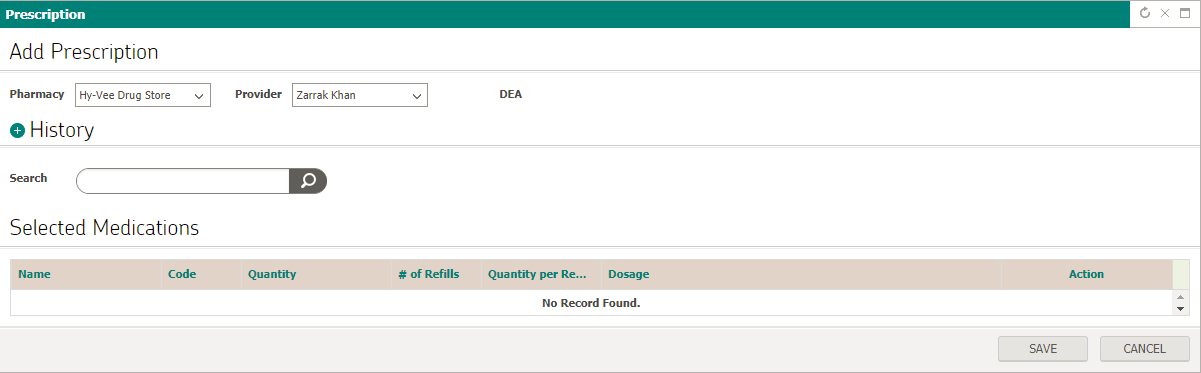
Selecting a Pharmacy
The user can select an In-house or External pharmacy from the Drop-down list.
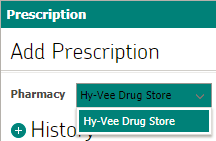
- If the provider selects In-House, then the list of available medications will be limited to the ones that are available in the inventory of the Location.
- If the provider selects External, the list of all the medications that are in the drug database will be available to the provider for prescribing.
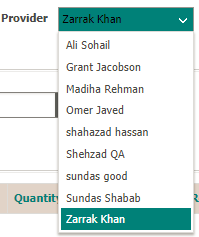
Selecting a Provider
The user can select the appropriate provider from the drop-down list. By default the user’s name appears, if the user is a provider. Another provider can be selected from the dropdown list by the user if required.
Date
Current date is displayed in the format mm/dd/yyyy.
Time
Current time is displayed in the format hh:mm am/pm.
DEA
DEA (Drug Enforcement Administration) number associated with the providers (Settings > My Practice > User > User Profile > Profile Information) is automatically populated by the system when a provider is selected (if available).

Vaccination
Vaccination is accessed when the provider wants to prescribe a vaccine to a patient. To access the Vaccination section, select a patient and navigate to below mentioned path:
Navigation Path: Click on EMR > Clinical > select a SOAP Note > Plan

View Vaccinations
To view vaccination records, click  on the Vaccination section
The View Vaccinations screen opens and displays the list of vaccinations that have been administered to the patient or are scheduled for administration.
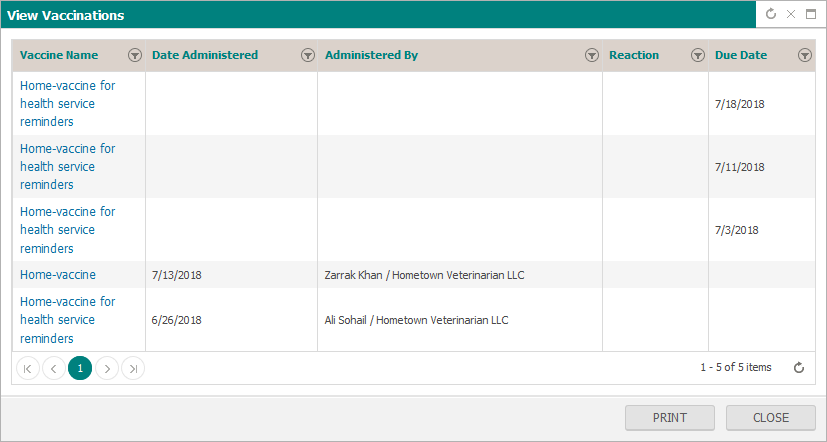
Note:
- User can delete a vaccine from vaccines list by clicking on delete icon placed in the Action column corresponding to that particular vaccine. Delete icon appears in front of those vaccines only whose Date Administered field has no date entry.
- Print button [image] prints the list of all vaccinations of the patient just like they are displayed in the View Vaccinations screen along with patient and client name.
- If the user clicks on a vaccine name, the system displays the Vaccine Details window. From this window the user can update the vaccine details (refer to Adding/Updating Vaccination).
Add a Vaccine
Vaccination can be added for a patient to the system by following the navigation path mentioned below:
Navigation Path: Click on EMR > Clinical > Select a SOAP Note > Plan
Under Vaccination section, the user clicks on the button to add a vaccine, following popup will be displayed

Updating a Vaccine
- User clicks on the specific vaccine name displayed on View Vaccination screen.
- Vaccine Details window appears with the previously-entered information for that vaccine.
- The system displays the Vaccine Details screen in the read-only mode if the vaccine has already been administered.
- The user enters or modifies the information in the fields, as defined above. All the * marked fields are mandatory.
- The user clicks on the Save button. The user is navigated back to the Plan screen.
- If the user has clicked on the Cancel button, then the system will not save any updated information and control will pass back to View Vaccination screen.
Note:
- All the * marked fields are mandatory.
Lab Orders & Results
To access lab orders & results:
Navigation Path: EMR > Clinical > select a SOAP Note > Plan
Lab Orders
Lab Orders are either a single test or a combination of tests, which a patient is prescribed to obtain information which cannot be extracted through history and physical examination. This information assists in the determination of a patient’s overall health, in the diagnosis of a disease and in the establishment of an appropriate treatment plan.
Lab Orders allows the user to select tests, which play a vital role in determining the course of the Treatment Plan of the patient. The user can create and place a Lab Order once the specimen has been collected, inputting the details of the specimen and other details required to conduct a particular test.
The user accesses this section:
- To add lab tests to patient’s Treatment plan.
- To create and place a lab order.
- To update test order (Specimen Details) from the Treatment sheet.
Create and Place Lab Order
Navigation Path: Click on EMR > Clinical > Select a SOAP Note > Plan > Add Lab Order
When user clicks on add button under diagnostics section to add Lab Tests to patient plan, the following screen appears:
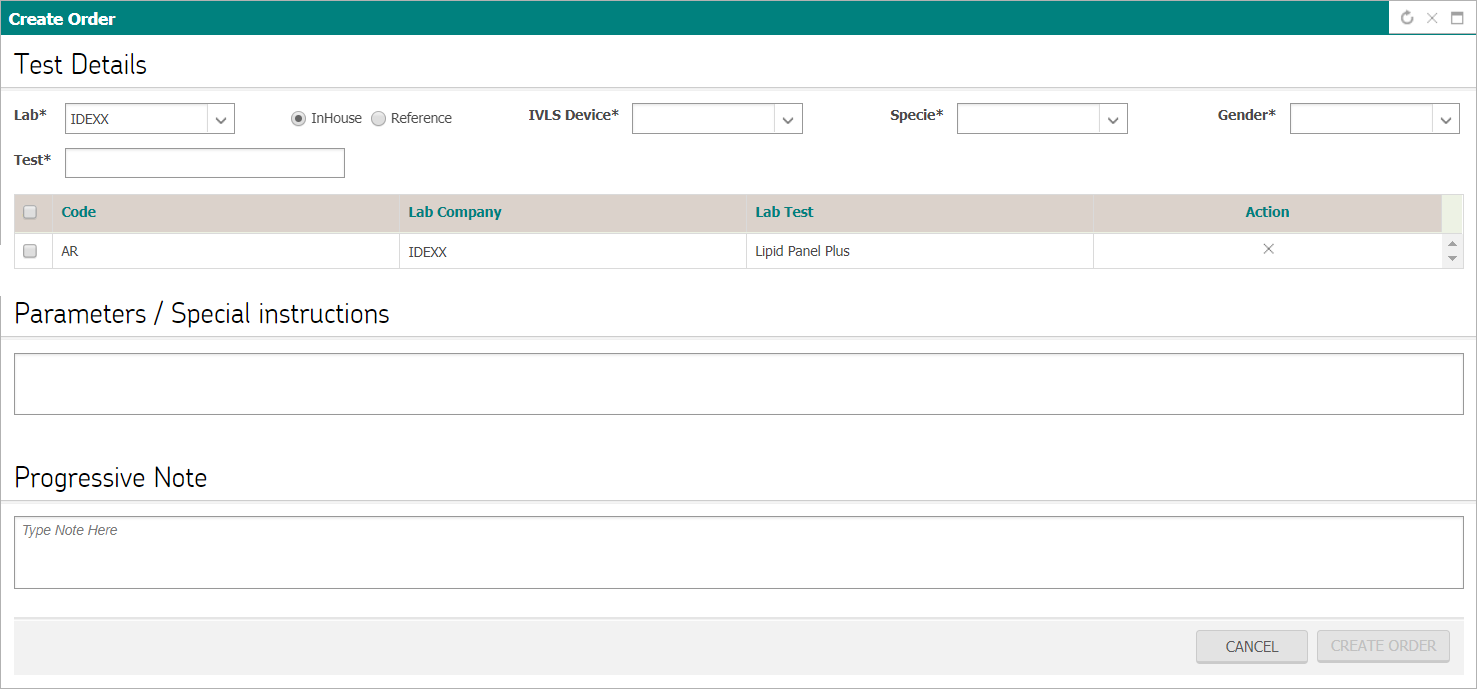
Create Order screen contains following sections:
- Test Details
- Specimen Details
- Parameters / Special Instructions
- Progressive Note
A. Test Details
1. Lab:
While creating lab order from settings module i.e. settings > EMR > Lab > Test, user can associate more than one lab company with lab test. This drop down contains all the lab companies associated with lab test. Once user selects Lab Company, lab test will auto populate in grid below with code, company name, test name.
User have to select a lab to which s/he wants to send lab order. As per the selection of lab company further details will be required to fill before sending lab order which includes:
- Specie
- Breed
- Gender
- InHouse/Reference (for IDEXX only)
2. Search by Test name
User can search lab tests that are available in the master list of lab tests. Search by is predictive search and system shows lab name and code in search result.
B. Specimen Details
Specimen Details section is comprised of:
- Sample Collection Date: This is the date the sample was collected by default the current date is set, however it is editable. The date format is MM/DD/YYYY.
- Sample Collection Time: This is the time the sample was collected. By default the current time is set, however it is editable. The time format is HH:MM AM/PM.
- Specimen: The system will auto-populate this field with the specimen that has been associated with the Lab Order in Settings.
- Acquisition Site: This is a text field which only becomes active if the Source required check-box is checked for this specific Lab Order in Settings.
- Containers Collected: This is a text field which accepts only numeric values entered by the user.
- Container Type: By default this field will show the Container Type associated with the Lab Order in Settings but the user can override this selection via the drop-down.
- Volume: By default this will show the minimum specimen volume required associated with the Lab Order in Settings. The user can overwrite the minimum required volume.
- Comments: This is text field where the user can enter additional information.
C. Parameters / Special Instructions
This text field will be active only if order frequency is Scheduled or Recurring. These parameters/special instructions will be shown in Treatment sheet.
D. Progressive Notes
This text field will be active only if order frequency is ‘Immediate’.
Steps to Create and Place Lab Order
- User clicks on the “Add” button on the Plan page to navigate to Create Order window.
- The user fills in Test Details and repeats for all the Lab Orders to be added.
- The user clicks the check-box next to a Lab Order and, then fills in the Specimen Details, clicking when done. Repeat Step3 for any additional Lab Orders in the grid. The user can also click if necessary.
- User then can click on any of the below mentioned action icons:
- Place Order: This button is enabled only when the Order Frequency is Scheduled or Recurring. Once the user clicks on the place order button, the details inputted above are saved in the database and are populated on the Plan page.
- Cancel: The user can cancel the details inputted by clicking on the button. The system will ask for confirmation by displaying a warning message.
- Mark Done: This button is enabled only when the Order Frequency is Immediate. Once the user clicks on Mark Done, the system checks if all the mandatory fields are filled with the valid information; otherwise the system will highlight those fields and display an error message. If the mandatory fields are filled in, the system will take the confirmation from the user: “Do you want to place order?” Once the user agrees, the order will be placed with the Lab Company.
- Discontinue: This field will be active only if the user navigates to this window from the Treatment Sheet by clicking on the respective time slot. Also, this button will be active only for Recurring Order Frequency.
- Cancel: This field will be active only if the user navigates to this window from the Treatment Sheet by clicking on the respective time slot.
Note:
- All the * marked fields are mandatory.
- Lab Order can be created for Active patients only.
- In case of an Inpatient, once tests are selected and the Plan Estimate is approved by the Client, the Lab Orders will reflect as Pending in the Treatment sheet, if the order type is Scheduled or Recurring.
- Requisition ID will be generated once user clicks Place Order. This button will be enabled only if the Order Frequency is selected as Immediate
- Once the user clicks on Add Test Details, the grid below populates with Code, Lab Company Name, Test, Date of Execution, and Time of Execution.
- If the user navigates to Create Lab Order screen from the Plan screen, the default Order Frequency selected will be Immediate, but the user can change to Scheduled or Recurring.
- The user can update the Lab Order Plan page only before the plan is approved, by clicking the Edit link.
The following fields will populate on the Plan page:
- Header: Lab Company Name; View, Edit and Delete links.
- Lab Order name
- Status:
- Draft: As soon as the tests are added on the plan page.
- Pending: As soon as the Lab Order is placed, it reflects in the Lab Orders list on the Plan page. The status of such an order is Pending report.
- Partial Received: In a Lab Order, if reports for some tests ordered are received and some are pending, the Status of the Lab Order will be Partial Received.
- Received: In a Lab Order, if reports for all the tests ordered are received, the Status of the Lab Order will be Received.
- Viewed: Once the provider acknowledges the Order by clicking on the acknowledge button, the status of the Order becomes Viewed.
- Closed: Once the patient checks out, the status of the order becomes Closed.
- Action:
- Delete: This option is available only for Draft orders.
- Edit: User can update specimen details until lab order is in draft status.
Treatment (TX)
A Treatment (TX) order is an order for a procedure to be performed on a patient.
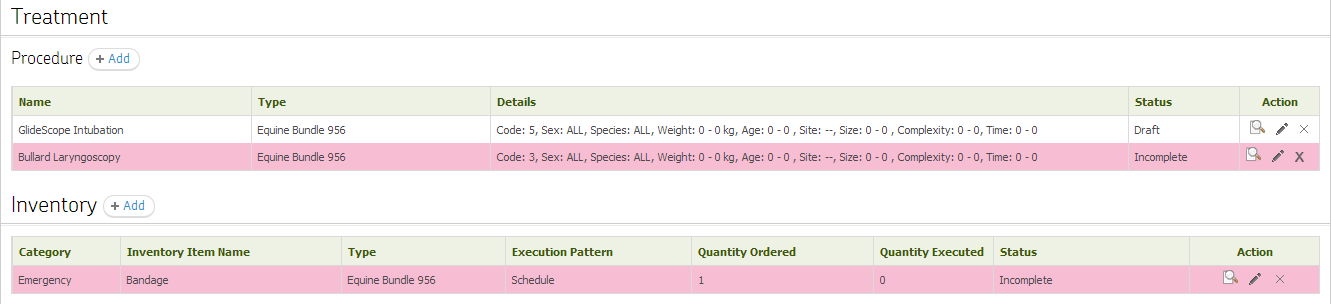
Procedures
During a patient visit, a user creates a SOAP Note and adds Procedures in the Plan page.
To access Procedures:
Navigation Path: EMR > Clinical > select a SOAP Note > Plan > Treatment (TX)
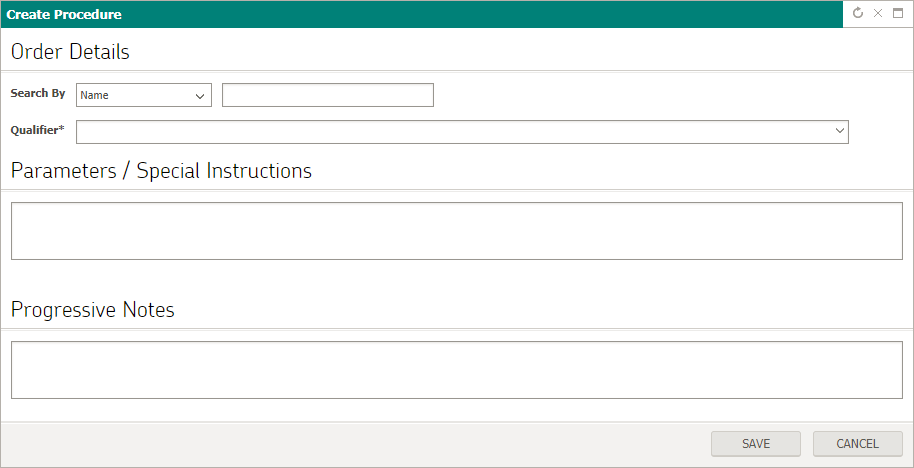
To create Procedures:
- Click button from the Plan page under Treatment section against Procedures.
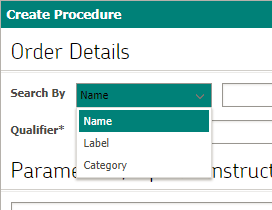
- Create Tx Order screen appears:
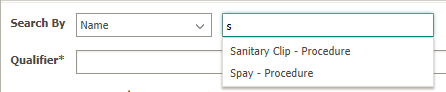
- Select a search criterion from the Search by drop-down list.
- Type all or part of the search criteria in the text box next to the Search By drop-down and select one of the results from the list of matching procedures that appear.
- A list of qualifiers based on the species, gender, weight and age of the patient appears as a dropdown. Select the appropriate qualifier.
- Parameters / Special Instructions These parameters/special instructions will be shown in Treatment sheet.
- Progressive notes: This is a text field to document progress notes


Click on  or click on
  , User will be returned to Plan page.
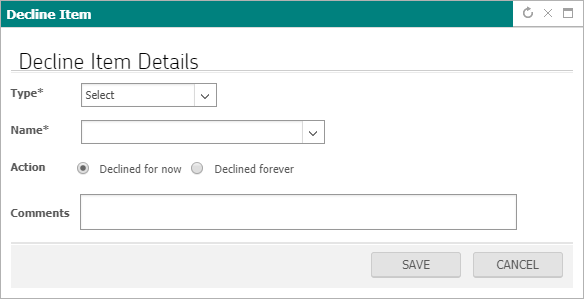
Declined Items
Declined Items is accessed when the client won’t allow to apply a particular item (medication/vaccine/lab test/procedure/inventory. To access the Declined items section, select a patient and navigate to below mentioned path:
Navigation Path: Click on EMR > Clinical > select a SOAP Note > Plan
Under Declined items section, the user clicks on the  button to add an item, following popup will be displayed
Attachment
User can add documents/files in SOAP Note attachment section which will be available to download or print view when user print SOAP Note/Medical Summary.
Images
User can add images for reference with the note, so that those images can be used for future reference.
Followup Appointment
User can create followup appointments through SOAP Note which will then available in the SOAP Note and also in the scheduler.
Communication (CX)
The Communications section on the Plan page is used to capture and communicate any instructions related to the patient care.
Client Communications
This is used to capture the communications between the provider and the client. This section consists of the following fields.
- Client Communication type: Various types of client communications are available as check boxes. The user can select the relevant types by selecting the check boxes from the following list.
- Estimates
- RDVM Call
- Client Call
- Reference Letter
- Discharge Instructions
- Referral consult
- Follow up
- Notes: This text area is used to type the notes that are to be communicated to the client.
Inventory Order
During a patient visit, a user creates a SOAP Note and adds Inventories in the Plan page.
To access Procedures:
Navigation Path: EMR > Clinical > select a SOAP Note > Plan > Inventory

To create Inventory:
Click on button from the Plan page under Inventory section.
Create Inventory screen opens:
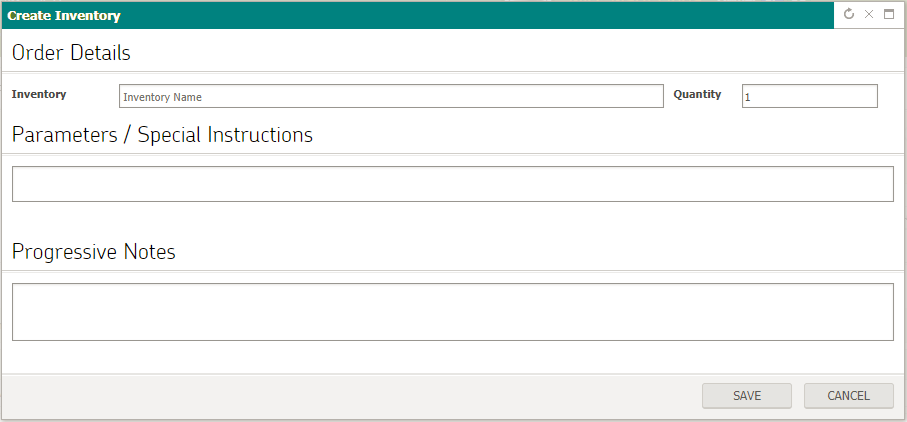
Create Inventory order contains four main sections i.e.
- Order Details
- Parameters / Special Instructions
- Progressive Notes
Order Details
Inventory: User can search inventory from master list of inventory i.e. Settings > Inventory > Item.

System shows inventory Item Name - Description - Code of Item - Brand associated with item - Quantity in Stock in search result
Quantity: Quantity to be ordered
Parameters / Special Instructions
These parameters/special instructions will be shown in Treatment sheet.
Progressive Notes
This is a text field to document progress notes.
Click on or click on . The user will be returned to the Plan page.
Notes
Rich text field is given for notes. User can add/edit notes, if SOAP is not signed.
Approving orders
For all the orders to be listed on the Treatment Sheet, the user needs to click on the button available on the plan screen. The button is enabled only for inpatient/day patient visits only. The system adds only Scheduled or Recurring orders to the treatment sheet. For further details kindly refer to the Treatment Sheet Section.
Create Estimate
User can create a charge estimate by clicking on “Create Estimate” button at the bottom left of plan screen. All billable entities in plan component will be added to charge estimate screen. (Detailed workflow in Billing user manual)
TREATMENT SHEET
The Treatment Sheet is a detailed worksheet of a particular patient for a specific patient visit. It is created for in-patients and day patients.
It will have the treatment schedule of the patient after the user approves the Plan page orders. It displays the different statuses of the various orders of a particular patient visit.
Treatment sheet can only be viewed when the user Approves Orders from the Plan page. The user can also view the Treatment Sheets of previous visits by navigating to a SOAP Note of previous inpatient or day patient visits.
Navigation Path: Click on EMR > Clinical > select a SOAP Note > Navigate to Treatment Sheet
Treatment sheet has following sections
- Special Instructions
- Orders
- Progressive Notes
- IV Catheter
- Information Panel
Components of the Treatment Module
Special Instructions
It is the text field where a user can capture special instructions related to Treatment Sheet after saving it.
Orders
The Orders header contains the features and options mentioned below:
Switch to 12 hrs. View
- User can change view of orders grid from 24 hrs. to 12 hrs. View
Legends
Legend contains different statuses of orders. Following are the statuses with their colors
- Orange: Pending Order
- Green with Check Mark: Completed Order
- Blinking Pink: Pending & Time Sensitive Order
- Yellow: Pending & Continual Order
- Blue: Pending & Skipped Order. If the Order is not “Marked Done” within two hours of the scheduled time, the system automatically turns the cell blue. For time-sensitive orders, the cell turns blue half an hour after the order is skipped
- Red: Cancelled
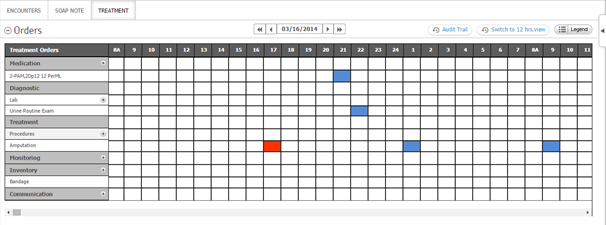
Treatment Orders
The RX, DX, TX and Inventory orders created on the Plan screen are brought forward to the treatment sheet. However, monitoring orders can be created only from Treatment sheet. The user just has to click on ‘+’ icon and a pop up will appear identical to the one that can be seen on the Plan page.
Treatment Sheet Grid
This section displays Treatment Orders along with scheduled time slots highlighted. Treatment Orders that are present on the grid are:
- Medication (Rx): Displays the list of all Prescriptions ordered in the approved Plan for this patient visit.
- Diagnostic (Dx): Displays the list of all Diagnostics ordered in the approved Plan for this patient visit. It further displays the following sub-sections:
- Lab
- Treatment (Tx): Displays the list of all Treatments ordered in the approved Plan for this patient visit. It is further displays the following sub-section:
- Procedure
- Monitoring: User can both order and view the monitoring orders under the header. User can place multiple orders within an hour. The number of pending orders within an hour will reflect in the cell in a circle. I.e. if a BP order is scheduled after every 15 minutes in an hour, the hour cell will reflect 4 within a circle in the cell. For further details refer the Create Monitoring Orders section of this manual.
- Inventory: Display list of all inventory orders approved for Plan for this patient visit.
Progressive Notes
Users can create Progressive Notes by using free text option and clicking on “Done” once they’re finished. The system saves the progressive note with the date, time and name of user who saved it
Note:
- User can collapse/expand Progressive Notes by performing actions (-)/(+)
- User can view a running list reverse chronological order of all notes for the sheet.
IV Catheter
User can save date, time, length and information about the site of the IV Catheter.
Note:
- User can collapse/expand Progressive Notes by performing actions (-)/(+)
- User can view the most recent on the top
- Once user performs action on ‘Print’, system to print all the pages of the treatment sheet, not just the screen shot view.
- User selects printer, specifies printing settings and executes print request.
Note:
- The user views the Treatment Sheet reflecting the flow of orders in default 24 hours view. This view defaults to the current date and time.
- By default the Treatment Sheet will display all the One Time and Recurring orders approved from the Plan page as Pending orders.
- The user can comment against all types of orders - Pending, Executed, Time Sensitive, Continual, Skipped and Cancelled by using the comment section in the pop up, which can be accessed by clicking on a time slot.
- The user can mark done or cancel skipped orders as well.
Monitoring Order from Treatment Sheet
The user can create and execute Monitoring orders from the Treatment sheet during the patient visit.
- The user clicks on the button against the Monitoring header.
- System opens up the Monitoring screen.
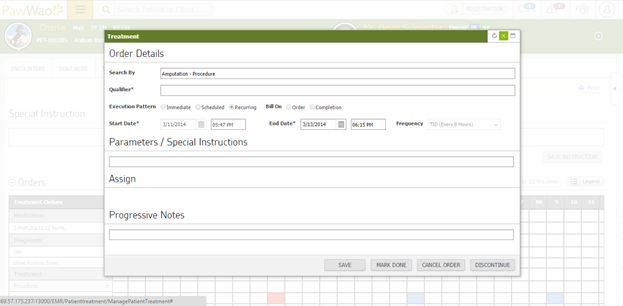
Monitoring Order
Monitoring order contains:
Type:
- List of monitoring orders
- Single selection
Order Frequency:
This consists of 3 radio buttons:
- Immediate: This radio button is by default selected for Order Frequency.
- Scheduled: This is for a single-scheduled Order.
- Recurring: This radio button is selected by the user when there are a repeated number of the same Lab Orders for a patient at regular intervals.
Time Sensitive:
If the user checks this field, then the new Lab Order will reflect as a Time Sensitive order in the Treatment Sheet. Enter the Start Date, End Date, Start Time and End Time via the calendar and clock icons, and the Frequency via the drop-down wherever required.
Parameters / Special Instructions
This text field will be active only if order frequency is Scheduled or Recurring. These parameters/special instructions will be shown in Treatment sheet.
Assign
User can assign lab test to other user(s) user group(s). Intended users will get Task of lab order.
Progressive Notes
This text field will be active only if order frequency is ‘Immediate’.
Executing Orders from Treatment Sheet
Click on any time slot with pending order status, a pop up with will open depending on order type. Same pop up will open as it open during creation of order except for Medication order.
Enter the relevant details and click on [image] to change the status of an order to Completed.
RX - Prescription
This section of EMR module is used to access the list of all prescriptions that have been prescribed in the various locations to which the user has access. It helps the user to view the details of the prescription and also perform functions such as filling and refilling prescriptions and also printing labels for them.
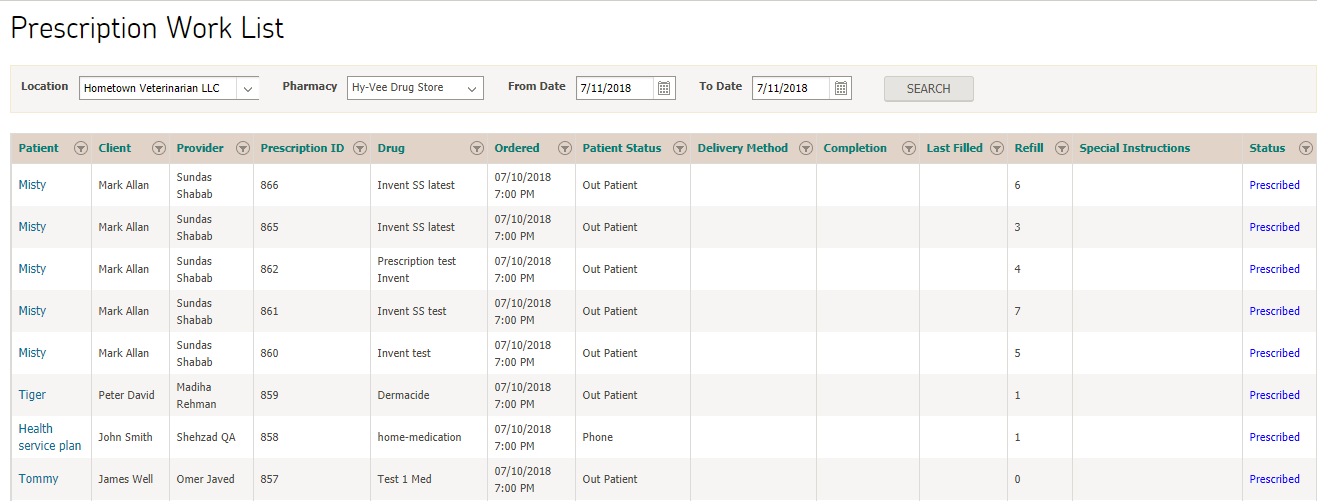
List of Prescriptions
This list of prescriptions displays all the prescriptions that have been created in the selected Location along with their description and current statuses. The user (typically a pharmacist) can search for prescriptions from this screen and view their details. This screen is accessed when the user wants to search and view the details of a prescription and when they need to perform various actions on the prescription like printing labels, dispensing, refilling etc. using the Prescription Details screen.
Navigation Path: Click on Electronic Records > Prescriptions
The list of prescriptions is displayed on the basis of valid search criteria. The Rx screen must include following:
- Location: It displays the drop-down list of all locations associated with the user. Single selection is allowed and by default the location assigned to the user will appear.
- Pharmacy: List all pharmacies in a dropdown.
- From Date: It is a date picker field and by default the current date will appear in this field.
- To Date: It is a date picker field and by default the current date will appear in this field.
These 3 fields sort the search for the list of prescriptions when the user hits on the [image] button.
The search results section showcases a table consisting of the following columns:
- Patient Name
- Client Name
- Provider
- Prescription ID
- Drug
- Prescription Ordered Date and Time
- Patient Status
- Delivery Method
- Completion
- Last Filled
- Refill
- Special Instructions
- Status
Note:
- Click on the filter wherever necessary to search for the required data.
- The prescription list is sorted on the basis of prescription date time column in ascending chronological order.
Prescription Details
To view the Prescription Details of a specific prescription, user clicks on name of the patient. A pop-up window will appear containing the Prescription Details.
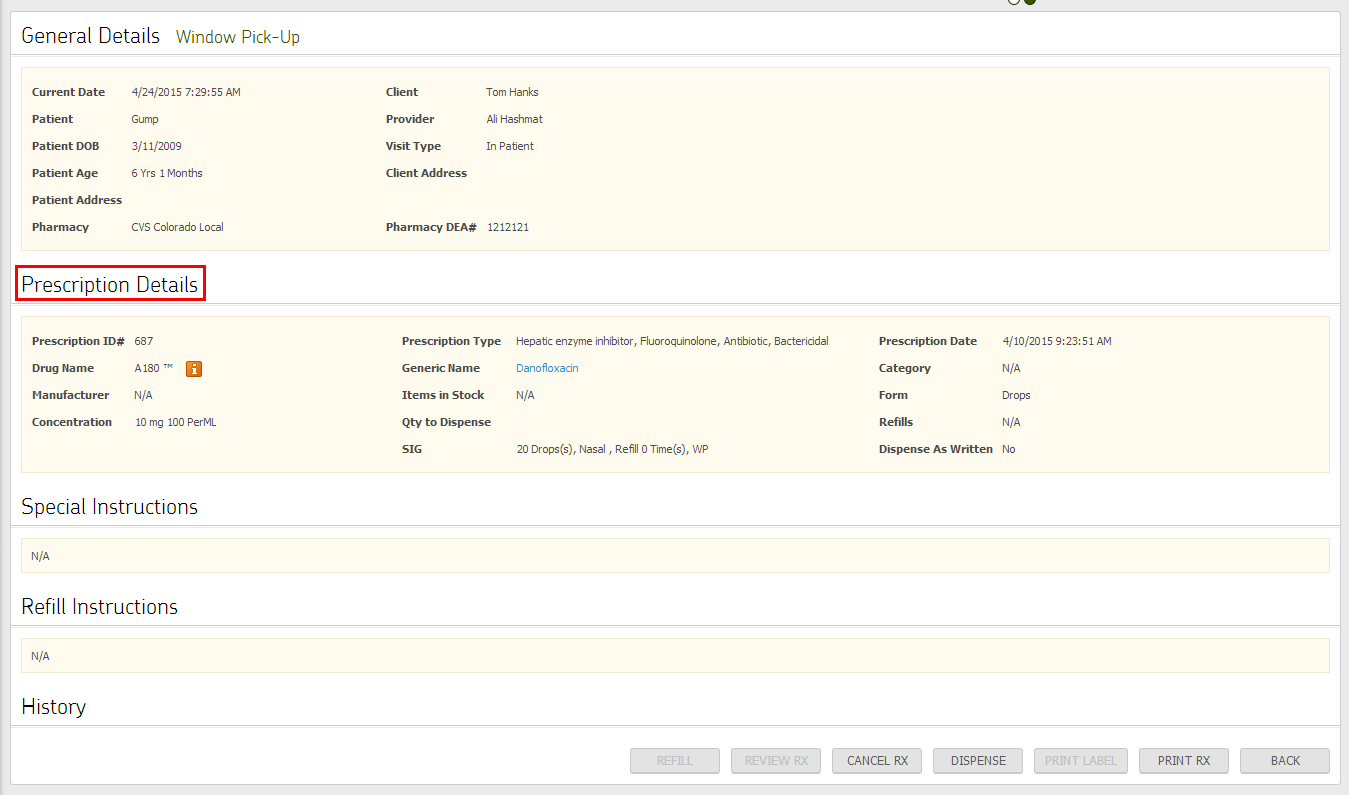
The prescription details screen includes the following:
1. Patient Details section
- Patient Name
- Date of Birth
- Patient Age
- Address
- Client Name
- Provider
- Visit Type
- Pharmacy
- Prescription No.
- Prescription Date and Time
2. Rx section
- Brand Name (Generic Name), Form, Strength, SIG (Dose, Route, Frequency, For duration, Starting From start date, Ending on end date)
- Quantity to Dispense
- Dispense as Written
- Refills
- Special Instructions (if not available system will display “N/A”)
-
Dispensing Details: This field is populated only if the dispensing details have been saved for this prescription. The field when populated has the following buttons against it:
- Edit (to update dispensing details)
- Delete (to delete the dispensing details)
- Refill Details: This field is populated only if any refill details have been saved for this prescription. If there are multiple refills, a “refill number” is also displayed against each refill. The refill details when populated have the following buttons against it:
- Edit (to update refill details)
- Delete (to delete the refill details)
3. Actions buttons
- Refill: Enabled only if the number of refills remaining > 0)
- Dispense: Enabled only if the status of the prescription is prescribed.
- Print Label: Disabled in the case of External Pharmacy.
- Print Rx: Prints the Prescription Details displayed on the screen with a header and footer.
- Back: It takes user to the previous screen.
Dispensing Details
The user can dispense medications against a prescription by clicking on the Dispense button available on the prescription details screen. The dispensing details can be captured or updated on the Dispensing Details screen. The prescription once dispensed is eligible to be invoiced. The system will determine the status of the prescription. If the status of the prescription is dispensed, then the system will display the “Dispense” button in disabled mode on the Prescription Details screen.
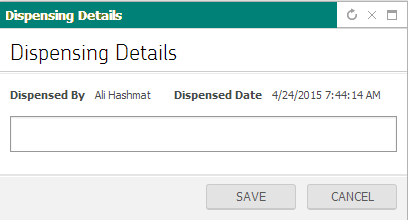
If the status of the prescription is prescribed, the system will display the Dispense button in enabled mode. The user clicks on the Dispense button to dispense a prescription; the system will then display the Dispensing Details pop-up screen.
The user fills in the required Dispensing Details and clicks on the Save button. The system will then display the saved dispensing details under Prescription Details screen. Dispensing Details screen includes the following:
- Dispensed by: Last and First Name of the user
- Dispensed Date: Current Date and Time in the format mm/dd/yyyy hh:mm AM/PM
- Dispensing Details: A mandatory text area where the user can input maximum of 2000 characters.
From the Prescription Details screen, the user can edit/delete the dispensing details when required. However, the system will populate the already saved data for this Dispensing Detail when it is edited. The user can only modify the Dispensing Details section.
Note:
- Dispensing is allowed only for In-house pharmacy prescriptions and not for External prescriptions.
- A prescription cannot be dispensed more than once. However it can be refilled as many times as directed by the prescriber.
- A Dispensing Detail cannot be deleted if it has been refilled even once.
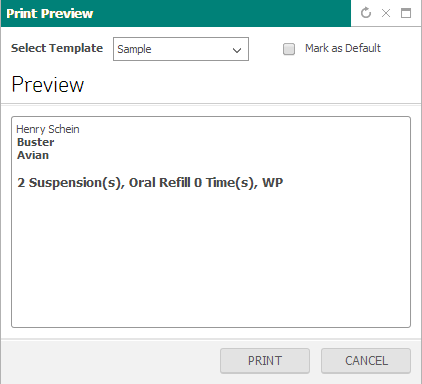
Print/Re-Print Label
A label is printed for each prescription dispensed by the pharmacy. The label contains information regarding the patient, the prescribed medication and its dosage instructions, the quantity to be prescribed, refilling details, etc. When the user clicks on the Print Label, the system displays Print Label Preview.
The user then clicks on the Print button. The system displays the printing options on the screen and the user completes the print options and sends it to print. After printing the label, the system navigates back to the Prescription Details screen.
Note:
- Print Label button will be enabled if the status of the prescription is dispensed.
- Prescription label can be printed multiple times for the current fill/refill.
- The name of the Print Label button changes to Re-Print Label if the current fill/refill has already been printed.
Refill
Refilling is the process of dispensing medications by a pharmacy for a prescription which had been prescribed and dispensed earlier. The total number of times a prescription can be refilled is mentioned on the prescription by the provider.
A prescription can be refilled if it has been dispensed earlier and there are refills remaining for that prescription. The system will check that the remaining refill count of the prescription is greater than 0. If the refill count is 0, then the system disables the Refill button on the Prescription Details screen. If the refill count is greater than 0, the system enables the Refill on the Prescription Details screen.
The user clicks on the Refill button to refill a prescription. The system then displays the Refill Details pop-up.
The Refill Details screen includes the following:
- Refilled By: Last and First Name of the user
- Refilled Date: Current date and time in the mm/dd/yyyy hh:mm AM/PM format
- Refill Details: A mandatory text area where the user can input a maximum of 2000 characters.
The user fills in the required refill details and saves it by clicking on the Save button. Saved Refill Details will then appear on the Prescription Details screen.
The system will then decrease the count of remaining refills by one. From the Prescription Details screen, the user can edit/delete the refill details when required. However, the system will populate the already saved data for this refill detail when it is edited. The user can only modify the Refill Details section.
Note:
- Refills are allowed only for In-House pharmacy prescriptions and not for External prescriptions.
- A prescription can be refilled only if it has been dispensed earlier and the refill count is greater than 0.
- Every time the prescription is refilled, its remaining refills count goes on decreasing.
- The Refill Details of each refill will be displayed on the Prescription Details screen along with the serial number of the refill.
- The buttons for adding, updating or deleting a Refill Detail are available on the Prescription Details screen.
Lab Worklist
To view lab worklist, user navigates to Medical Records > Lab Worklist, following screen will displayed
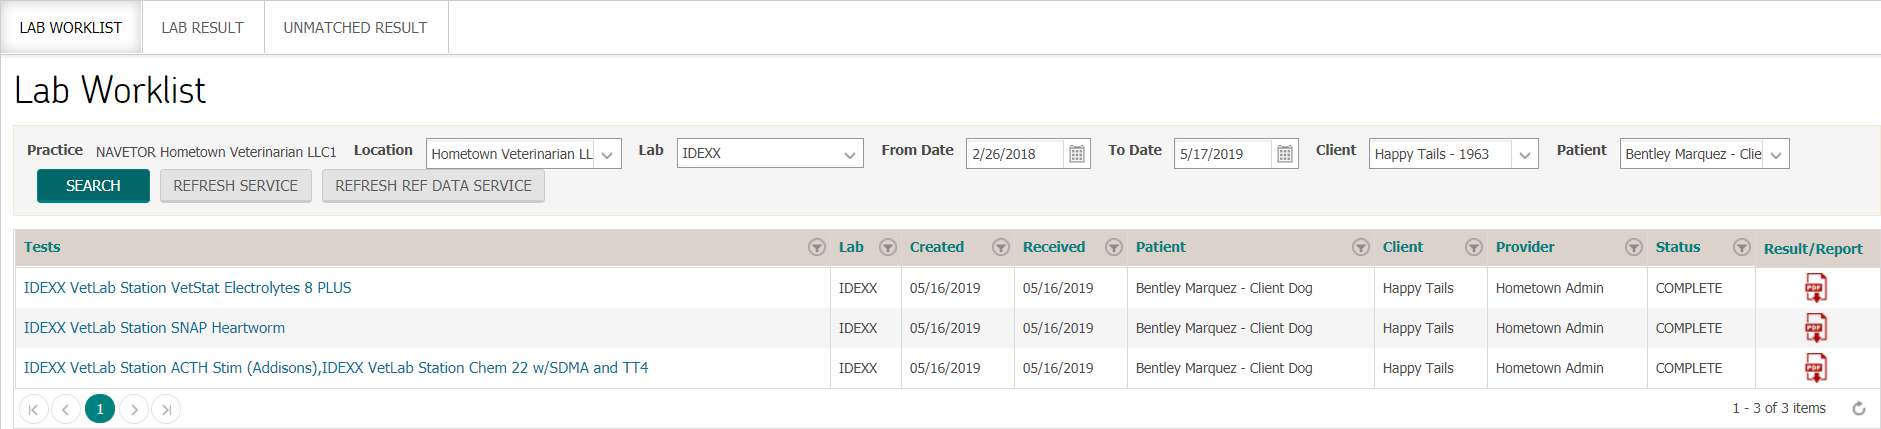
To view test report, user can download pdf file by clicking on icon under “Result/Report” column.
User can view results by applying filter as per the choice against different labs.

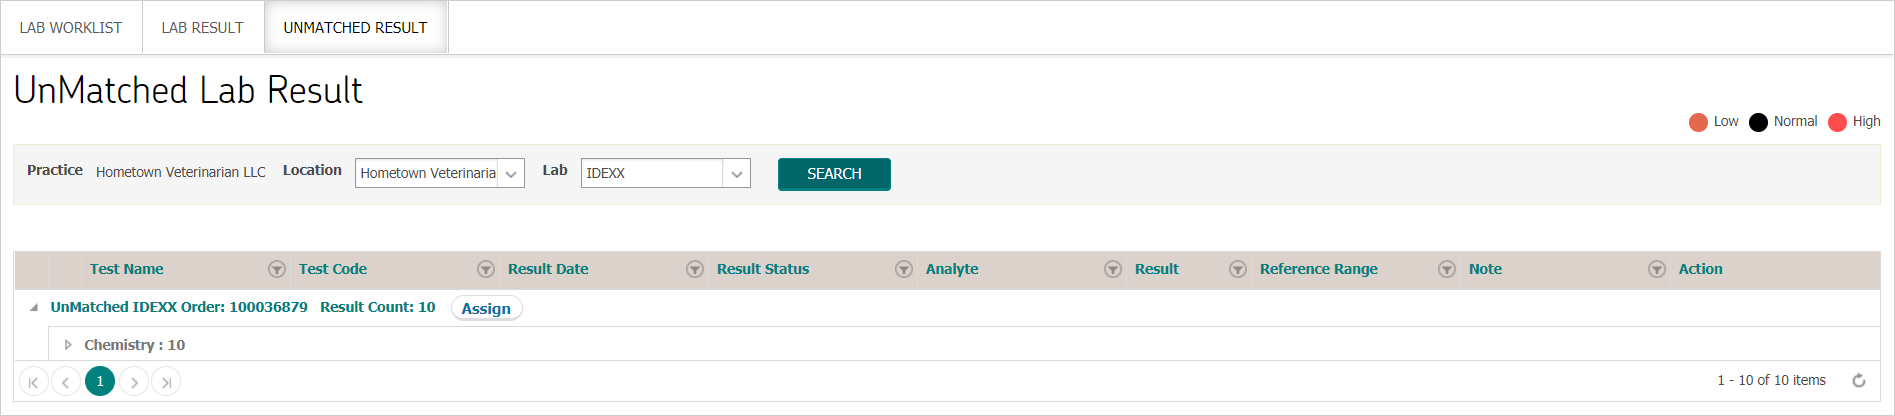
User can also view lab results of those tests that were generate through IVLS device without linking to a patient for IDEXX lab. User can also assign those tests to a patient.
Recall Worklist
To view recall worklist, user navigates to Medical Records > Recall Worklist, following screen will displayed
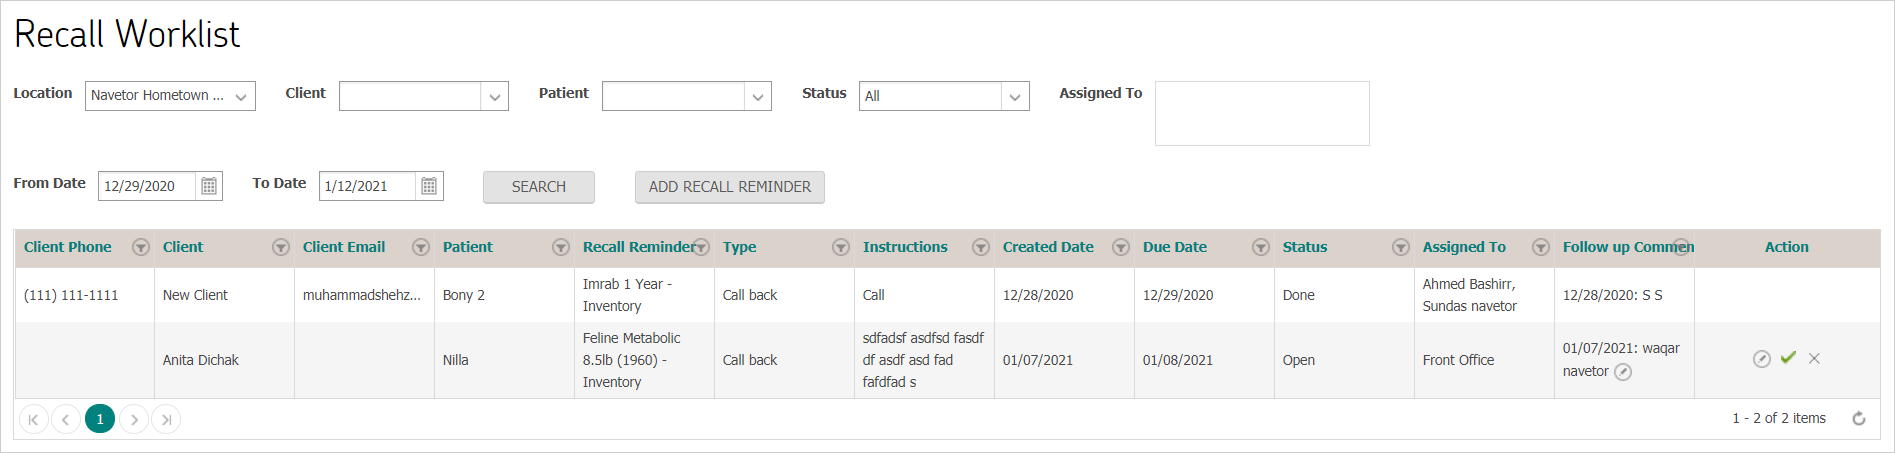
User can search recall reminder with following filters.
- Location
- Client Name
- Patient Name
- Status
- Assigned to
- Date Range (start and end dates)
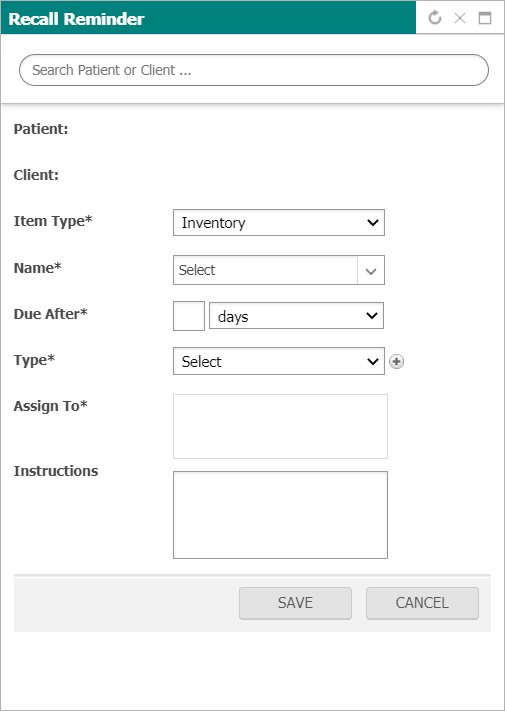
User can also add new recall reminder by clicking on the add button. When user clicks add button then system will open popup for details. After providing details when user save then the recall reminder for the client/patient will be added in the system.
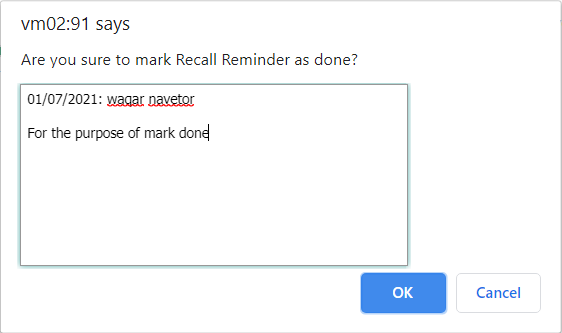
After adding a new recall reminder, user can edit due date and comments whereas user can also update followup comment by clicking on the respective edit buttons. User can mark the recall reminders as marked done, on clicking “Mark Done” button system will open popup where followup comments are editable.
© 2018 NaVetor - All Rights reserved. No reproduction or redistribution without written authorization of TPI
User Manual - Inventory
Inventory Module
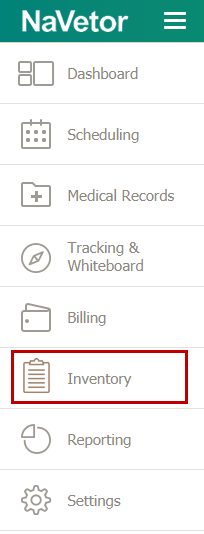
Inventory module can be accessed from the Navigation button at the top left of the screen.
Inventory module further consists of three parts:
- Inventory
- Inventory Purchase Orders
- Inventory Receipts
Inventory
Through this sub-module, user can perform following actions:
- View inventory items master list
- Add a new inventory item
- Add/Update fee schedule for inventory item
- Add quantity pricing criteria for inventory item
- Add stock for an inventory item
- Add stock adjustment of inventory item
- Edit an inventory item/stock
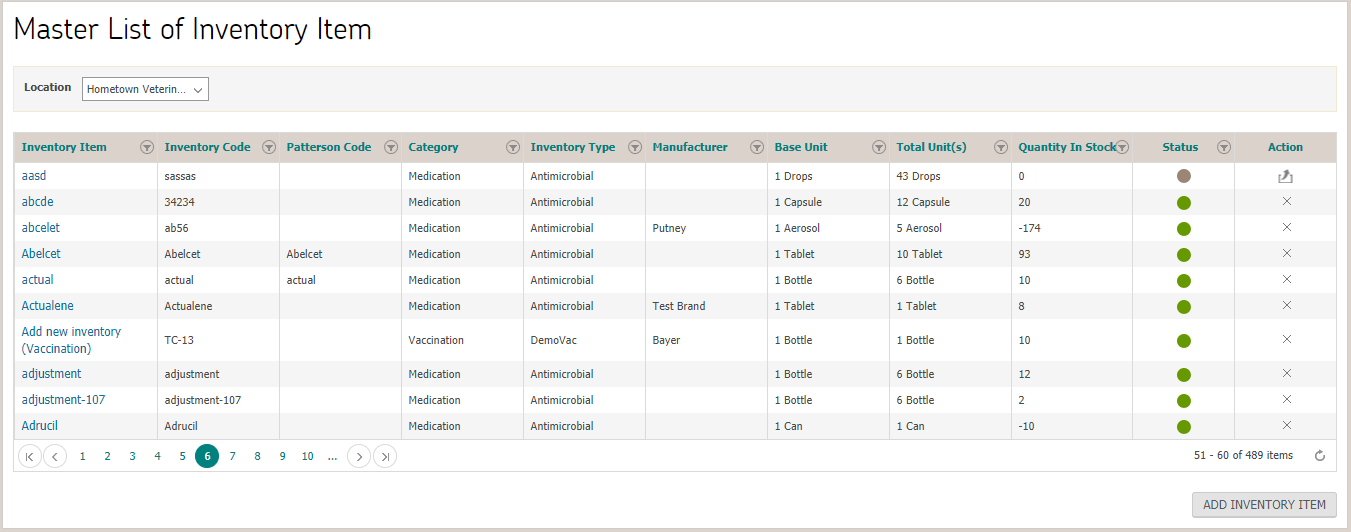
View Inventory Item
To view master list of inventory items, user navigates to inventory > inventory. List is filtered based on location.
Add Inventory Item
User can add a new inventory item by clicking on “Add inventory item” button at the bottom of the page. By default, item category is defined as “Medication”. User must specify necessary details before clicking on save button.
Note:
- Inventory type is added from settings > inventory > inventory item.
- Manufacturer is added from:
- Settings > Inventory > Manufacturer
- Clicking on the
 button from Add/Update inventory page corresponding to ‘Manufacturer’ dropdown which will open the following pop-up:
 - Inventory types can be added from:
- Settings > Inventory > Inventory Item Types
- Clicking on the button from Add/Update inventory page corresponding to ‘Inventory Type’ dropdown which will open the following pop-up:
- Drug brand is added from settings > EMR > Prescriptions > Brand tab
- Drug generic is added from settings > EMR > Prescriptions > Generic Drug tab
- Drug route is added from settings > EMR > Prescriptions > Drug route tab
- User can add multiple Base Unit, by clicking button.
- User can add multiple Sale Unit, by clicking button.
- Quantity in stock field is read only and auto populated with aggregate of current availability of item in stock.
- Linked items searchable toolbar displays all existing inventory items in the system.
- Clear inventory reminders is a searchable toolbar containing all existing inventory items.
- Clear procedure reminders is a searchable toolbar containing all existing procedures.

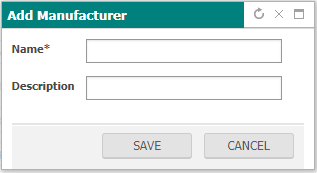

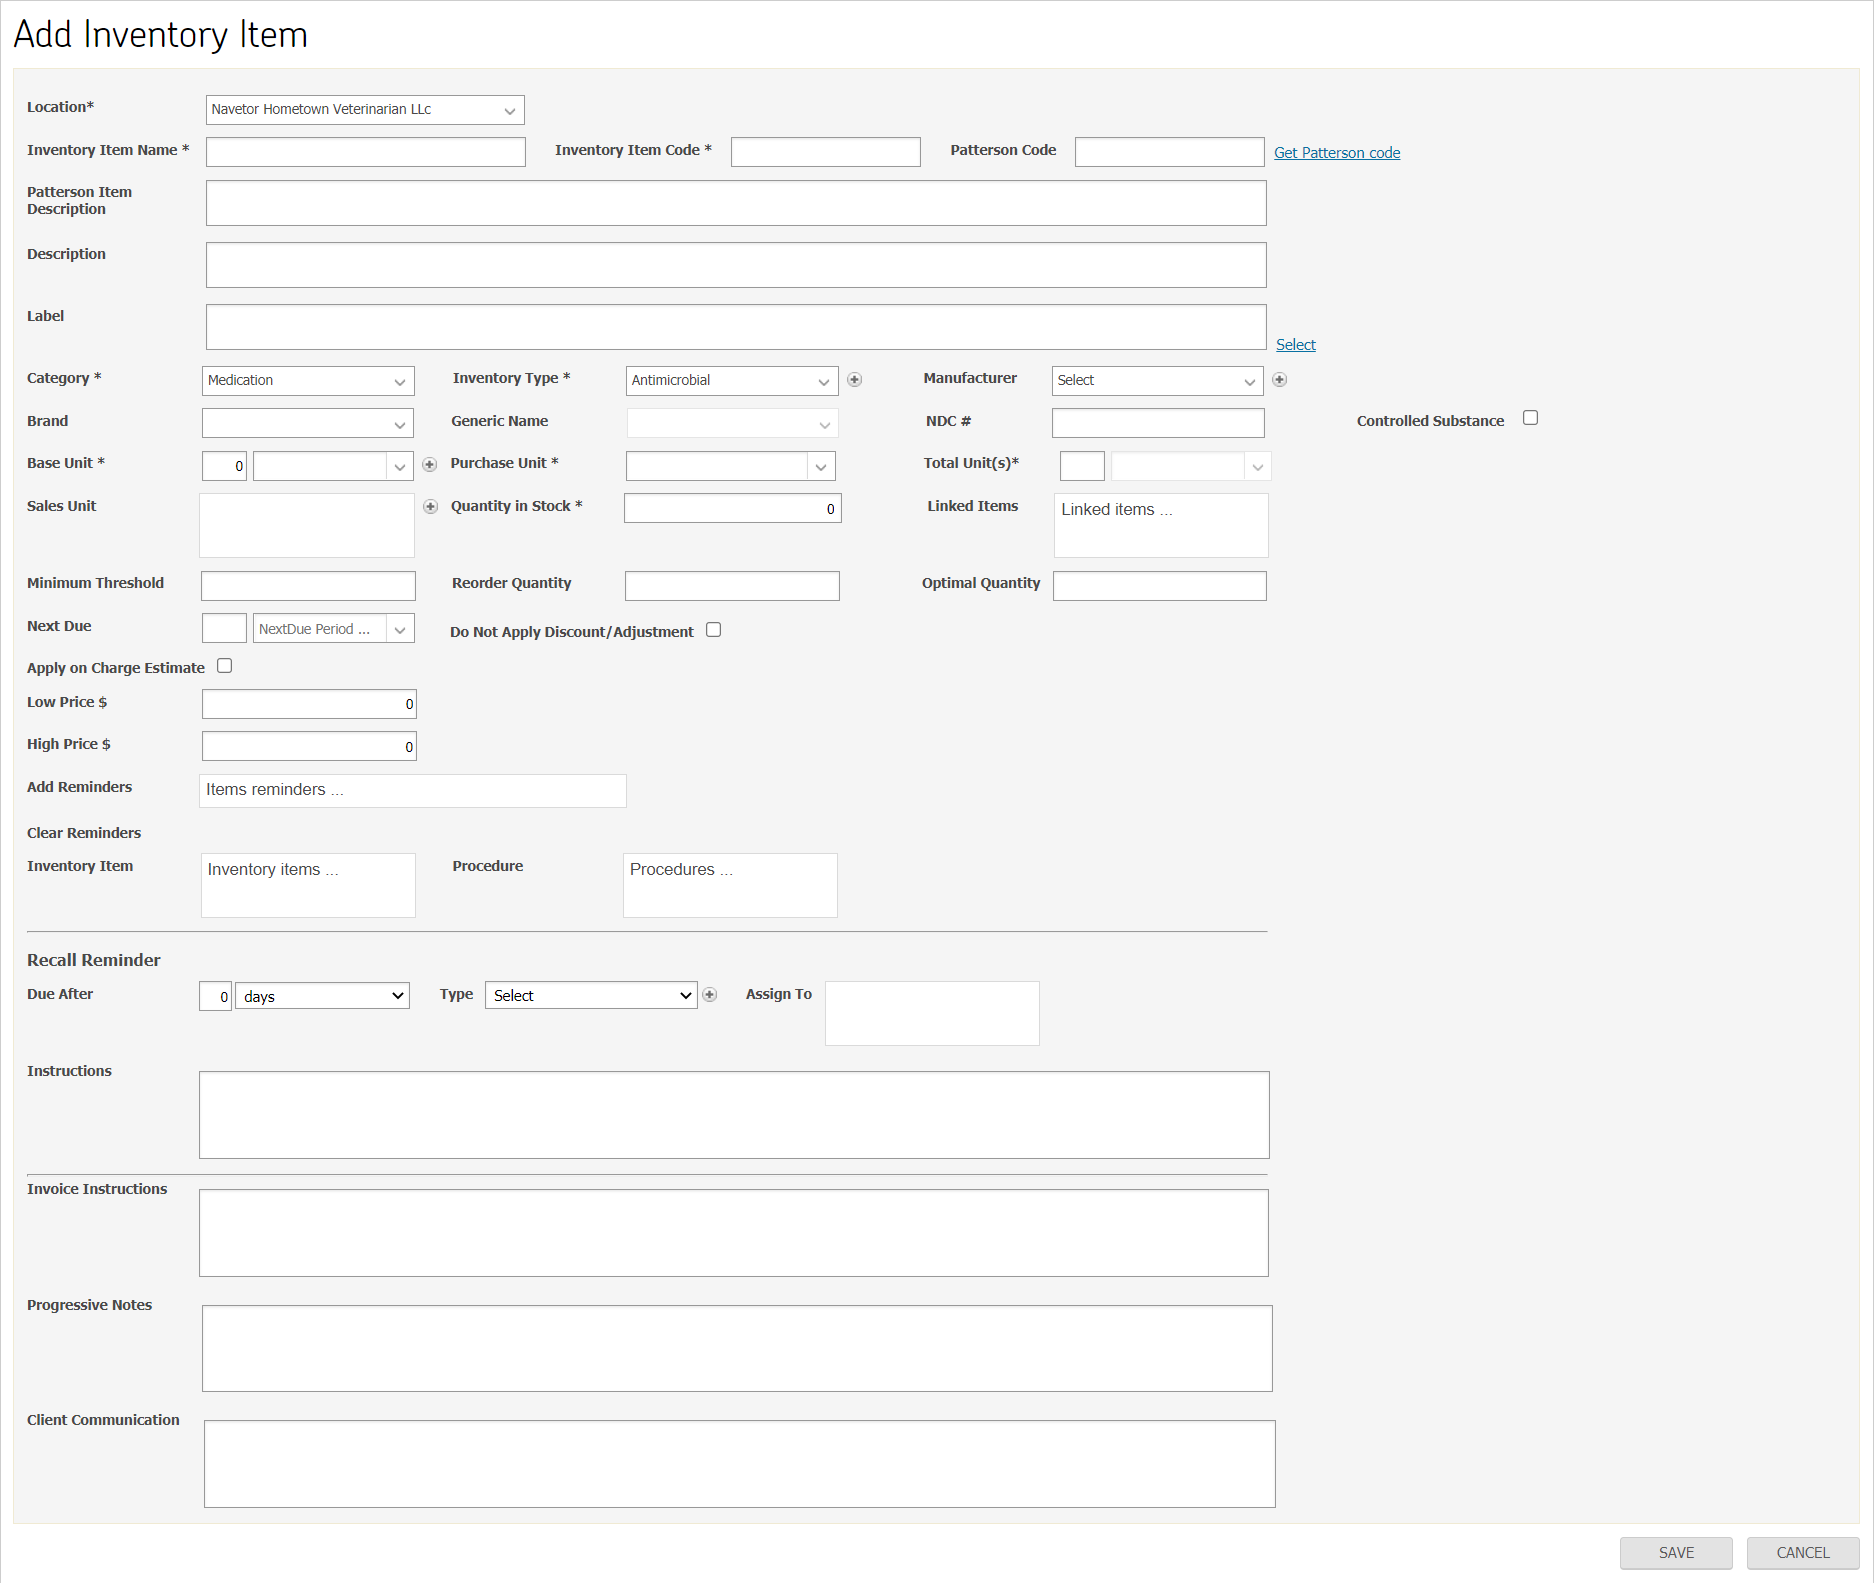
If item category is defined as “other”, relevant fields will be displayed. User must specify necessary details before clicking on save button.
If item category is defined as “vaccination”, relevant fields will be displayed. User must specify necessary details before clicking on save button.
Note:
- Vaccine is added from settings > EMR > Vaccines > Vaccines
Upon clicking on save button, new features will be made available. These features are discussed in following sections.
Add Quantity Pricing Criteria
To add quantity pricing criteria, user navigates to inventory item details page.

On clicking “add quantity pricing criteria” hyperlink button, following popup screen is displayed
Note:
By default, no quantity pricing criteria is applicable.
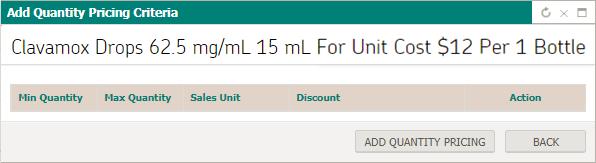
User can add pricing criteria by clicking on “add quantity pricing” button, new row will be added in the grid. User can define multiple criterions by clicking on this button.
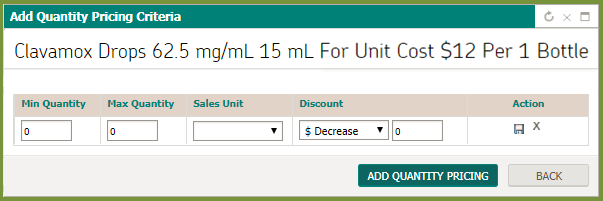
User can save, modify or remove defined criterions at any time by simply navigating to above screen.
The criterions defined will be applicable at the time of checkout when the client is being invoiced for the respective item.
Add/Update Fee Schedule
User can add/update fee schedule of inventory item by navigating to item details page.
Note:
Fee schedule section will display relevant item related details. This will also be available at settings > billing > fee schedule

Once changes are made, user must click save button for changes to take effect.
Add Stock
User can add stock for an inventory item by clicking on item name from the listing page. Inventory item details will be displayed along with stock section under it.
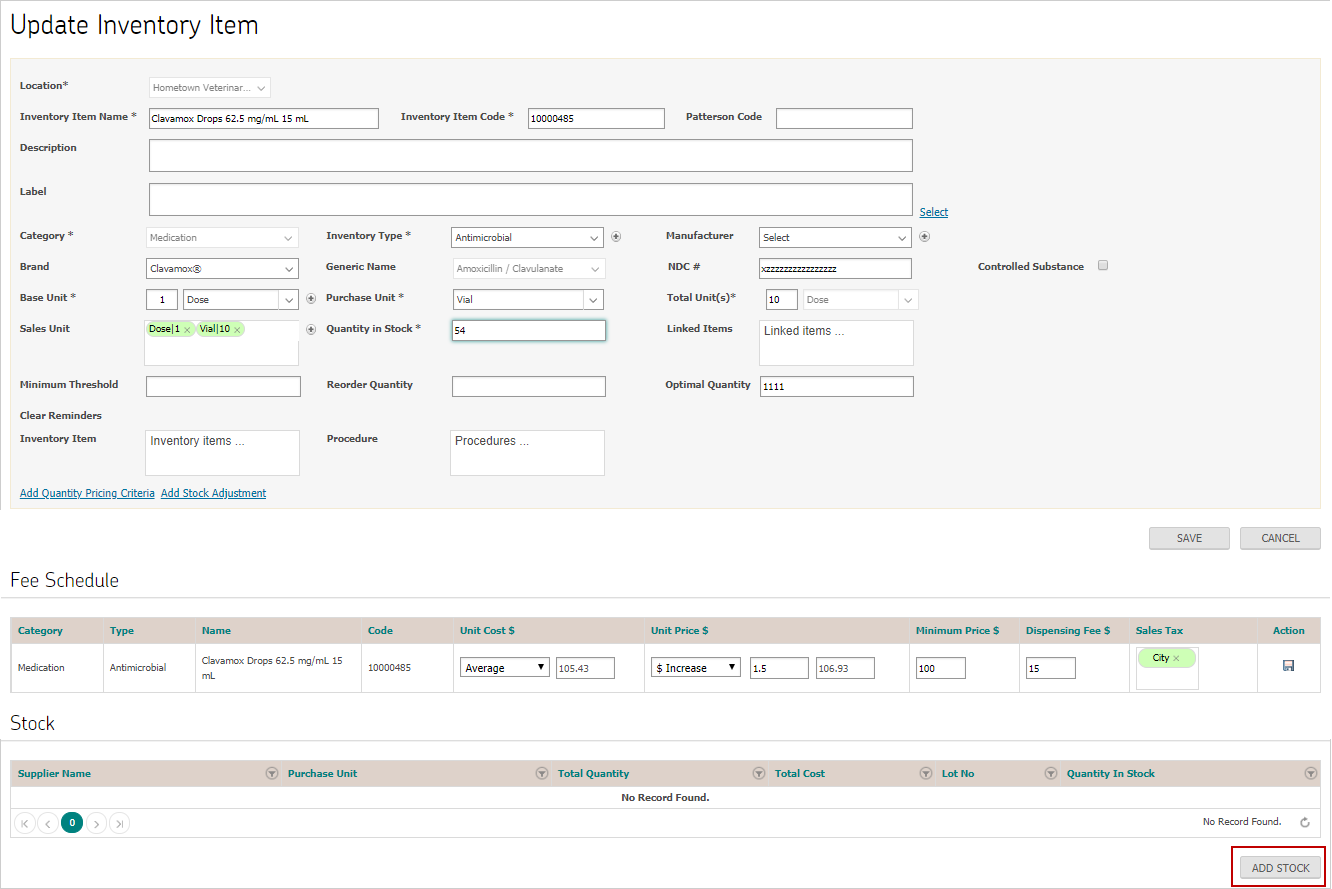
User now clicks on “Add Stock” button to enter stock details
Note:
Suppliers are added from Settings > Inventory > Suppliers.
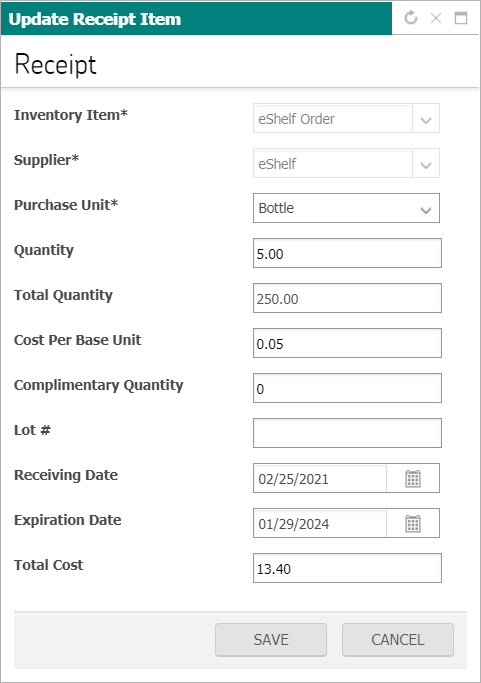
User must enter necessary details before clicking on save button. Upon doing so, stocks are added under their respective section

Edit an Inventory Item/Stock
User can edit an inventory item details by clicking on item name from the listing page
Note:
Location and category dropdowns are read only in edit mode.
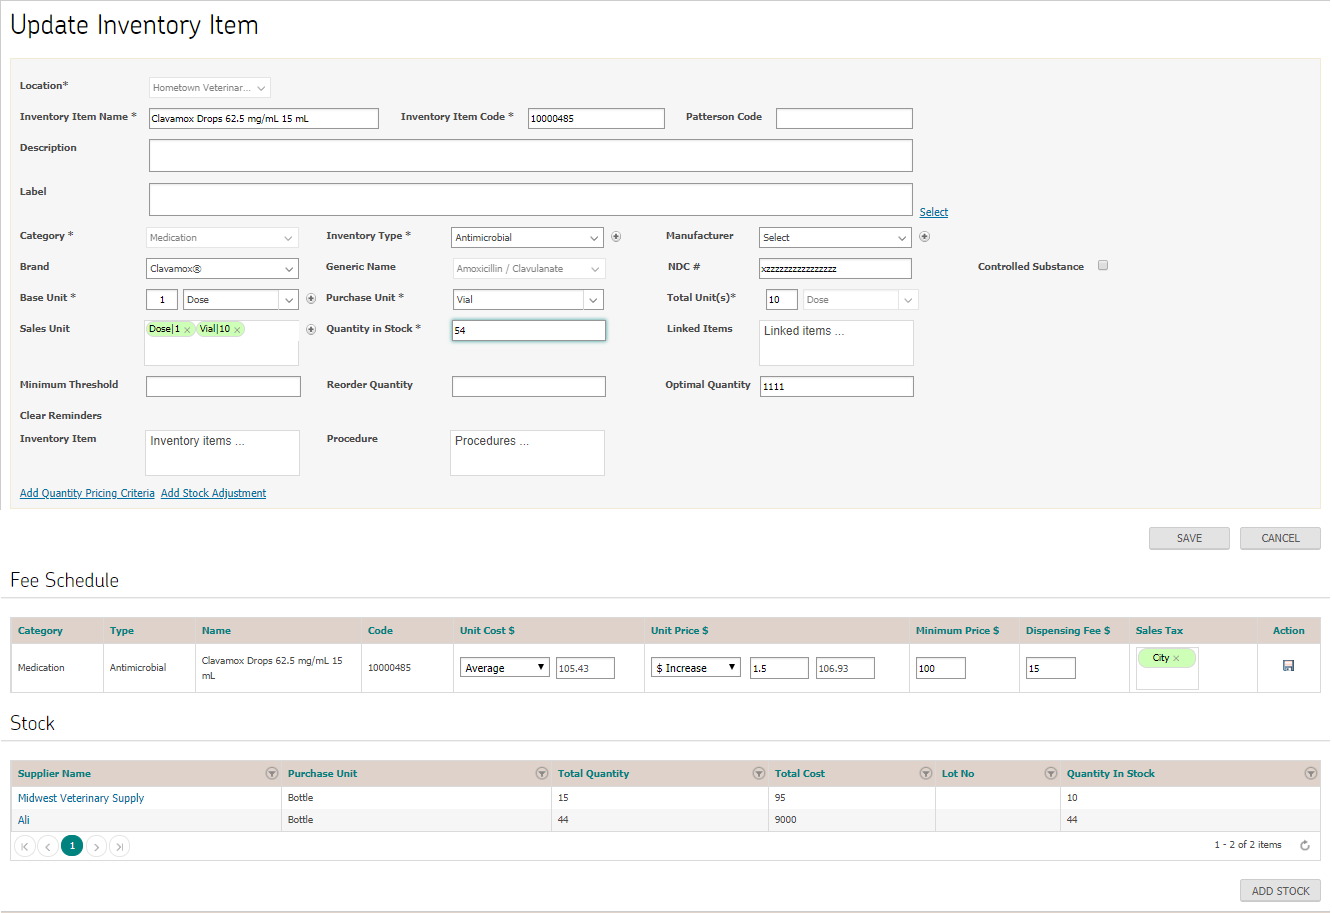
Upon clicking on save button, user is navigated back to listing page.
Similarly, user can edit an existing stock by clicking on supplier name under stock section
Note:
Supplier dropdown is read only in edit mode.

Upon clicking on save button, changes are reflected under stock section.
Add Stock Adjustment
User can add stock adjustment for an inventory item by navigating to inventory item details page
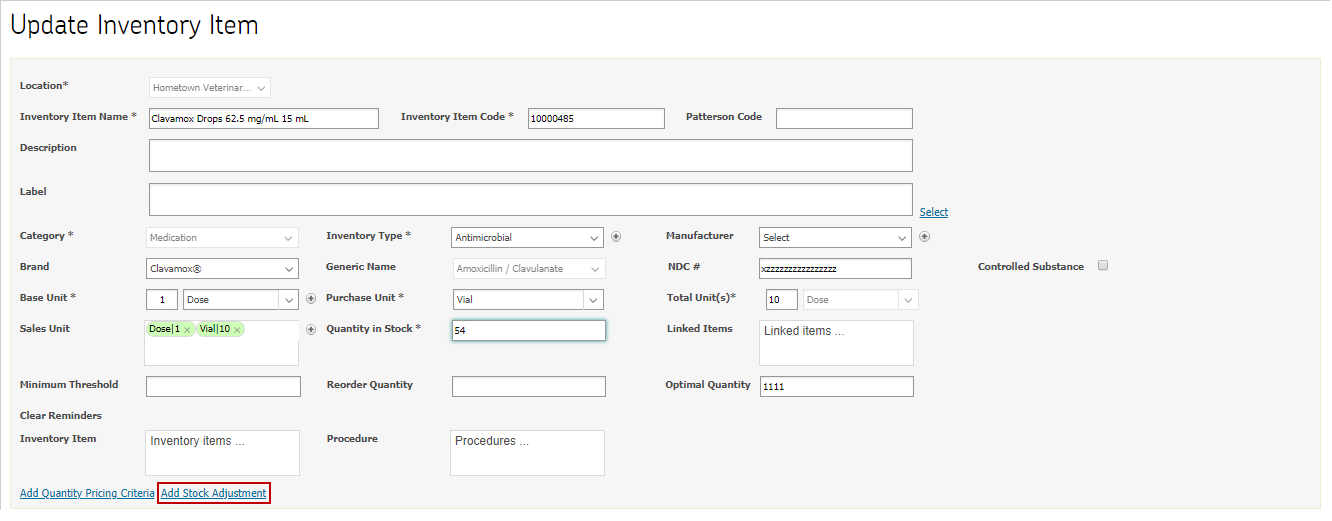
Upon clicking “add stock adjustment” hyperlink button, following popup screen is displayed
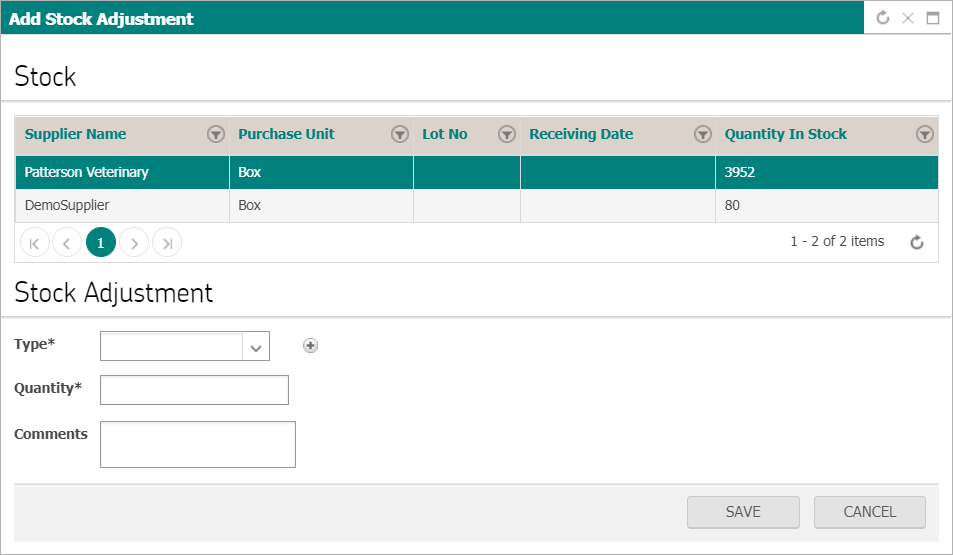
Stock must be adjusted against a suppliers available in the system, by default system select the first record whereas user can change the by clicking on the relevant row in stock grid.
Stock adjustment can be of following types:
- Wastage
- Broken
- Expired
- Not accounted for
Stock adjustment can be positive or negative and upto 1 decimal point. “Type” that leads to negative adjustment highlighted as red in “Type” dropdown.
Upon entering mandatory details, stock adjustment will update “Quantity in stock” value accordingly.
Stock Adjustment Log
User can view stock adjustment log as well, where following information displayed in grid.
- Supplier Name
- Lot No
- Purchase Unit
- Type
- Quantity
- Username
- Date & Time

Inventory Purchase Orders
Master list of inventory purchase orders can be viewed by navigating to Inventory > Inventory Purchase Orders.
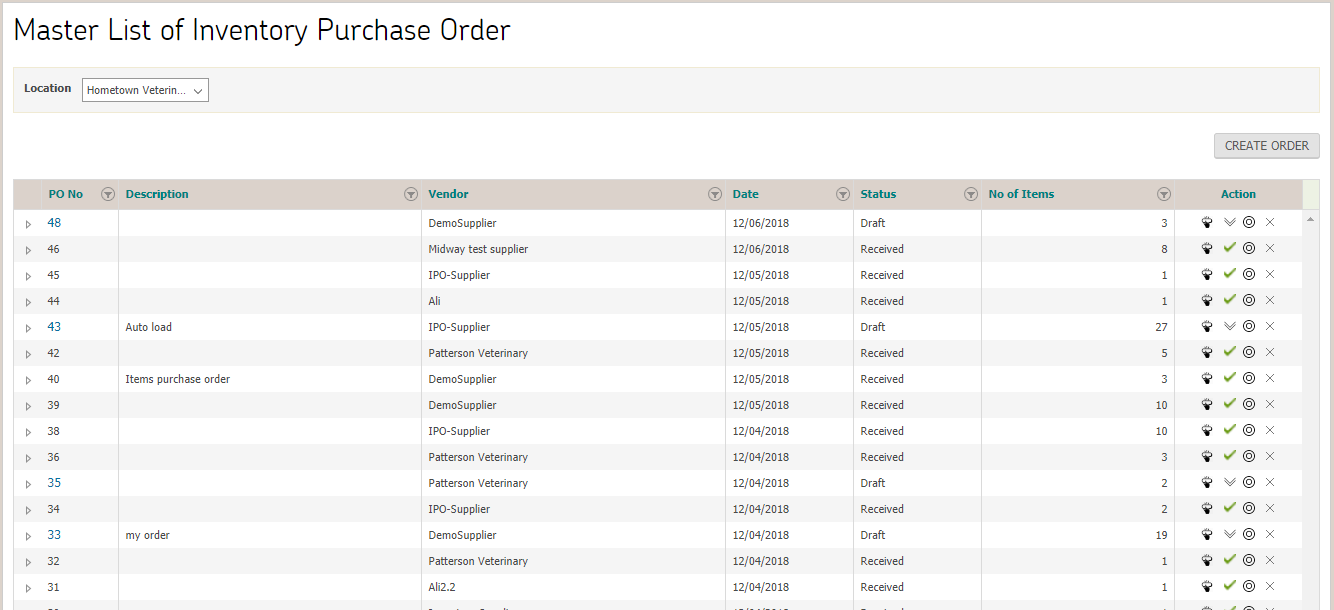
The inventory purchase order list contains the following values:
- P.O Number – Purchase order no. field should be readonly. This number is automatically assigned by the system when an order is created.
- P.O Description – Free text field to be filled with any special description when creating a purchase order.
- Vendor – Name of Vendor
- Date – (Default to current date)
- Status – This signifies the status of the Purchase order. Each purchase order will be assigned either of the three statuses. When a purchase order is created but not submitted, the status should say “Draft”. Once the purchase order is submitted, the status must read “Submitted”. Once the order is mark received the status must show “Received”
- No of Items – This field show the quantity of items to be procure.
- Action – The user must have the ability to perform following actions on a Purchase order:
 Submit the Purchase Order. Once the user has finalized the order, they can click on the “submit” button to place the order. The order’s status is also changed to ‘Submitted’.
 Receive the Purchase Order. Once the user has received the purchase order, the user can click the “Received” button to mark it as Received. Once an order has been successfully received, the system navigates to the receipt screen.
 View Received Order Receipt. Once user has received the purchase order, the user can click the “View Received Order Receipt” button to view the receipt. The system then navigates to the receipt screen and user can edit details of an item except “Inventory Item” and “Supplier”. User can also delete an item from receipt and user can update stock with the received quantity of an item.
  Clone the Purchase Order. If the user wants to create an identical purchase order, the user can click the “Clone” button which will open a page similar to ‘Create Purchase Order’ and auto-filled with same data as the original order (PO No. will be updated by the system). User can make necessary updation if required and save the purchase order to display it to the master list.
-
 Delete the Purchase Order. If the user wants to Delete a particular order, the user can click on the “Delete” icon to delete it. Note that only those orders that have the status ‘draft’ can be deleted.
Once deleted, the order is removed from the master list of inventory purchase orders.  View Order item details. On clicking this icon, an expanded section will open which will display the list of items included in the order along with their quantities.
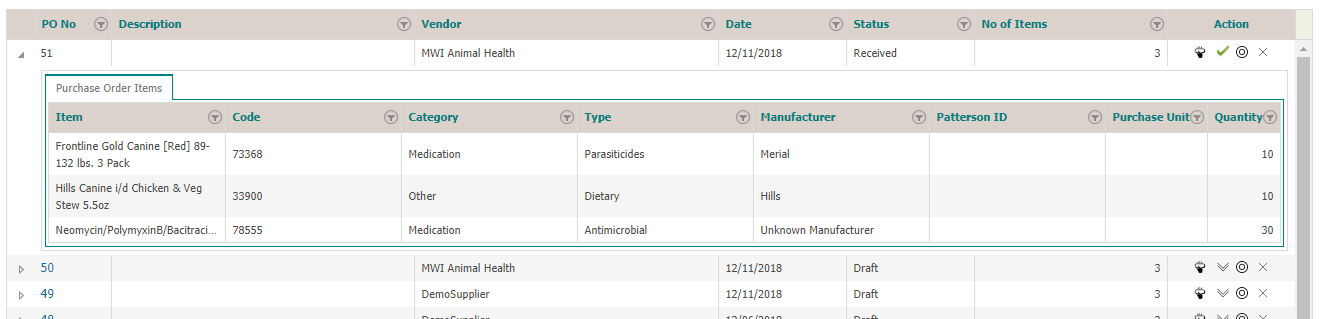
Create New Inventory Purchase Orders
A new inventory purchase order can be created by clicking on the  button which will navigate to the following screen:
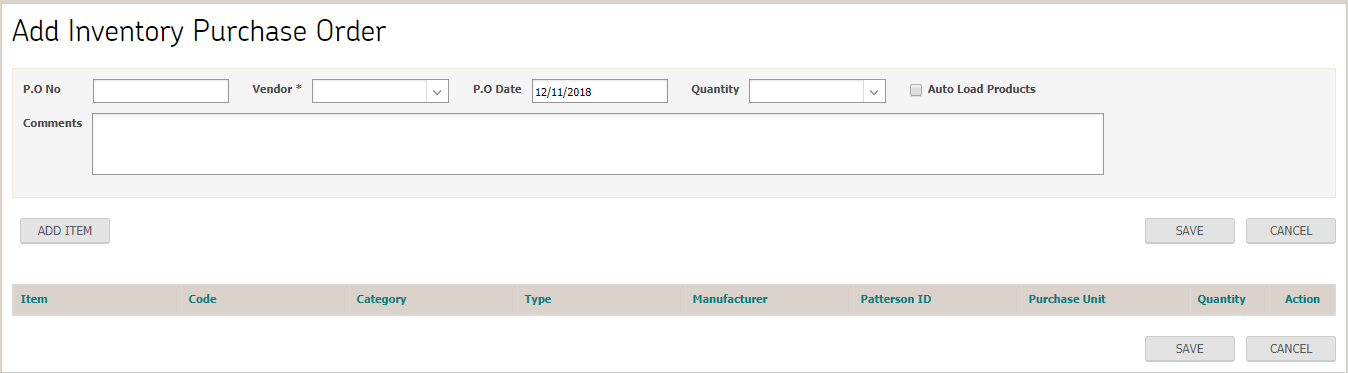
User enters all the required fields in the inventory order details section (note that PO no. is system generated and therefore, can’t be entered by user). Once all details have been entered, the user needs to include item(s) in the order (at least one item should be included in every order). The order can be entered in two ways:
-
Auto Load
This is done by checking the checkbox. Once checked, the system will add all Inventory items where quantity in stock is below minimum threshold.
-
Add Item
Another option to add products to the order is by adding items manually. This is done by clicking on the button which will open a pop-up containing the list of all products which can be added into the order. Any item can be added by clicking on its name.
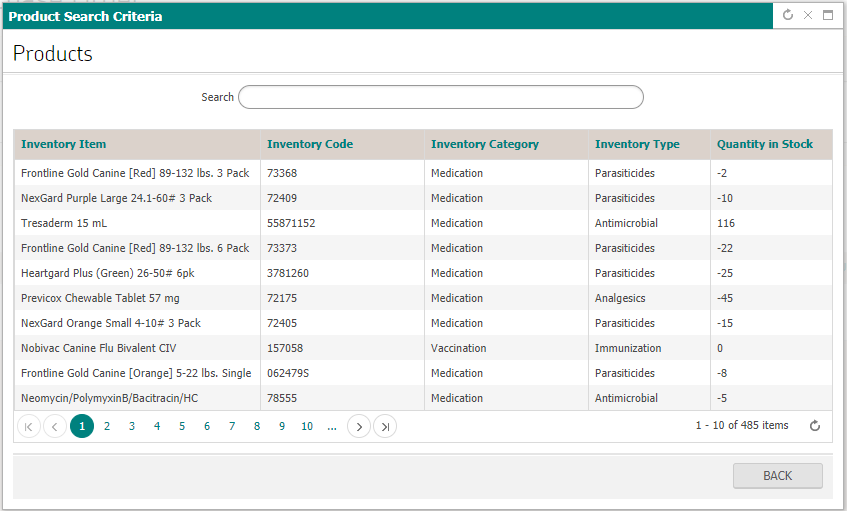
On adding the items and clicking the back button, user is navigated back to ‘Add Inventory Purchase Order’ page where user can now add the quantity of each item or delete the item.
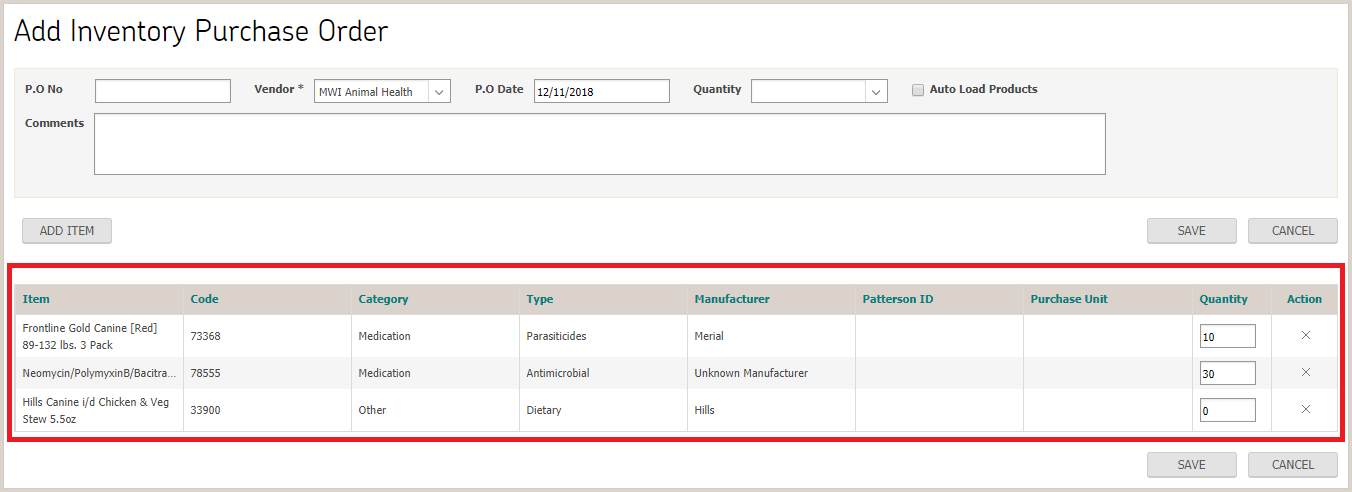
On clicking the save button, the purchase order is successfully saved and displayed in the master list of inventory purchase orders.
Inventory Receipts
To view master list of inventory receipts, user navigates to Inventory > Inventory Receipts.
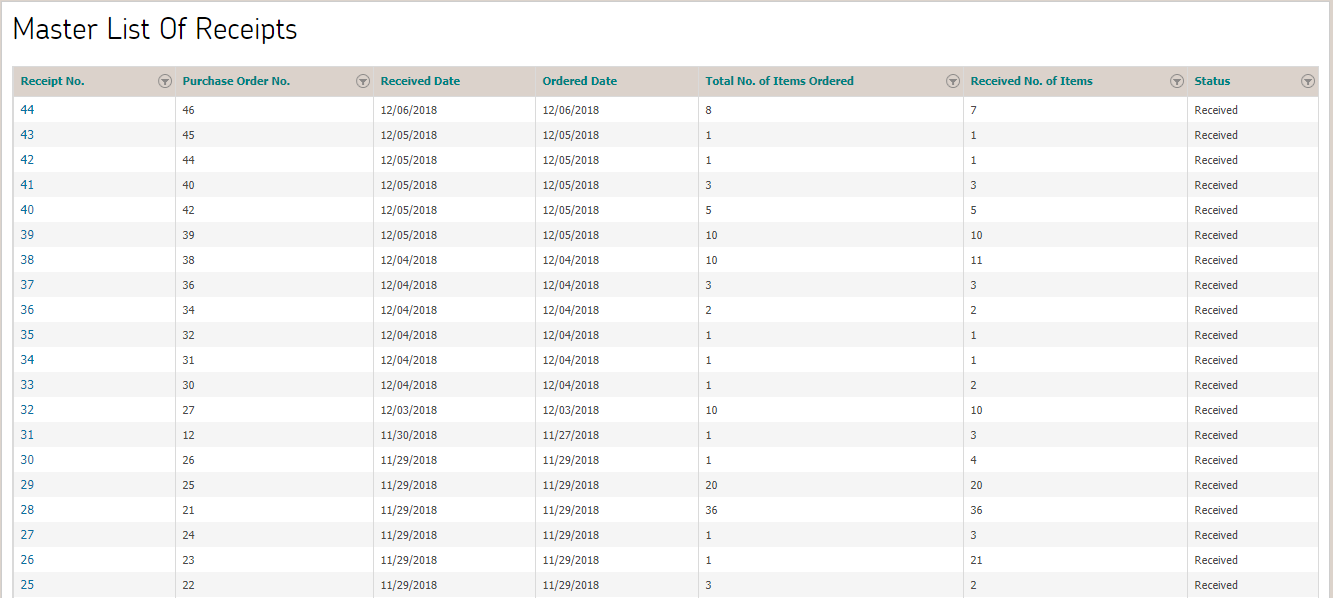
Receipts are automatically created as soon as a purchase order’s status is changed to ‘Receive’. This means that each receipt is created against a received order.
A purchase order receipt can be opened by clicking on the receipt no.
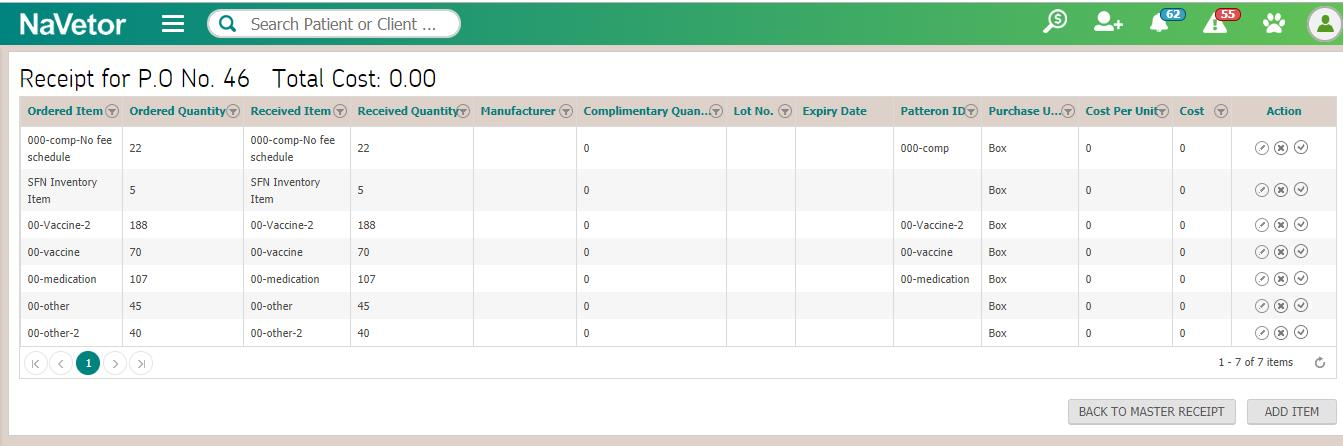
Users can add complimentary items in the receipt by clicking on the  button. On clicking this button, a pop-up will open where user can enter the item details and on clicking ‘Save’, the user will be navigated back to receipt page and item will be added to the receipt (note that the items added in the receipt will have blank ‘Ordered Item’ and ‘Ordered Quantity’ columns).
Note: Complimentary quantity will be added to stock but are not counted for cost calculation.
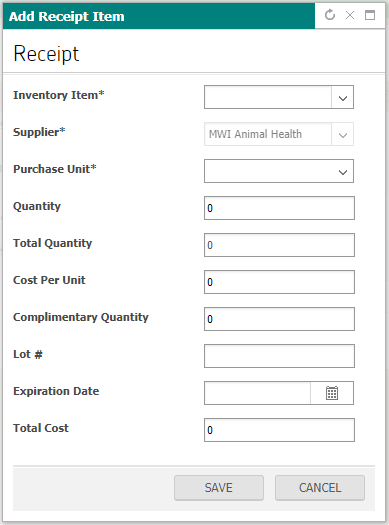
User can also edit a receipt item by clicking on the  button which open a window similar to the ‘add receipt item’ pop-up. However, supplier and item name will be read-only.
By clicking the  button, the user can delete an item from the receipt. A prompt is generated for confirmation and if the user agrees, the item is deleted.
From the receipt, the user can also update the stock. By clicking the  button, the user can directly update the stock with the received quantity or updated received quantity.
© 2018 NaVetor - All Rights reserved. No reproduction or redistribution without written authorization of TPI
User Manual - Reports
Reports Module
Reports module can be accessed from the Navigation button at the top left of the screen.
Through this module, user can view following reports
- Patient Reports
- Patient Vaccination Report
- Daily Report
- Monthly Report
- Vaccination Certificate
- Health Service Reminders Report
- Notes Summary Report
- Medication Report
- Outstanding Balance Report
- Order Report
- Monthly Statement Report
- Patient Breed Report
- Adjustment/Discount Report
- Patient List Report
- Scheduling Reports
- Appointment Scheduler Report
- Cancelled/No Show Report
- Boarding Occupancy Report
- Practice Reports
- Sales Tax Report
- Deposit Reports
- Sales Tax Summary Reports
- Controlled Substance Report
- Quantity in Stock Report
- Inventory Stock Alert Report
- Void and Refund Report
- Inventory List Report
- Inventory Consumption Report
- Inventory Stock Report
- Provider Productivity Report
- Productivity by Item Report
- Fee Schedule Report
- Rabies Tag Report
- Rabies Vaccination Report
- Quickbook Integration Report
- Productivity By Provider Report
- Accounts Receivable Report
- Time Clock Report
- Invoice Status Report
- Client Reports
- Client List Report
- Client Missing Data Report
- Client Statement Report
- Referrals Tracking Report
- Reminder Sent Report
Patient Reports
To view patient related reports, user navigates to reporting > patient reports as shown in following screen
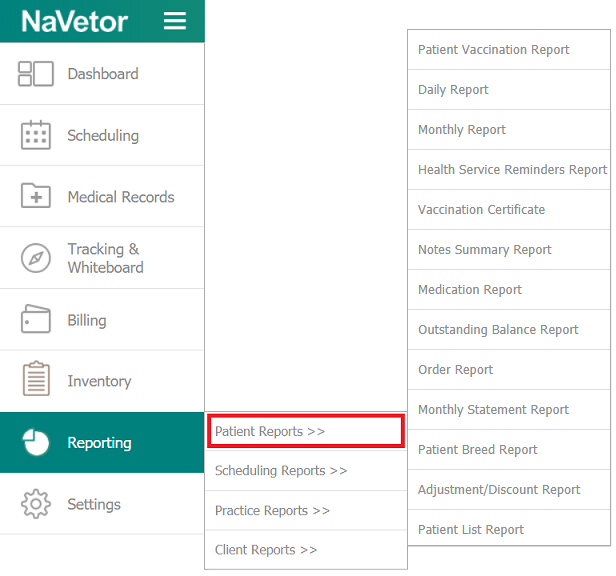
Patient Vaccination Report
To access patient vaccination report, user navigates to reporting > patient reports > patient vaccination report, following screen is displayed

User enters search criteria. Upon clicking on view button, reports will be filtered and displayed based on criteria defined by user.
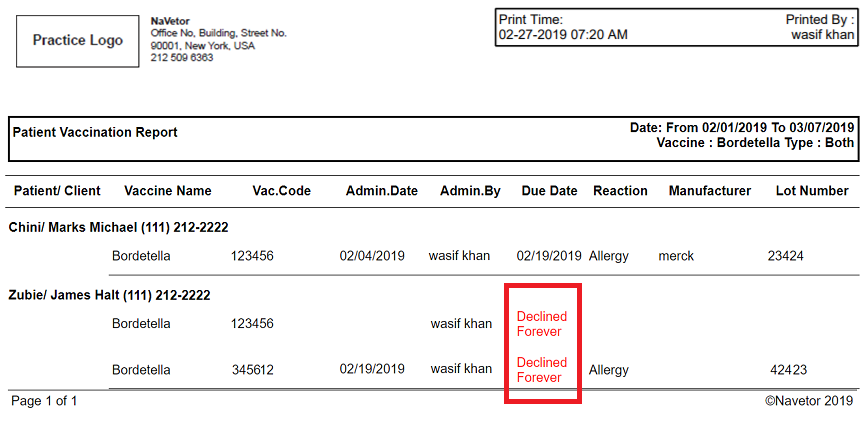
If there is any medication which was declined forever, it will appear on report in due date column.
Daily Report
To access daily report, user navigates to reporting > patient reports > daily report, following screen is displayed

User enters search criteria. Upon clicking on view button, reports will be filtered and displayed based on criteria defined by user.
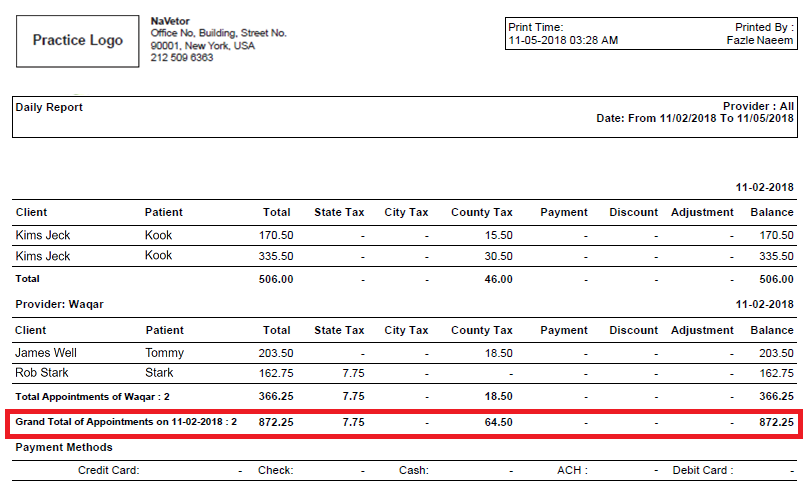
User can view “Grand total” on this report as well.
Monthly Report
To access monthly report, user navigates to reporting > patient reports > monthly report, following screen is displayed

User enters search criteria. Upon clicking on view button, reports will be filtered and displayed based on criteria defined by user.
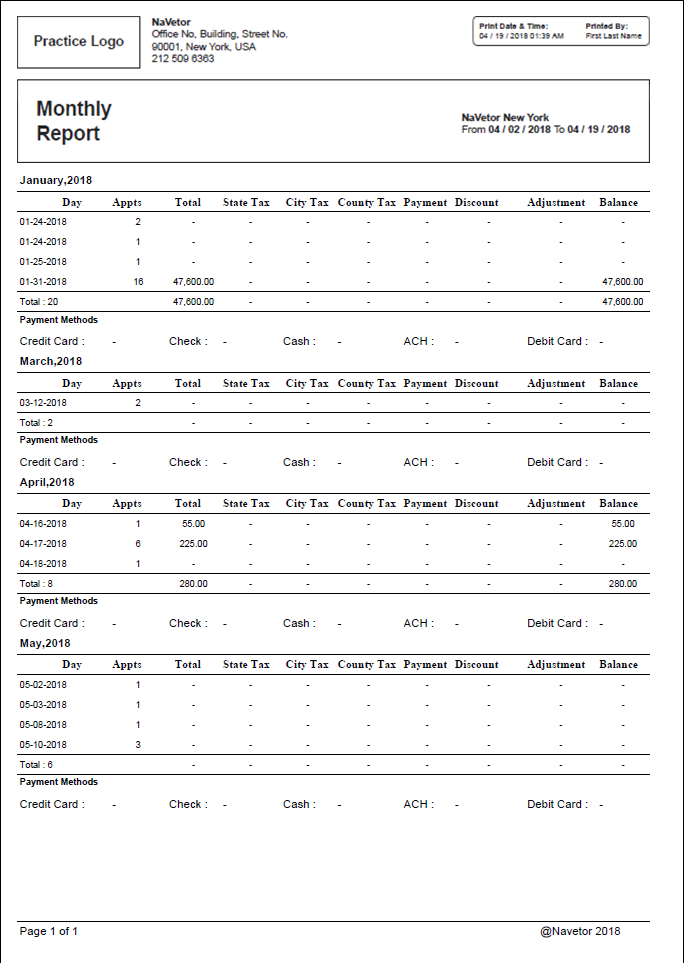
Vaccination Certificate
To access vaccination certificate, user navigates to reporting > patient reports > vaccination certificate, following screen is displayed

User enters search criteria. Upon clicking on view button, reports will be filtered and displayed based on criteria defined by user.
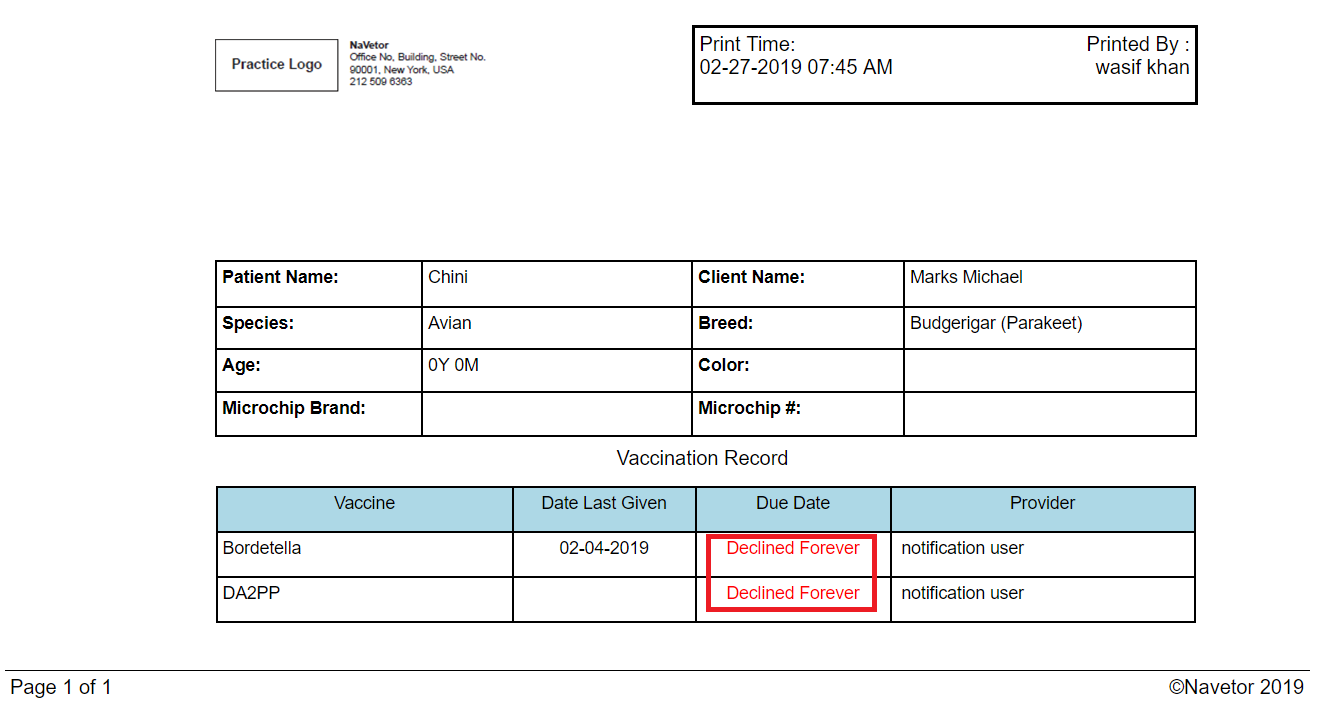
If a medication was declined forever then it will indicated with red color test in due date column.
Health Service Reminders Report
To access health service reminders report, user navigates to reporting > patient reports > health service reminders report, following screen is displayed
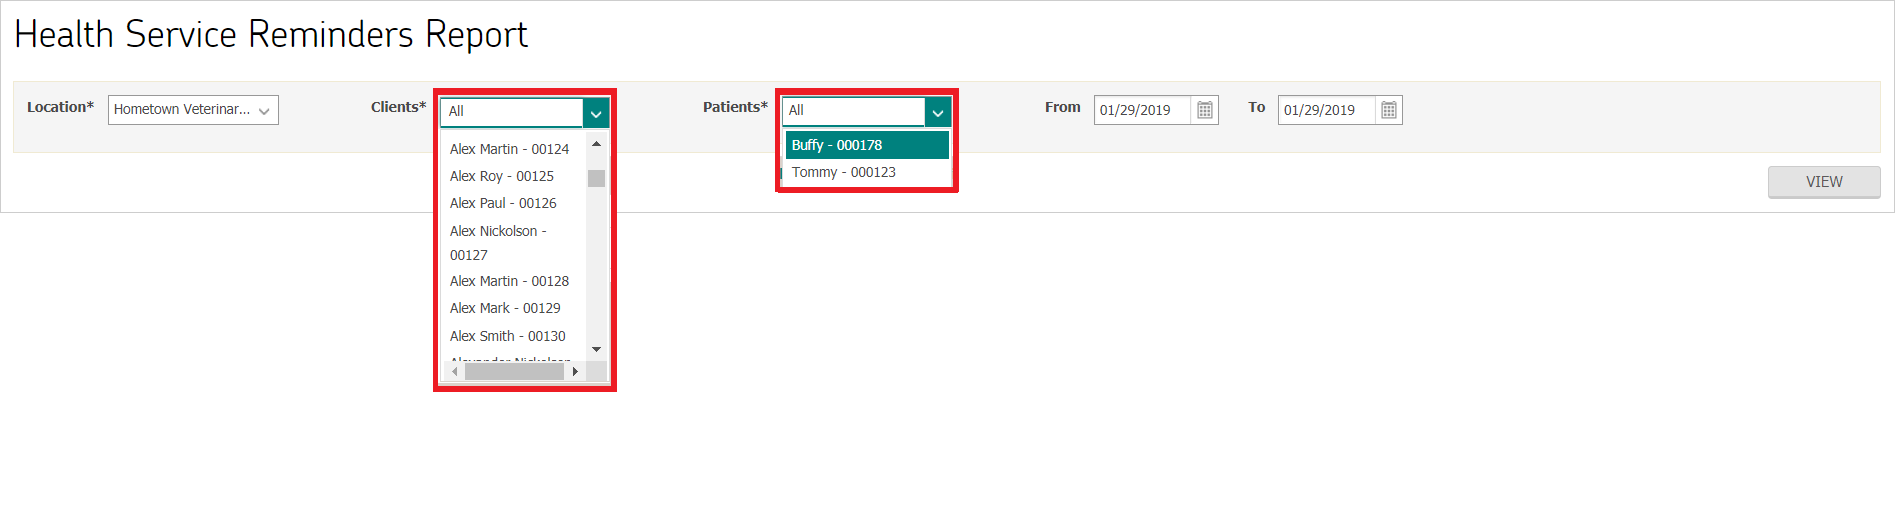
User enters search criteria. Upon clicking on view button, reports will be filtered and displayed based on criteria defined by user.
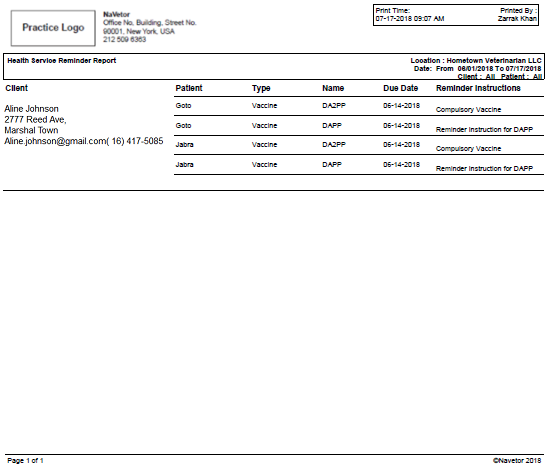
Notes Summary Report
To access notes summary report, user navigates to reporting > patient reports > notes summary report, following screen is displayed

User enters search criteria. Upon clicking on view button, reports will be filtered and displayed based on criteria defined by user.

Medication Report
To access medication report, user navigates to reporting > patient reports > medication report, following screen is displayed

User enters search criteria. Upon clicking on view button, reports will be filtered and displayed based on criteria defined by user.
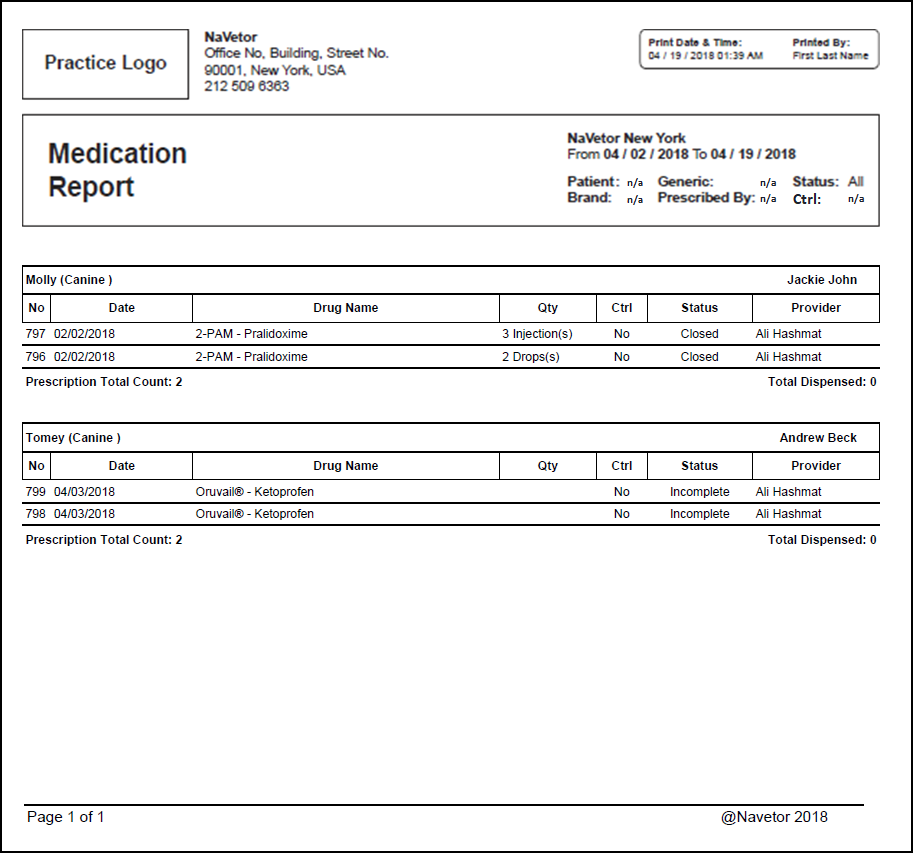
Outstanding Balance Report
To access outstanding balance report, user navigates to reporting > patient reports > outstanding balance report, following screen is displayed
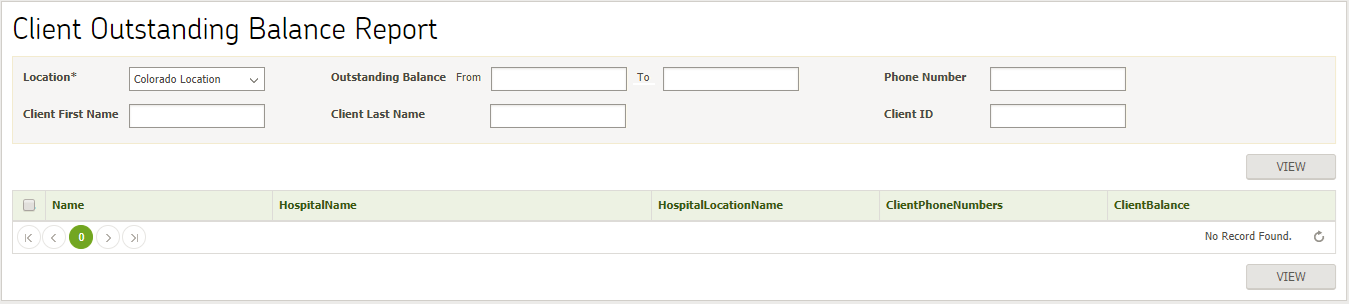
User enters search criteria. Upon clicking on view button, matching results will be displayed in a list
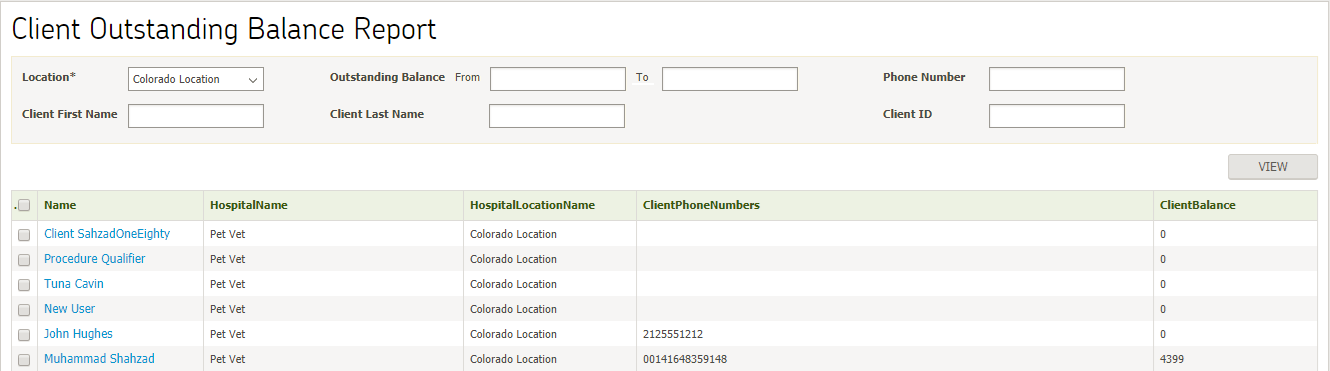
User can select one/multiple clients from listing page and click on “view” button, report for selected client(s) will be displayed as shown below
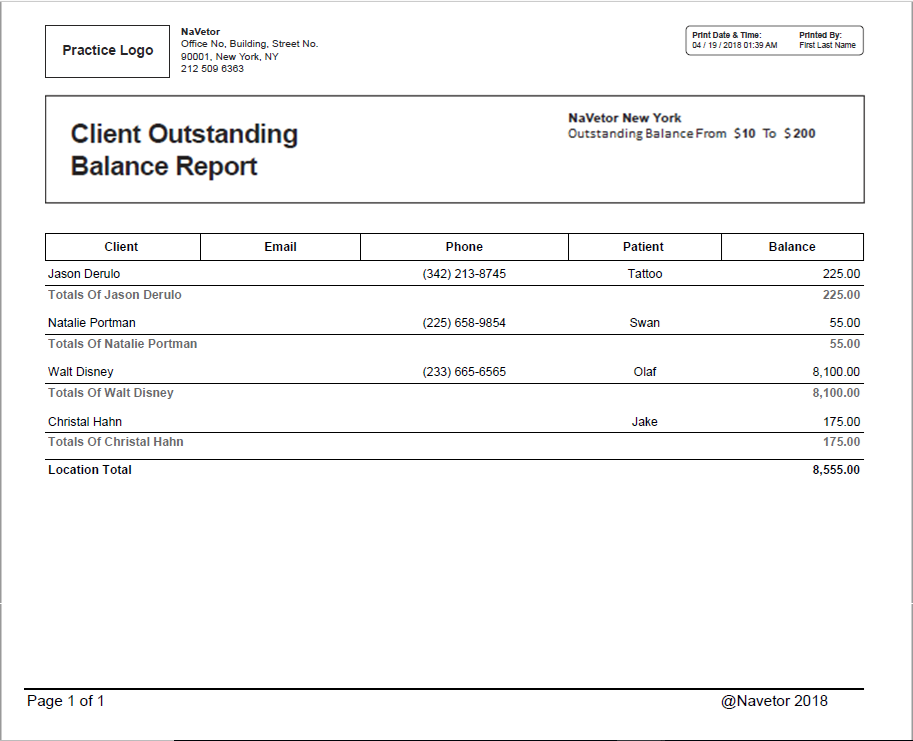
Order Report
To access order report, user navigates to reporting > patient reports > order report, following screen is displayed

User enters search criteria. Upon clicking on view button, reports will be filtered and displayed based on criteria defined by user.
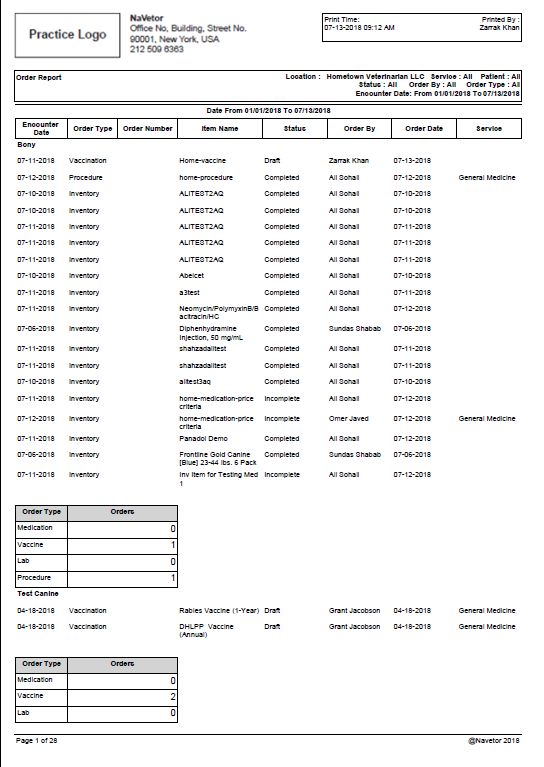
Monthly Statement Report
To access monthly statement report, user navigates to reporting > patient reports > monthly statement report, following screen is displayed

User can download the batch containing statements by clicking on download icon to local drive. Upon opening, the report will be displayed as shown below
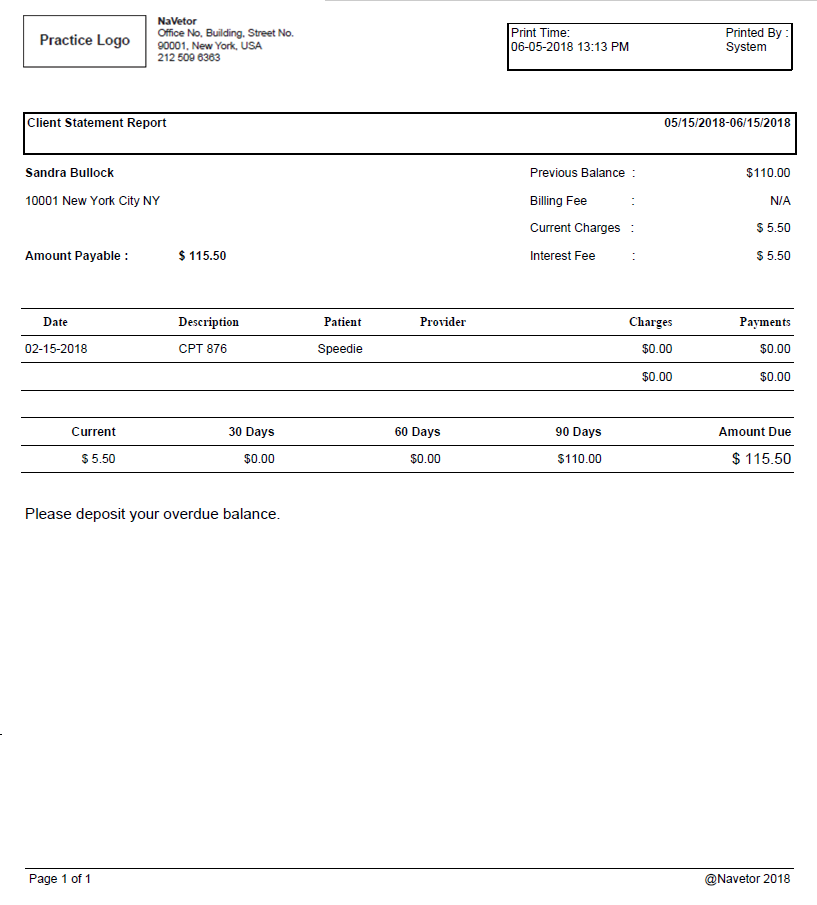
Patient Breed Report
To access patient breed report, user navigates to reporting > patient reports > patient breed report, following screen is displayed

User enters search criteria. Upon clicking on view button, reports will be filtered and displayed based on criteria defined by user.
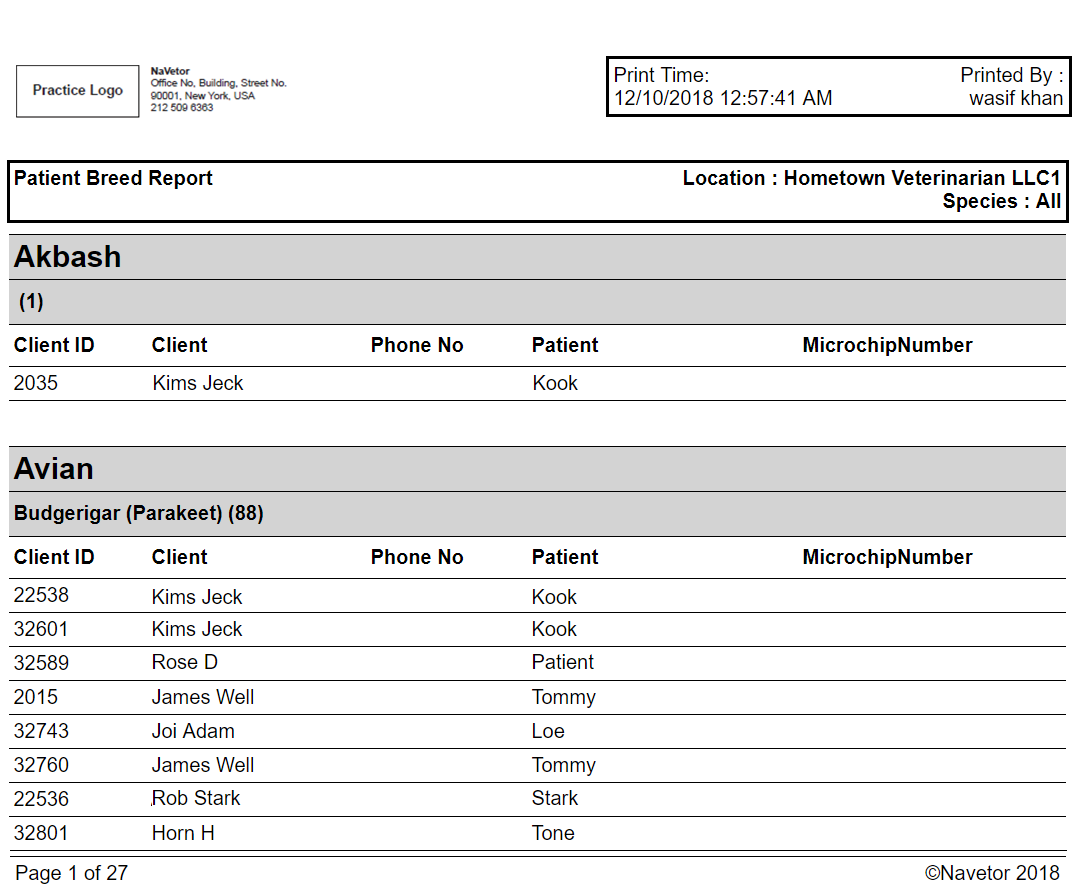
Adjustment/Discount Report
To access adjustment/discount report, user navigates to reporting > patient reports > adjustment/discount report, following screen is displayed
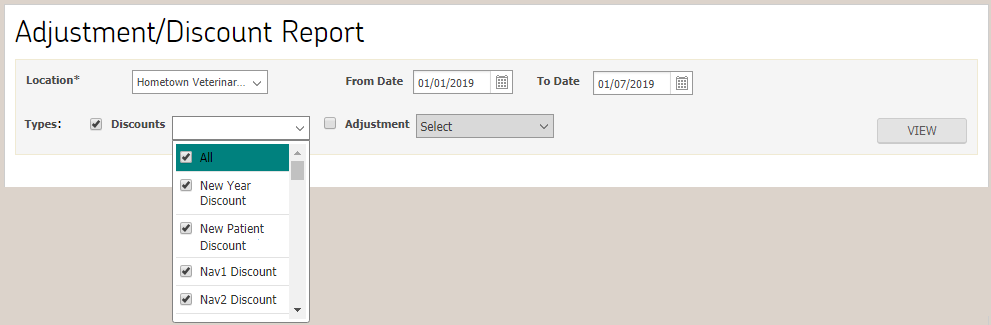
User enters search criteria. Upon clicking on view button, reports will be filtered and displayed based on criteria defined by user.
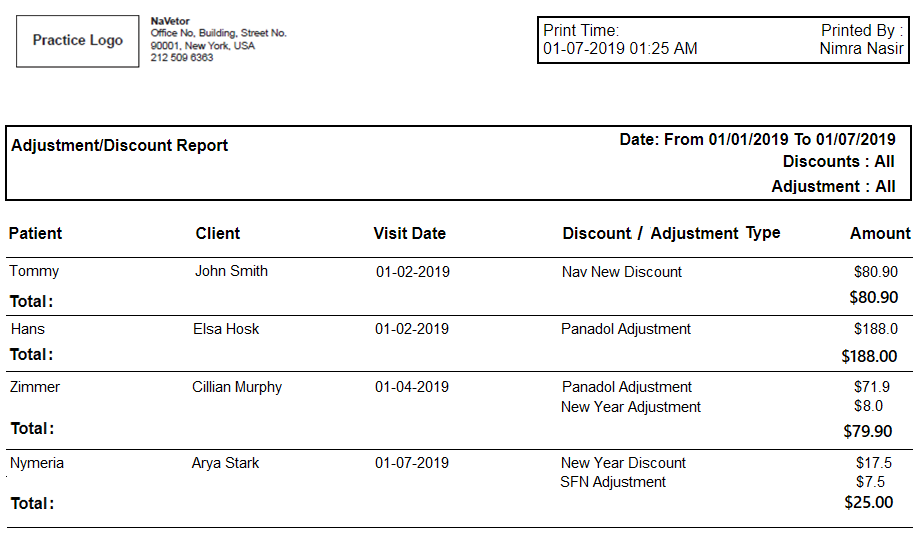
Patient List Report
To access patient list report, user navigates to reporting > patient reports > patient list report, following screen is displayed

User enters search criteria. Upon clicking on view button, reports will be filtered and displayed based on criteria defined by user.
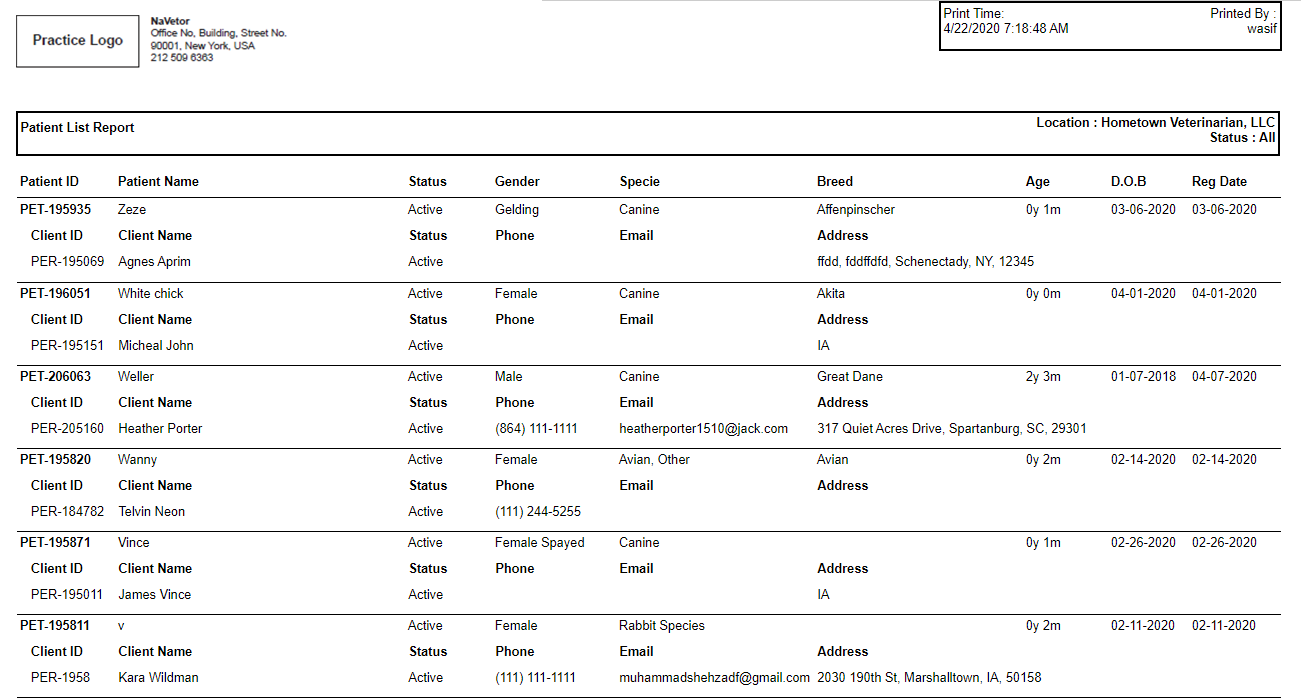
Scheduling Reports
To view scheduling related reports, user navigates to reporting > scheduling reports as shown in following screen
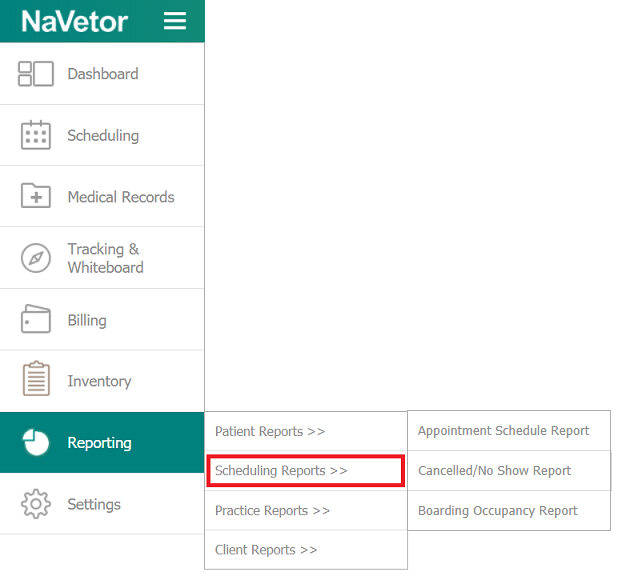
Appointment Scheduler Report
To access appointment scheduler report, user navigates to reporting > patient reports > appointment scheduler report, following screen is displayed

User enters search criteria. Upon clicking on view button, reports will be filtered and displayed based on criteria defined by user.

Cancelled/No Show Report
To access appointment scheduler report, user navigates to reporting > patient reports > cancelled/no show report, following screen is displayed

User enters search criteria. Upon clicking on view button, reports will be filtered and displayed based on criteria defined by user.
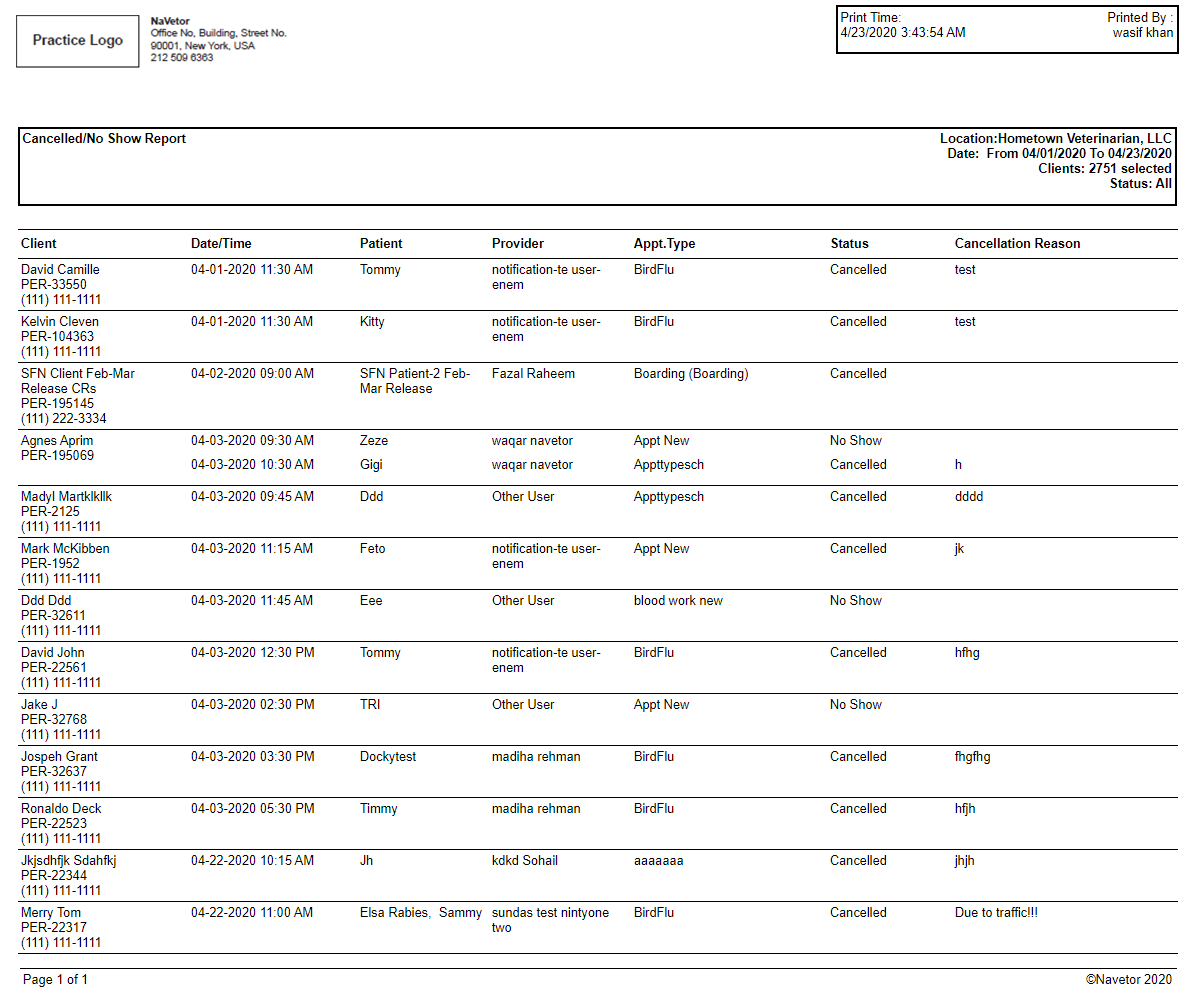
Boarding Occupancy Report
To access appointment scheduler report, user navigates to reporting > patient reports > boarding occupancy report, following screen is displayed

User enters search criteria. Upon clicking on view button, reports will be filtered and displayed based on criteria defined by user.
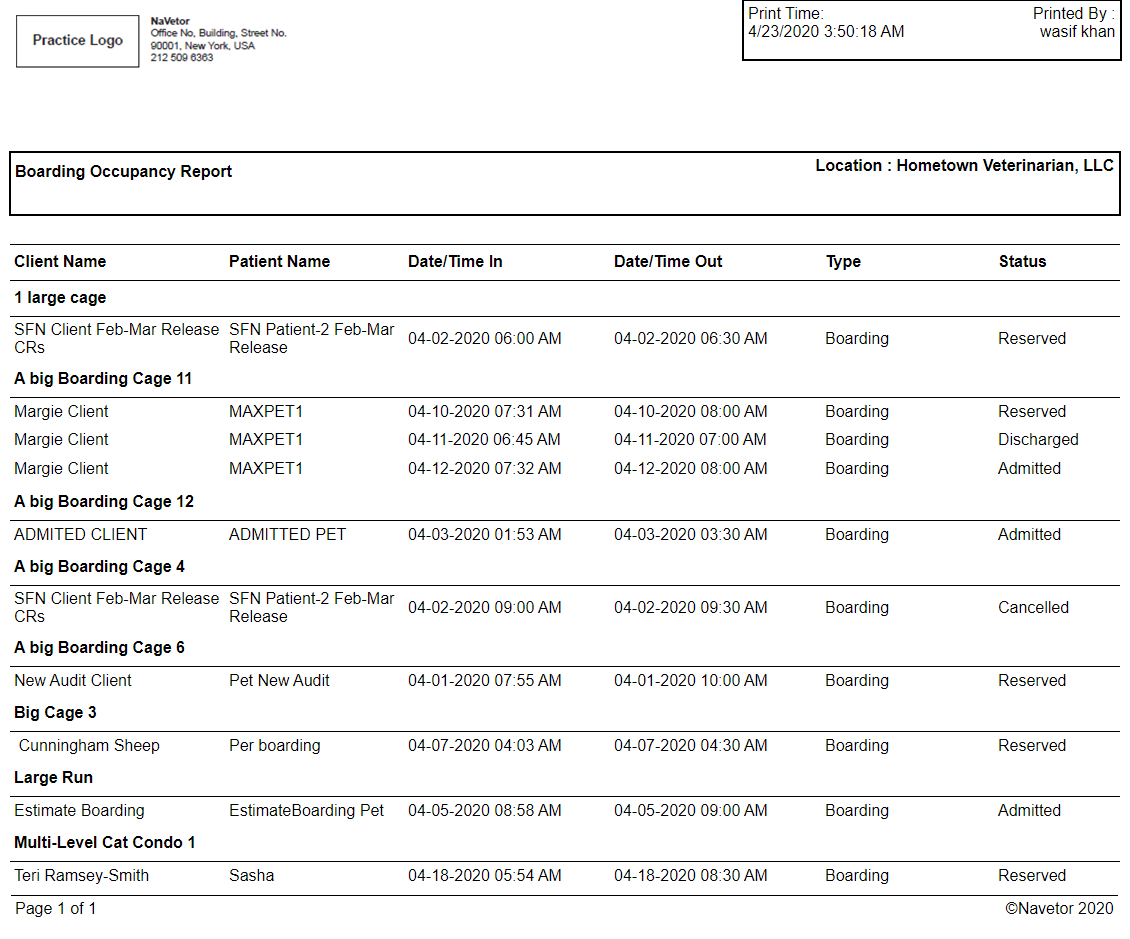
Practice Reports
To view practice related reports, user navigates to reporting > practice reports as shown in following screen
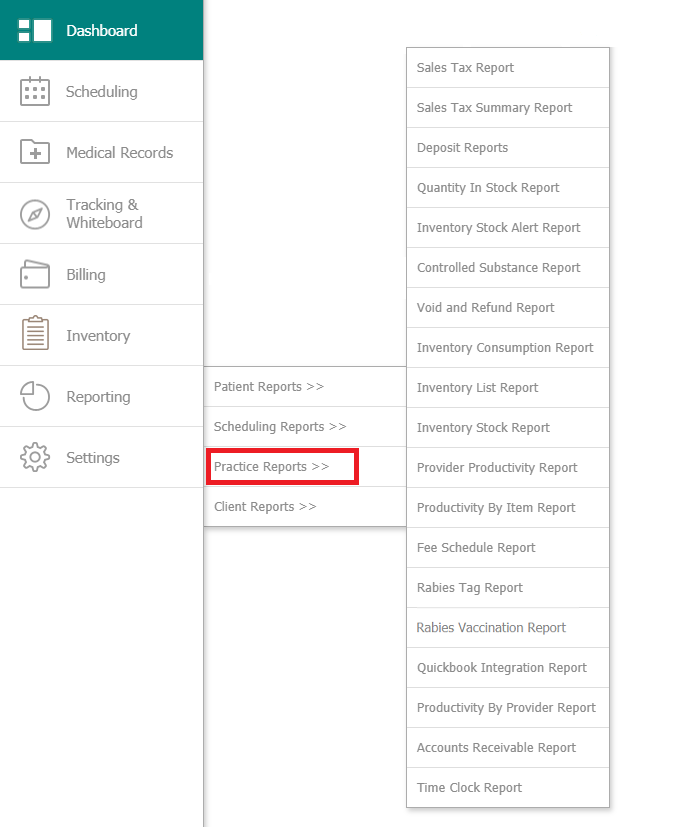
Sales Tax Report
To access sales tax report, user navigates to reporting > practice reports > sales tax report, following screen is displayed

User enters search criteria. Upon clicking on view button, reports will be filtered and displayed based on criteria defined by user.
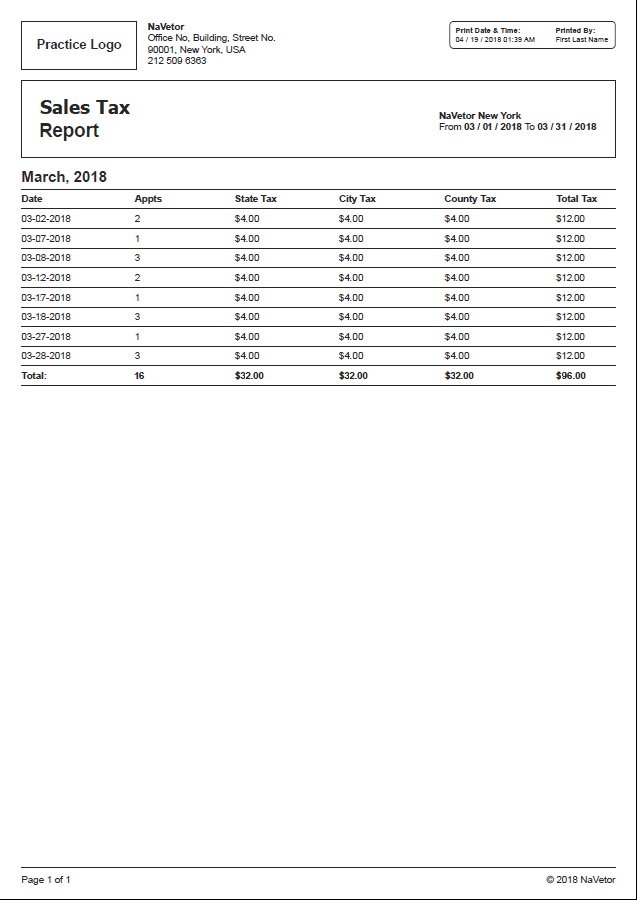
Deposit Reports
To access deposit report, user navigates to reporting > practice reports > deposit report, following screen is displayed

User enters search criteria. Upon clicking on view button, reports will be filtered and displayed based on criteria defined by user.
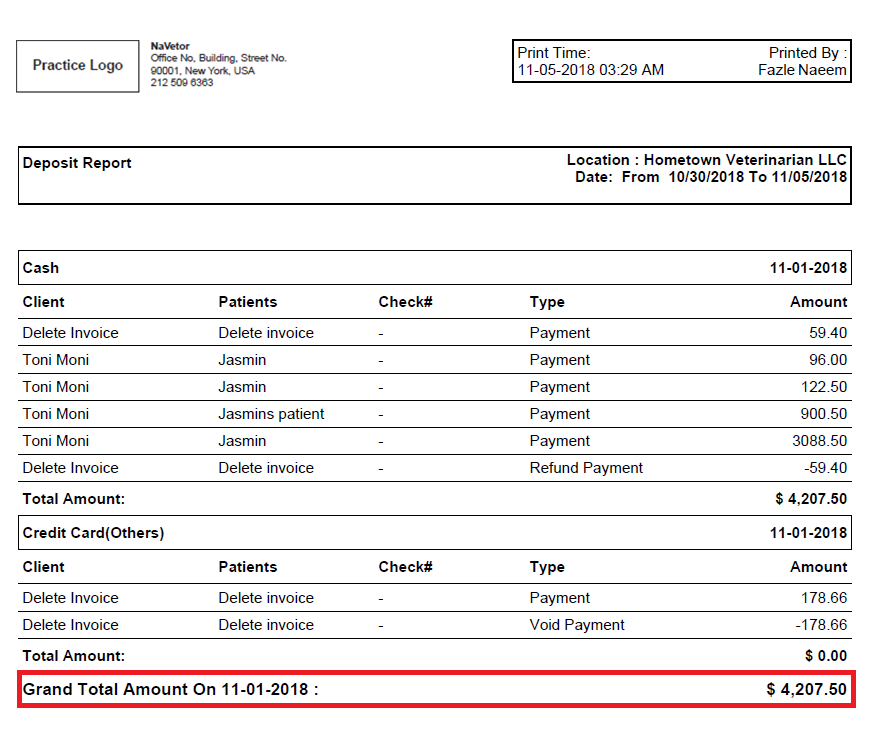
User can view “Grand total” on this report as well.
Sales Tax Summary Reports
To access deposit report, user navigates to reporting > practice reports > sales tax summary report, following screen is displayed

User enters search criteria. Upon clicking on view button, reports will be filtered and displayed based on criteria defined by user.
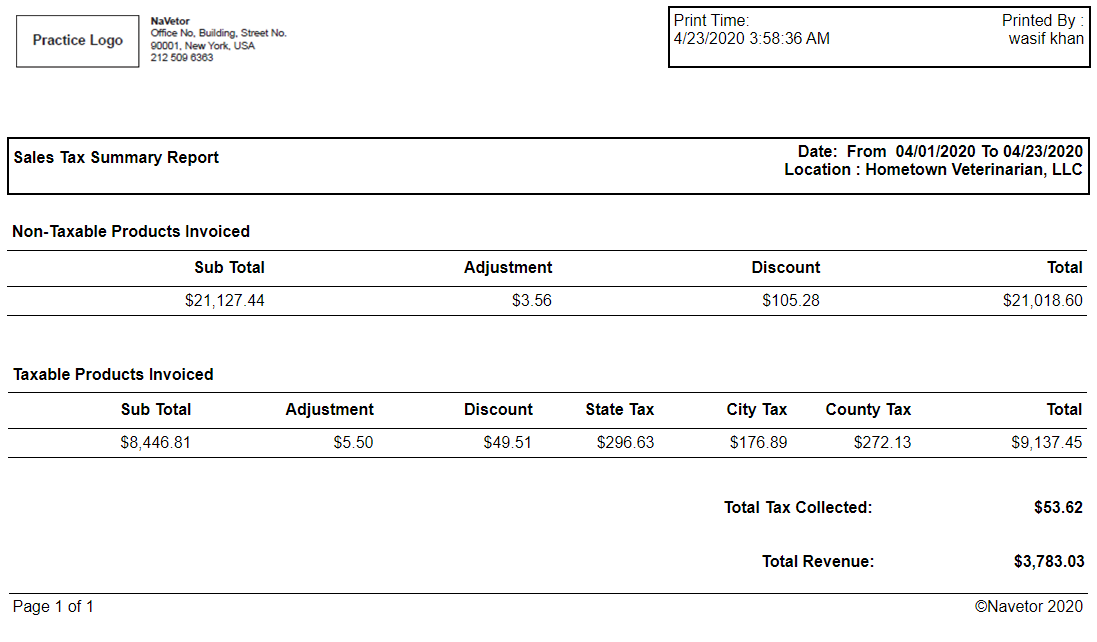
User can view “Total Tax Collected” and “Total Revenue” on this report as well.
Controlled Substance Report
To access controlled substance report, user navigates to reporting > practice reports > controlled substance report, following screen is displayed

User enters search criteria. Upon clicking on view button, reports will be filtered and displayed based on criteria defined by user.

Quantity in Stock Report
To access quantity in stock report, user navigates to reporting > practice reports > quantity in stock report, following screen is displayed

User enters search criteria. Upon clicking on view button, reports will be filtered and displayed based on criteria defined by user.
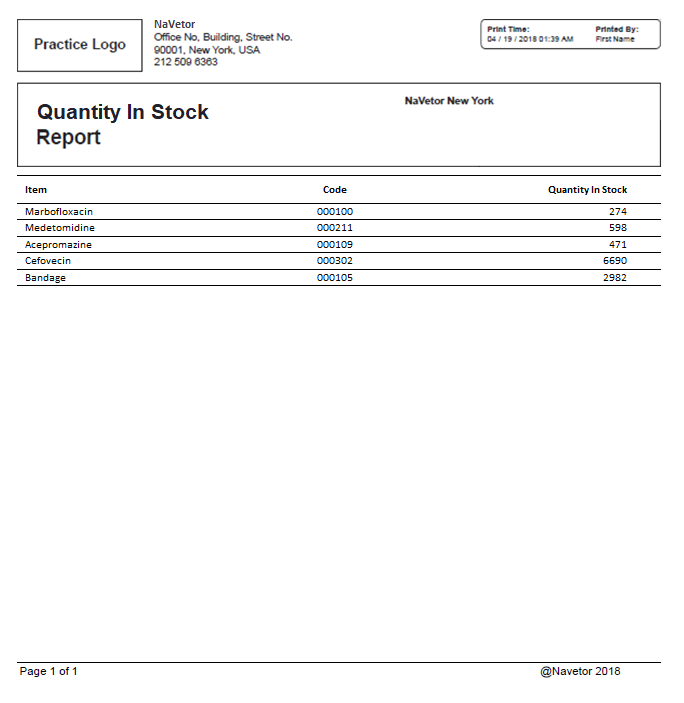
Inventory Stock Alert Report
To access inventory stock alert report, user navigates to reporting > practice reports > inventory stock alert report, following screen is displayed

User enters search criteria. Upon clicking on view button, reports will be filtered and displayed based on criteria defined by user.
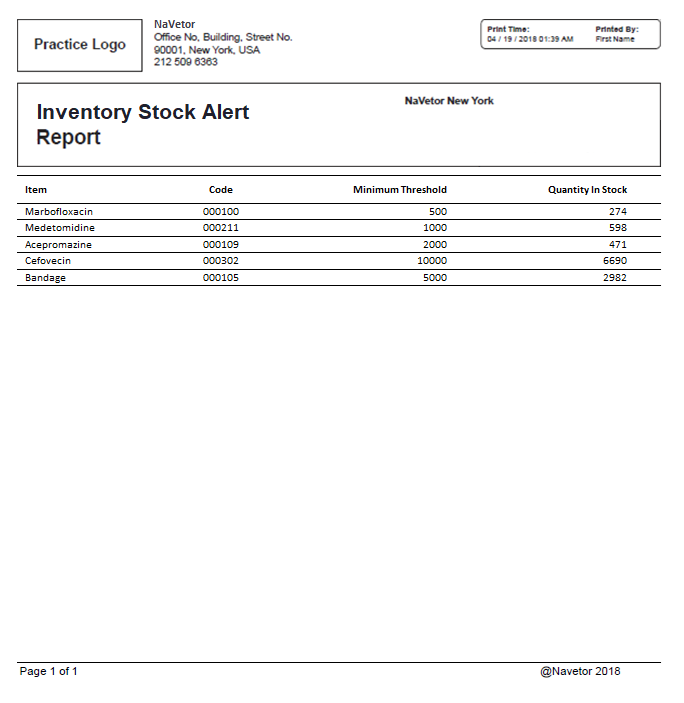
Void and Refund Report
To access void and refund report, user navigates to reporting > practice reports > void and refund report, following screen is displayed

User enters search criteria. Upon clicking on view button, reports will be filtered and displayed based on criteria defined by user.
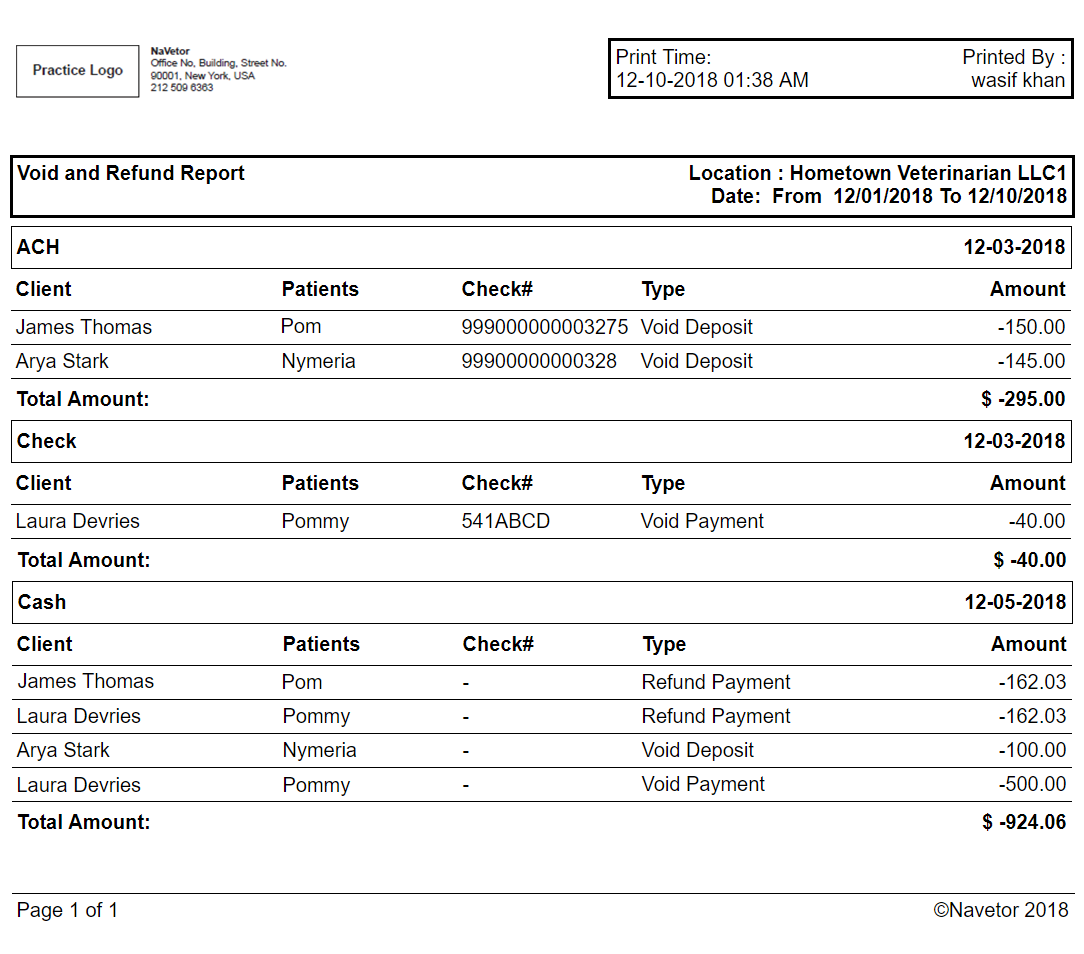
Inventory List Report
To access inventory list report, user navigates to reporting > practice reports > inventory list report, following screen is displayed

User enters search criteria. Upon clicking on view button, reports will be filtered and displayed based on criteria defined by user.
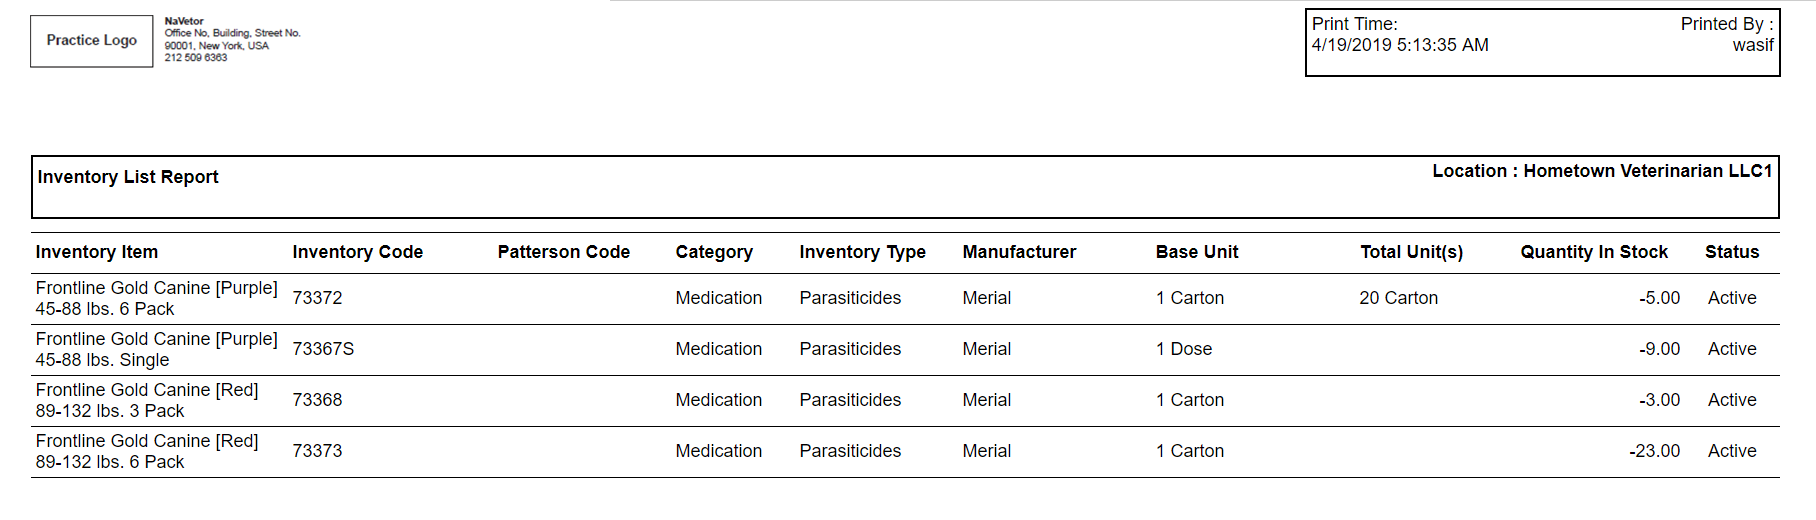
Inventory Consumption Report
To access inventory consumption report, user navigates to reporting > practice reports > inventory consumption report, following screen is displayed

User enters search criteria. Upon clicking on view button, reports will be filtered and displayed based on criteria defined by user.
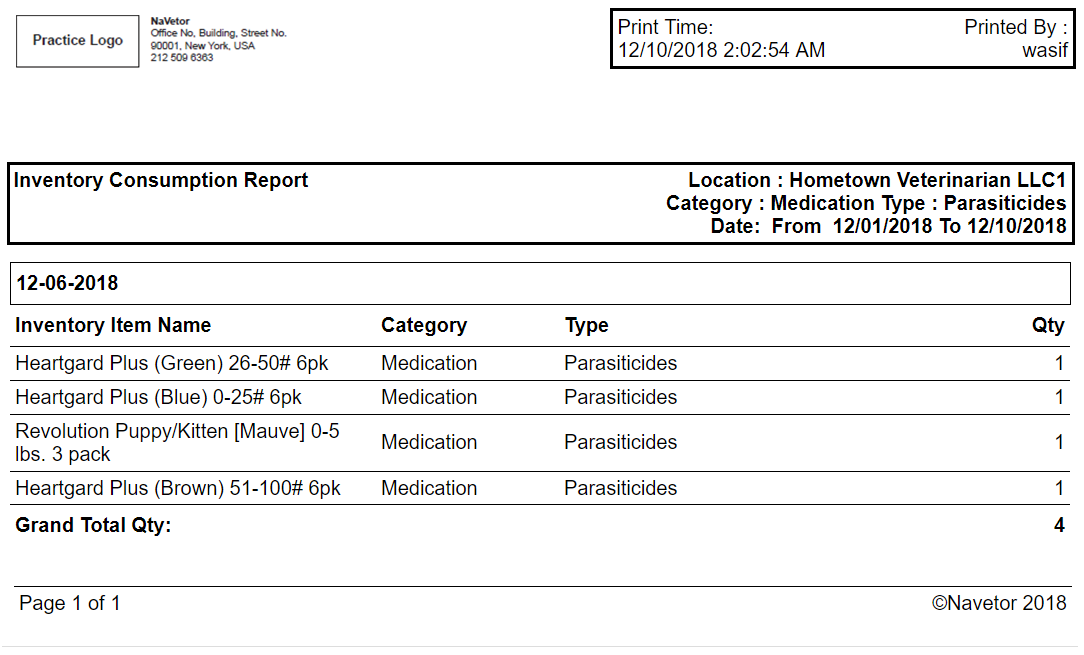
Inventory Stock Report
To access inventory stock report, user navigates to reporting > practice reports > inventory stock report, following screen is displayed

User enters search criteria. Upon clicking on view button, reports will be filtered and displayed based on criteria defined by user.
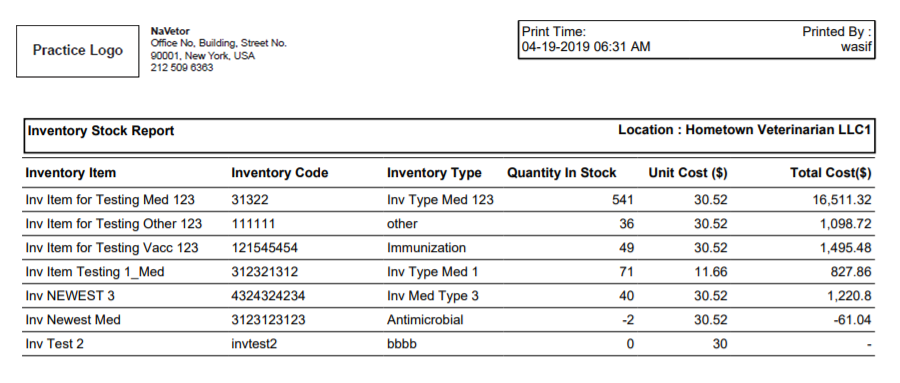
Provider Productivity Report
To access inventory stock report, user navigates to reporting > practice reports > provider productivity report, following screen is displayed

User enters search criteria. Upon clicking on view button, reports will be filtered and displayed based on criteria defined by user.
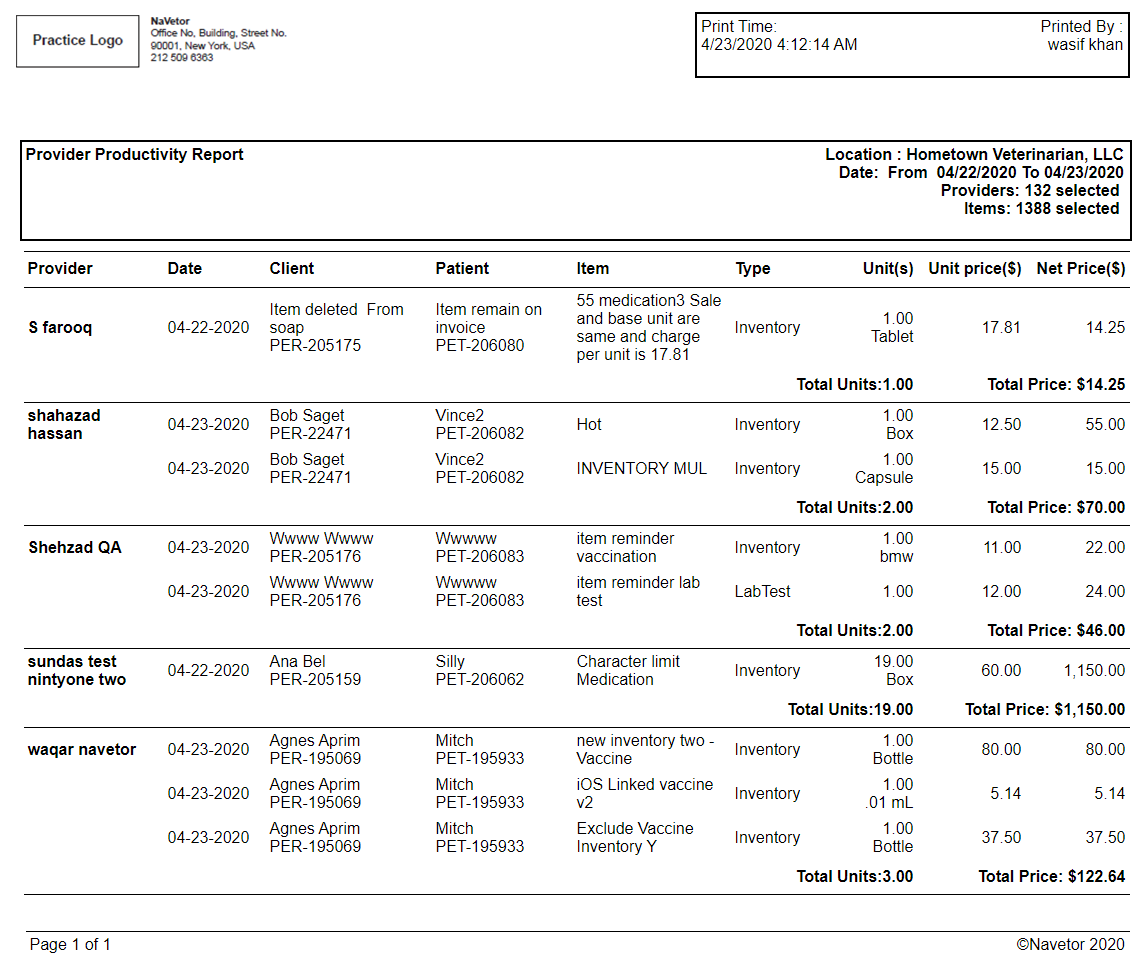
Productivity by Item Report
To access inventory stock report, user navigates to reporting > practice reports > productivity by item report, following screen is displayed

User enters search criteria. Upon clicking on view button, reports will be filtered and displayed based on criteria defined by user.
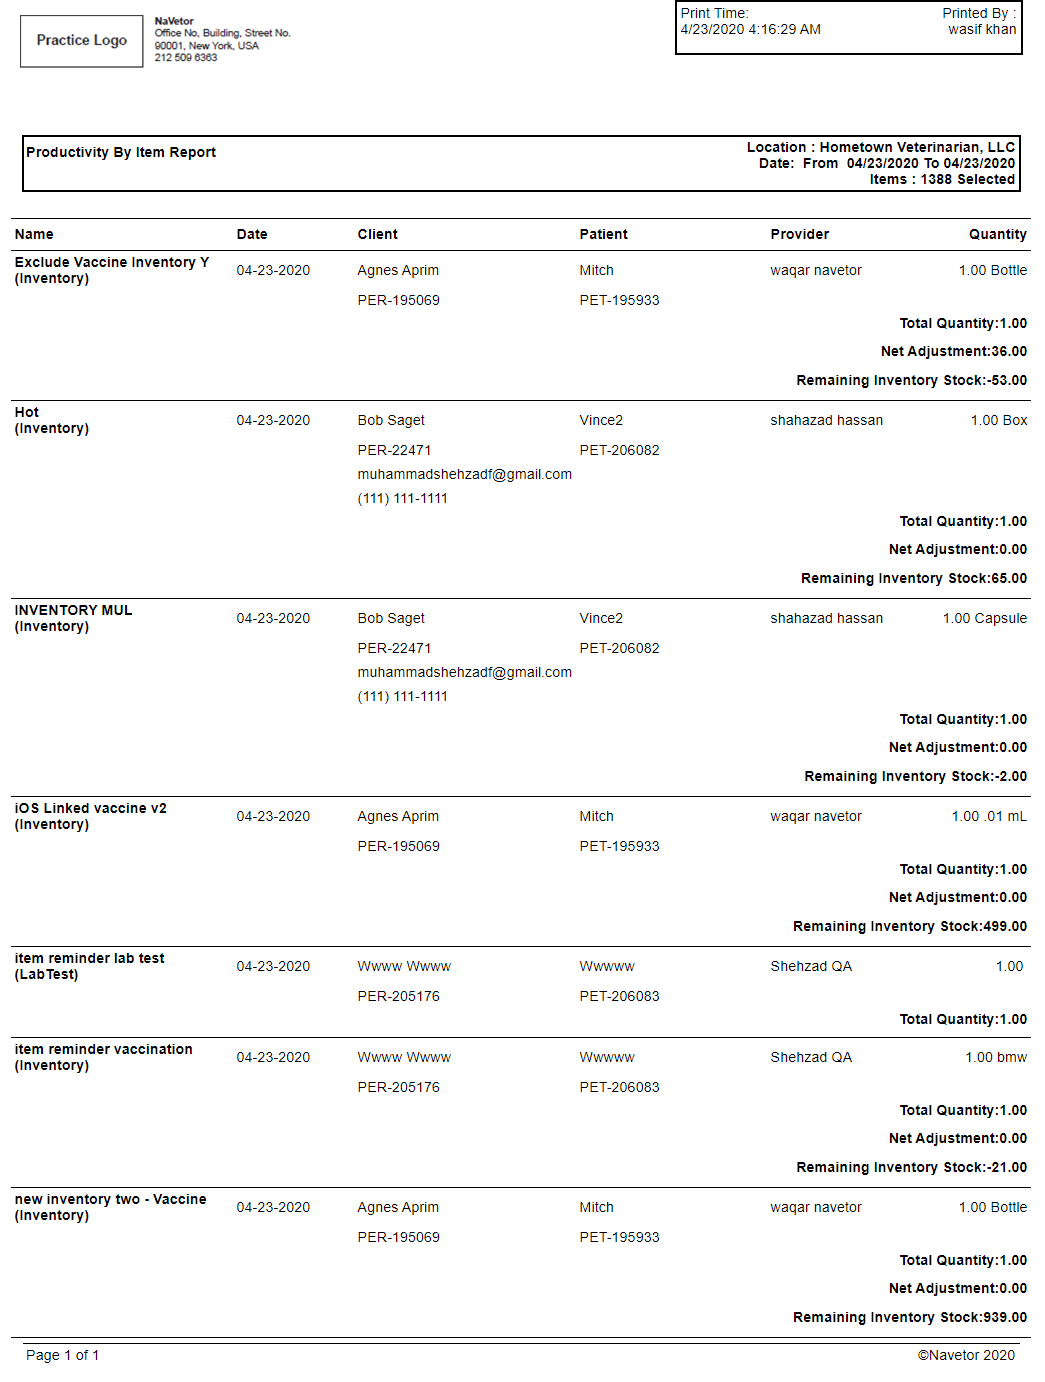
Fee Schedule Report
To access inventory stock report, user navigates to reporting > practice reports > fee schedule report, following screen is displayed

User enters search criteria. Upon clicking on view button, reports will be filtered and displayed based on criteria defined by user.
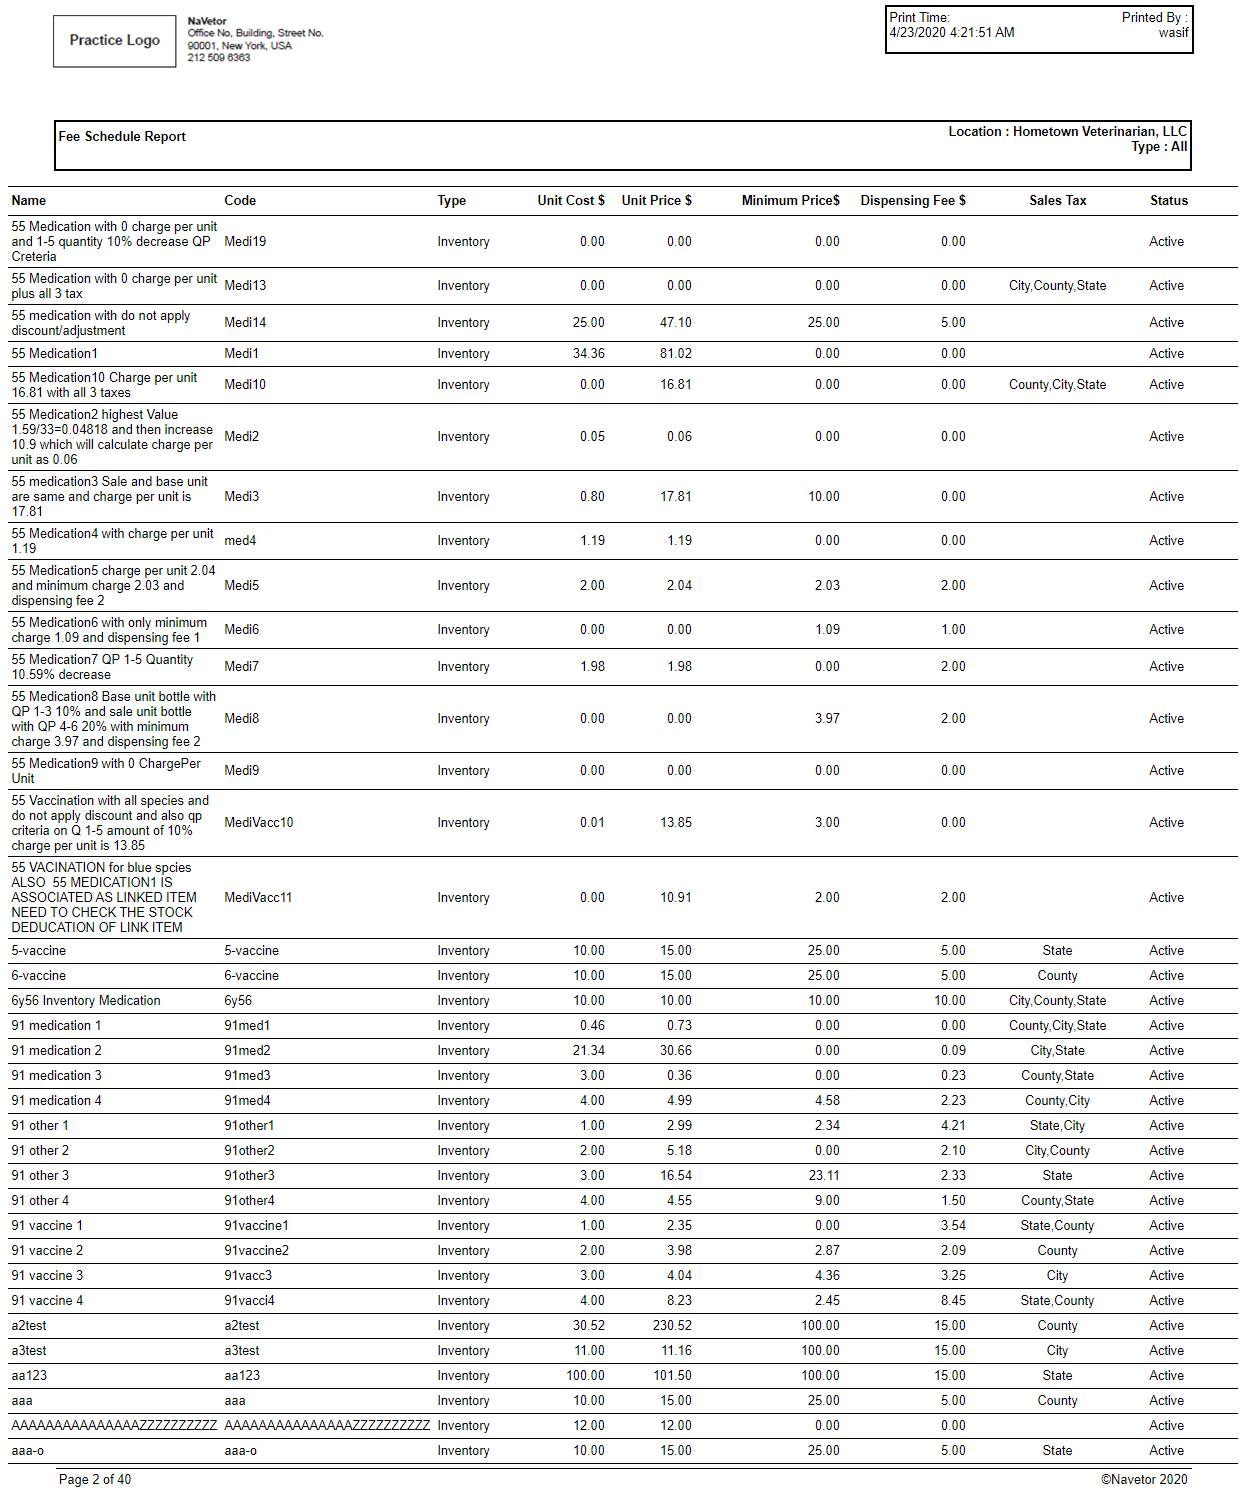
Rabies Tag Report
To access rabies tag report, user navigates to reporting > practice reports > rabies tag report, following screen is displayed

User enters search criteria. Upon clicking on view button, reports will be filtered and displayed based on criteria defined by user.
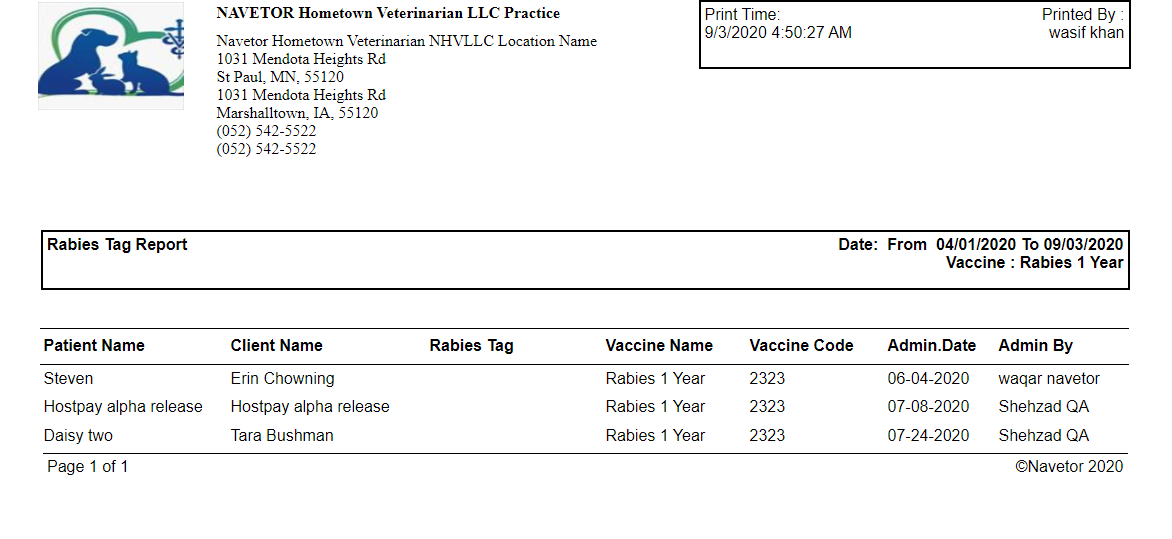
Rabies Vaccination Report
User can navigate to rabies tag report through Reporting Practice Reports >> Rabies Vaccination Report.

After applying filter user can view details of the patients.

Quickbook Integration Report
To access quickbook integration report, user navigates to reporting > practice reports > quickbook integration report, following screen is displayed

User enters search criteria. Upon clicking on view button, reports will be filtered and displayed based on criteria defined by user.
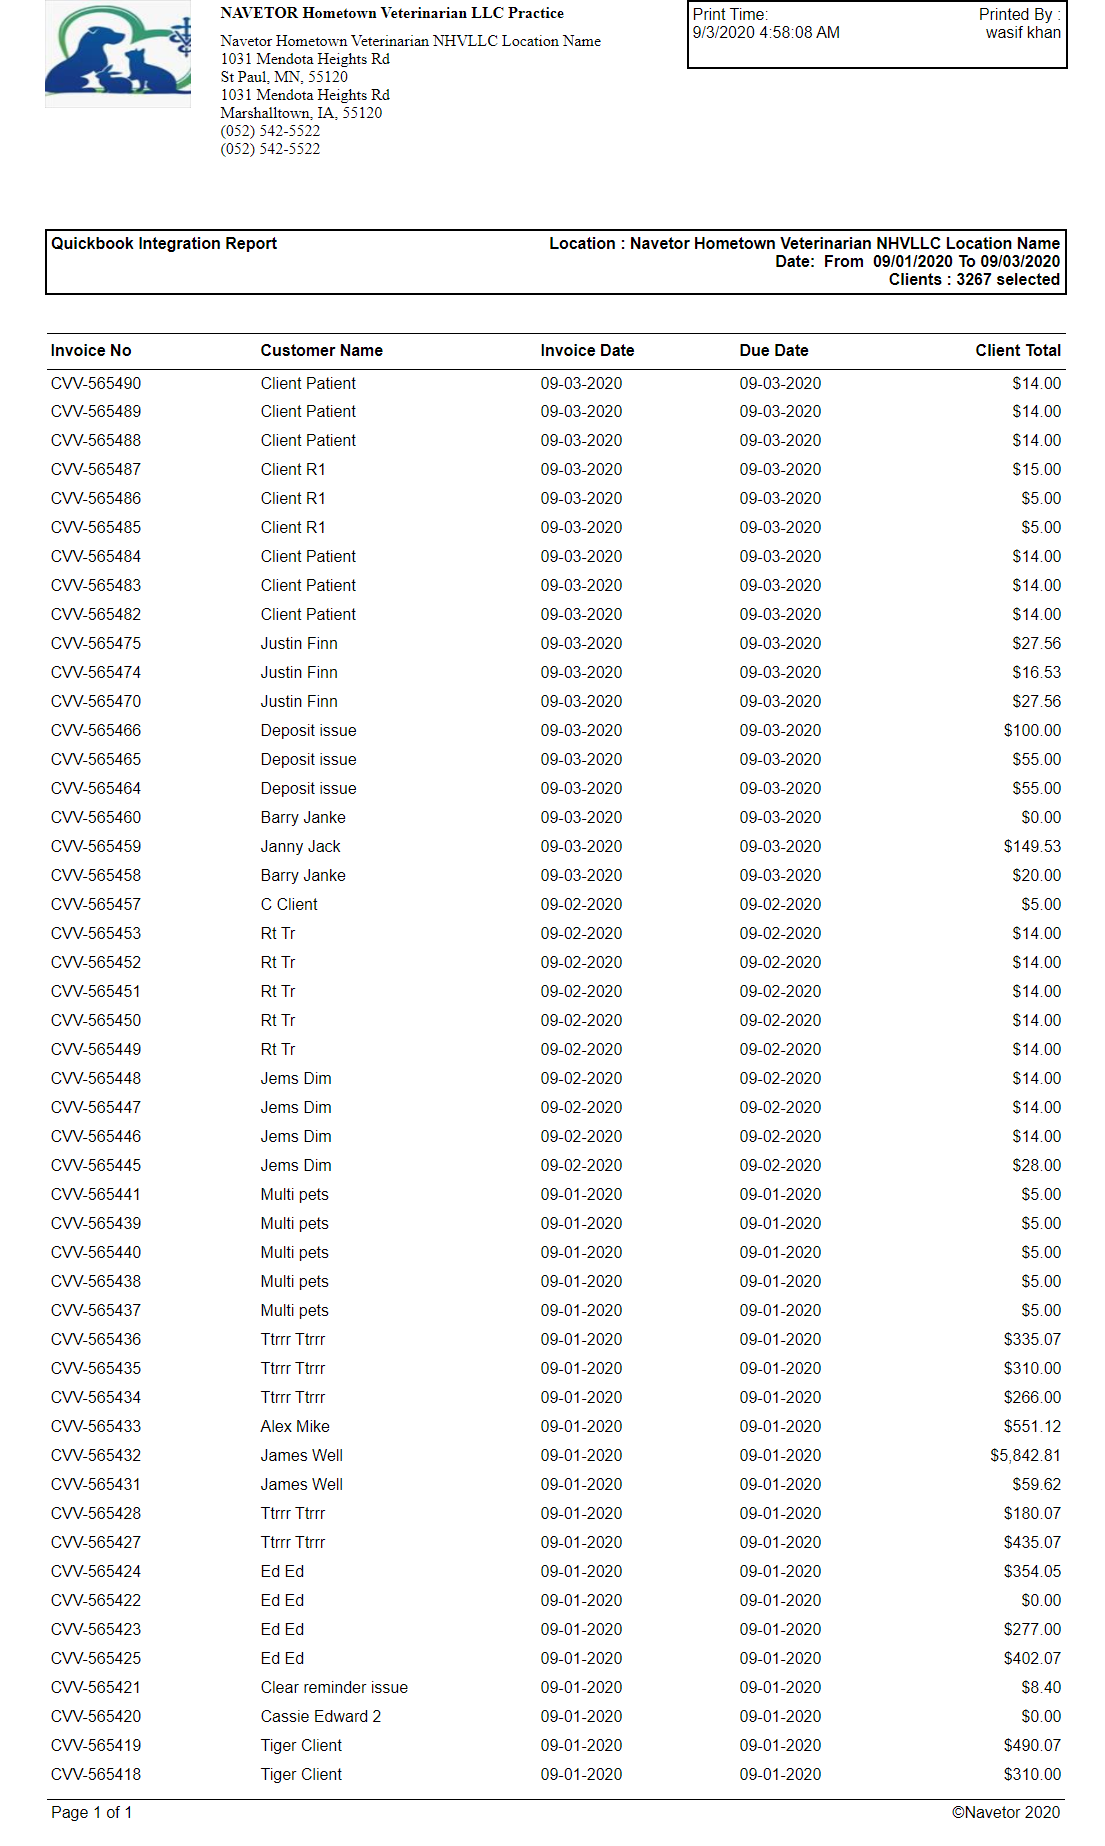
Productivity By Provider Report
To access productivity by provider report, user navigates to reporting > practice reports > productivity by provider report, following screen is displayed

User enters search criteria. Upon clicking on view button, reports will be filtered and displayed based on criteria defined by user.

Accounts Receivable Report
To access accounts receivable report, user navigates to reporting > practice reports > accounts receivable report, following screen is displayed

User enters search criteria. Upon clicking on view button, reports will be filtered and displayed based on criteria defined by user.
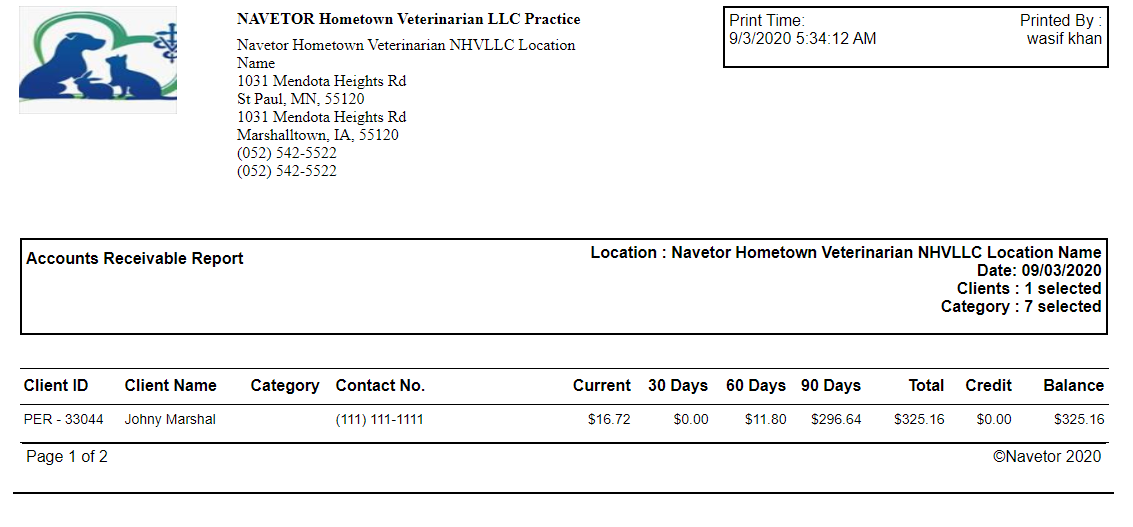
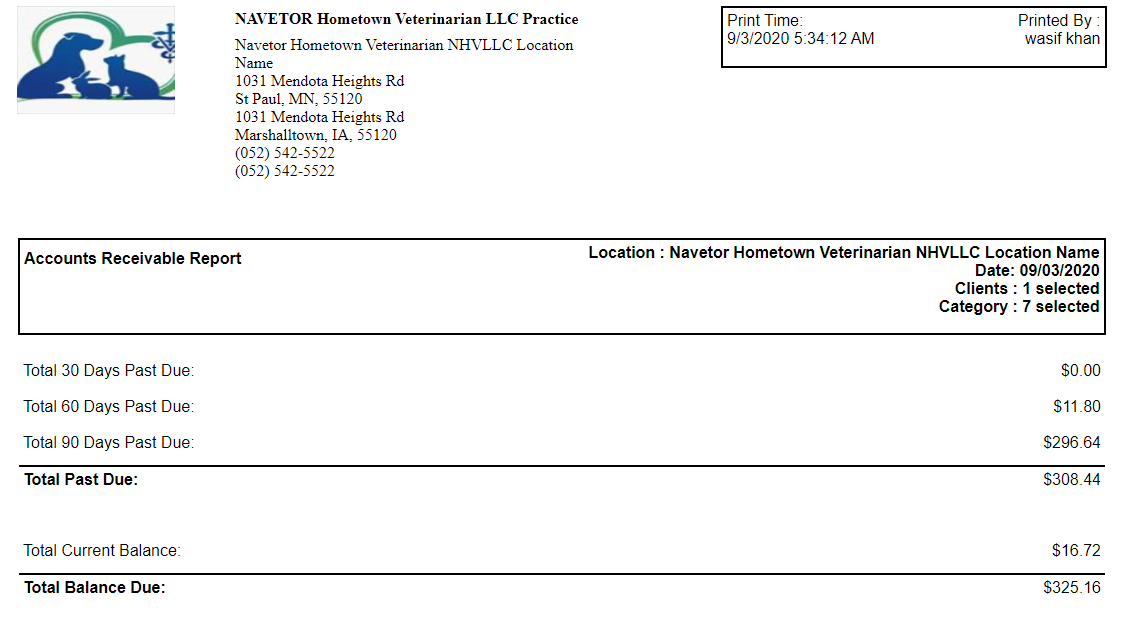
Time Clock Report
To access time clock report, user navigates to reporting > practice reports > time clock report, following screen is displayed

User enters search criteria. Upon clicking on view button, reports will be filtered and displayed based on criteria defined by user.
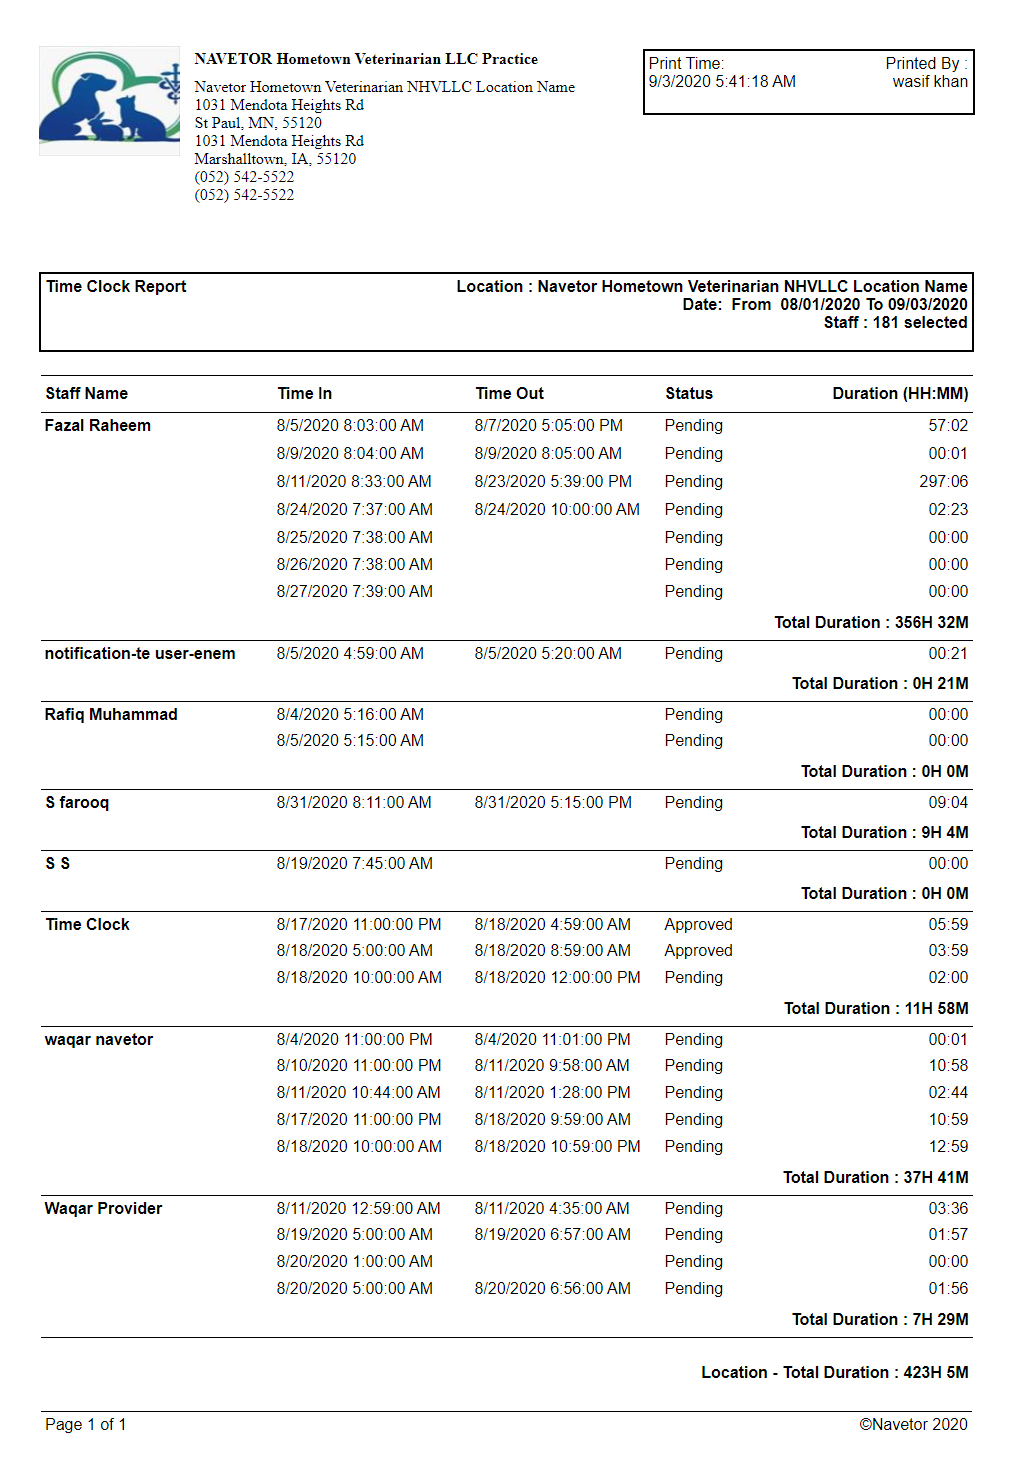
Client Reports
To view client related reports, user navigates to reporting > client reports as shown in following screen
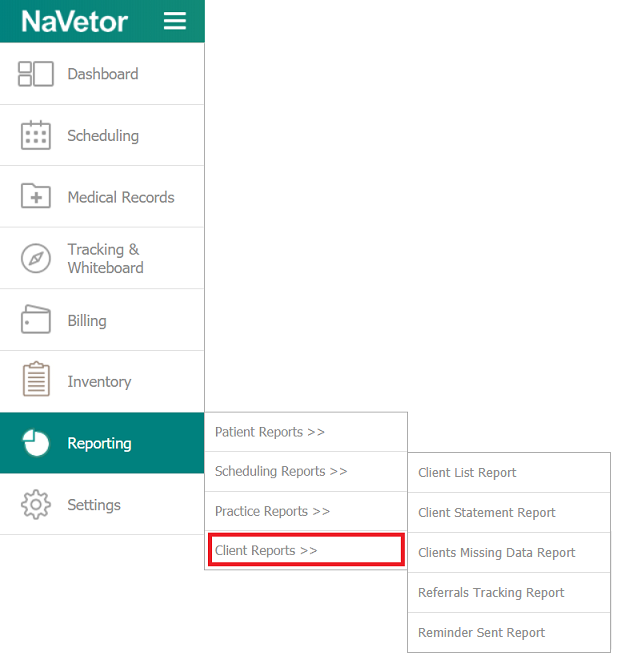
Client List Report
To access active client list report, user navigates to reporting > client reports > client list report, following screen is displayed

User enters search criteria. Upon clicking on view button, reports will be filtered and displayed based on criteria defined by user.
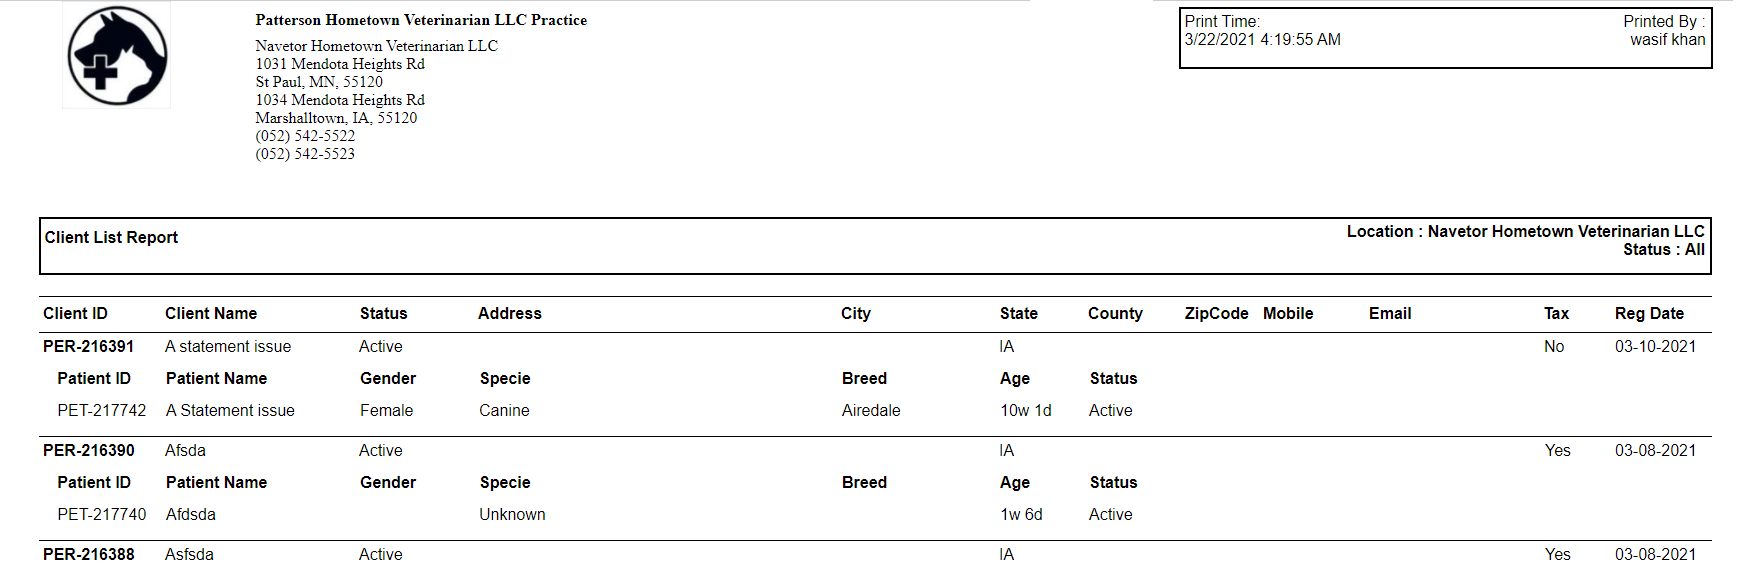
Client Missing Data Report
To access client missing data report, user navigates to reporting > client reports > client missing data report, following screen is displayed

User enters search criteria. Upon clicking on view button, reports will be filtered and displayed based on criteria defined by user.
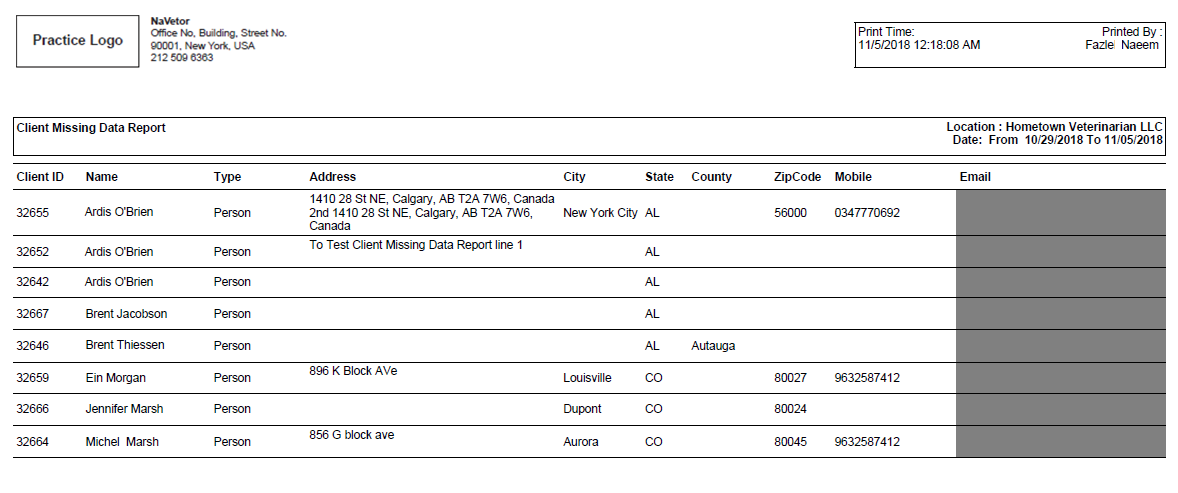
Client Statement Report
User can also configure to print invoice items in report through practice configuration. Practice configuration can be accessible through Settings → Admin >> → My Practice >> → Practice Setting.
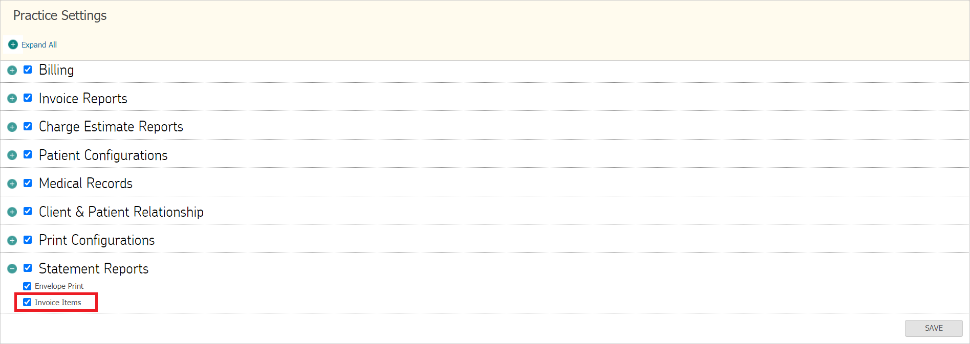
To access client missing data report, user navigates to reporting > client reports > client statement report, following screen is displayed
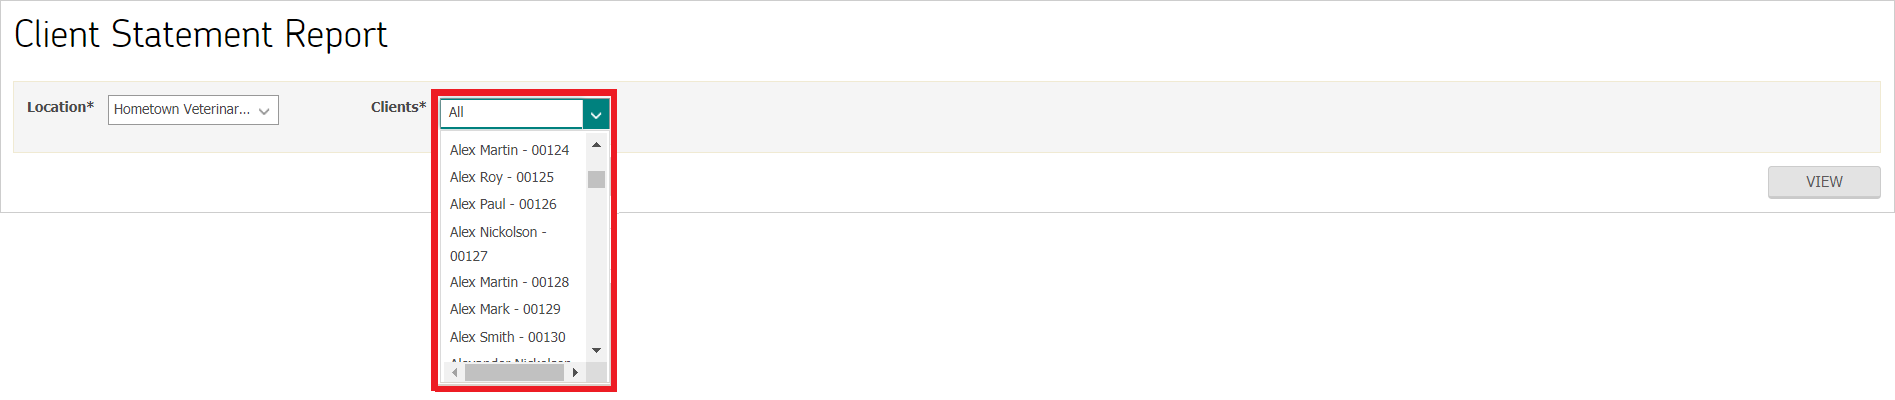
User enters search criteria. Upon clicking on view button, reports will be filtered and displayed based on criteria defined by user.
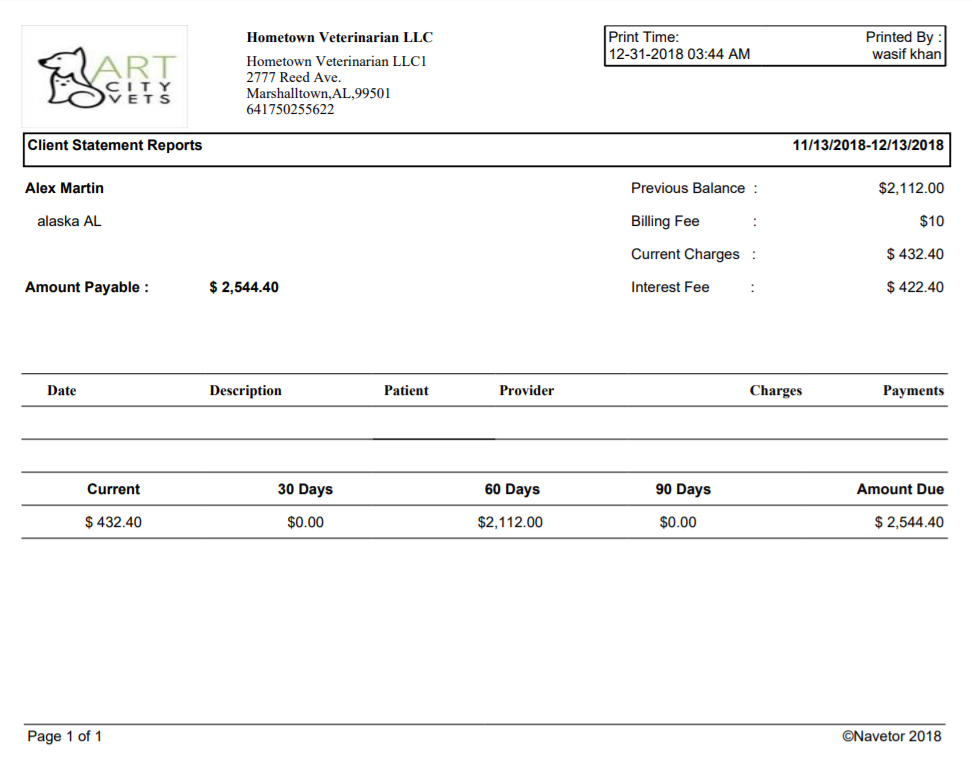
*Report without Invoice Items
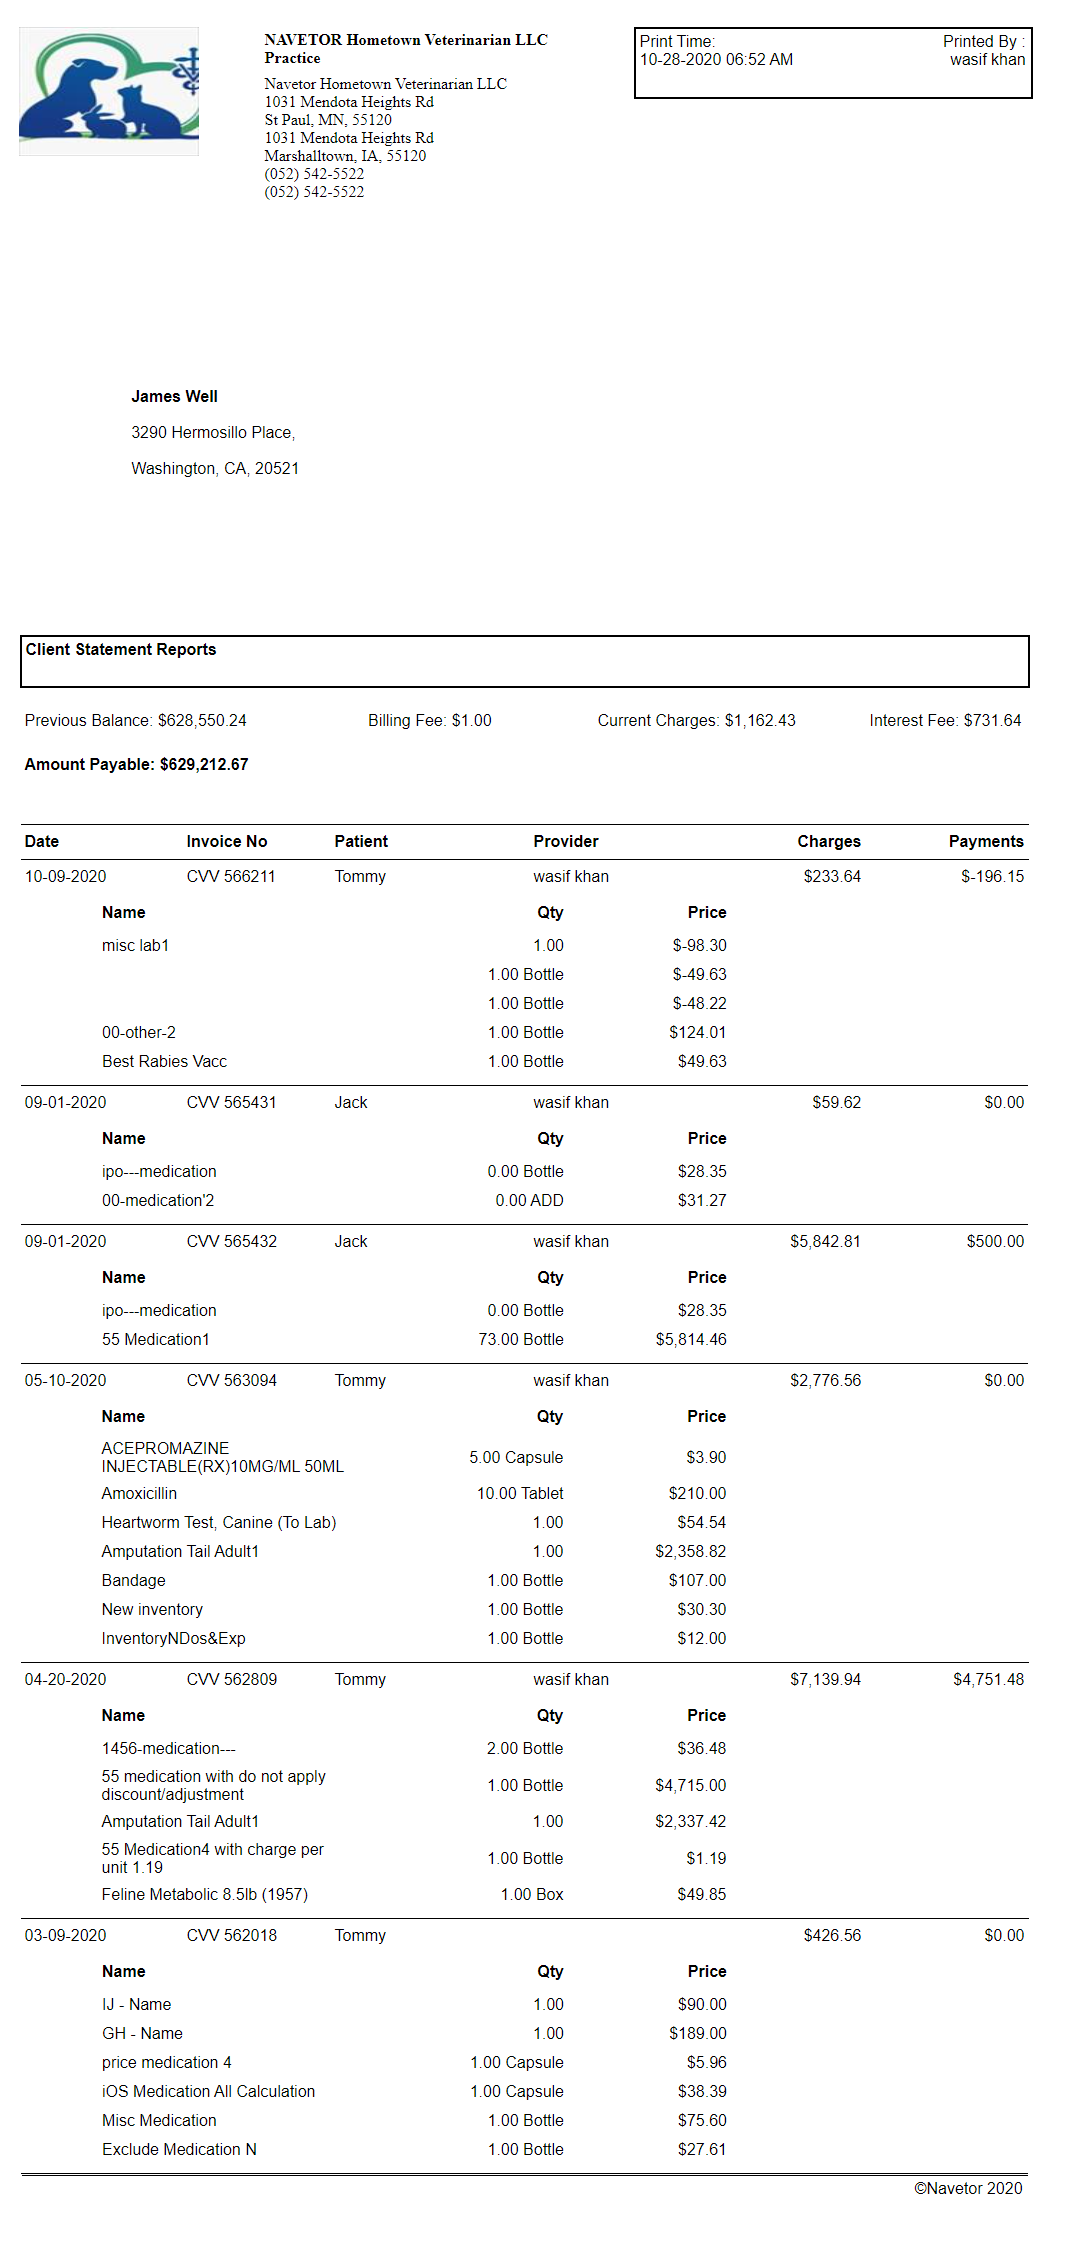
*Report with Invoice Items
Referrals Tracking Report
To access client missing data report, user navigates to reporting > client reports > referrals tracking report, following screen is displayed

User enters search criteria. Upon clicking on view button, reports will be filtered and displayed based on criteria defined by user.
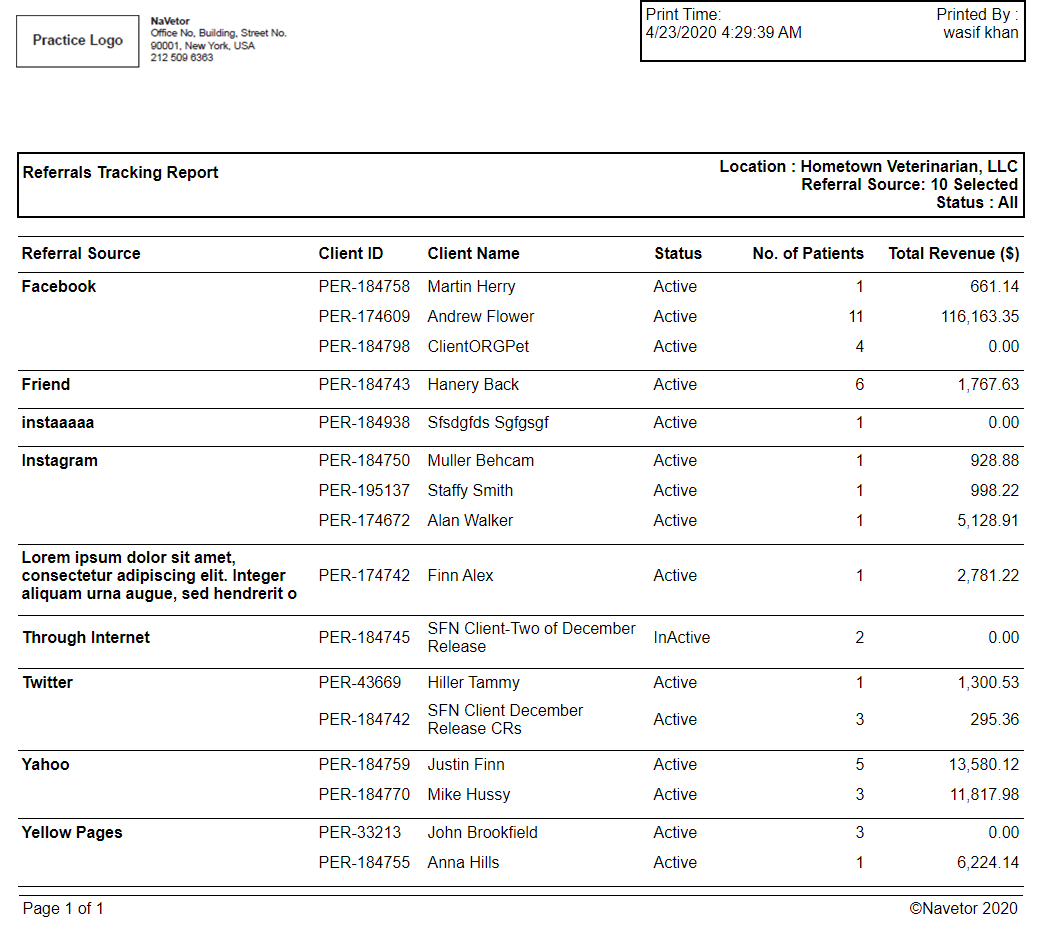
Reminder Sent Report
To access client missing data report, user navigates to reporting > client reports > reminder sent report, following screen is displayed

User enters search criteria. Upon clicking on view button, reports will be filtered and displayed based on criteria defined by user.

© 2018 NaVetor - All Rights reserved. No reproduction or redistribution without written authorization of TPI
User Manual - Scheduler
Scheduling Module
User navigates to login page.
Upon entering login credentials, after authentication, user is navigated to default dashboard page
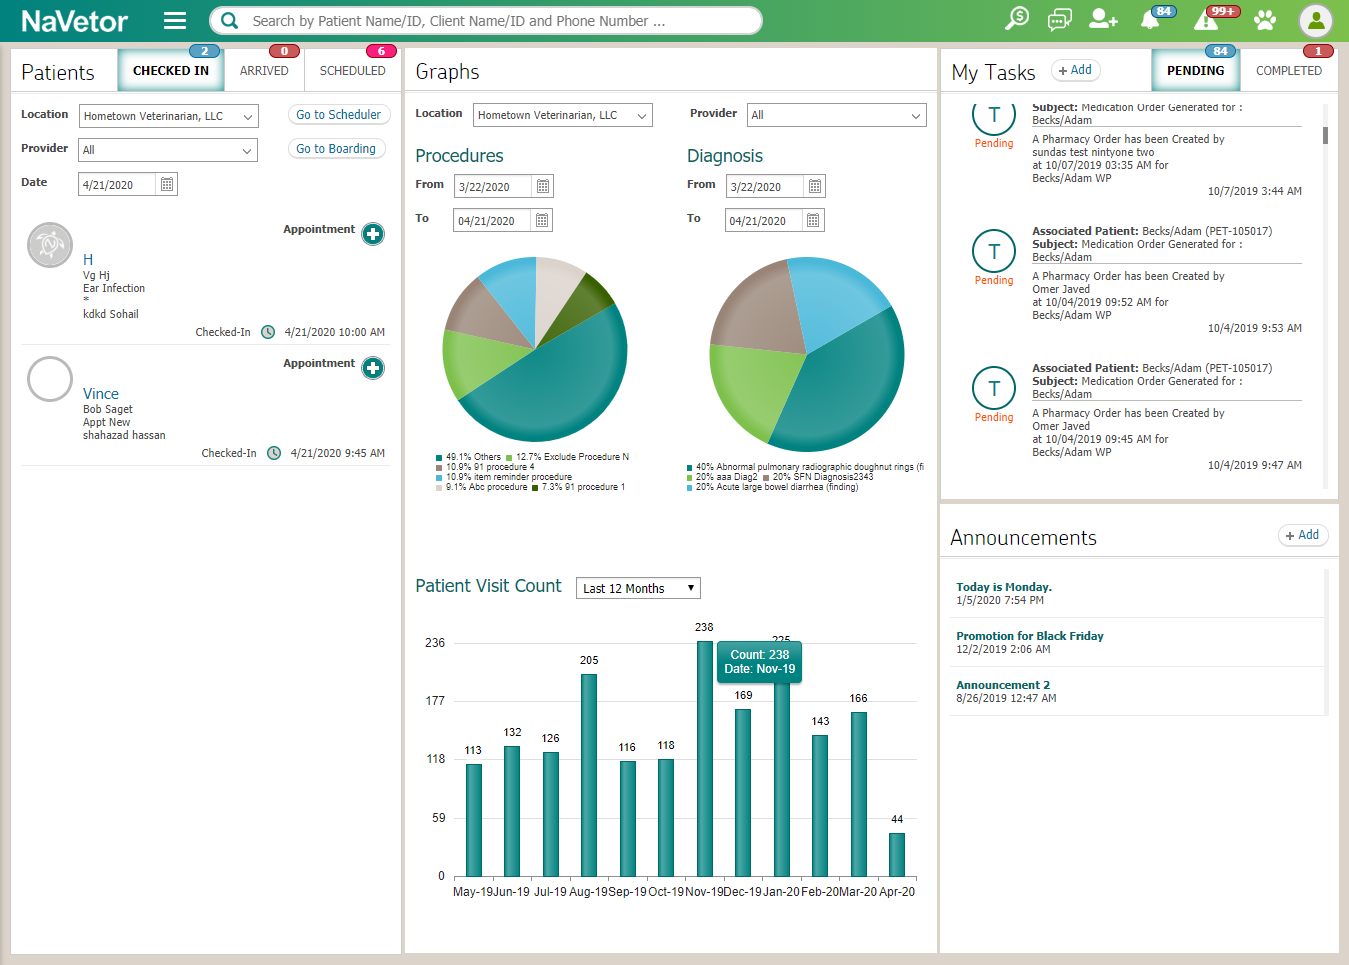
Scheduling module can be accessed from the Navigation button at the top left of the screen.
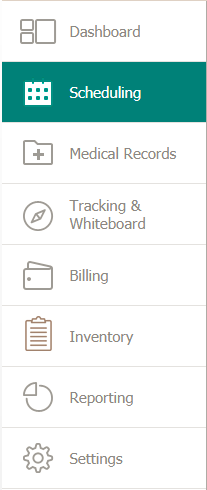
Through this module, the authorized user can do any of the following action for Scheduler or Boarding.
- View different views of the provider/resource calendar
- Full Day
- Business Hours
- Day View
- Week View
- Month View
- Agenda View
- View calendars of multiple providers/resources at a particular location
- View the current status of appointments/reservation
- View information in the provider/resource calendar
- View appointment/reservation information
- Create appointments/reservations
- Reschedule appointments/reservations with the same provider/resource
- Delete appointments/reservations
- Change the status of appointments/reservations
- Transfer appointments between providers
The scheduling module is divided in to five main areas:
- Scheduler
- Bulk Transfer Appointments
- Affected Appointments
- Appointment Requests
- Block List
- Day Note
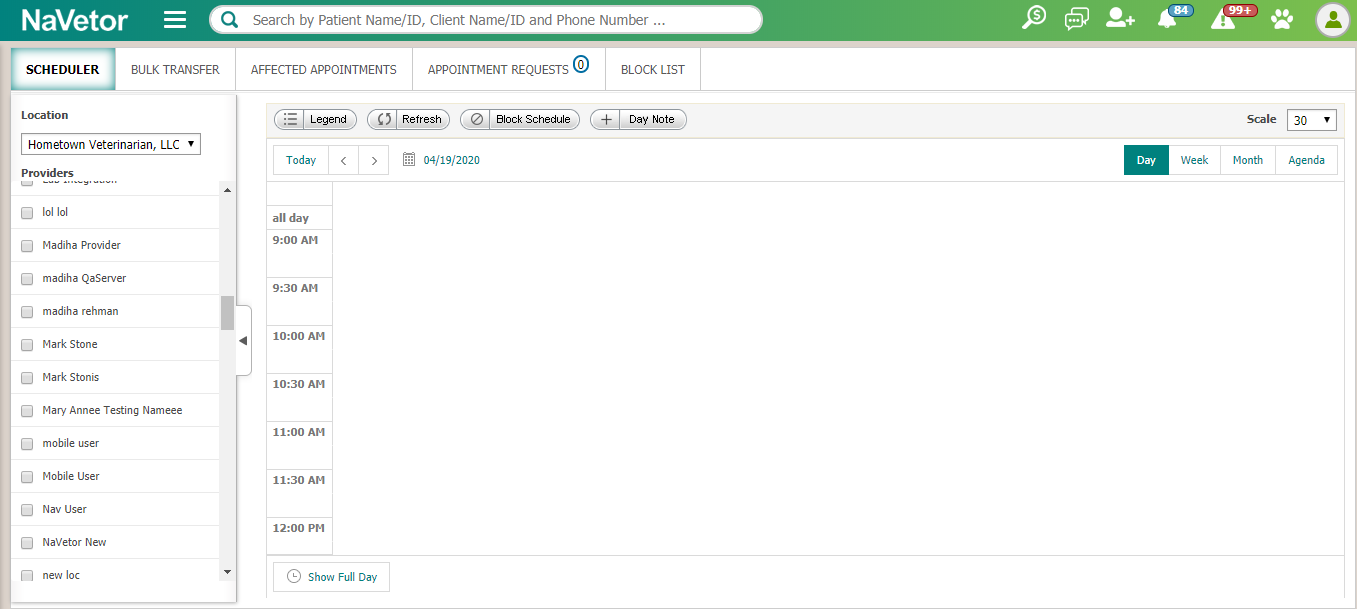
Scheduler
The scheduler shows available time slots for a particular provider at a particular location. Users have the option to view, create, delete and change the status of appointments for different Providers or resources. The scheduler is divided into two main sections:
- Calendar View
- Calendar Selection
Calendar View
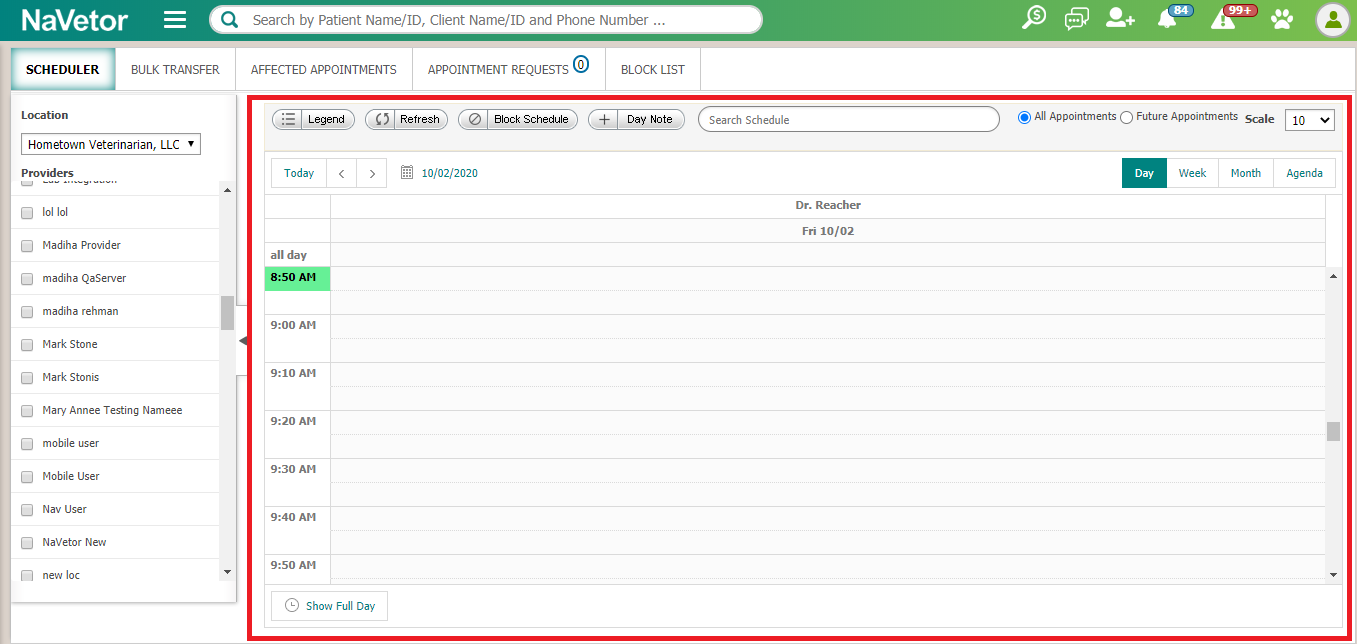
The Calendar view contains
- Scroll to Current Time
- Legends
- Refresh
- Calendar Scale
- Date Navigator with Today quick Navigation
- Day View Option
- Week View Option
- Month View Option
- Agenda View Option
- Calendar Area
- Full day/business Hours Toggle
- Block Schedule
- Day Note
- Appointment Search
Scroll to Current Time
When user open the scheduler then system will show the area having current time with light green background.
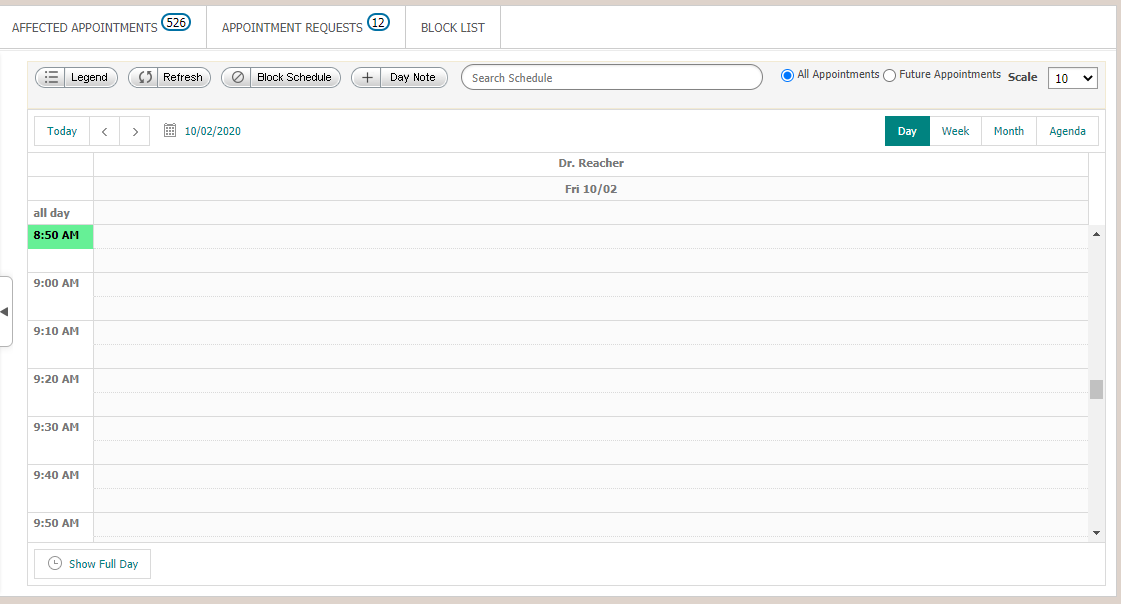
On day/week view, system will scroll to current time of the practice and on creating appointment for another time system will show that time on which appointment created and won’t scroll in that case.
Legends
Appointments in the scheduler are displayed with different colored backgrounds for the appointment body and the status icon. User can click on  icon on above calendar to view Appointment color and status codes.
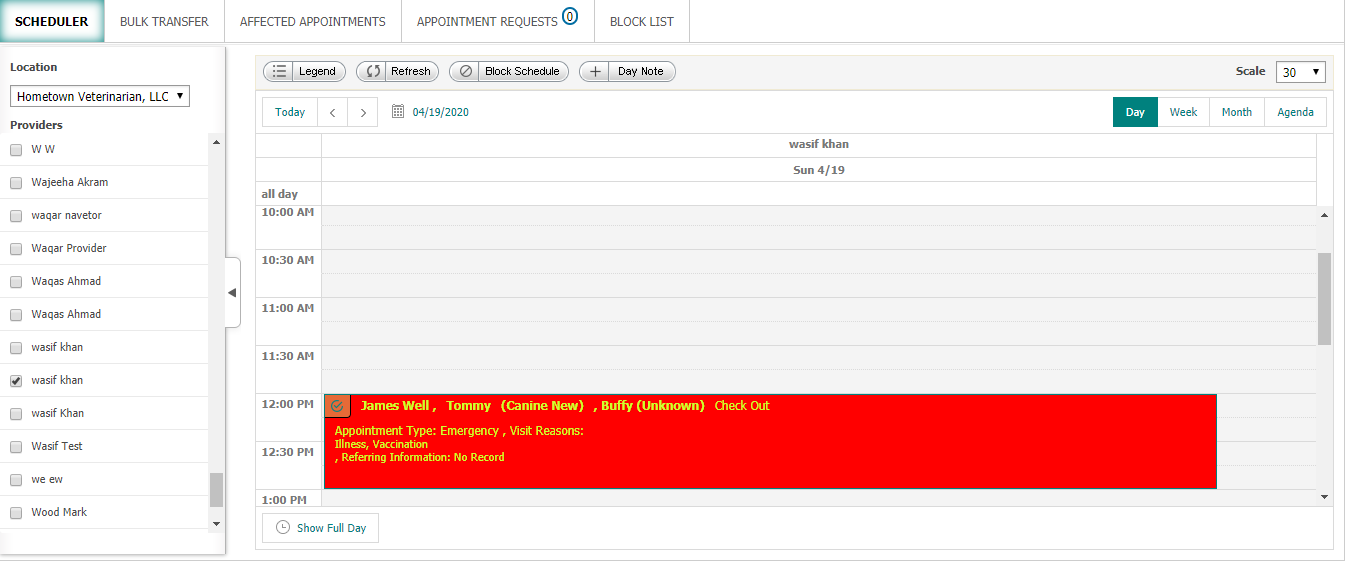
The appointment body color depends on appointment type which the authorized user is able to assign a color for every appointment type. Appointment type colors can be defined from
Settings > Scheduling > Appointment Type
The Status Icon colors can be changed by admin users.

Refresh
Although the screen auto-refreshes every 20 seconds but there are times that the user might not have that much time to see new information that has come up. In such as a case, the user can click on  to refresh the current view and add/edit/view any new appointments that may have been created.
Calendar Scale
Through the Calendar scale the user will be able to display the calendar in intervals of 10, 30 or 60 minutes. Each interval is divided into 2 available slots and the appointment scheduled will expand or contract as per the time scale selected.
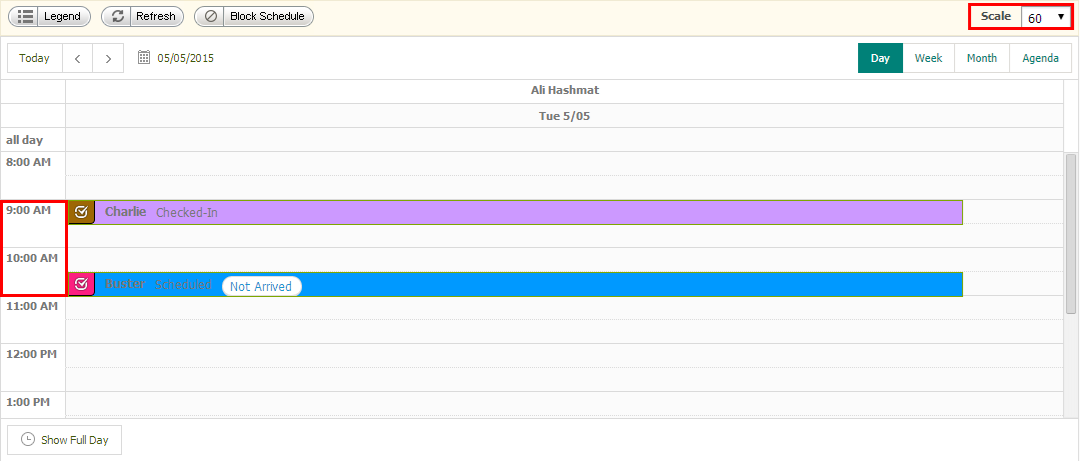
Date Navigator with Today quick Navigation
With the date navigator the user can go back and forth in the calendar according to the selected view. Each view has its own behavior when it comes to the navigator.
Day View Navigator
When the user is in the daily view, the navigator allows user to go to the next  or previous
  day as per selection.
Selecting the  action will navigate the user towards the current day regardless of the date the scheduler was displaying.
The user can also jump to a specific date by clicking on the  button.
Navigator

The navigation section allows the user to navigate to the scheduler for the past as well as coming months, and years.
By selecting the side navigators the user will be able to navigate to the previous and next month and be able to select a specific date from the calendar.
The user can click on the month button to open up the calendar that shows the months in that year.
Clicking on month name will open the following calendar.
Upon clicking on the year, current decade will be displayed.

The user will be able to navigate to the next and previous decades likewise by clicking on decade accordingly.
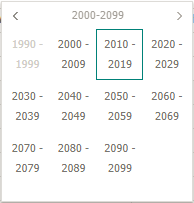
The application will give user the capability to choose decade, year, month and then the actual date. By default the application will display the current month.
The selected date is displayed right next to the action.
Week View Navigator
Although the basic principle is the same, in the week view the user is able to view a specific week from Sunday till Saturday. The navigation is the same but it will navigate week wise.

In terms of the Date jump, the application displays the entire week of the date selected. Selecting “Today” will navigate the user towards the current week.
Month View Navigator
Same as the week view the month view displays the month and can navigate to the previous or next month.

Agenda View Navigator
The agenda view gives the schedule for the 7 days from a particular date. Similar to the day view the user will be able to navigate accordingly but the application is going to display the appointments for 7 days inclusive of the date picked already.

Day View Option
Single Provider
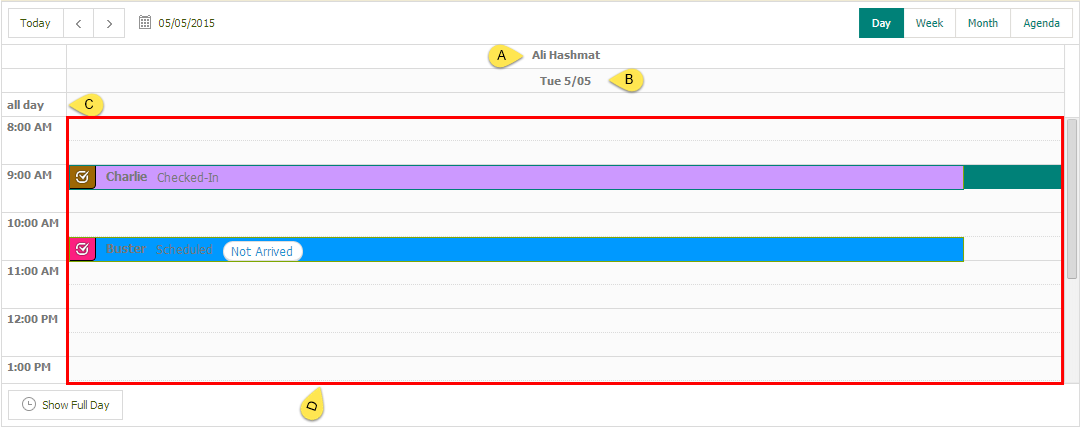
By Default the application will land on the Day View when the user navigates to scheduling module. The Day view displays all the available slots for the current day or the selected day. The Day view is divided in to 4 main rows which display
- Name of the Provider - Any provider or resource selected from the calendar selection area will be displayed on the top.
- The date of the calendar - The date will be displayed according to the user’s selection. By default the current date will be displayed.
- An all-day slot - The all-day slot displays appointments which have been scheduled for 24 hours or more. User will not be able to create all day appointments by selecting the slot but will be able to edit any appointment that is being displayed. In order to schedule an all-day appointment the user will select any available slot in the appointment area and set the start and end time to be 24 hours or more.
- Appointment Area - This area is where all the appointments are displayed, created, deleted, cancelled and status is changed.
Multiple Providers
When multiple providers/Resources are selected then the only difference is that the calendar is then divided into multiple sections depending on the selected entities from the calendar selection area.
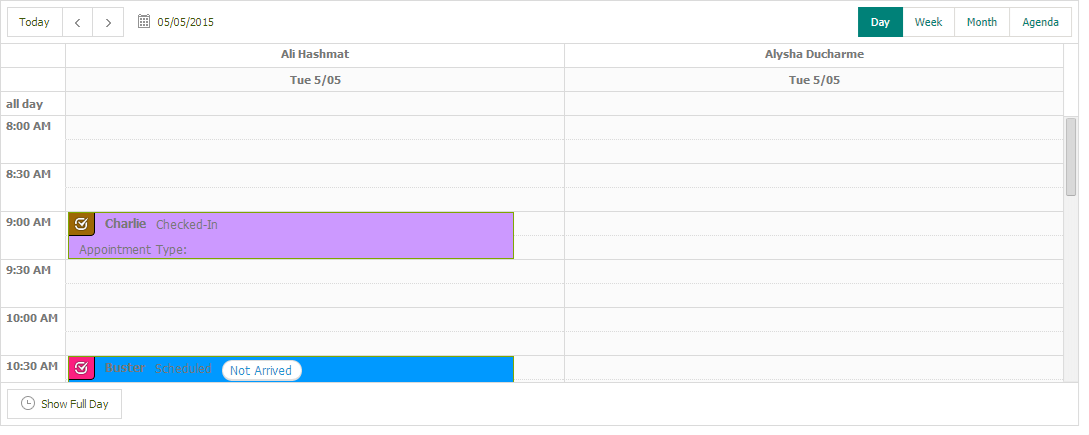
Week View Option
Single Provider
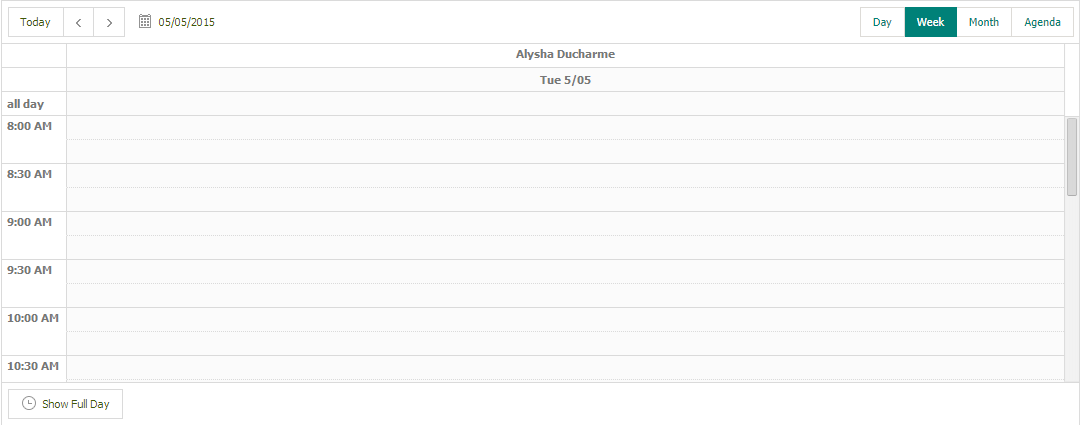
Multiple Provider/Resource
Just like the day view the Week view will display the weekly schedule of every entity selected from the calendar selection area.
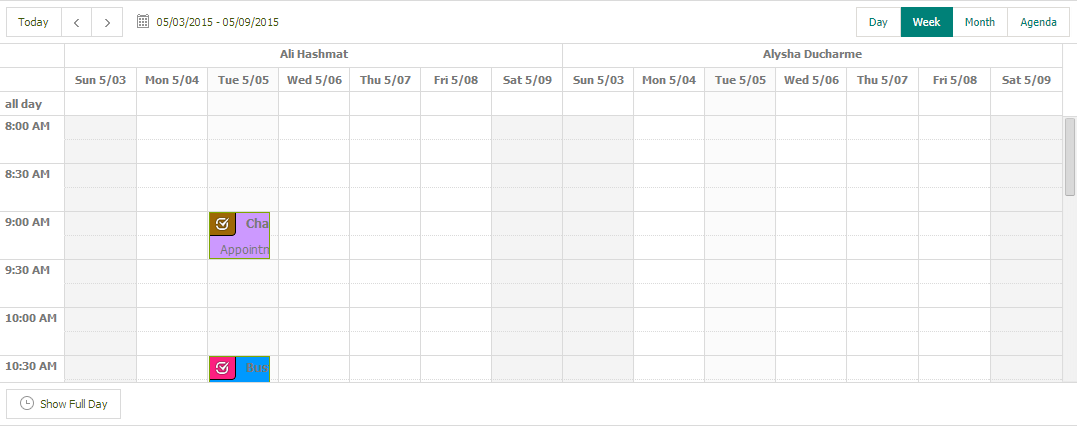
Month View Option
Single Provider
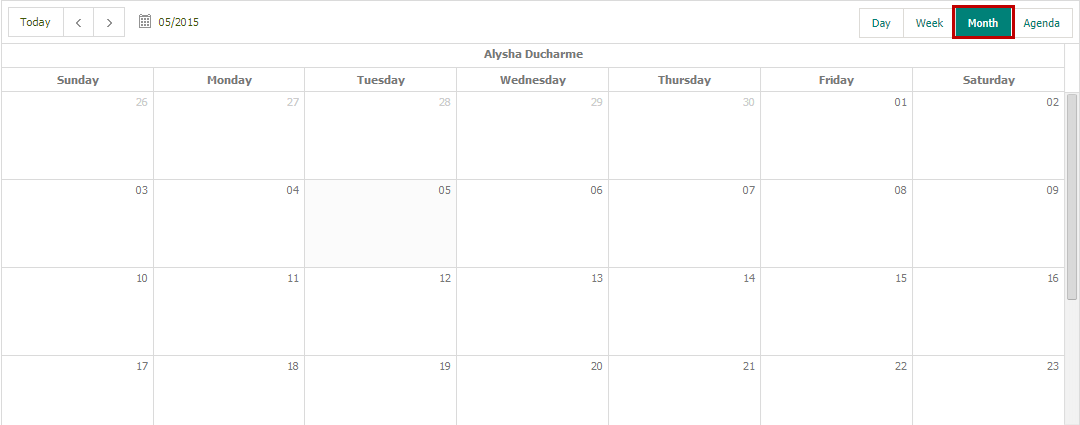
Multiple Provider

Agenda View Option
The agenda view only displays the appointments created for a selected provider or resource. The agenda view displays scheduled appointments for 7 days from the selected date inclusive.
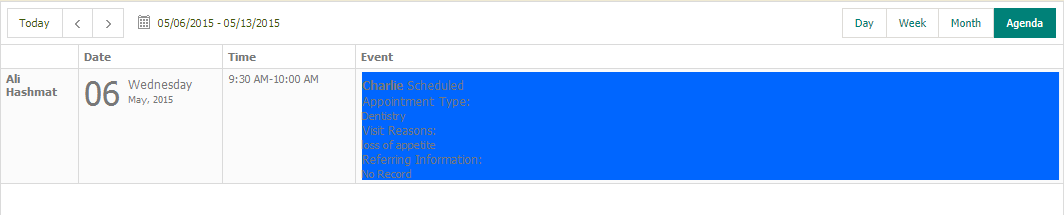
The system allows users to view the scheduler in Agenda view for multiple providers as well.
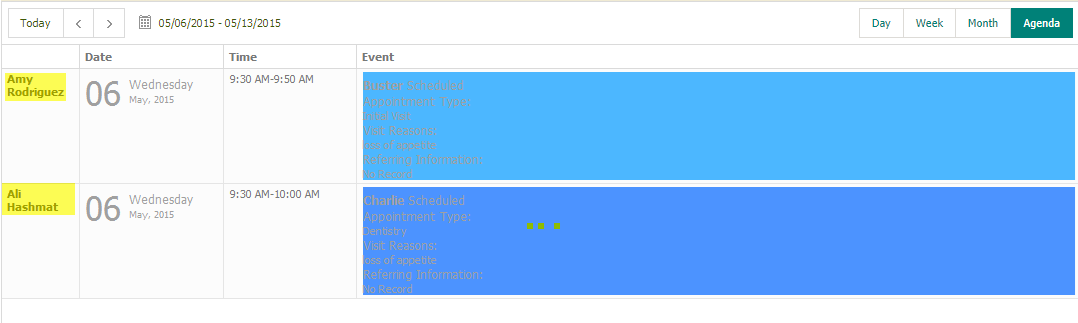
The agenda view displays:
- Selected entity (Provider or resource)
- Date of the Appointment grouped by the entity
- Time of the appointment grouped by date
- Appointment details
Once all the schedule appointments are displayed for the date range for particular entity the next entity’s information is displayed accordingly.
For logged in user, the state is saved for scheduler when user logs out from the application. When user logs in again, the scheduler will be displayed in the same state as before logging out.
Calendar Area
All the provider calendars are displayed as available by default. The available slots are displayed according to the Scale that has been selected as well as the Full Day/Business Hours Toggle. The user will be able to create a single or multiple appointments per available slot.
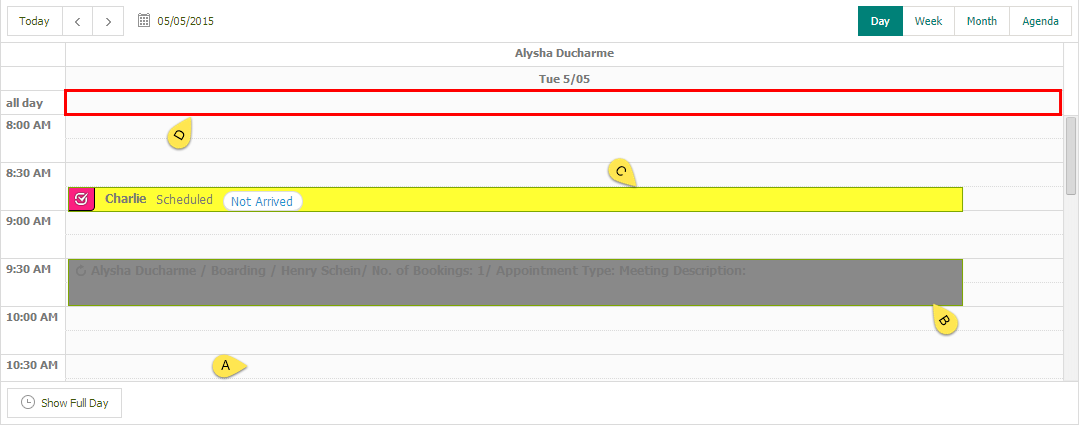
In the calendar area a user would typically find
- Available Slots - The user can schedule an appointment anywhere within the Calendar Area except for the All-day section. The user can create an appointment by double clicking on the gray area.
- Place Holder - Place holders are created as information appointments from the Master Schedule (Settings > Scheduling > Master Schedule) that gives the user the idea what kind of appointment the provider is available for.
- Appointment - The user will be able to create an appointment in any of the available slots. Once created, the appointment will be displayed with a background depending on the appointment type that has been selected. All appointments except Deleted Appointments are displayed.
- All Day Appointment - Any appointment scheduled with the difference between the start and end time being 24 hours or more will be displayed in the All-day section.
Full Day/Business Hours Toggle
The user has the option to view the scheduler for full day or for business hours only. There is a toggle button at the bottom of the screen that the user can click to switch between full day and business hours view. Users can click on  to view the scheduler for business hours.
Note: Those appointments created between the practice-specified business hours are displayed if “business hours” is selected.
Block Schedule
User has an option to block the schedule of single or multiple providers during specific hours of the day(s). User clicks on  to specify the hours during which appointment cannot be scheduled.
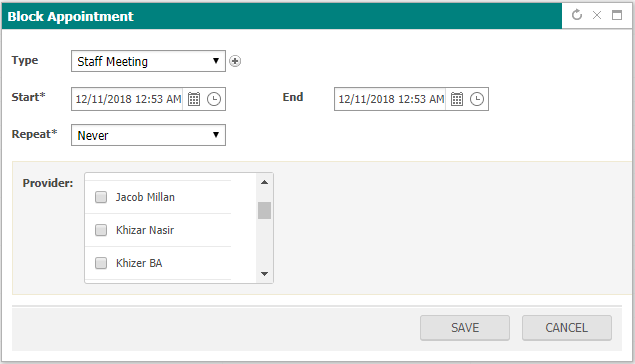
To block appointment, user has to specify
- Block Type (can be selected from dropdown or can add a new type using
 button)
 - Start and End time for appointment block.
- Repeat in case the calendar needs to be blocked on a recurring basis
- Provider(s) for which the calendar needs to be blocked
Once necessary information is specified, changes are reflected on the calendar.
Day Note
User has an option to add a day note for a single day or multiple days with reoccurrence. User clicks on  to specify the start and end date, repeat and Note before saving which will then display on scheduler for specified day(s).
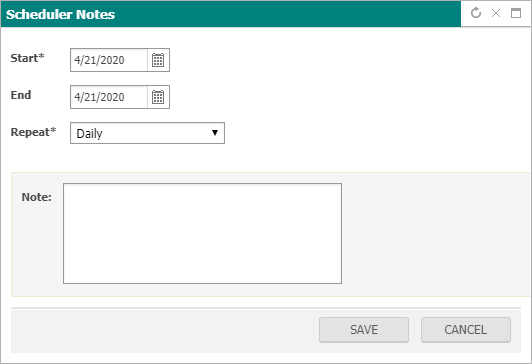
To add day note, user has to specify
- Start and End time for note.
- Repeat in case to view on a recurring basis in scheduler
- Note which needs to be displayed on scheduler
Once necessary information is specified, then note will be available on scheduler.
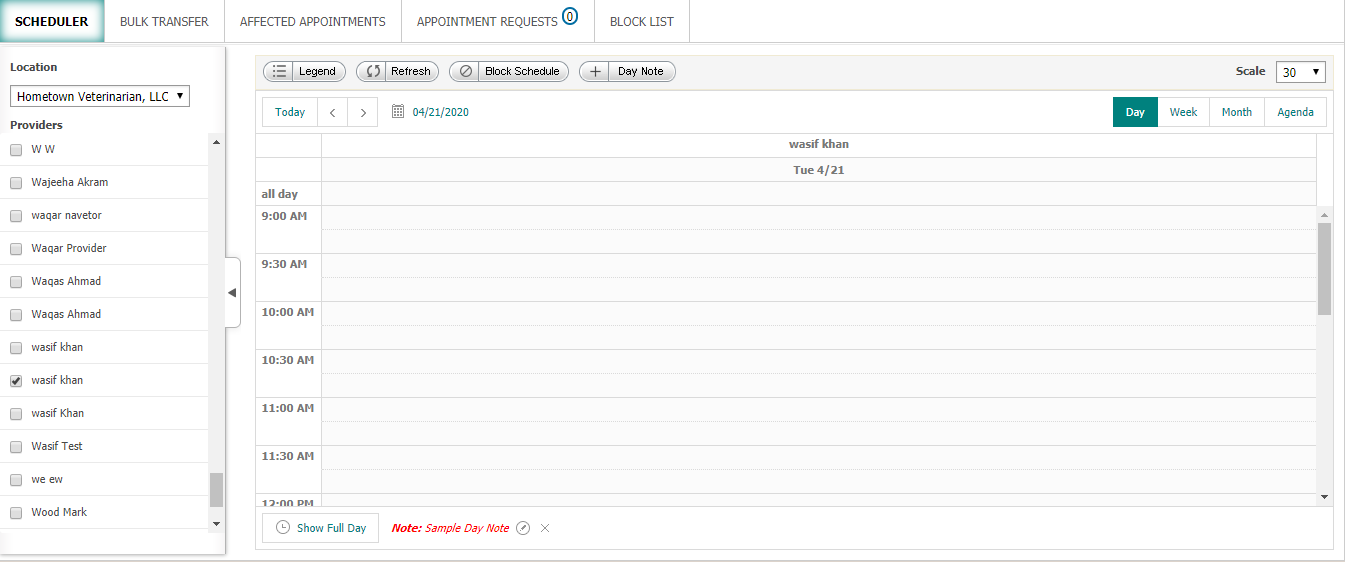
For Single Provider
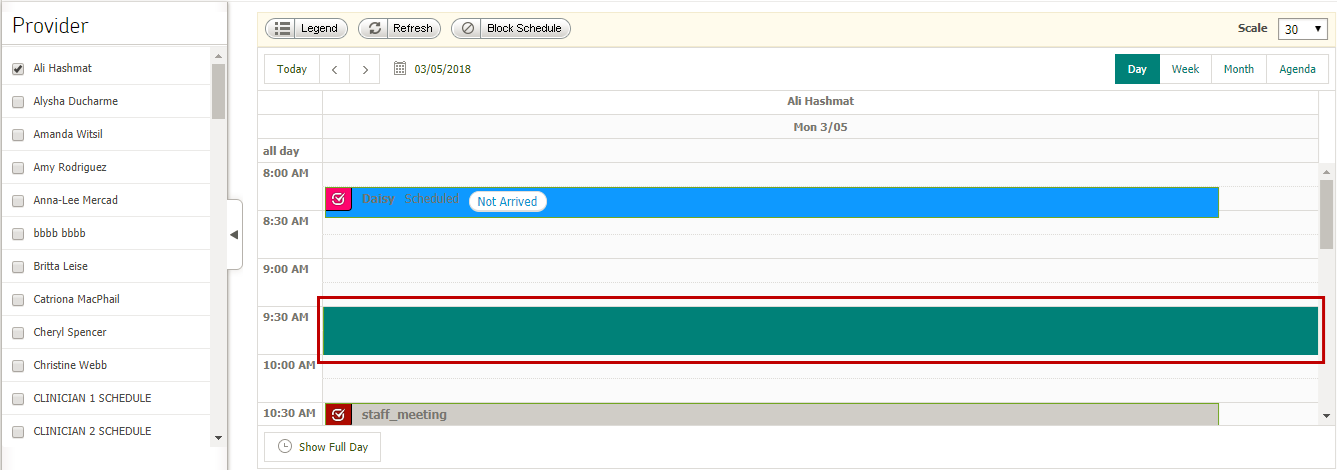
For Multiple Providers
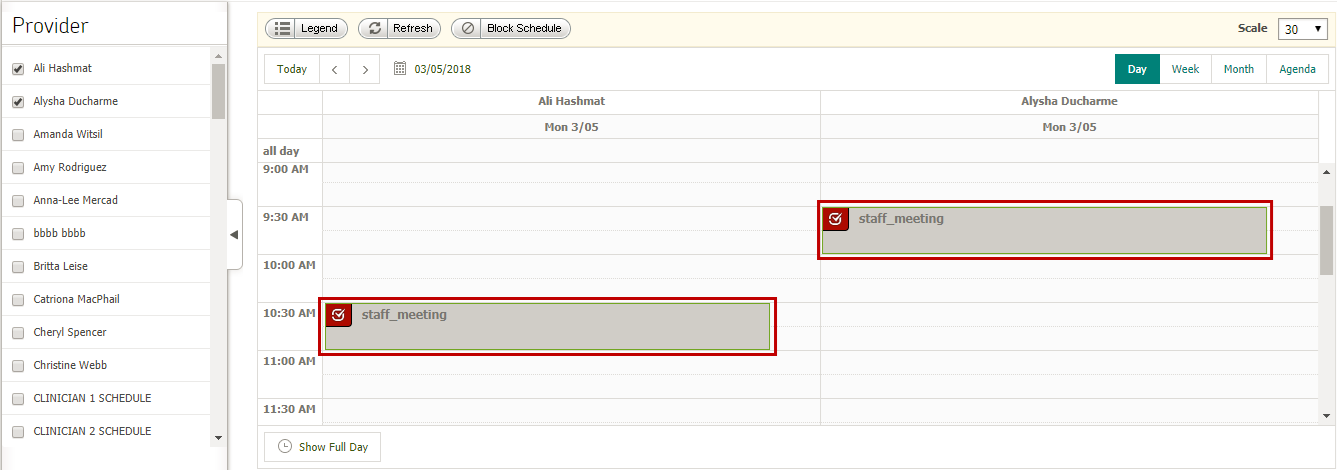
Unblock Schedule
User has an option to unblock the blocked schedule of a provider for a single occurrence or multiple occurrences if block is recurring. User clicks on  icon against a specific block on scheduler
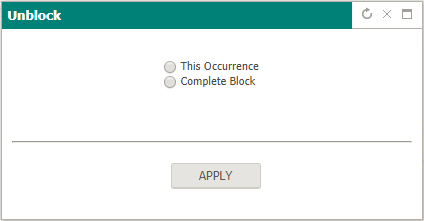
- If user selects this occurrence option, then block will be removed only for current occurrence.
- If user selects complete block option, then block will be removed for all recurring occurrences.
Once necessary action is made, changes are reflected on the calendar.
Calendar Selection
User has to select provider(s)/Resource(s) from its respective pane for relevant calendars to be displayed in calendar area.
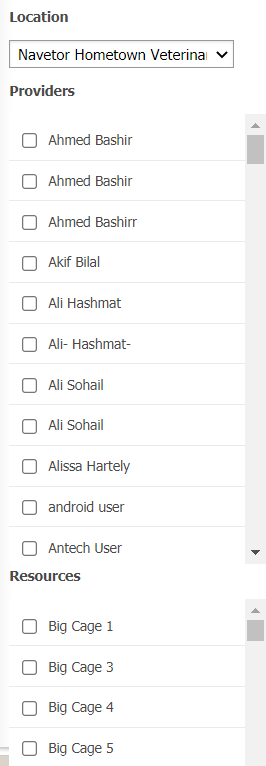
Appointment Search
User can search future/all appointments of patient through patient/client search on the scheduler. Then after selecting appointment system will navigate to the appointment by changing date time of the scheduler.
Transfer Appointments
Scheduling > Transfer Appointments Tab
The main purpose of the Transfer Appointment is to give the ability to the user to transfer single or multiple appointments from one provider to the other.
Transferring appointments is a 3 step process where the user would need to:
- Search for the appointments of a particular Provider
- Select the appointments that need to be transferred
- Transfer appointments to another provider

The first step is to select the provider whose appointments need to be transferred.
- The user needs to select the start and end date of the appointments.
- User selects the provider.
- After setting the Provider details, the user needs to click on “Search”.
- Once the search results are displayed the user can select the appointments that need to move.
- The user selects the appointment to be transferred from the search results and then selects the provider to transfer the appointment to.
- The user then clicks on Transfer. After a successful transfer, the following prompt will appear.
- Once the appointments have been transferred, they will be removed from the list and displayed in the calendar of the provider which the appointments were transferred to.


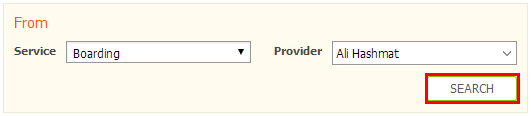
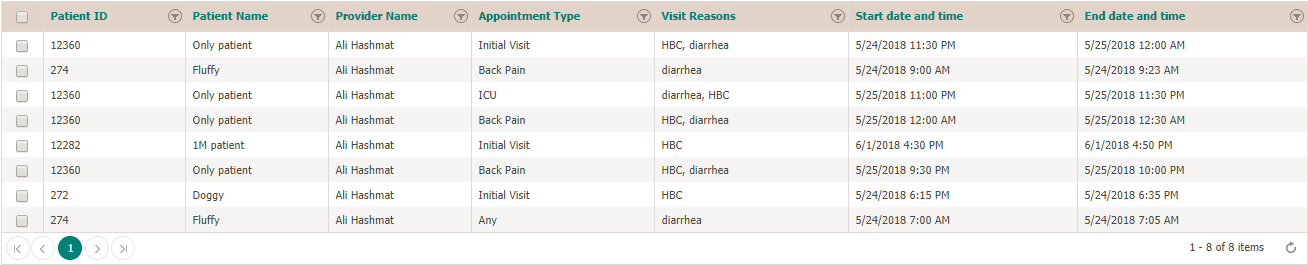

Affected Appointments
Scheduling > Affected appointment tab
The main purpose of affected Appointment tab is to give user the ability to either reschedule appointment for same provider or from one provider to another as a consequence of current appointment conflicting with the blocked schedule of a provider.
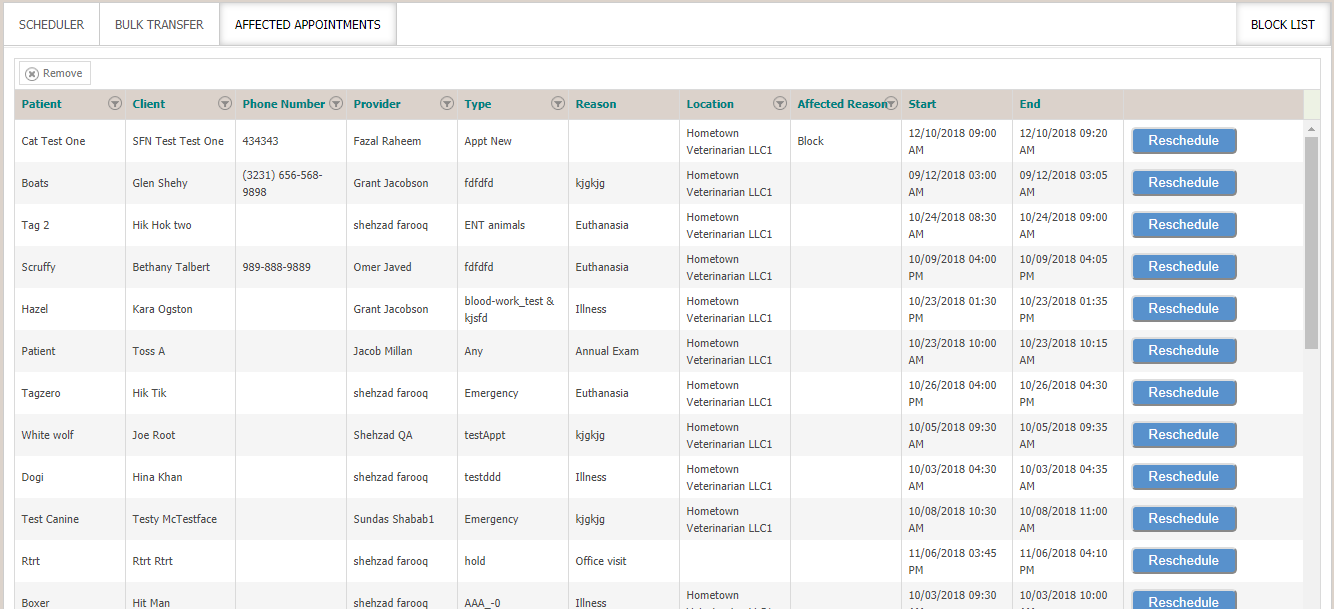
User clicks on  button to specify the details of appointment being rescheduled either for the same provider or from one provider to another.

Once user specifies the necessary details to reschedule an appointment, on clicking save button, appointment is updated and removed from the list of “affected appointments”.
Appointment Requests
Scheduling > Appointment request tab
The main purpose of Appointment request tab is to give user the ability to either schedule the appointment by mapping it on any current/new patient or remove the appointment request.
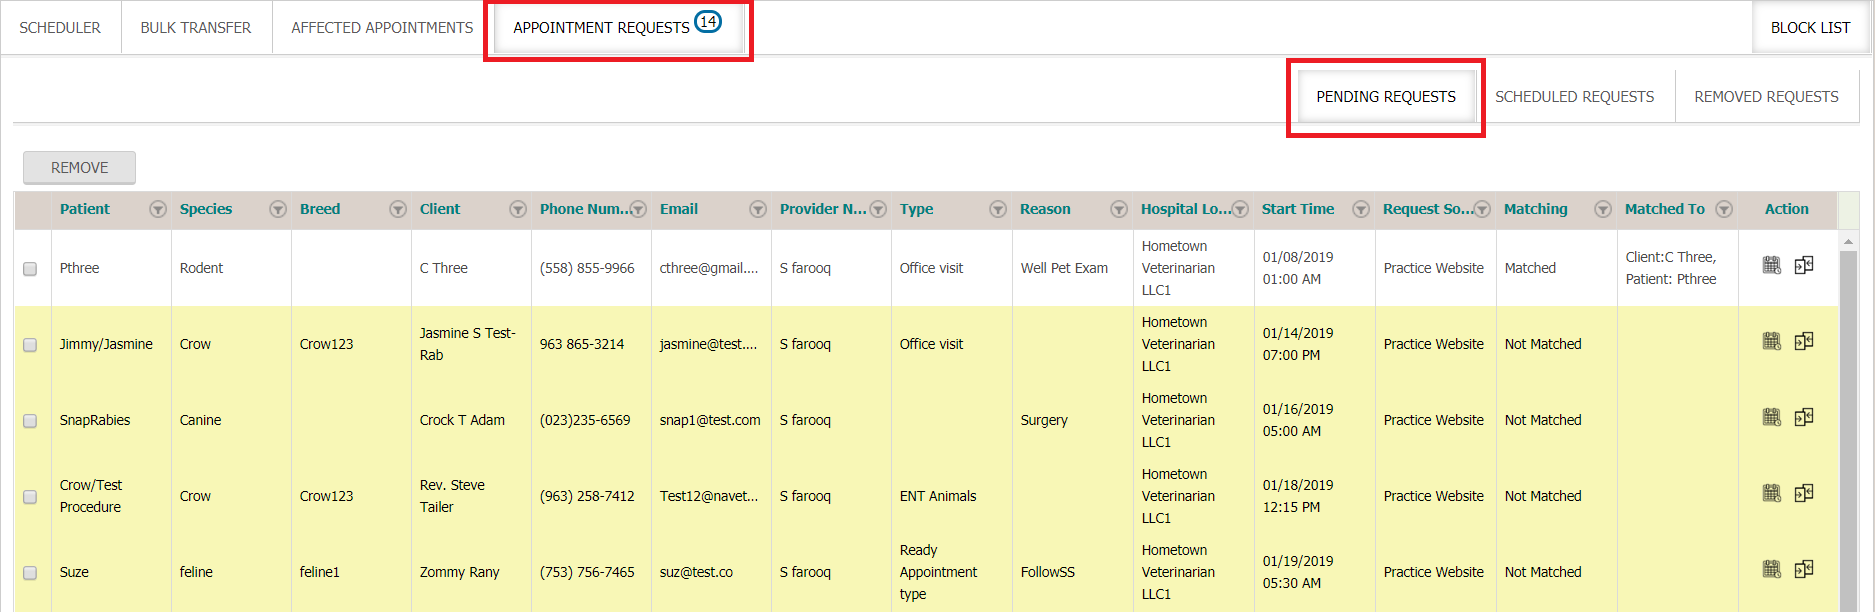
On this tab user can view all the requests received from practice website. All requests which are not matched to any client/patient or new client & patient is not created will be shown as Not Matche and these rows will be highlighted with yellow color for differentiation. Where the record is matched or created new, will show Matched.
Scheduling button will only clickable after client/patient mapping. When user click on mapping icon, then a popup window will appear which display the request data and suggested matching on comparing Client Name or Patient Name or Client Email or Client Phone Number.
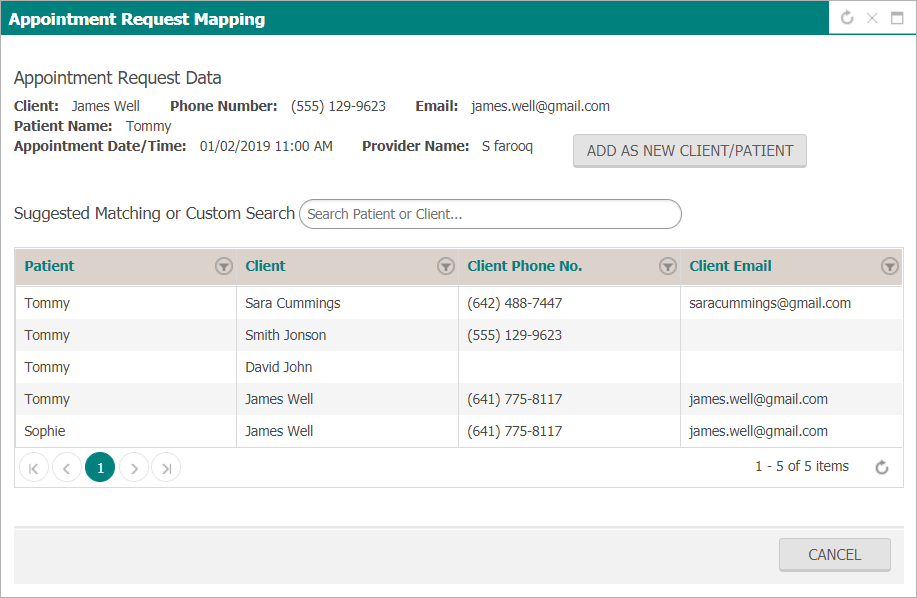
User can add as new client/patient by clicking on button and all the data will populate in editable fields.
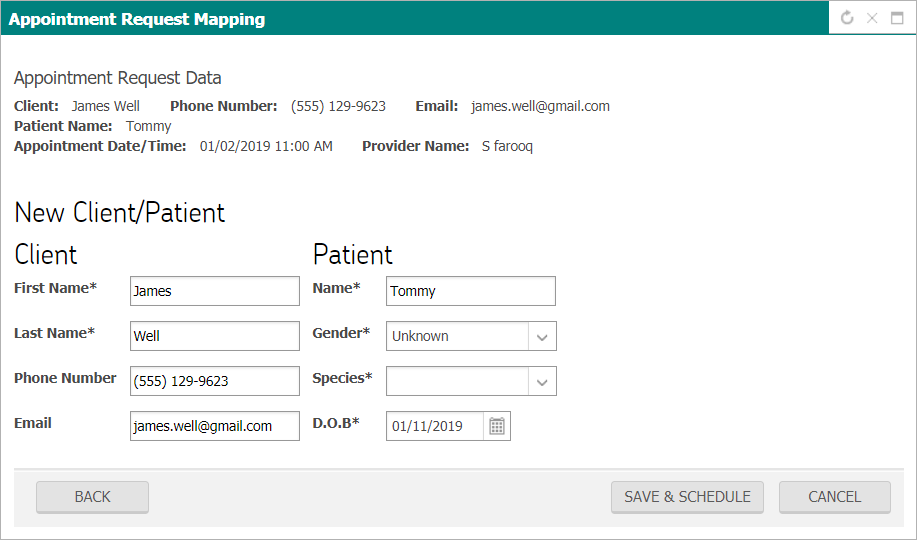
From here user can click Save & Schedule button and system navigates to appointment scheduling popup.
User can select any record from the list under suggested matching. User can also search client or patient through search bar from custom search.
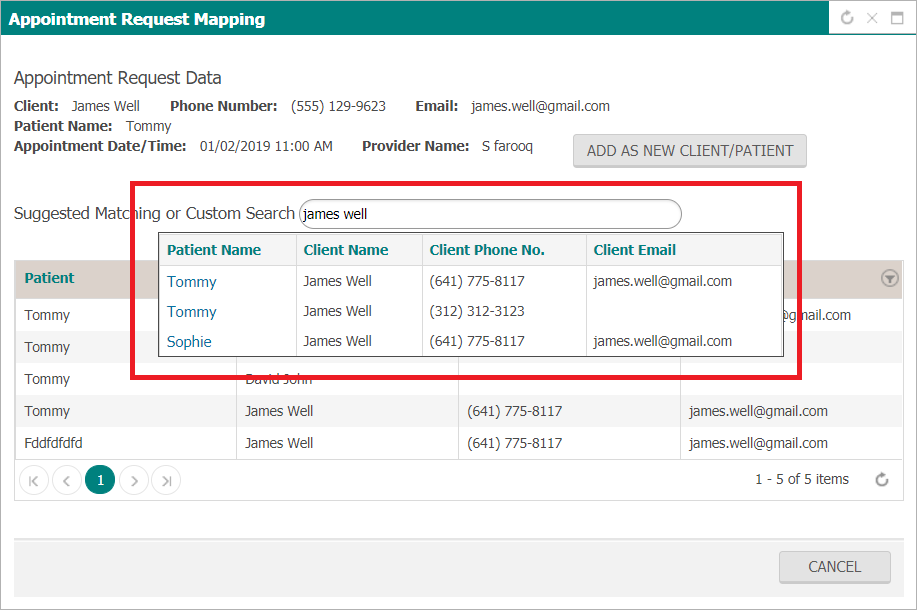
After selecting client/patient form search bar list or suggested mapping list, it will load on screen.
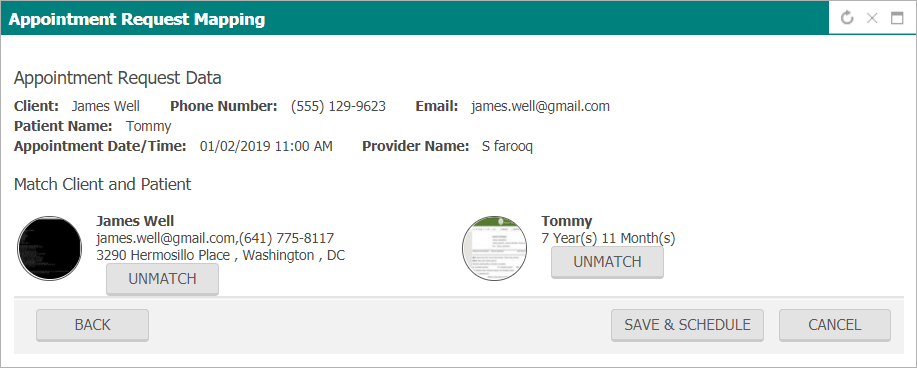
If user “unmatch” client then client and patient record will be removed from screen and user have an option to search or add as new client/patient after clicking “BACK” button. If user “unmatch” patient only then there will be a button, “add as new patient”.
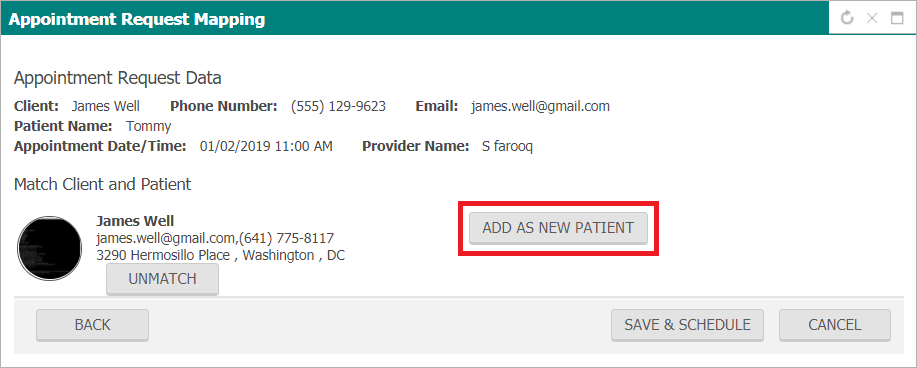
When user click on this button, then editable fields with patient data will populate where user can edit details.

When user click on Save & Schedule button, system will navigate to appointment schedule popup window through user can create appointment.
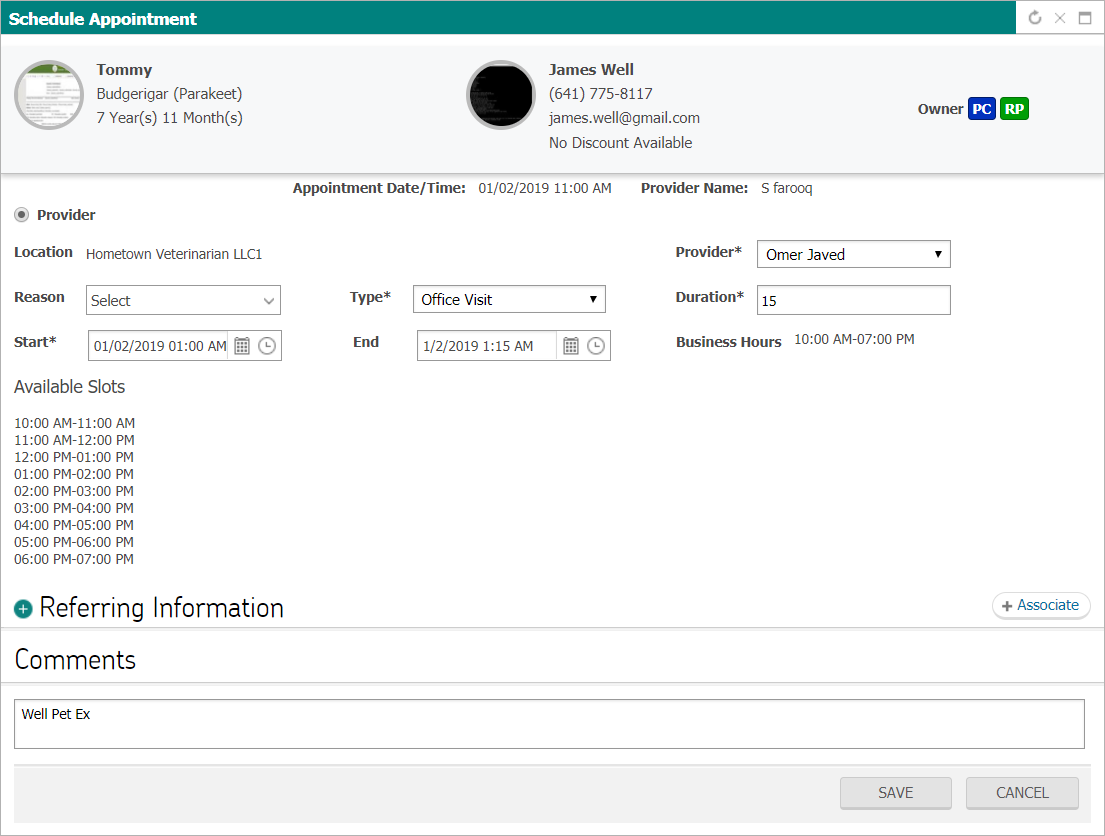
On this window user can create appointment. User can create appointment for those patients as well where client/patient data matched. If reason will not match to NaVetor app defined values then it will display in comments.
In pending appointment, tab user can remove multiple appointment request by select through checkbox and click remove button.

User can also view scheduled appointment against the requests received on “Scheduled Requests” tab.
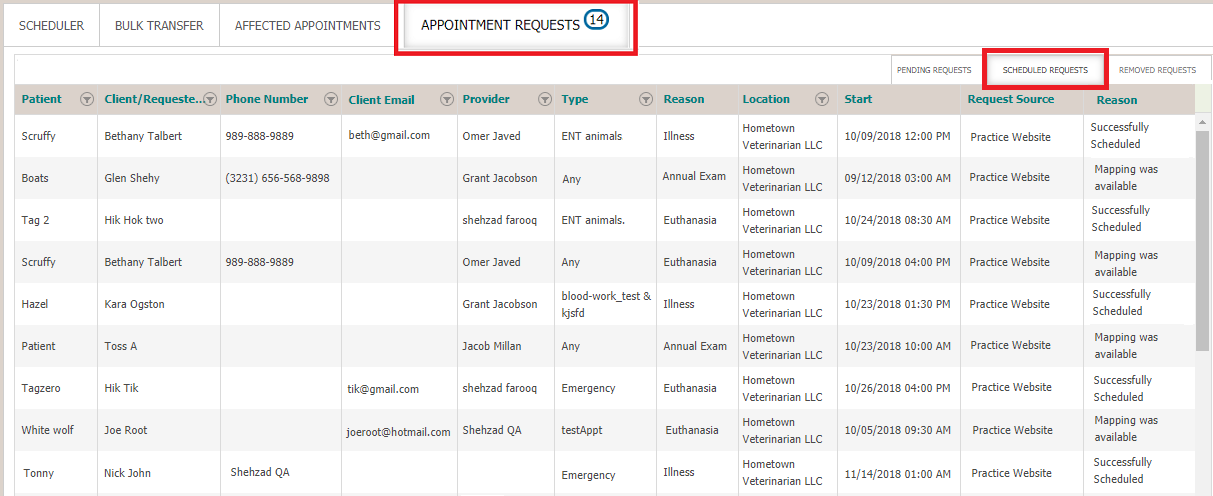
User can also view removed requests which user removed on “Removed Requests” tab.
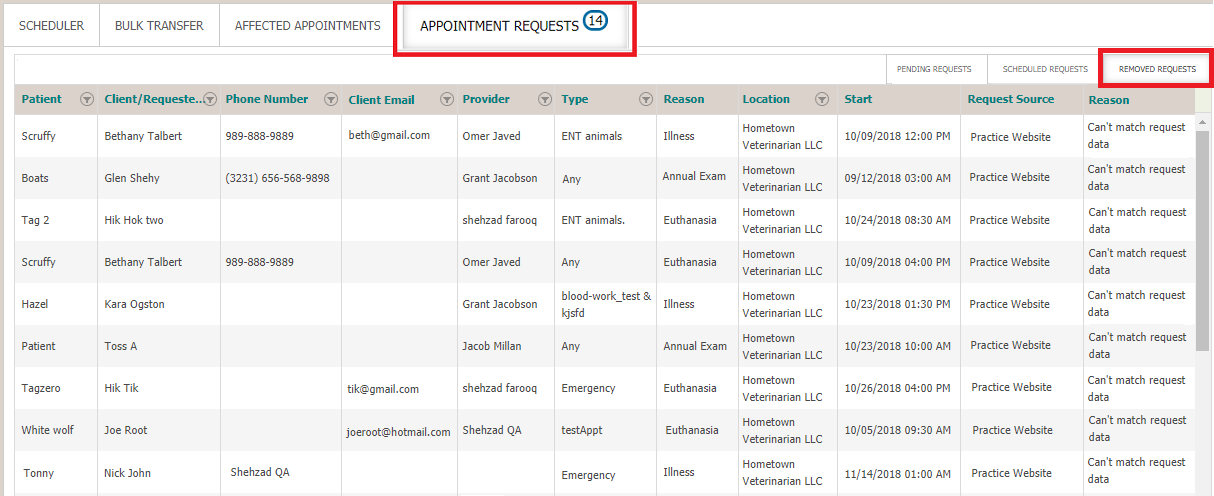
Block List
Scheduling > Block List Popup
The block list has details of all the blocks created against various providers within a practice. This list specifies the name of the block, provider for which block has been created, start/end time of block, block pattern (in case it’s a recurring block) and block status.
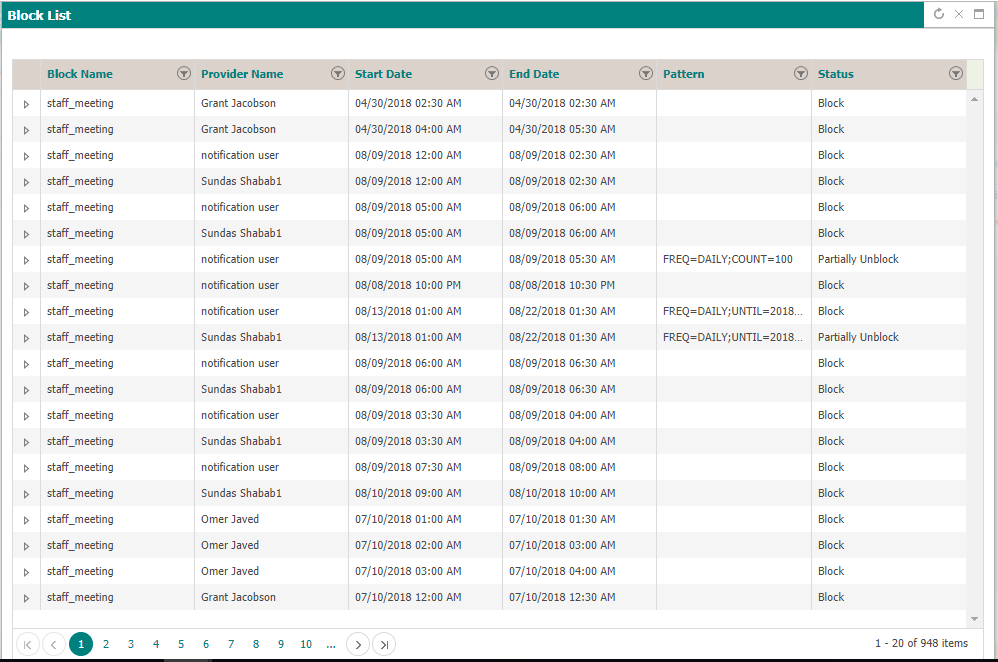
Appointments
In this section the following items will be covered:
- Master Schedule for Provider
- Create/Book Appointments
- Edit Appointments (includes Reschedule)
- Change Status of Appointments (Includes Delete and Check-In)
- Request Resource Appointments
- Viewing Appointment Details
Master Schedule for Provider
Settings > Scheduling > Master Schedule
An authorized user has the ability to create informational place holders that are displayed on the provider calendar accordingly.
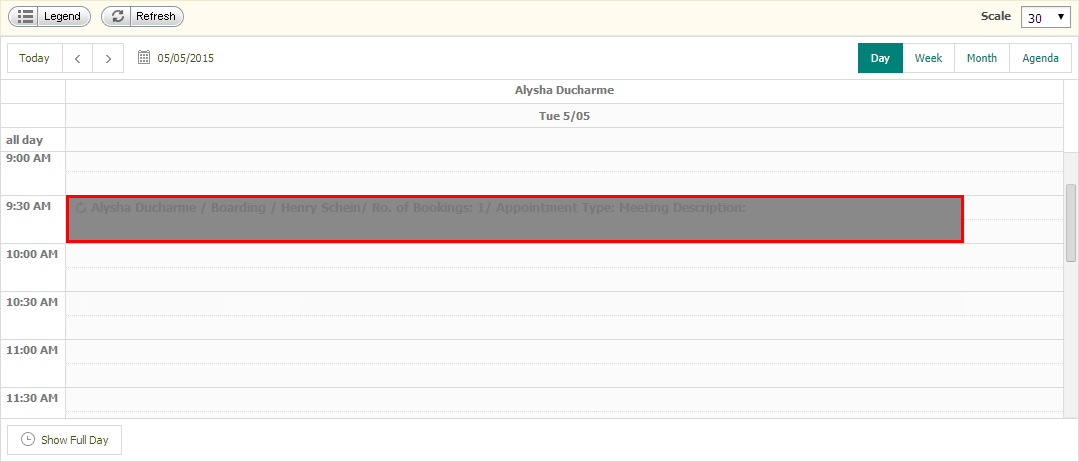
Once the user navigates to the “Master Scheduler” the user can see all the previously created placeholders, if there are any.
Master Scheduler
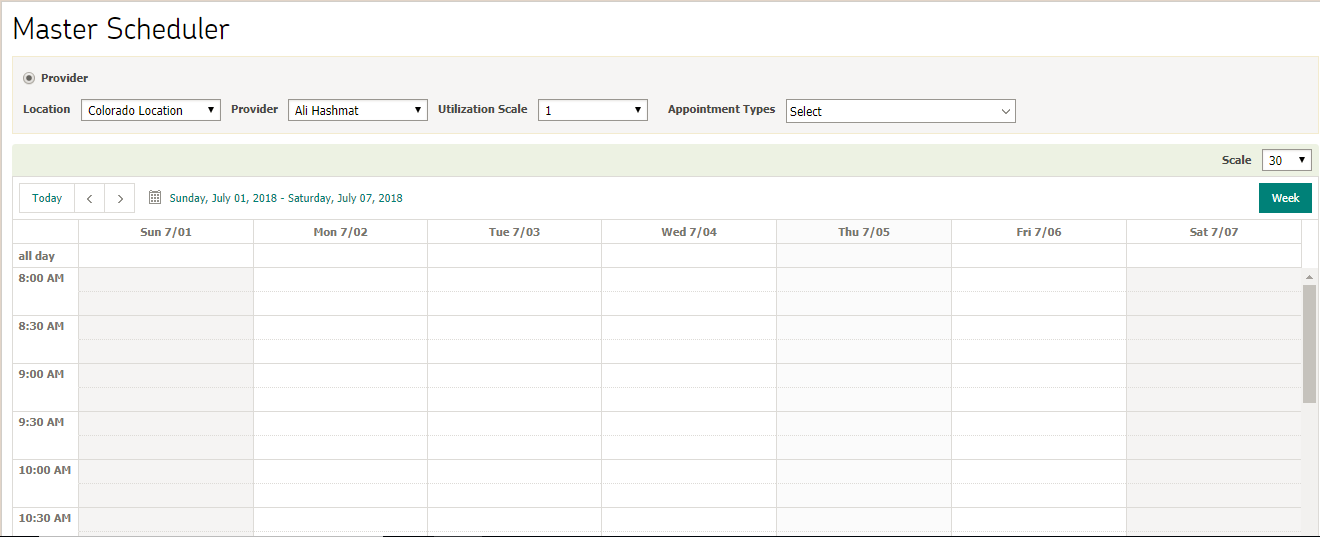
The provider master scheduler can be divided into 2 sections:
- Place Holder Filter
- Place Holder Area
Place Holder Filter

When the Provider option is selected, the user can see a set of 4 lists that are mainly concerned with the master scheduler. These lists determine the mandatory factors required during scheduling.
- Location - The list contains all the locations that the user is associated with. The default location of the user is selected.
- Appointment Types - Will display all the appointments types.
- Providers - Will display all the providers.
As the user starts selecting different options, the Place Holder area starts filtering out accordingly.
Once all options are selected, the user can create a place holder.
Place Holder Area

The place holder Area provides the ability to the authorized user to:
- View All created Place Holders
- Create Place Holders
- Edit Place holders
The view is similar to the main scheduler apart from the fact that the place holder area is only in Week view. The User can still change the Scale as well as the Full Day/business hours toggle the same way as the scheduler.
View all created Place Holders
User can view all the place holders within the location. There are 2 main types of place holders, one being a single place holder and the other being a part of recurrence. Those place holders can easily be differentiated by  .
.
On hover the application will display “Provider Name” / “Location” / No. Of Bookings: “Number” Appointment type: “Appointment type”
Create Place Holders
Once the user has selected the location, Appointment type and Provider the user will be able to create a place holder.
- In order to create a place holder double click on an available slot. The application will display the create place holder screen.
- The start and end time will be according to the slot selected which can be changed.
- The user can select the “All day event” option for which the start and end dates will be required.
- The user will have recurrence option based on daily, weekly and monthly. By default it is set to “Never”
- Daily - The user has the capability of repeating the same place holder according to number of occurrences or till a particular date.
- Weekly - The user has the capability of repeating the same place holder on particular days from Sunday till Saturday according to number of occurrences or till a particular date.
- Monthly - The user has the capability of repeating the same place holder on a particular date of the month according to number of occurrences or till a particular date.
- If the user wishes to put in comments or instructions the user can put in text in the description area. The description will only be visible when the place holder is in edit mode.
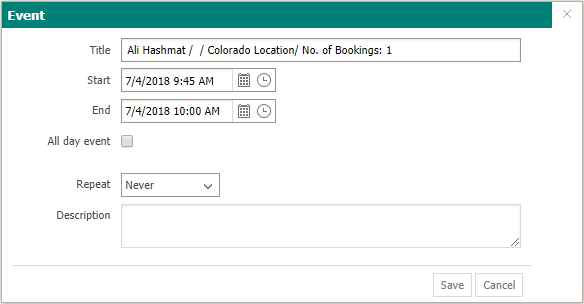
By default the Title will display “Provider Name” / “Location” / No. Of Bookings: “Number”.
The number of bookings only signifies the number of appointments that should be booked ideally during that time frame but it is still not a restriction. The number of bookings is only for information purposes.


Edit Place Holders
The authorized user will have the ability to edit place holders either from the Place Holder area or by selecting a placeholder and opening it in editable mode.
Place Holders Area
From the Place holders’ area the user will be able to move, increase/decrease duration and Delete place holders.
In order to move, the user can click and drag the place holder to anywhere in the Area. If the appointment is part of a recurrence the application will ask the user whether the current occurrence needs to be changed or the entire series.
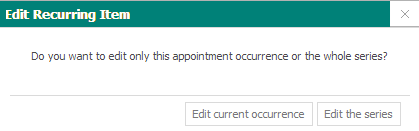
By dragging the border of the place holder, the user can increase or decrease the duration. Once again if the place holder is part of a recurrence, the user is prompted accordingly.
On hover the user can select the delete action in order to delete the placeholder. Once again the user has the option to delete a single occurrence or the entire series.
User will be able to edit all aspects of the Placeholder by double clicking on it. The same screen as the Create would open up where the user will be able to update all the information.

The user will also be able to delete the placeholder by selecting the Delete Action. If the place holder is part of a reoccurrence then the user will be prompted.
Note: The user cannot delete an occurrence while editing it. To delete it, the user needs to go back to the placeholder view on the Master Scheduler as illustrated above.
Scheduling Appointments
Before scheduling appointments, the user needs to make sure that the provider calendar is selected and the patient is selected. Once the user has selected the calendar, an appointment can be scheduled in any of the available time slots.
To schedule an appointment, the user needs to double click on the appointment slot. The system shall refresh to reveal the appointment details screen. The user will search the patient or client, fill in the appropriate details and click on “Save” to complete the scheduling process.
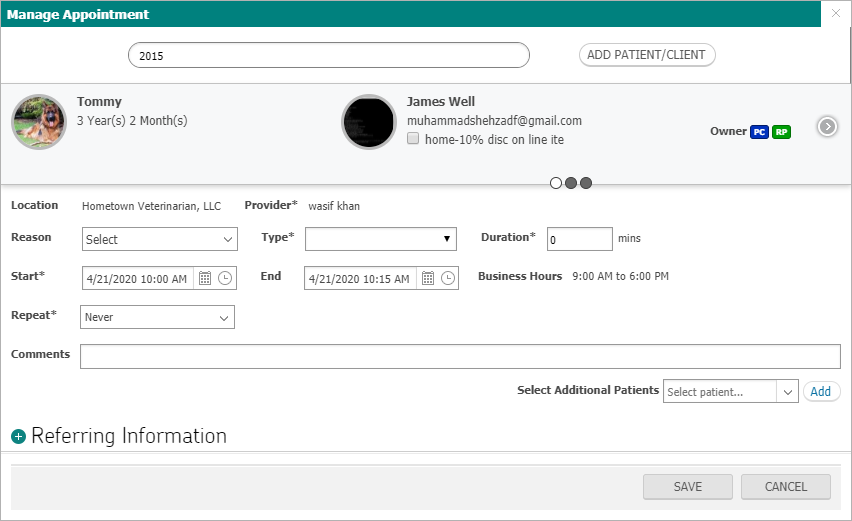
The Manage Appointment screen has four main segments.
- Patient Search
- Add Client/Patient
- Selected Patient and Client
- Appointment Details
- Additional Patients
Patient Search
The system requires the user to search for a patient from the appointment management screen.
After putting in the search criterion in the search bar, the user can click on search. The application will display the search results accordingly. User can search client or patient through their IDs assigned by application.
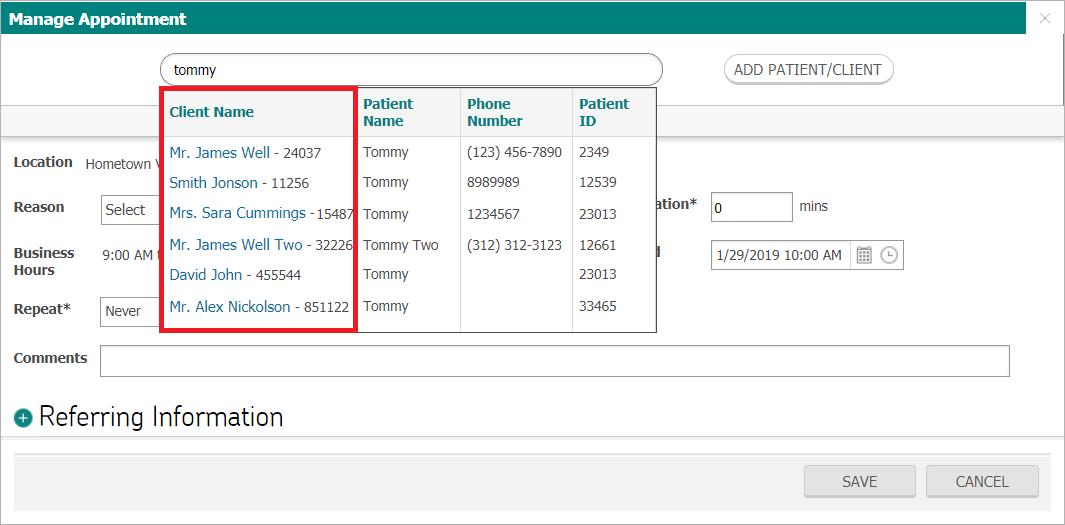
The user can select the client name and the associated patient and client details will be auto populated on the appointment management screen.
Add Patient/Client
The system also allows adding client/patient records within the Appointment scheduling module. This can be done by clicking on the  button which expands a section allowing user to input client/patient information.
Once the client/patient information has been entered, on clicking the ‘Save’ button, a new client and patient records is registered and the information is also loaded in the banner.

Patient and Client information on the Appointment Management Screen
The selected patient and client from the search will not affect the banner (until selected).
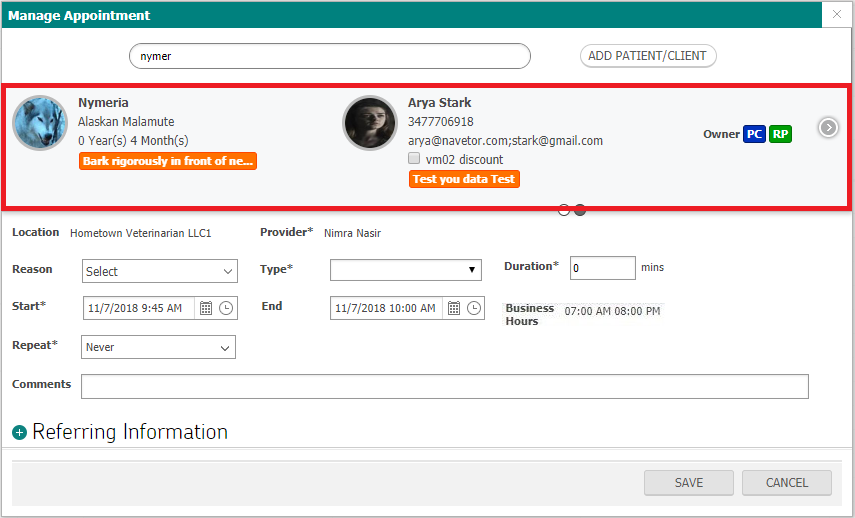
Appointment Details
Requisite information required to schedule an appointment successfully include documenting a reason for the appointment, the type of appointment and the start and end time of the appointment. User will also be able to create recurring appointment.
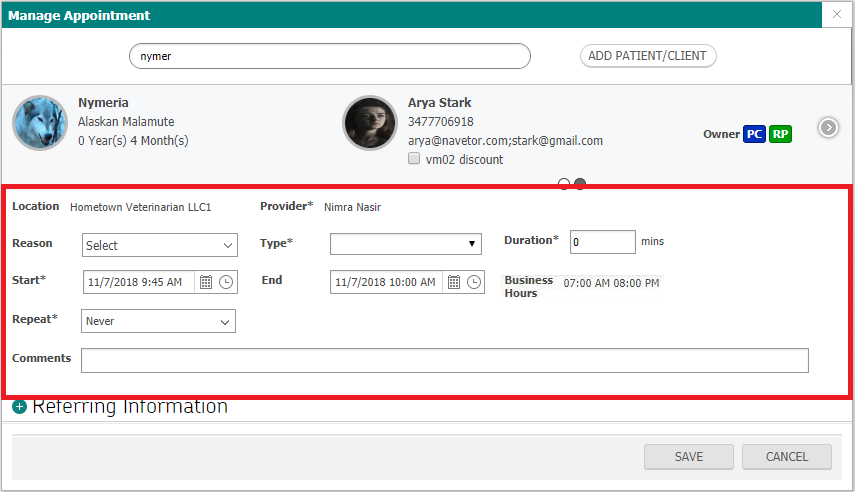
Location
This line field documents the practice location where the patient will be checked-in. In order to change the location the user needs to change the location of the calendar, select the provider and open the “Manage Appointment” screen again.
Provider
This field documents the name of the provider who will be seeing the patient. In order to change the provider the user can select a different provider and then schedule an appointment. An alternate way is to create an appointment and then transfer it to a different provider by navigating to the Transfer appointments screen.
Visit Reason
Users can also select visit reason and appointment type from respective drop down menus.
The master list of visit reason can be viewed or modified by following the workflow mentioned below:
Setting > Scheduling > Visit Reason
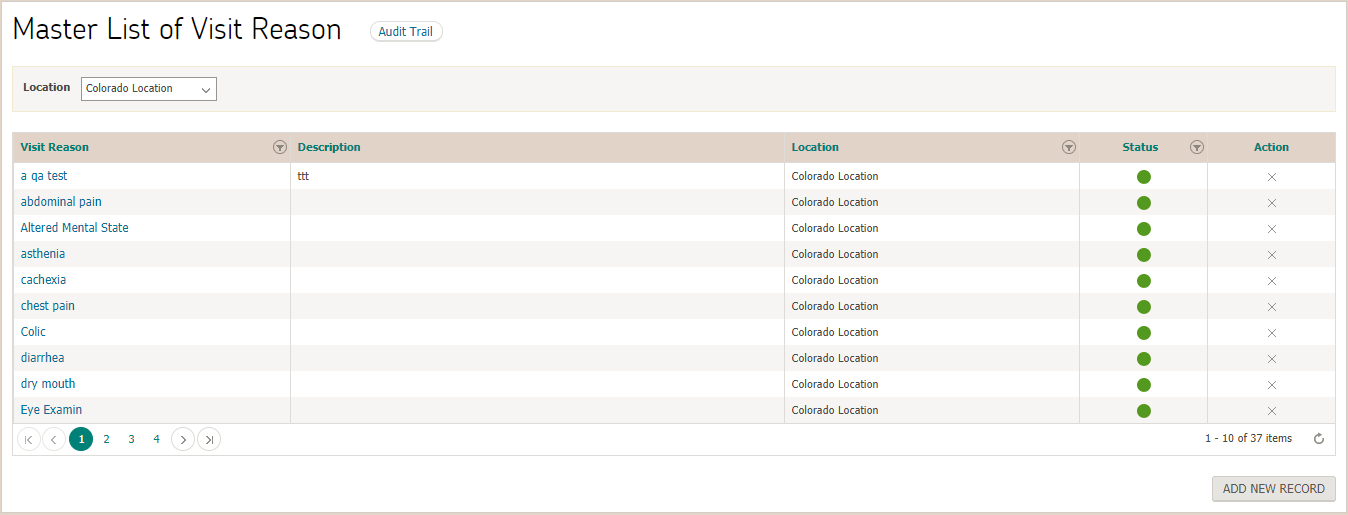
New visit reason can be added in the Master List by clicking on the  button at the bottom right corner of the screen, following popup screen is displayed
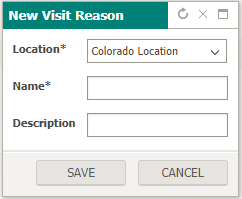
User can select multiple visit reasons from the list. Upon selecting “Other” another text field appears where the user can enter other visit reasons. Visit reasons documented in “Others” are not saved in the master list.
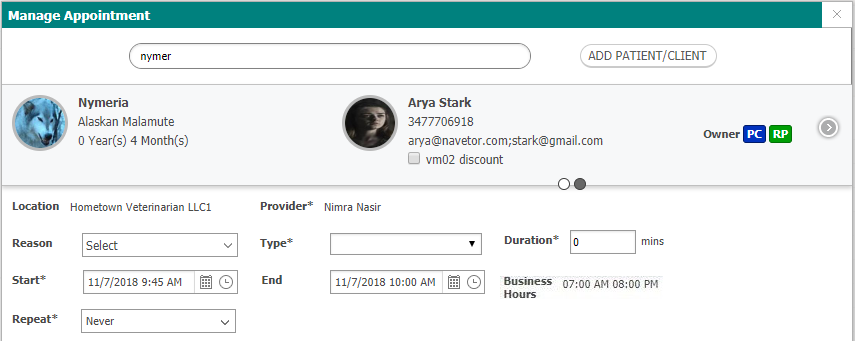
Appointment Type [Mandatory]
The type brings up records from its respective master list located in
Settings > Scheduling > Appointment type
Each appointment type is associated with a location, has time duration, background color and text color to represent it on calendar.
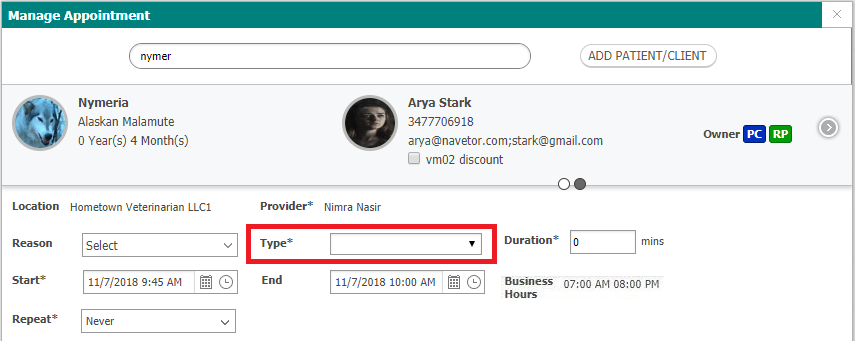
The user can set one appointment type for one appointment. The duration is populated as per the selected type and the end time is adjusted accordingly.
End Time
The end time is displayed according to the selected duration. The End time can be changed as long as it is not before the start time. The user can create a recurrence just like the master scheduler. By default it is set to “Never”.
- Daily
- Weekly
- Monthly
Additional Patients
When user select patient through the dropdown then the patient name and visit fields will populate below. User can only select those patients which are associated with the selected client.

When the user clicks on the “Add” button after selecting patient, then patient name with appointment details will be available below. Where user can change visit reason appointment type and even delete the patient if required.
Referring Information
To view or modify this information, the user needs to expand this tab.

When the user clicks on the  icon, the section expands to display all the RDVMs associated with the patient through the patient profile (if any). In case there are no associated RDVMs, it specifies ‘No records to display’ message on screen.
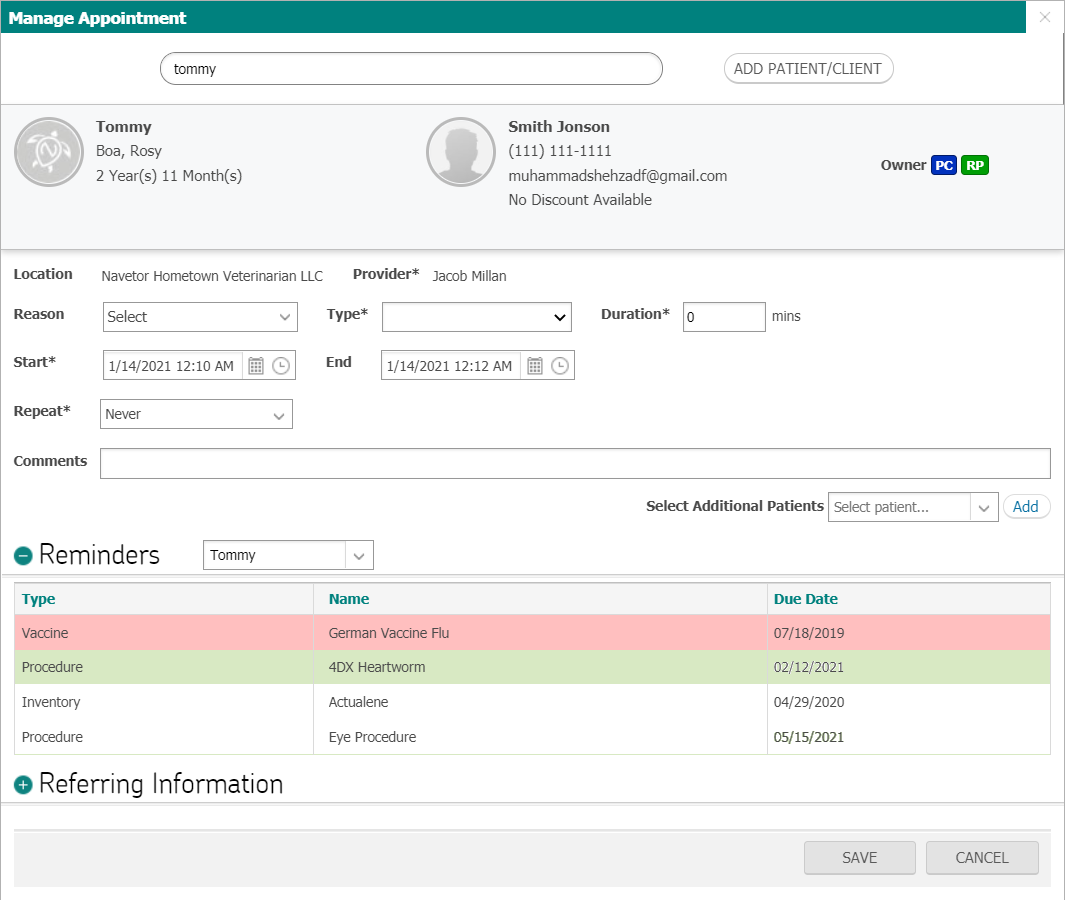
User can also associate an existing RDVM by searching from the ‘Search referrer’ search bar. On entering the search criteria, a dropdown list consisting of all records matching the search criteria are shown. Once a RDVM is selected from the list, it is loaded into the RDVM list.
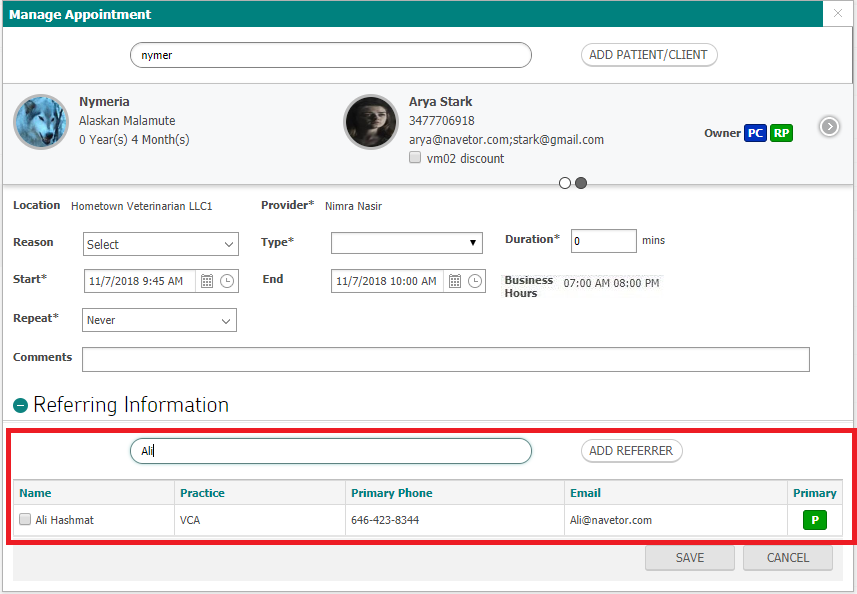
The user can associate the RDVM information with the scheduled appointment by enabling the check box.
User can also add a new RDVM by clicking on the  button which will expand the ‘Add Reffer’ section.
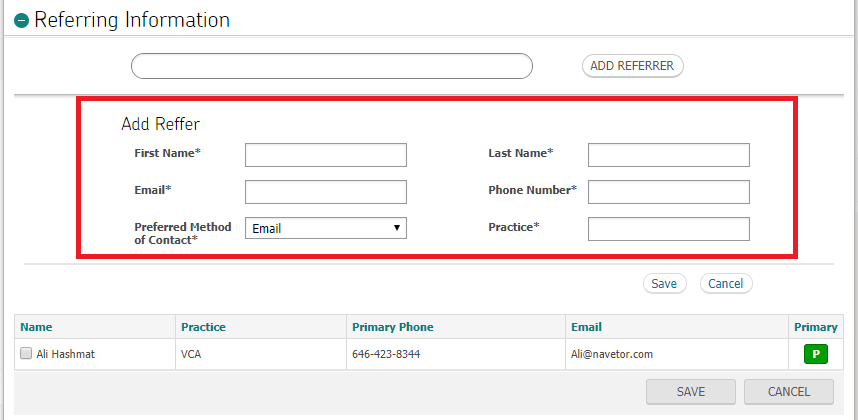
After entering the necessary information and clicking the ‘Save’ button, the RDVM is registered in the system and also loaded in the RDVM list.
Comments
In this section the user can document any information or notes on the patient’s appointment. These are displayed in the Scheduler.
Once all the mandatory information is entered and the user selects the save action the system will display the appointment accordingly in the scheduler.
Multiple Appointment Bookings
System enables user to schedule multiple appointment bookings for same slot on a provider calendar if appointment booking limit in user preferences of that provider is more than 1.
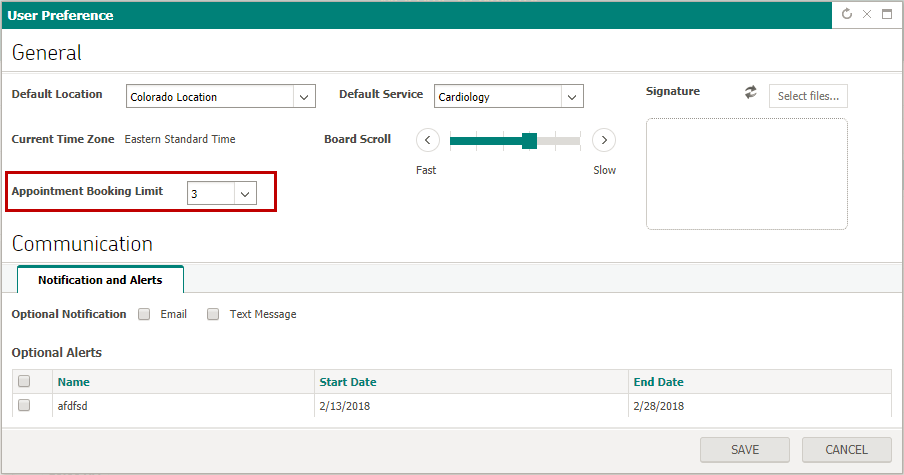
Multiple appointments for the same slot are displayed on the calendar accordingly

If appointment booking limit is 1 for a provider, on attempting to schedule multiple appointment booking, an alert message will be displayed restricting user from overbooking
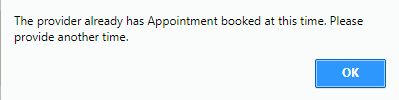
Edit Appointments
The user can edit the scheduled appointments that are not “Checked-In”. Editing can be done from the Calendar area or by selecting the scheduled appointment.
Editing from Calendar Area
The user can resize the appointment (Change the duration of the appointment) or move the appointment to a new date and time (Reschedule). Only appointments that are in “Scheduled” status can be edited.
Resize
The user can drag the bottom border of an appointment and drop it to a new end time. The user can see the start time and the new end time as the user is dragging it.
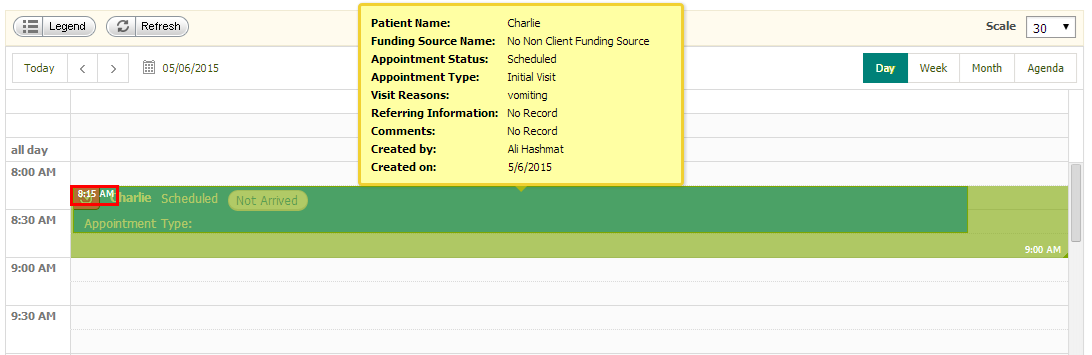
The user can resize appointments in multiple providers view mode as well. It is not possible in the Agenda view.
Move
The scheduled appointment can be moved to a different available time slot by a simple drag and drop action. This functionality works in multiple providers view mode as well.
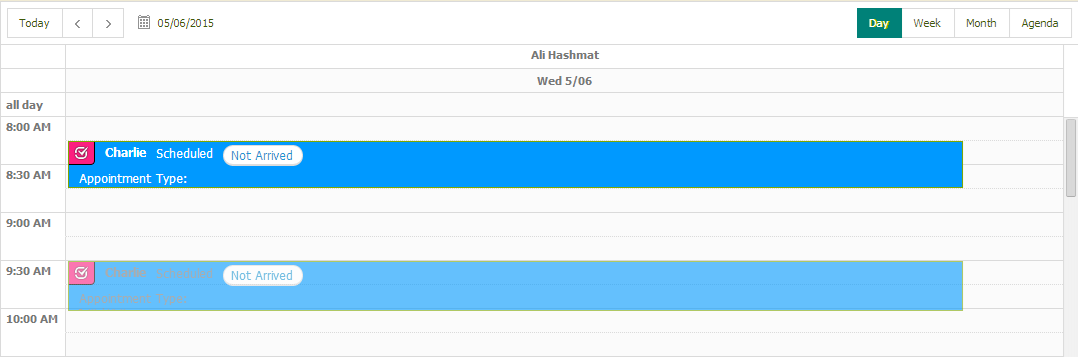
While moving, the appointment appears as a faded replica of the originally scheduled one.
Editing the Appointment Details
To edit a scheduled appointment, the user needs to double click on the appointment slot. This shall open up the “Manage Appointments” screen. The user can then make the necessary changes and click on “Save” button. After the patient checks in, the appointment cannot be edited.
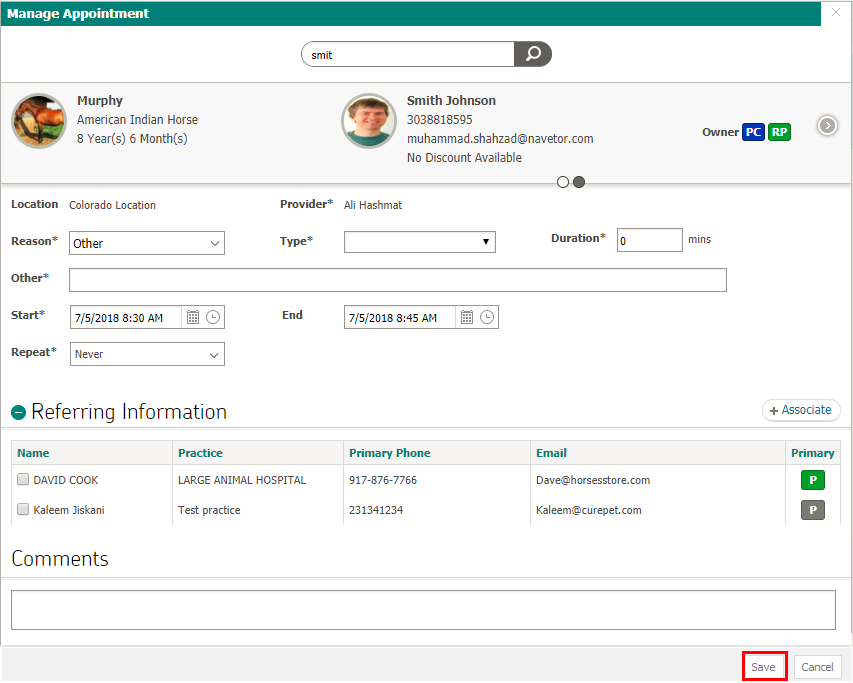
Changing the Status Appointments
When an appointment is created, the status is set as “Scheduled” by default. The user can change the appointment status by clicking on the  on the appointment slot.

The “Appointment Status” popup window appears.
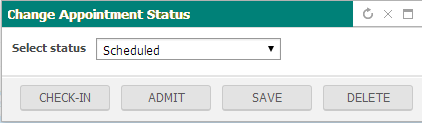
Before the patient is checked-in, the user can change the status to one of the three statuses that are listed in the drop down menu.
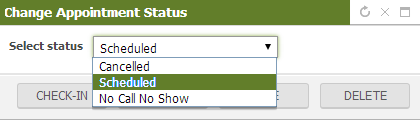
- If the appointment is “Cancelled” or “No Call No show”, the user cannot edit the appointment.
- If the appointment is set as Cancelled, the user can document the reason for the cancellation as well.
- Once the patient is checked in, the appointment status cannot be changed.
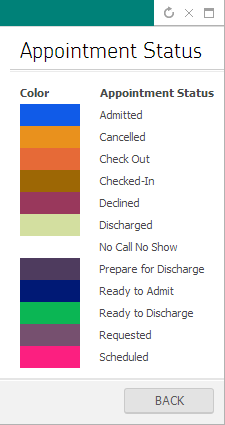
In order to delete the appointment, it has to have “scheduled” status. The user can then click on “Delete” to remove the appointment.
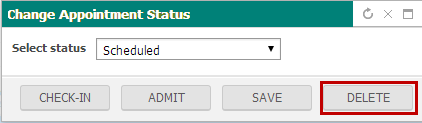
The application sends a confirmation prompt before deleting the appointment from the system.
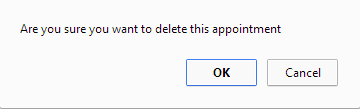
The same rule applies for Checking in a patient. The appointment needs to be in the “Scheduled” state.
Navigate to SOAP Note/Invoice/Patient Dashboard
Once an appointment status has been changed to ‘Checked-in’, users are given the option to navigate to SOAP Note, Invoice or patient dashboard. This can be done by clicking on the  button of a checked-in appointment which will open a menu.
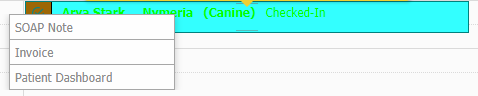
On clicking either of the option, user is navigated to corresponding page.
“Arrived” Status of the Patient
For any scheduled appointment, the patient status is “Not Arrived” by default.

The user can click on this button to switch it to “Arrived” status.

Viewing Appointment Details
To view the appointment details, the user can simply let the mouse hover on the appointment slot. The details of the appointment shall appear in a yellow tool tip.
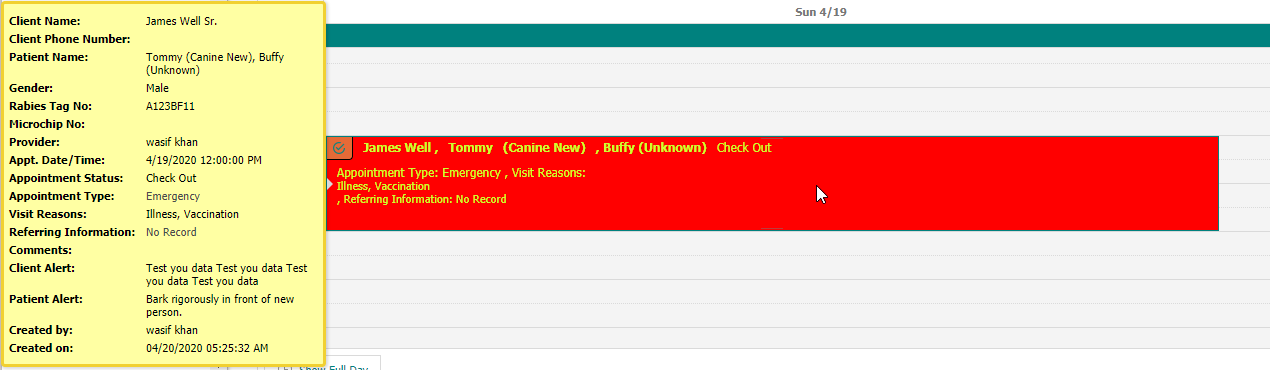
Boarding
The boarding shows available resources for particular days at a particular location. Users have the option to view, create, delete and change the status of reservations for different Resources. The Boarding is divided into two main sections:
- Resource View
- Calender Section
Resource View
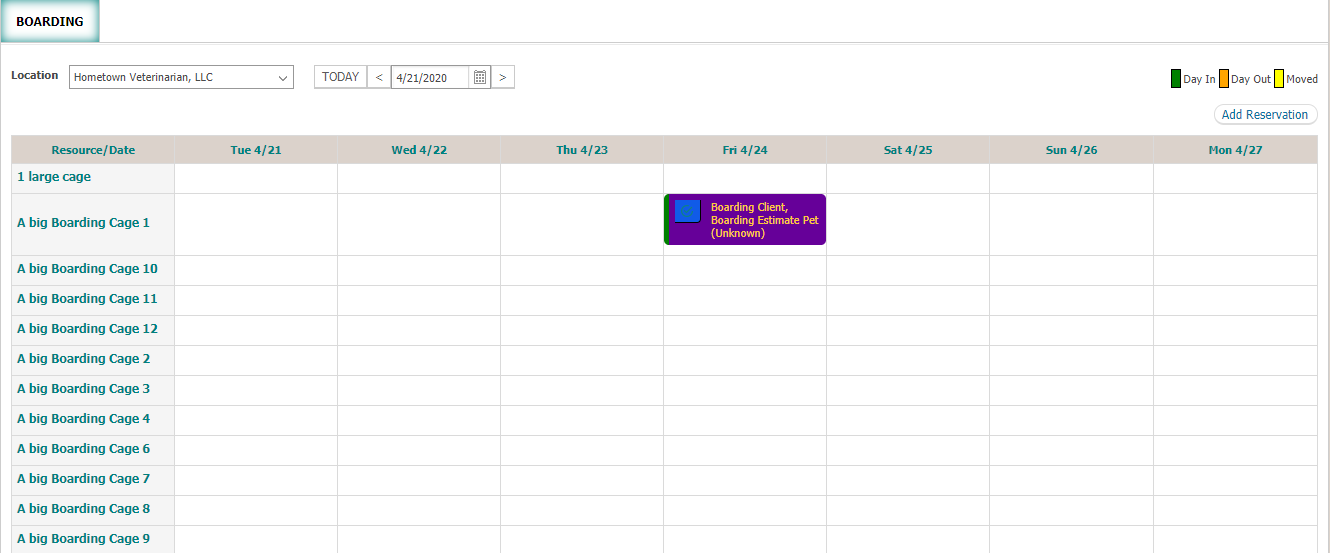
The resource view contains
- Date
- Add Reservation
Date
Boarding screen have calendar widget through which user can select a day for which user wants to view the reservation. Boarding view will display the resources availability of 7 days. In which user can create, edit, move or delete the reservation.
Boarding Card Report
When user open Boarding for patient boarding through Scheduling → Boarding then user can view/edit and print the boarding card when required.
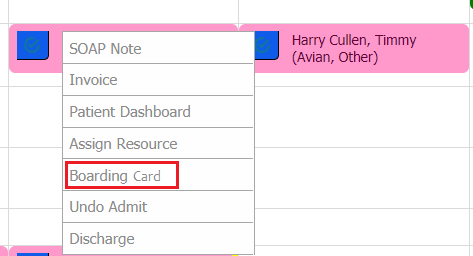
When user admit a patient of boarding reservation. Then system will show an option of boarding card in content menu. Once the user clicks, “Boarding Card” option then system will open popup where vaccination, overdue reminder and other instructions will be available.

After adding information in Feeding & Medication, Special Instructions and General Notes when user clicks save button then system will save the data for future reference of this reservation. After that when user clicks print button, then system will open boarding card report in new tab for print.
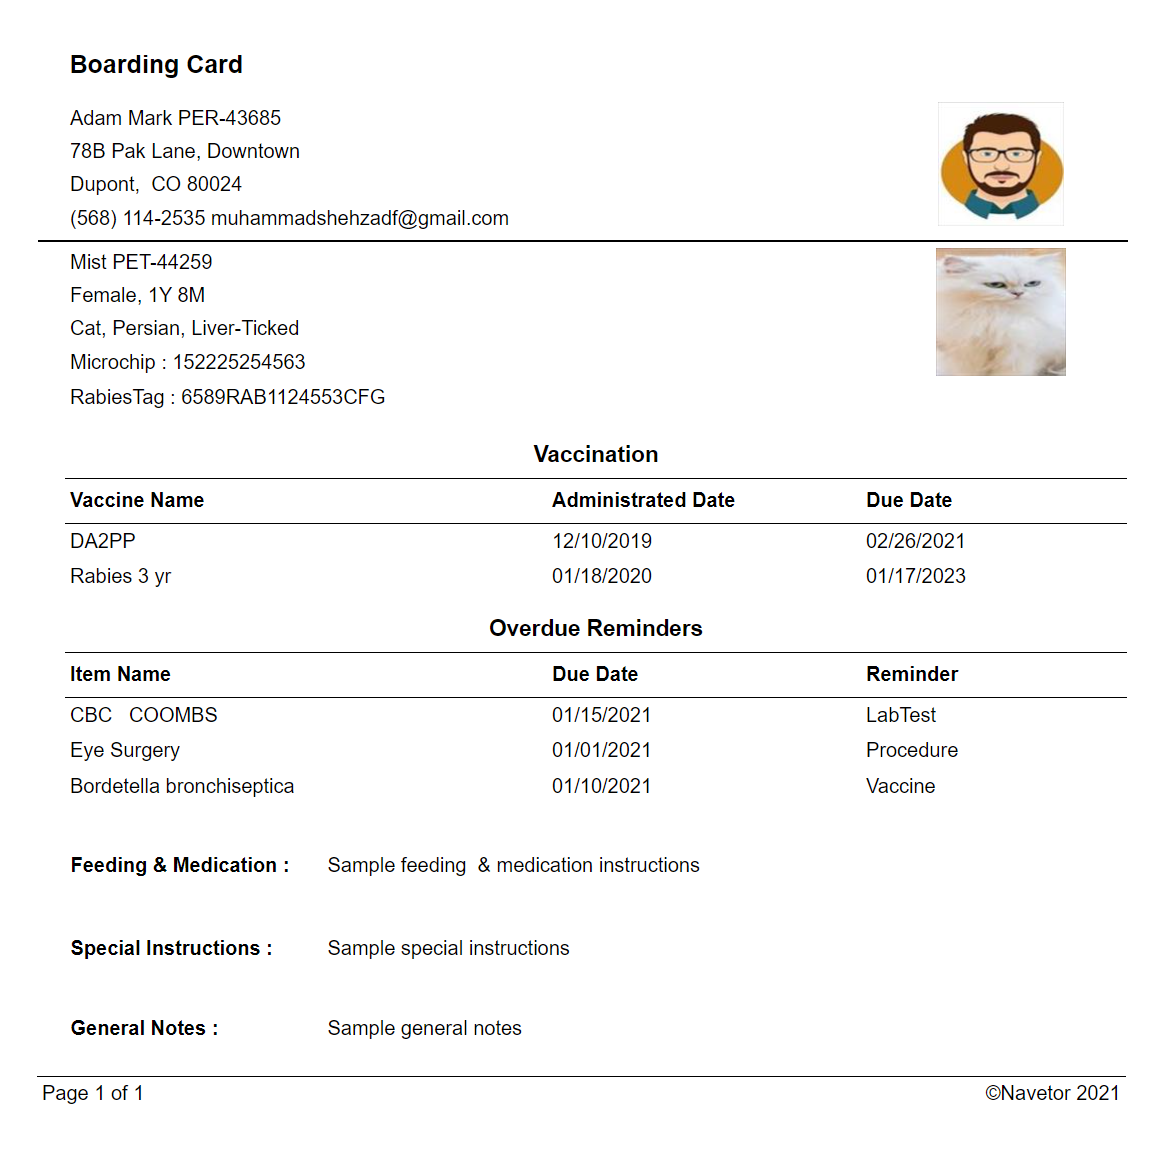
Add Reservation
User can add new reservation by clicking on a particular resource and on a specific day or user can change resource and day in manage reservation popup.
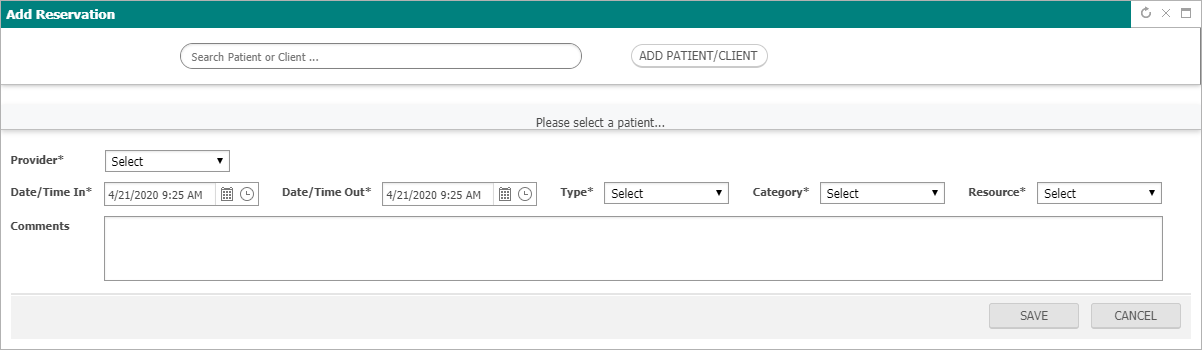
When user selects a patient the all the reminders of the selected patient will display in grid for reference.

© 2018 NaVetor - All Rights reserved. No reproduction or redistribution without written authorization of TPI
User Manual - Settings
Login/Forgot Password
User navigates to login page, following screen is displayed
User can enter credentials to login to application, upon doing so, practice dashboard is displayed.
In case password is forgotten, user can click on forgot password link to reset it, following screen is displayed.

User must provide registered username to proceed with password reset instructions. Upon providing a valid user name and clicking on proceed button, password reset link is emailed to registered email id of user as shown in following screen
Upon clicking on the reset password link received on registered email id, user is required to enter new password info as shown in following screen
Upon providing necessary details, user clicks on reset now button, password reset is complete and following screen is displayed.
User can login to application with new password by clicking on “go to login” button, user is navigated to main login page.
Settings Module
Settings module can be accessed from the Navigation button at the top left of the screen.

Settings module contain following sections:
- Admin
- Registration
- Scheduling
- EMR
- Billing
- Inventory
- ADT / Whiteboard
- Pharmacy
- Document Designer
- ePetLite Reminders
- Integration
- Reports
- Client/Patient
Admin
Admin section allows user to perform user and system related configurations. It contains following sections:
- My Practice
- Practice
- User
- Practice Settings
- Resource Category
- Referring Practice
- User Group
- Time Clock
Practice
To configure a practice, user navigates to Settings > Admin > My Practice > Practice
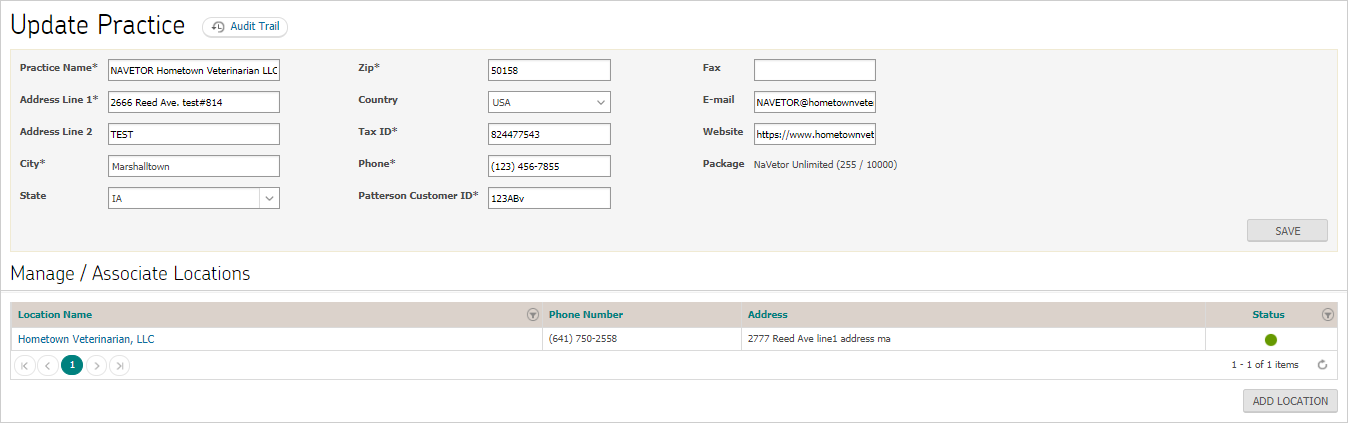
A practice can have multiple locations. To add a new location, user clicks on add location button
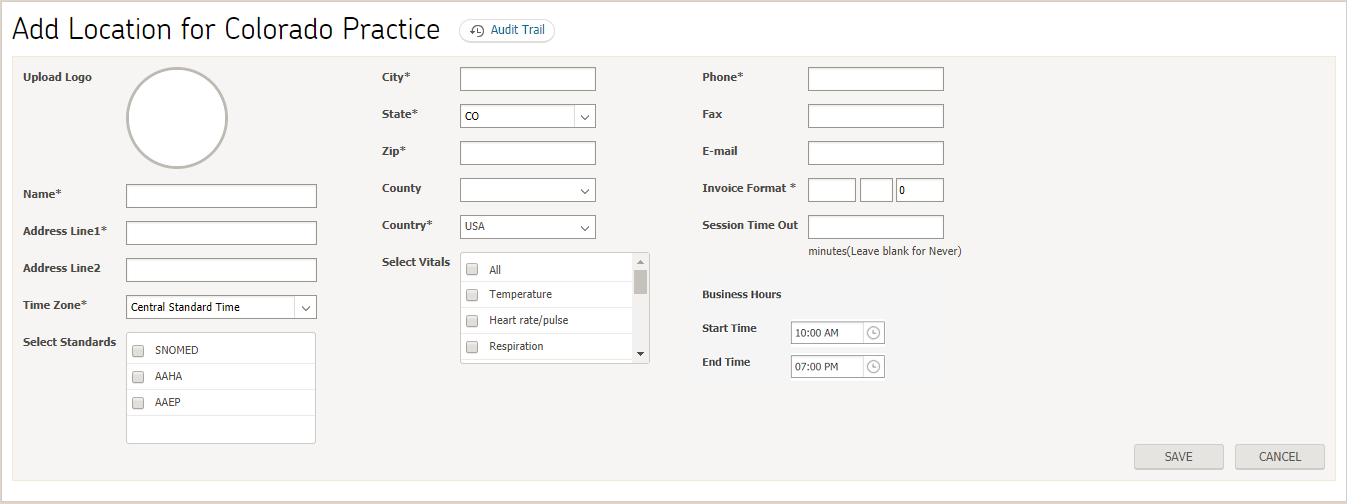
User must specify mandatory fields before clicking on save button for a location to be added. Upon clicking on save button, a new section “manage / associate resources” section is displayed under update location section.
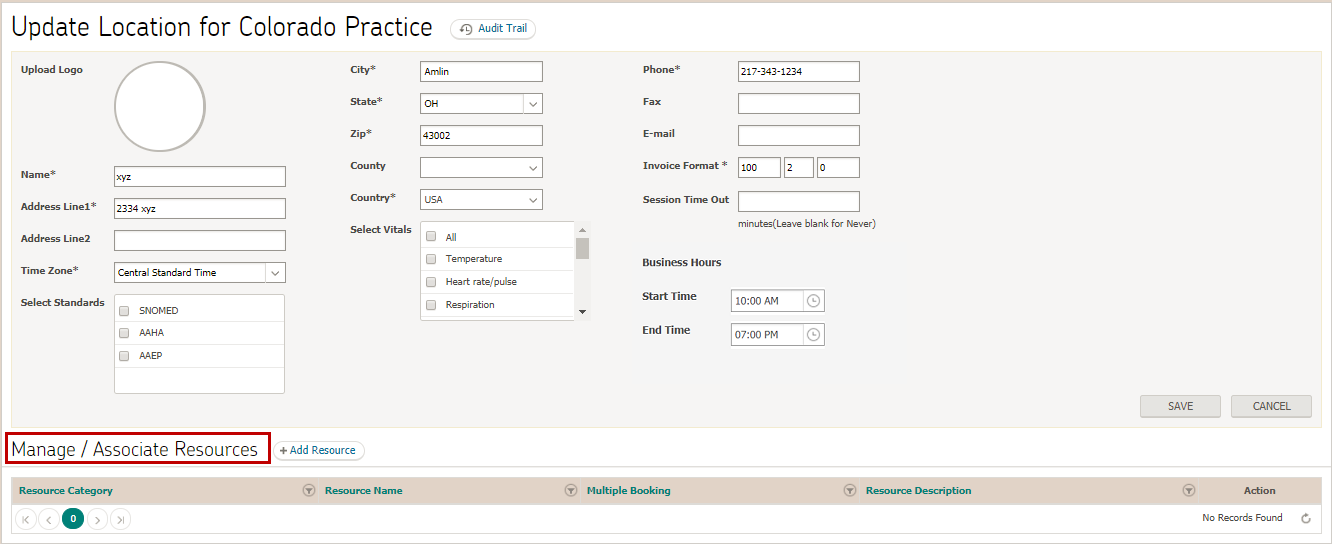
User can associate resources to a location by clicking on “Add Resource” button. User can only associate those resources to a location that have been added
Note:
- Category dropdown will only display those resource categories that have been added to the same location to which the resource is being associated.
- Adding a resource category for a location will be explained in resource category section of this document.

To edit an existing location, user can click on location name under its relevant section
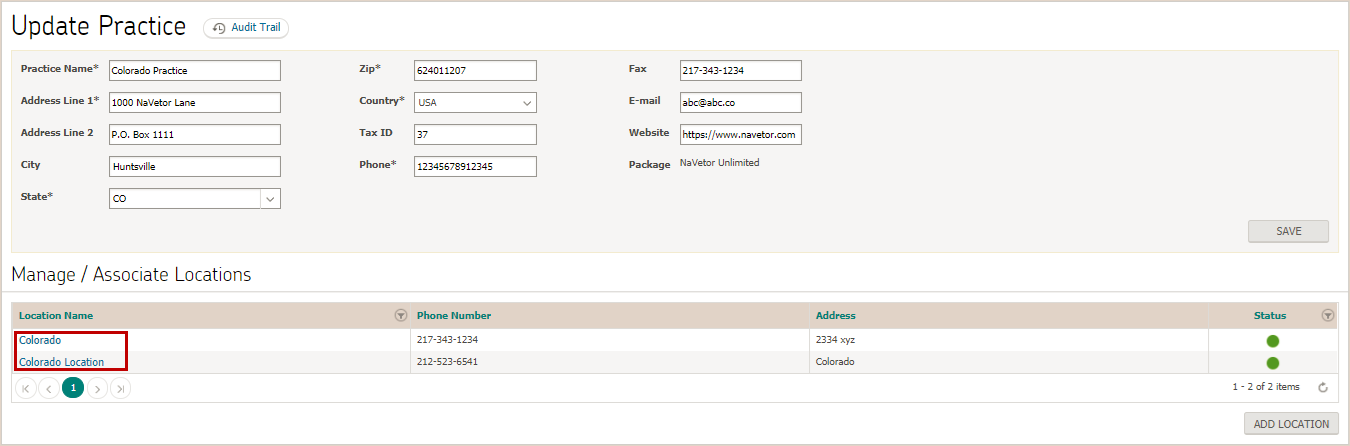
To update location details, user can make necessary changes and click on save button for them to take effect.

User
Master list of all users can be viewed by navigating to Settings > Admin > My Practice > User. By default, registered users are displayed on listing page who have complete patient information added.
Note:
For non-registered users, patient information is incomplete and are filtered under non-registered search criteria.
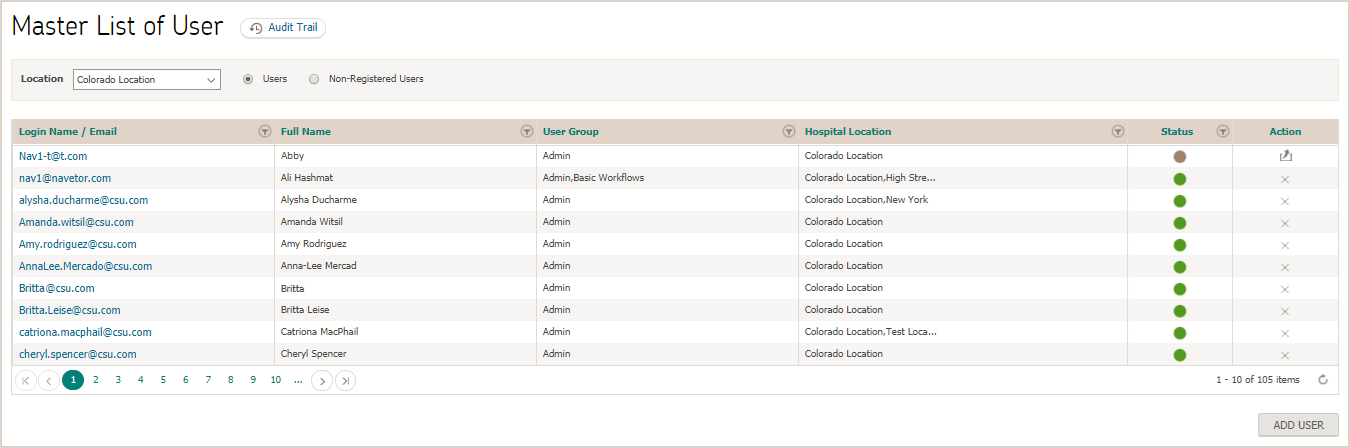
To add a new user, click on  button
Note:
- User groups will be explained in next section
- Values in “user types” dropdown are added from backend.
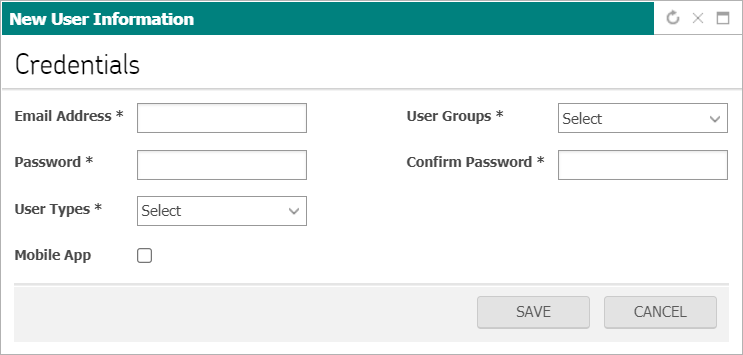
User specifies necessary information and clicks on save button. Upon doing so, user will be required to add “profile information” and “locations” information to complete patient registration.
Profile information
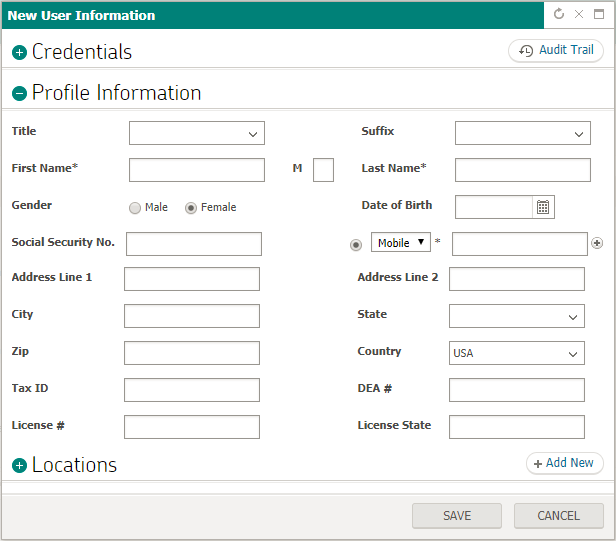
Locations
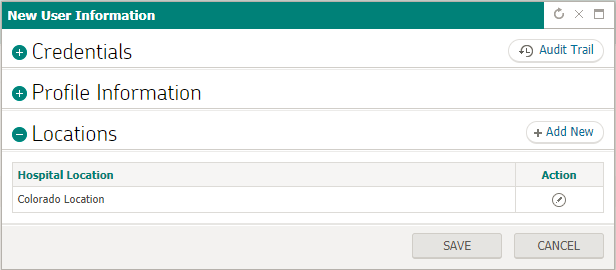
To add a new location, user can click on  button, a dropdown containing all locations will be displayed under “hospital location” column.
Note:
Incase only credentials information provided, user will be considered as non-registered user.
To edit an existing user, select name from master list and user will be able to perform necessary actions. (Similar to adding a new user)
Practice Settings
Practice Settings can be viewed by navigating to Settings > Admin > My Practice > Practice Settings. These configurations will specify practice-specified customizations. By default, all the sections will be collapsed.
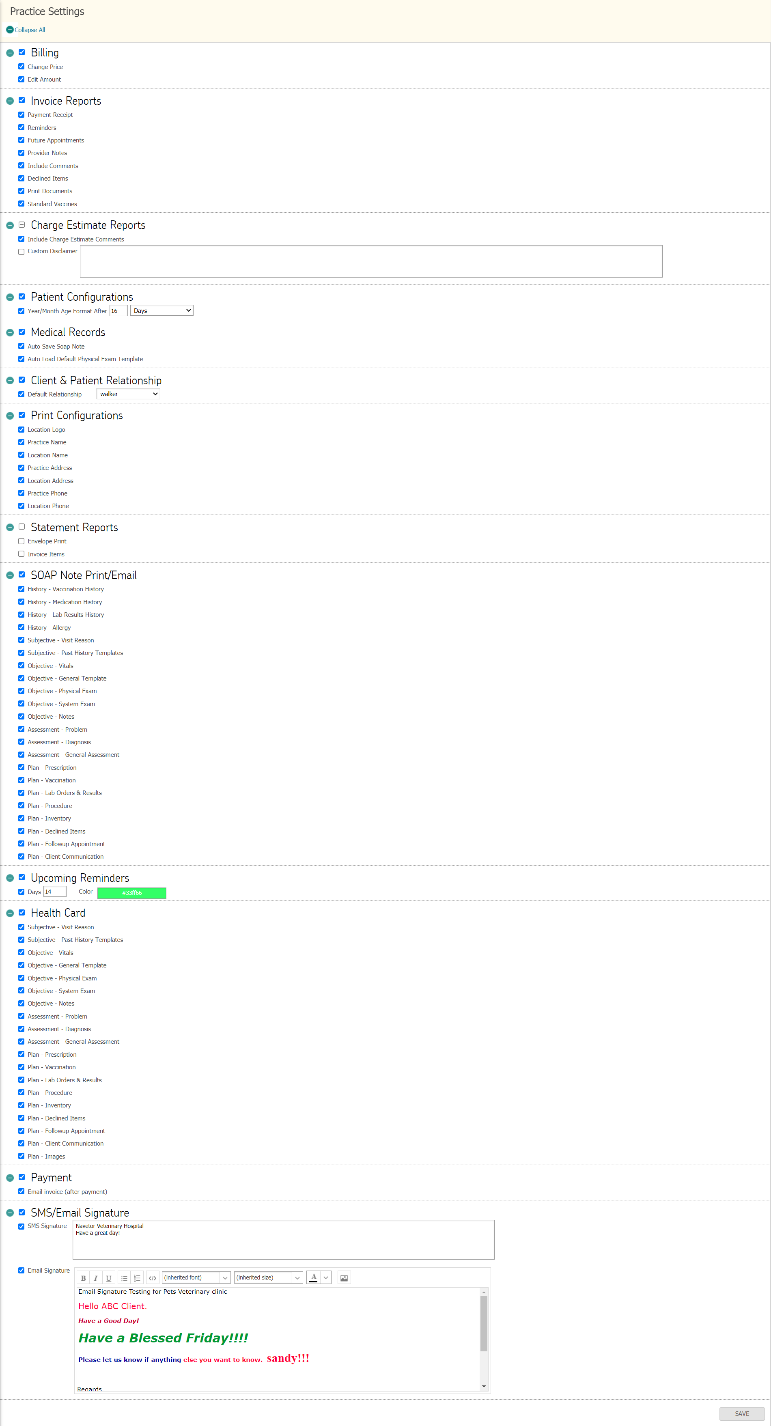
Extended set of all settings under the group headers can be viewed by expanding the respective group accordion or simply by clicking Expand All / Collapse All shortcuts on top of the page under group name.
To mark all set of permissions under a group, user can simply mark the master checkbox corresponding to each group header name.
Consumer App User List
In order to get access for Consumer App menu, user should have permission for user group settings. It will be accessible through Setting → Admin >> → User Group.
In the navigation menu, “Consumer App User List” option should be included in the menu after getting permission, which will open the user list. It will be accessible through Setting → Admin >> → My Practice >> → Consumer App User List.
When click “Consumer App User List” through menu then system navigates to master list of consumer app user.
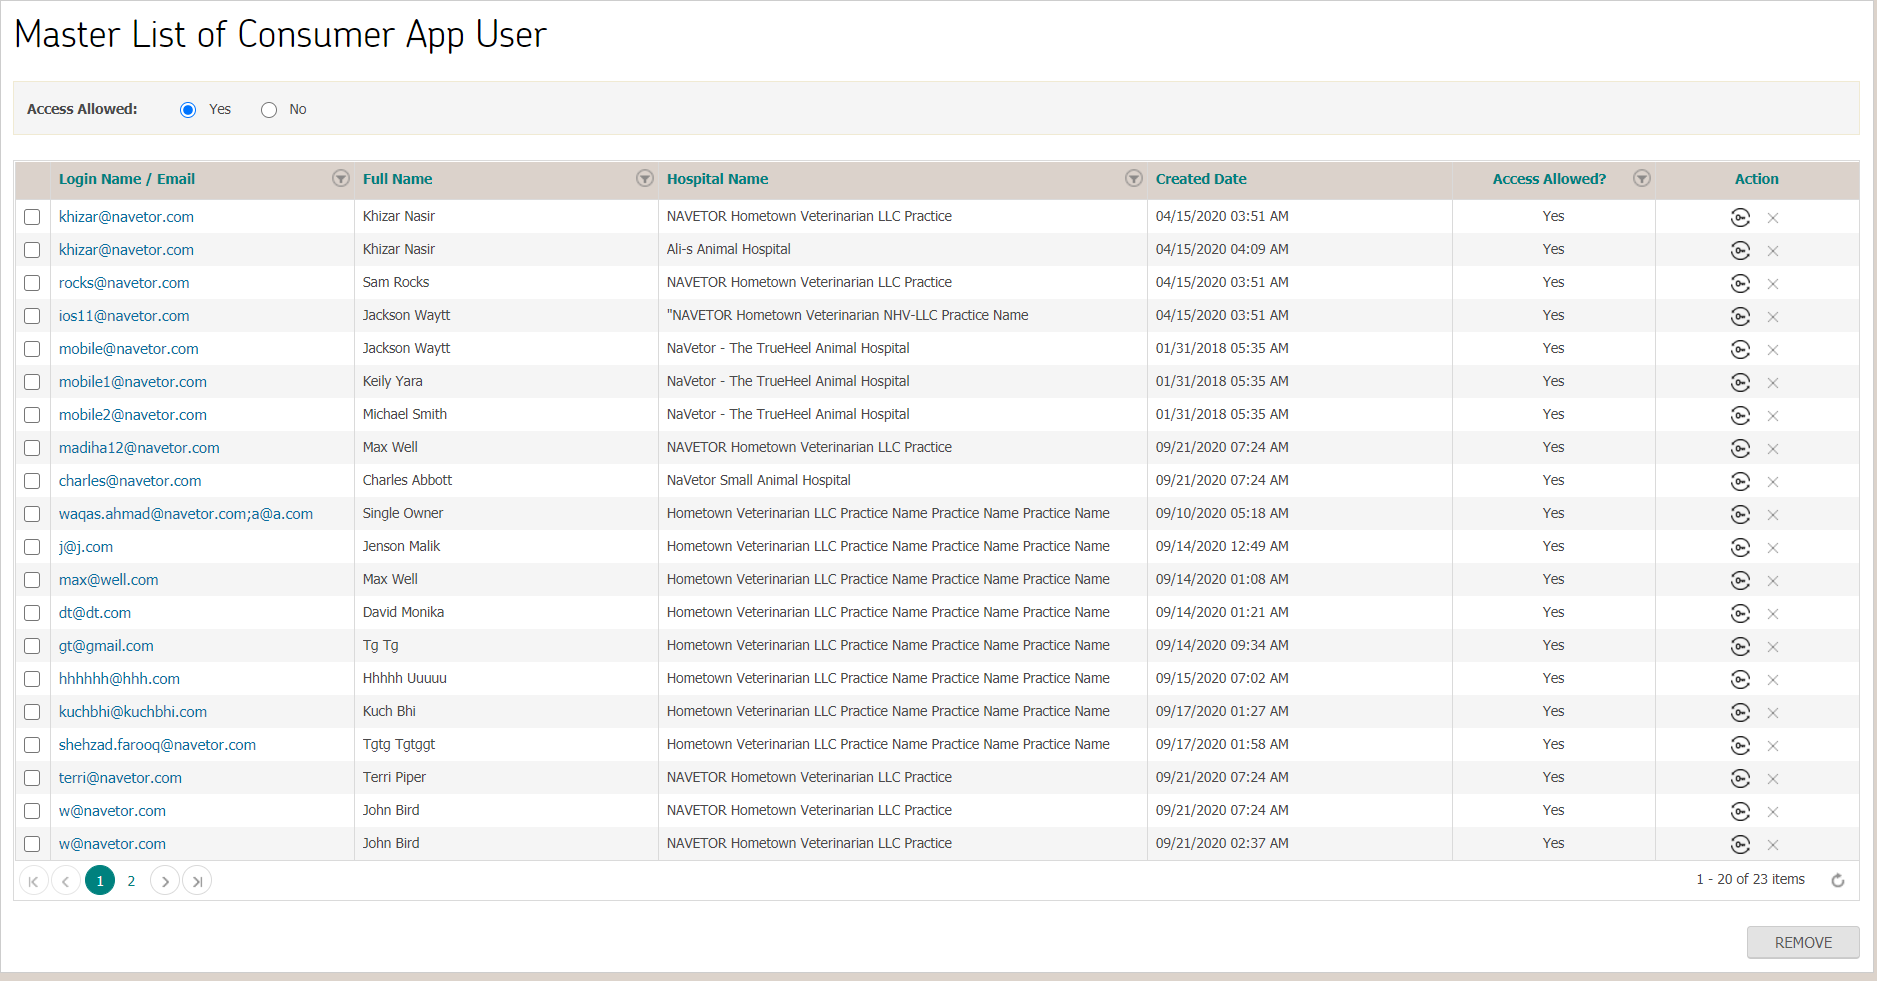
User can remove access or reset password by clicking on the icons available in action column and these are individual record actions. Whereas user can also select multiple users through the checkbox available with login name/email and then remove access by clicking on “Remove” button below list.
When user select “No” in the filter on top of the list then system will show all the those users whose access had been revoked. User can allow access by clicking on the icon available in the action column whereas user can also select multiple users through the checkbox available with login name/email and then allow access by clicking on “Allow Access” button below list.
Resource Category
User can add/update a resource category by navigating to Settings > Admin > Resource Category.
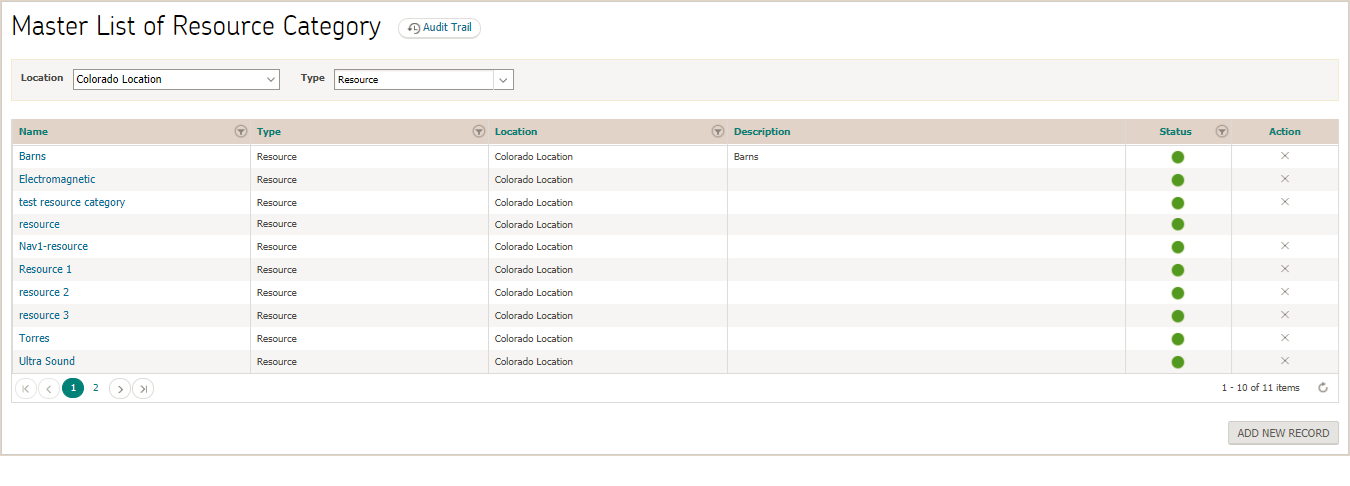
To add a new category, user clicks on  button
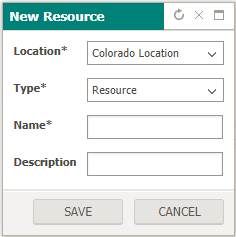
User must specify location, type and name for a category to be added. Description is an optional field.
To update a resource, user clicks on the resource name from the list.
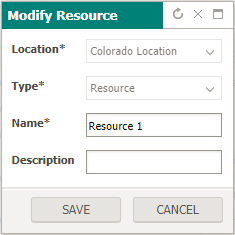
Location and type are read-only fields once saved. User can modify name and description of resource category.
Note:
Resource categories added above will be filtered in category dropdown when associating resources to a location discussed in practice section above.
Referring Practice
User can add/update a RDVM by navigating to Settings > Admin > Referring Practice. By default, list is sorted by RDVM.
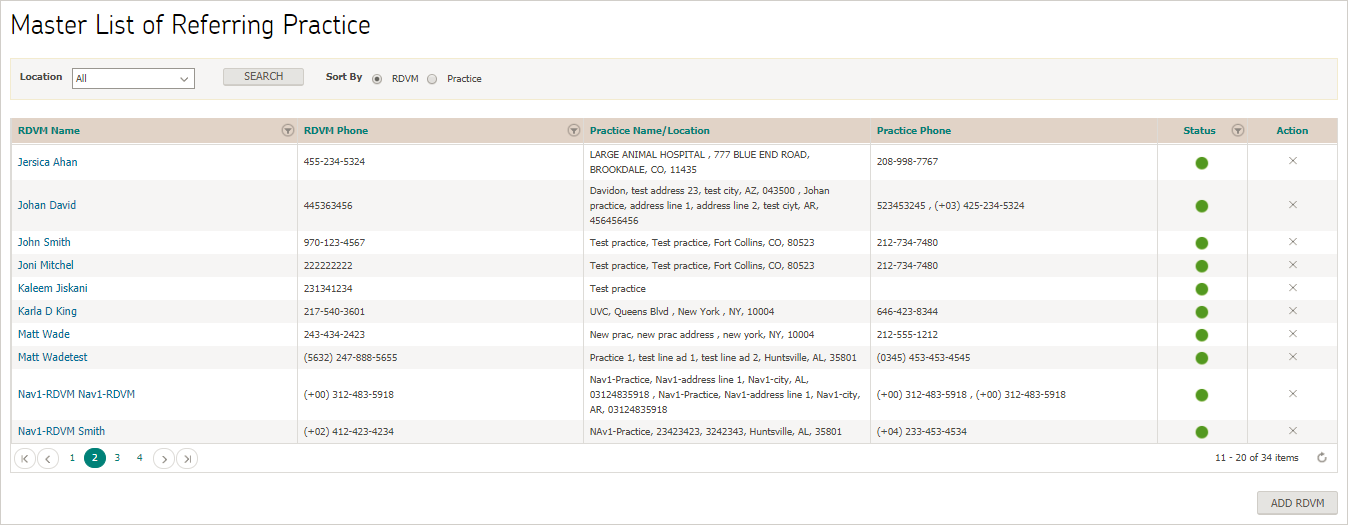
To add a new RDVM, user clicks on  button.
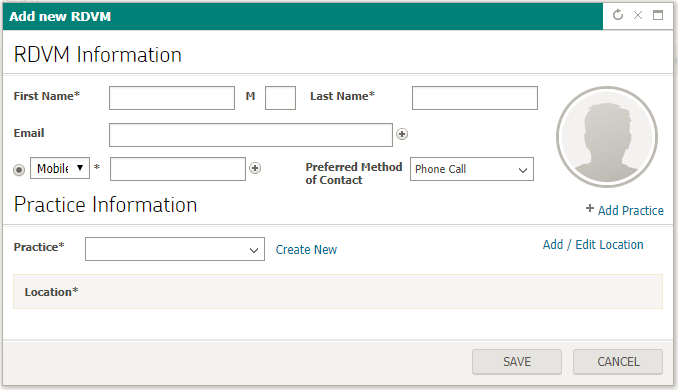
User must specify necessary RDVM and practice information for a new RDVM to be added.
To edit an existing RDVM, click on RDVM name from master list of referring practice and user will be able to perform necessary actions. (Similar to adding a new RDVM)
User can sort master list by practice name / Location by selecting “Practice” radio button.

User can further edit practice/location info by clicking on practice name from the master list
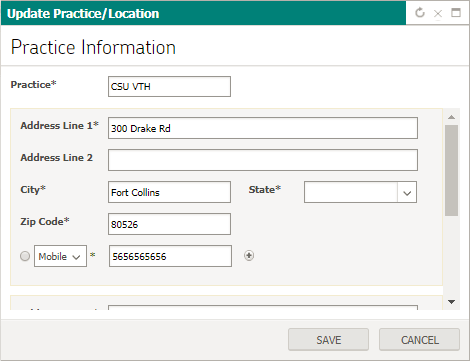
User Group
Master list of all user groups can be viewed by navigating to Settings > Admin > User Group.
Note:
User Groups dropdown under credentials while registering a new user is populated with values listed on this page. (User section explained in earlier part of the document)

To add a new user group, click on  button. User will required to enter group name before clicking on “save” button.
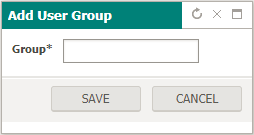
Upon clicking on save button, user will be navigated to a new page where user will define the required set of permissions that will be applicable to all users associated to this group.
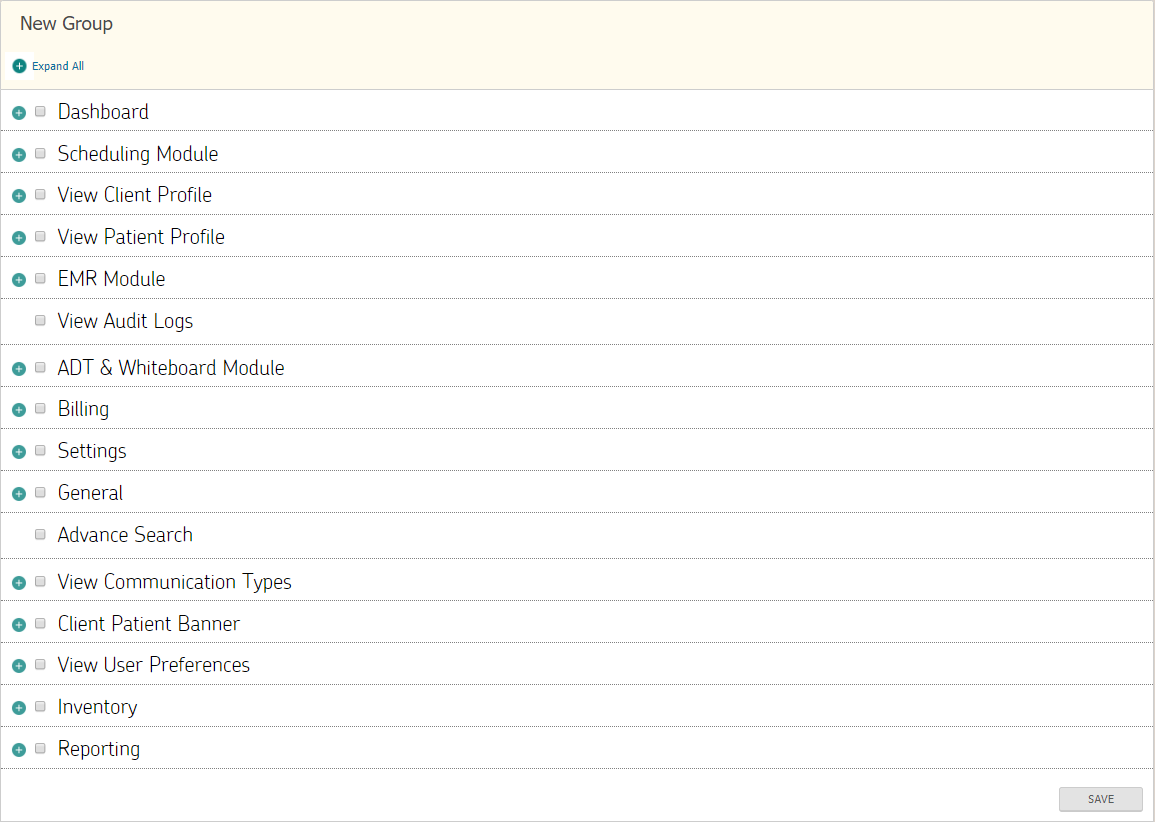
Extended set of all permissions under the group headers can be viewed by expanding the respective group accordion or simply by clicking Expand All / Collapse All shortcuts on top of the page under group name.
To mark all set of permissions under a group, user can simply mark the master checkbox corresponding to each group header name.
To edit an existing group, click on group name from master list and user will be able to perform necessary actions. (Similar to adding a new user group).
Time Clock
Time Clock can be viewed by navigating to Settings > Admin > Time Clock. User can also navigate to time clock page by clicking on the icon available on the top banner of the application.

When user navigate to Time Clock screen then system will show logged in user name in the dropdown and current date in both start date and end date filters.

From this screen user can view his/her time in & out whereas admin can view time in & out of all user. After providing start date and end date user can view all the logged times with the status.

User can add time in & out by click on the Add button available at the bottom of the page. When user clicks add button then system will open a popup where time in is mandatory field to add record.
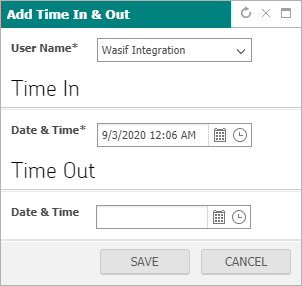
User can also edit time in & out by clicking on the edit button against the records available on the screen. Where user can edit time in & out.
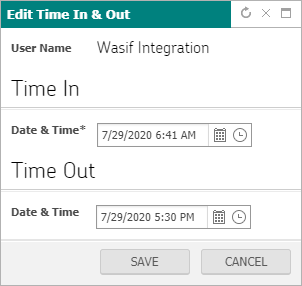
User can also delete the records having status “Pending” whereas admin can delete any record. By clicking on the delete icon in the list.
Registration
Registration settings enables user to configure following sections
- Title
- Suffix
- Client Relationship Type
- Species
- Patient Color
- Category
Title
Master list of all titles can be viewed by navigating to Settings > Registration > Title
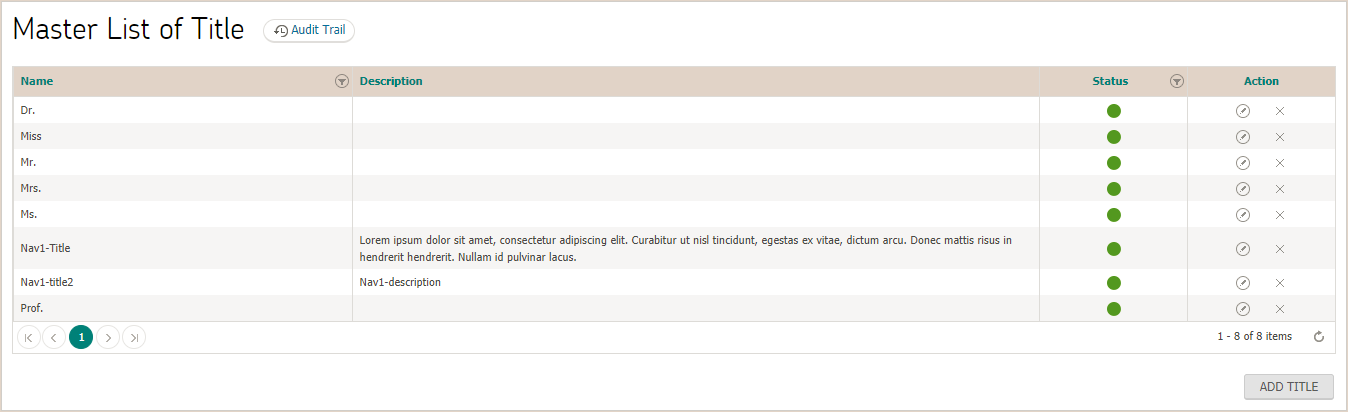
To add a new title, user clicks on  button. User must specify title name for a new title to be added to master list.
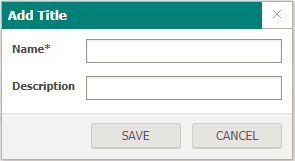
User can edit a title by clicking on  icon in Action column. User can make necessary changes and click on save button for the record to be updated. (Similar to adding a new title).
Suffix
Master list of all suffixes can be viewed by navigating to Settings > Registration > Suffix
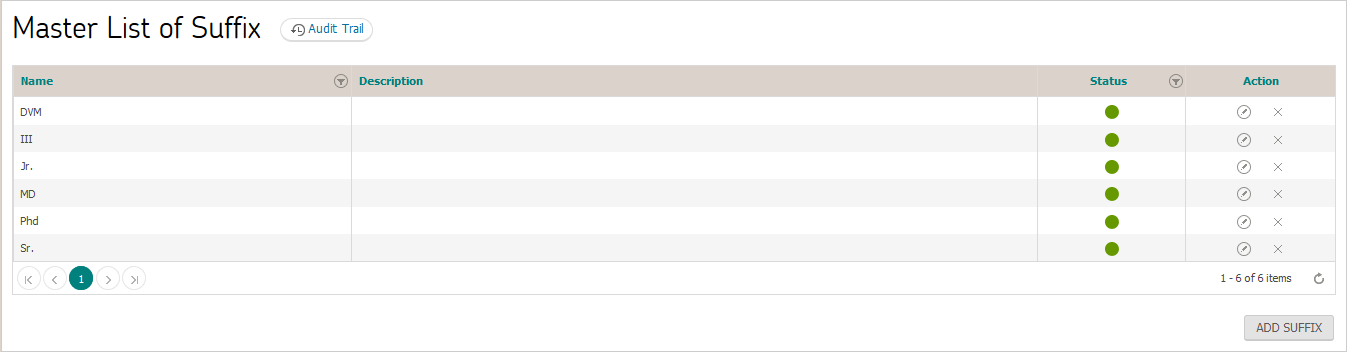
To add a new suffix, user clicks on  button. User must specify suffix name for a new suffix to be added to master list.

User can edit a suffix by clicking on icon in Action column. User can make necessary changes and click on save button for the record to be updated. (Similar to adding a new suffix)
Client Relationship Type
Master list of all client relationship types can be viewed by navigating to Settings > Registration > Client Relationship type
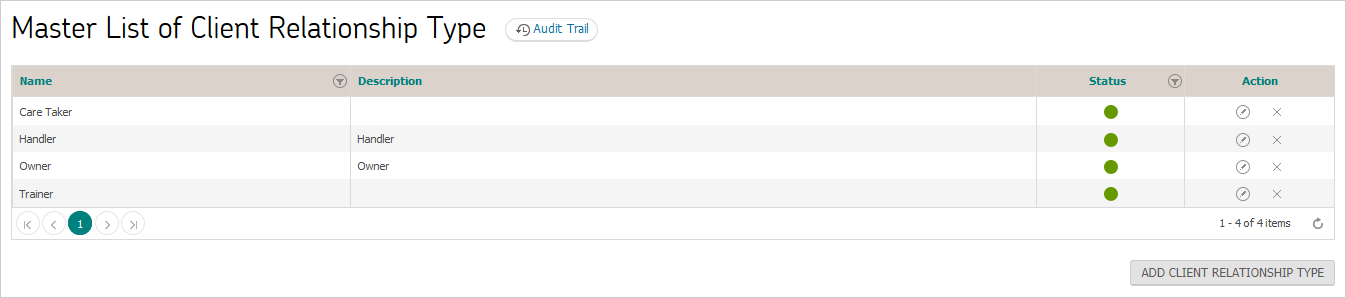
To add a new client relationship type, user clicks on  button. User must specify client relationship type name for a new type to be added to master list.
User can edit a client relationship type by clicking on icon in Action column. User can make necessary changes and click on save button for the record to be updated. (Similar to adding a new client relationship type)
Species
Master list of all species can be viewed by navigating to Settings > Registration > Species
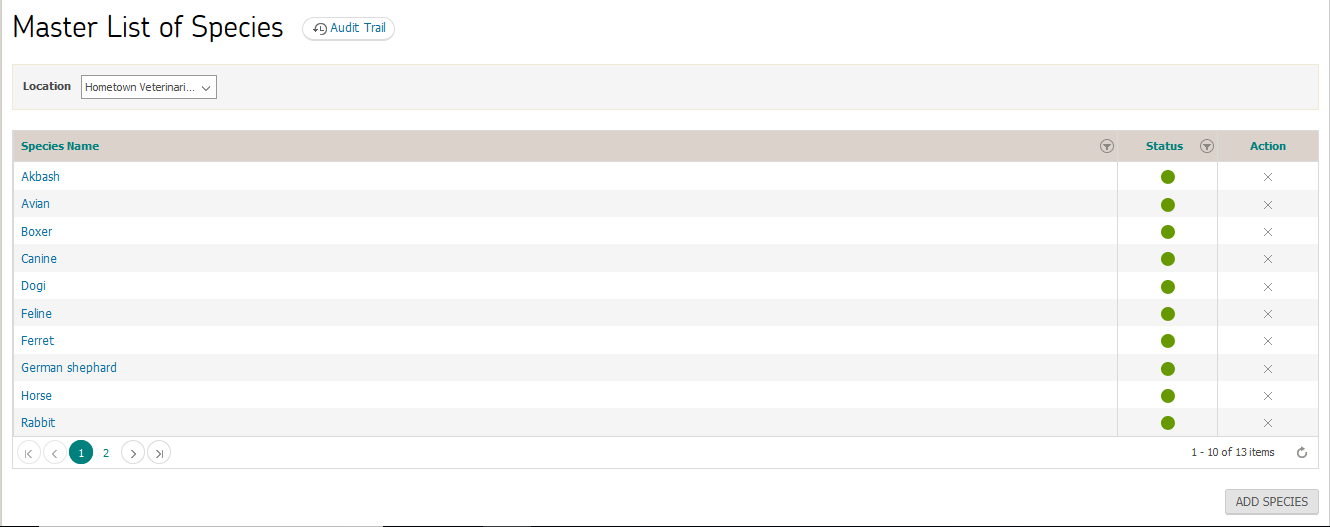
To add a new specie, user clicks on  button. User must specify location and name for a new specie to be added to master list.
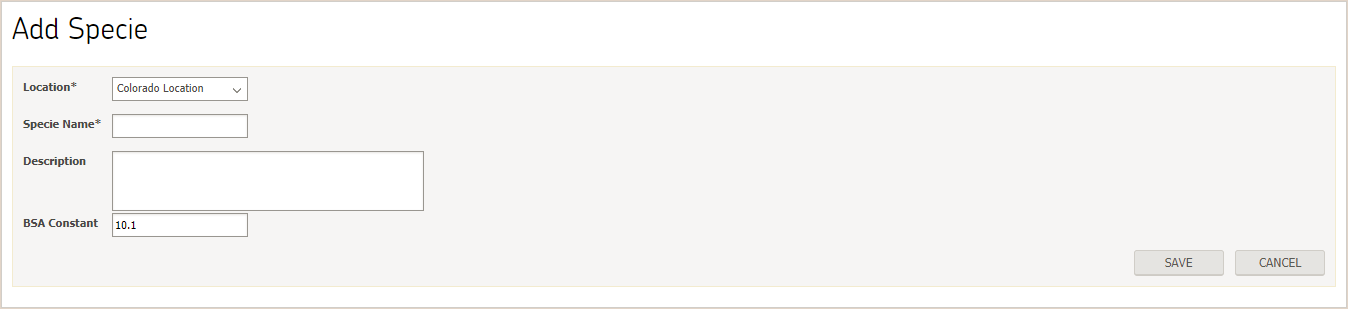
Upon clicking on save button, a new section “manage breed” is displayed under “add species” section.
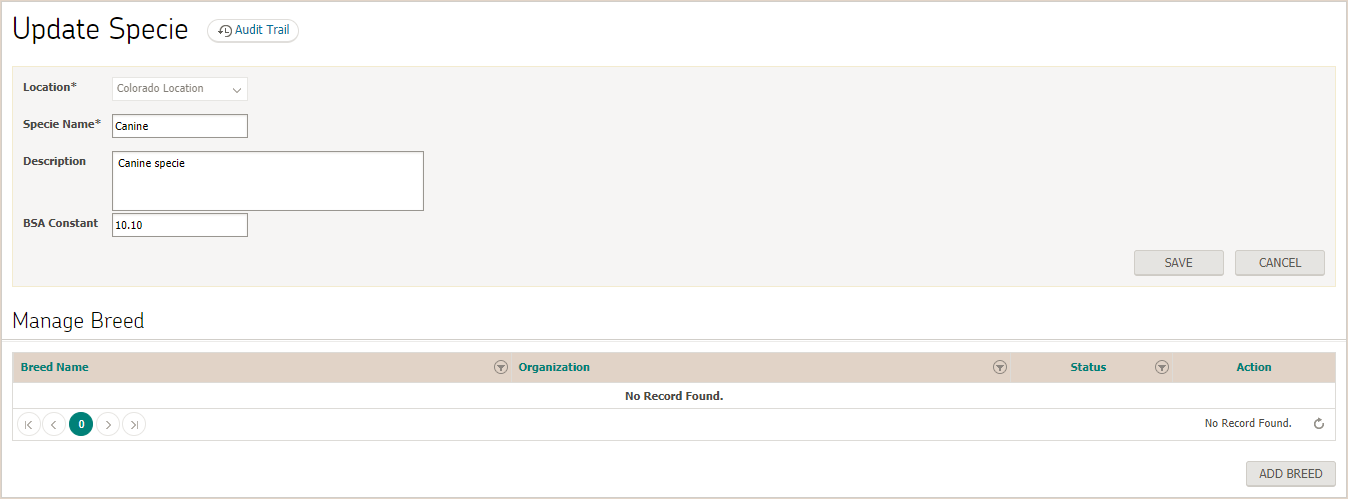
To add a new breed, user now clicks on  button. User must specify breed name for it to be saved
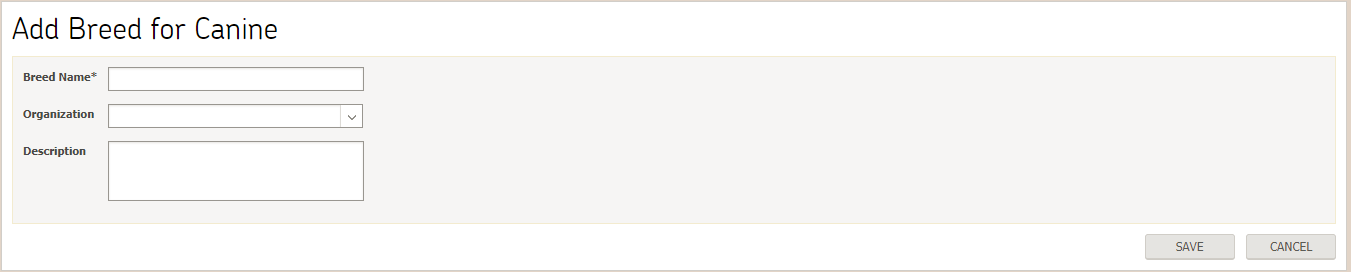
Upon clicking on save button, it will be added under manage breed section
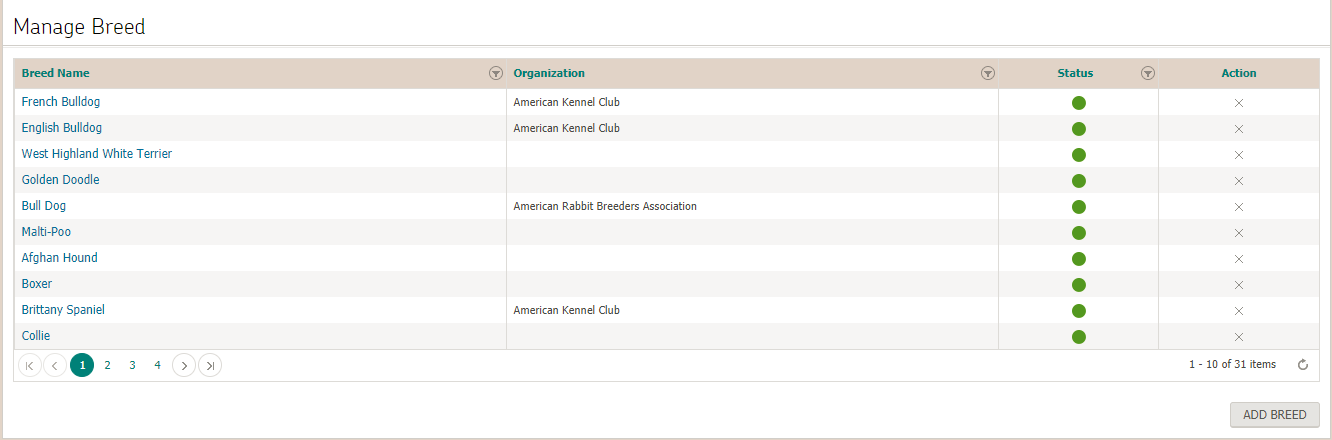
User can edit a breed by clicking on breed name and following the same steps as mentioned above for adding a breed, changes will be updated upon saving provided necessary information is entered.
User can edit a specie by clicking on specie name and following the same steps as mentioned above for adding a specie, changes will be updated upon saving provided necessary information is entered.
Patient Color
Master list of all patient colors can be viewed by navigating to Settings > Registration > Patient Color
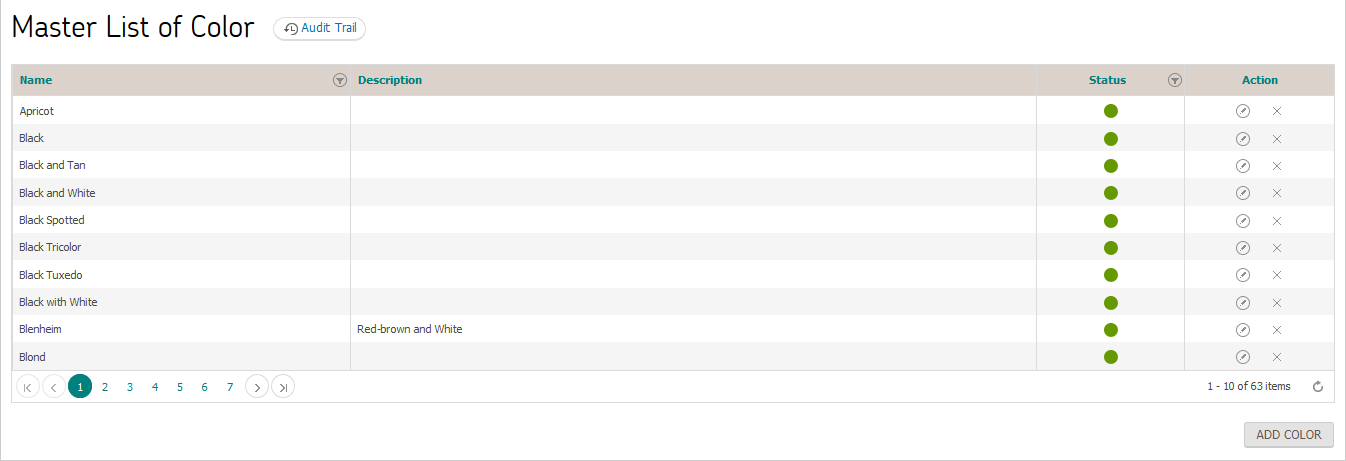
To add a new patient color, user clicks on  button. User must specify color name for a new color to be added to master list.
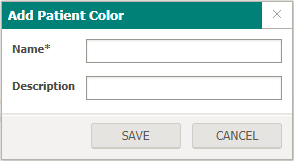
User can edit a color by clicking on icon in Action column. User can make necessary changes and click on save button for the record to be updated. (Similar to adding a new color)
Category
Master list of all category can be viewed by navigating to Settings > Registration > Category

To add a new category, user clicks on button. User must specify category name for a new category to be added to master list.
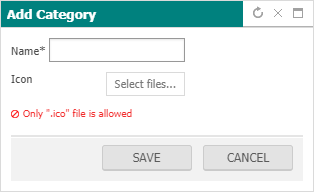
User can edit a category by clicking on name of the category. User can make necessary changes and click on save button for the record to be updated. (Similar to adding a new category)
Scheduling
Scheduling settings enable user to configure following sections
- Appointment Type
- Block Type
- Visit Reason
- Master Scheduler
Appointment Type
Master list of all appointment type can be viewed by navigating to Settings > Scheduling > Appointment Type
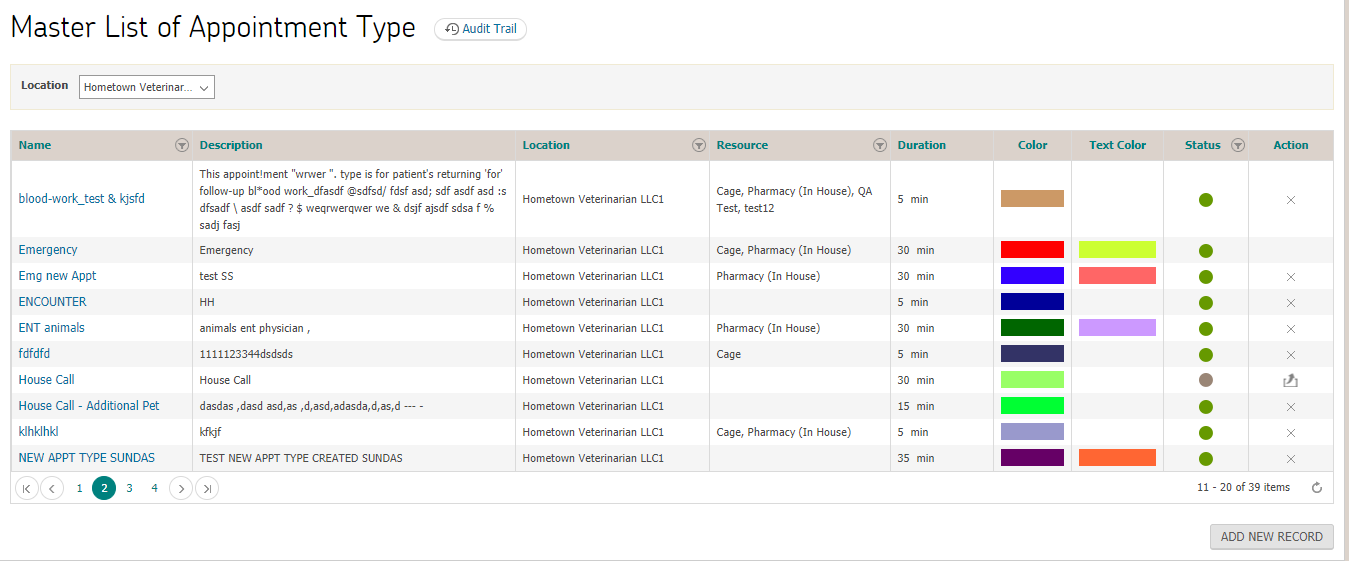
To add a new appointment type, user clicks on button. User must specify mandatory fields before clicking on save button for new appointment type to be added to master list.
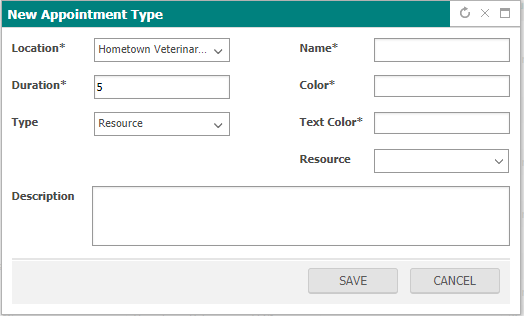
User can edit an appointment type by clicking on type name and following the same steps as mentioned above for adding a type, changes will be updated upon saving provided necessary information is entered.
Block Type
Master list of all block type can be viewed by navigating to Settings > Scheduling > Block Type
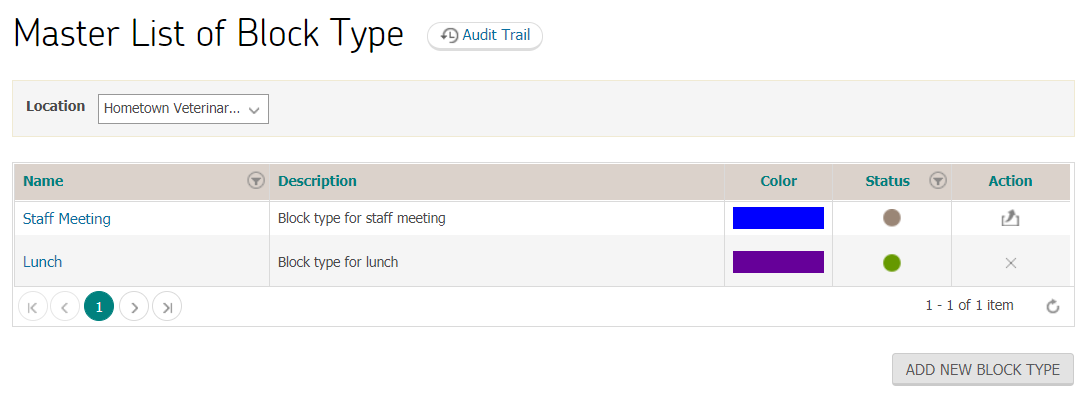
To add a new block type, user clicks on “Add New Block Type” button. User must specify mandatory fields before clicking on save button for new block type to be added to master list.
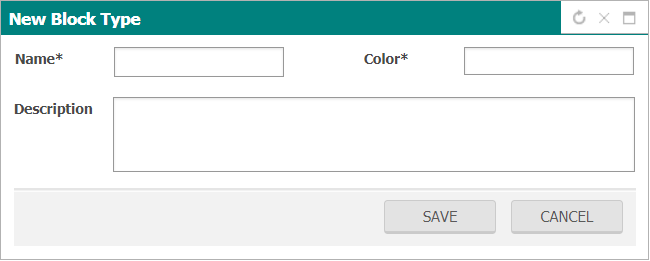
User can edit an block type by clicking on type name and following the same steps as mentioned above for adding a type, changes will be updated upon saving provided necessary information is entered.
Visit Reason
Master list of all visit reasons can be viewed by navigating to Settings > Scheduling > Visit Reason
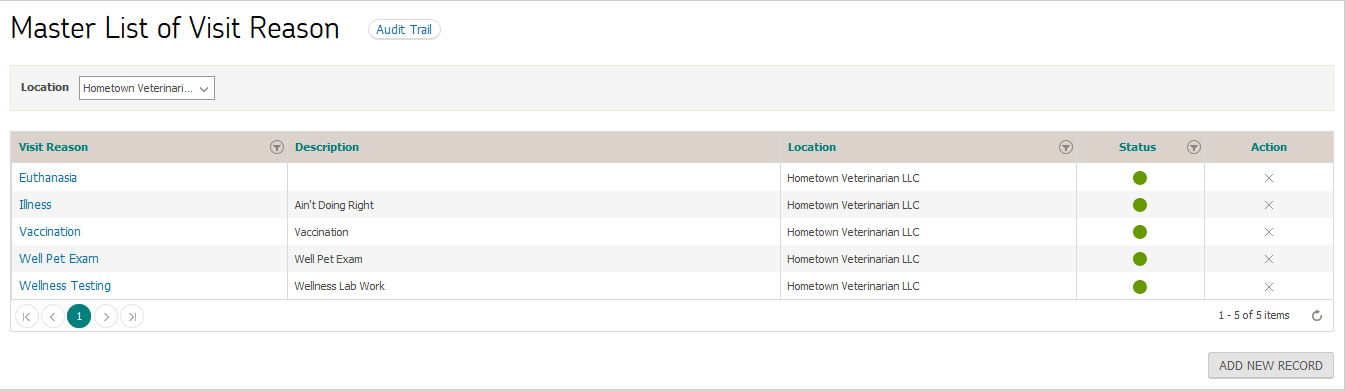
To add a new visit reason, user clicks on button. User must specify location and name before clicking on save button for new visit reason to be added to master list.
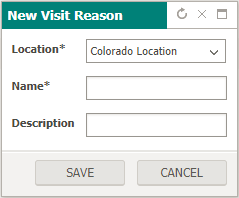
User can edit a visit reason by clicking on reason name and following the same steps as mentioned above for adding a visit reason, changes will be updated upon saving provided necessary information is entered.
Master Scheduler
Master scheduler can be viewed by navigating to Settings > Scheduling > Master Scheduler
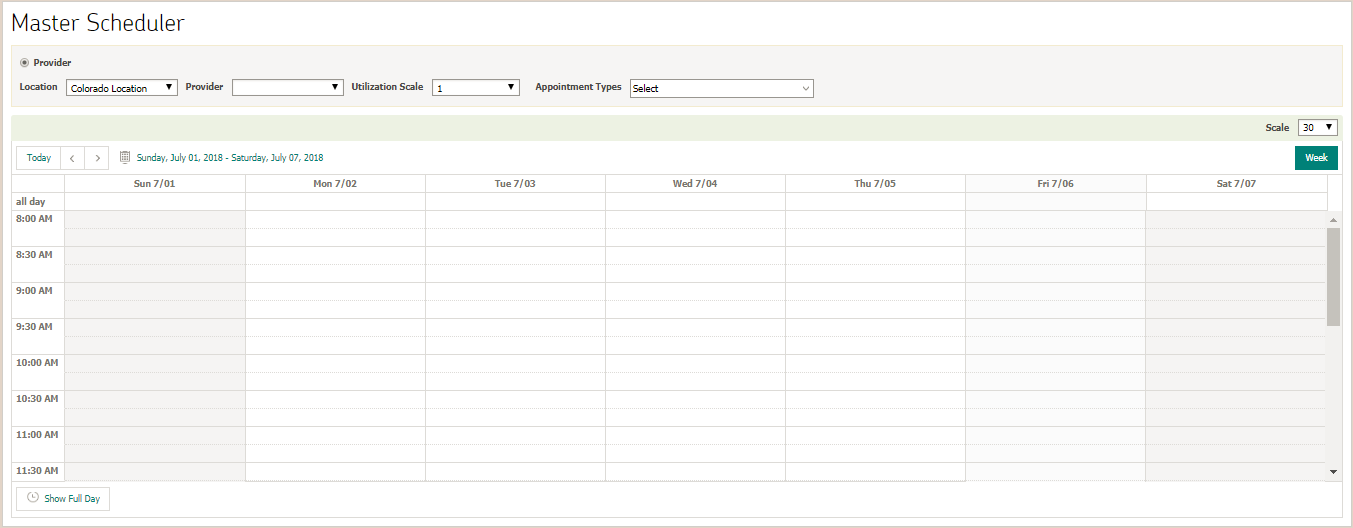
The provider master scheduler can be divided into 2 sections:
- Place Holder Filter
- Place Holder Area
Place Holder Filter

When the Provider option is selected, the user can see a set of 4 lists that are mainly concerned with the master scheduler. These lists determine the mandatory factors required during scheduling.
- Location - The list contains all the locations that the user is associated with. The default location of the user is selected.
- Appointment Types - Will display all the appointments types.
- Providers - Will display all the providers.
As the user starts selecting different options, the Place Holder area starts filtering out accordingly.
Once all options are selected, the user can create a place holder.
Place Holder Area
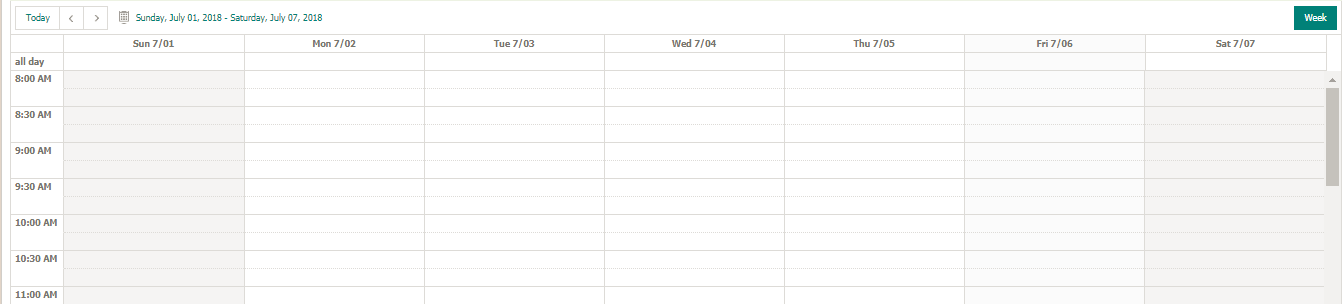
The place holder Area provides the ability to the authorized user to:
- View All created Place Holders
- Create Place Holders
- Edit Place holders
The view is similar to the main scheduler apart from the fact that the place holder area is only in Week view. The User can still change the Scale as well as the Full Day/business hours toggle the same way as the scheduler.
View all created Place Holders
User can view all the place holders within the location. There are 2 main types of place holders, one being a single place holder and the other being a part of recurrence. Those place holders can easily be differentiated by  .
.
On hover the application will display “Provider Name” / “Location” / No. Of Bookings: “Number” Appointment type: “Appointment type
Create Place Holders
Once the user has selected the location, Appointment type and Provider the user will be able to create a place holder.
- In order to create a place holder double click on an available slot. The application will display the create place holder screen.
- The start and end time will be according to the slot selected which can be changed.
- The user can select the “All day event” option for which the start and end dates will be required.
- The user will have recurrence option based on daily, weekly and monthly. By default it is set to “Never”
- Daily - The user has the capability of repeating the same place holder according to number of occurrences or till a particular date.
- Weekly - The user has the capability of repeating the same place holder on particular days from Sunday till Saturday according to number of occurrences or till a particular date.
- Monthly - The user has the capability of repeating the same place holder on a particular date of the month according to number of occurrences or till a particular date.
- If the user wishes to put in comments or instructions the user can put in text in the description area. The description will only be visible when the place holder is in edit mode.
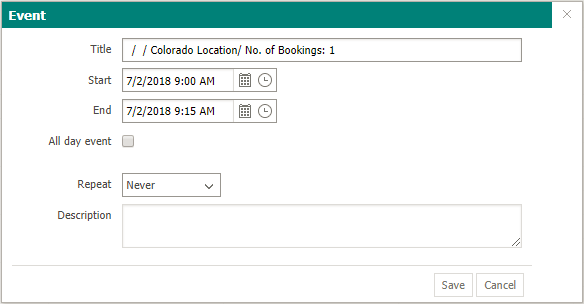
By default the Title will display “Provider Name” / “Location” / No. Of Bookings: “Number”.
The number of bookings only signifies the number of appointments that should be booked ideally during that time frame but it is still not a restriction. The number of bookings is only for information purposes.
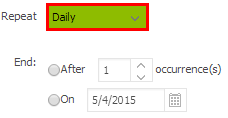
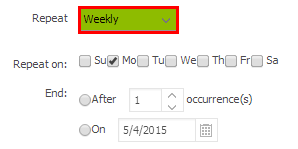
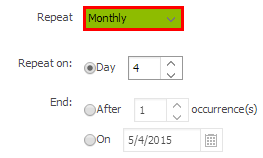
Edit Place Holders
The authorized user will have the ability to edit place holders either from the Place Holder area or by selecting a placeholder and opening it in editable mode.
Place Holders Area
From the Place holders’ area the user will be able to move, increase/decrease duration and Delete place holders.
In order to move, the user can click and drag the place holder to anywhere in the Area. If the appointment is part of a recurrence the application will ask the user whether the current occurrence needs to be changed or the entire series.

By dragging the border of the place holder, the user can increase or decrease the duration. Once again if the place holder is part of a recurrence, the user is prompted accordingly.
On hover the user can select the delete action in order to delete the placeholder. Once again the user has the option to delete a single occurrence or the entire series.

User will be able to edit all aspects of the Placeholder by double clicking on it. The same screen as the Create would open up where the user will be able to update all the information.
The user will also be able to delete the placeholder by selecting the Delete Action. If the place holder is part of a reoccurrence then the user will be prompted.
Note: User cannot delete an occurrence while editing it.
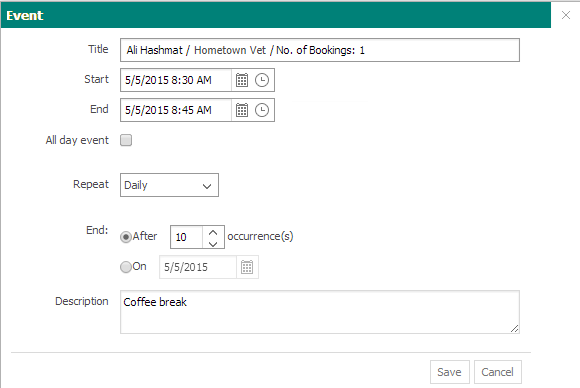
EMR
EMR settings enable user to configure following sections
- History
- Exam
- Health Service Plan
- Assessment
- Procedure
- Prescriptions
- Lab
- Template
- Vaccines
- Communication Types
- Vital Ranges
- Alerts
- IV Catheter
- Pulse and respiration
History
User navigates to Settings > EMR > History
System
System tab will be displayed as default landing page showing master list of system
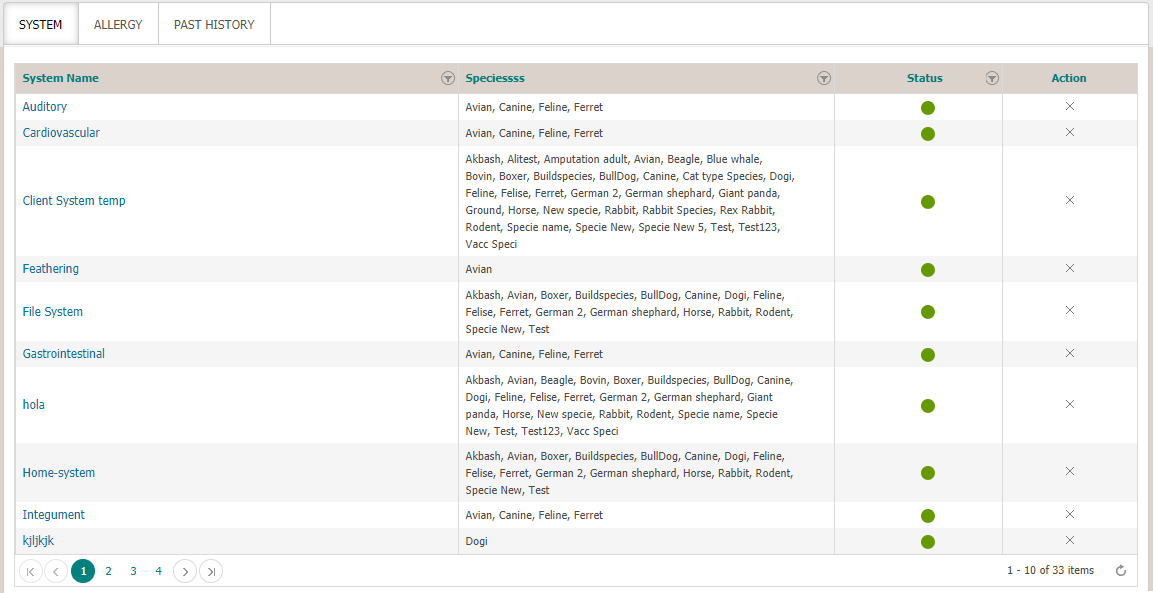
User can add a new system by clicking on  button. User must specify mandatory fields before clicking on save button for new system to be added to master list.

User can edit a system in master list by clicking on system name and following the same steps as mentioned above for adding a new system, changes will be updated upon saving provided necessary information is entered.
Allergy
User navigates to Settings > EMR > History > Allergy tab, master list containing all allergies is displayed
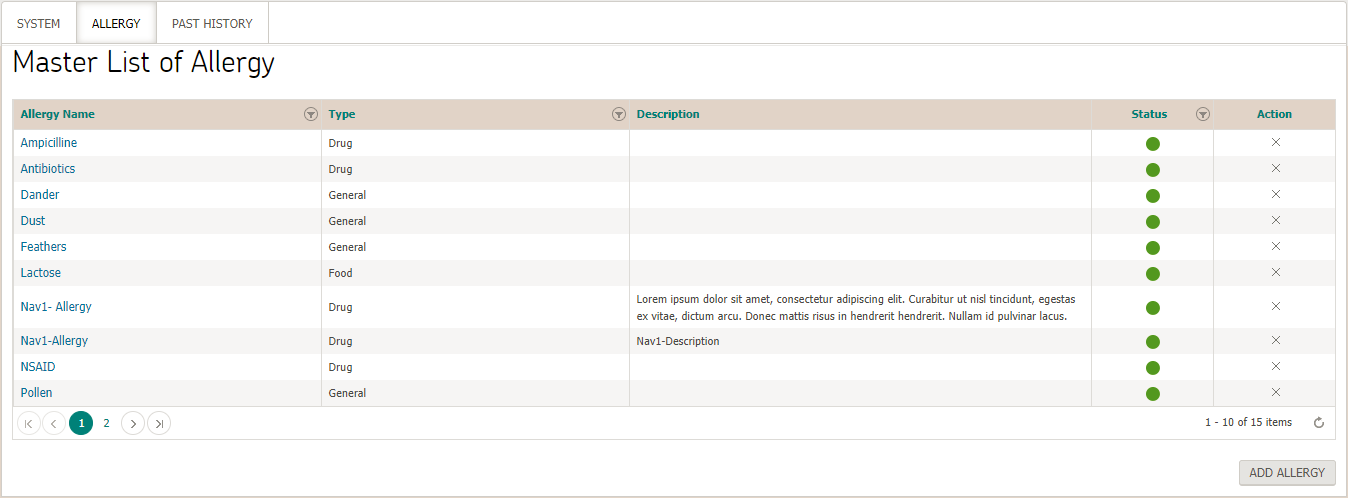
User can add a new allergy by clicking on  button. User must specify mandatory fields before clicking on save button for new allergy to be added to master list.
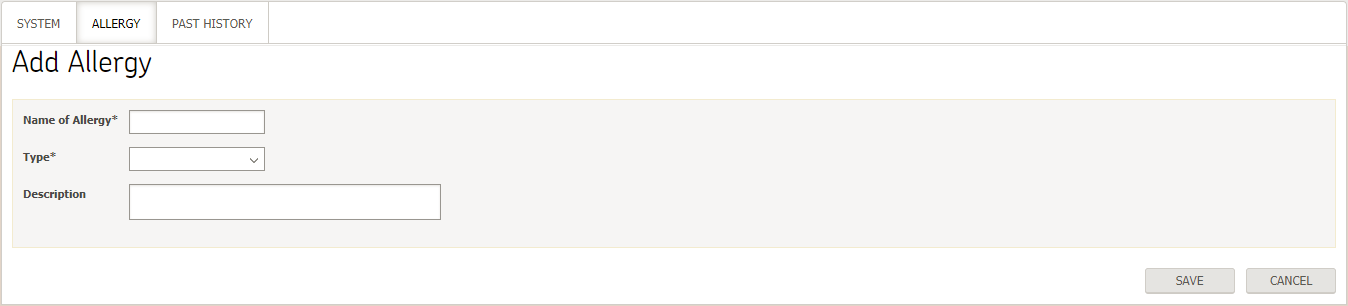
User can edit an allergy in master list by clicking on allergy name and following the same steps as mentioned above for adding a new allergy, changes will be updated upon saving provided necessary information is entered.
Past History
User navigates to Settings > EMR > History > Past History tab, master list containing all Past Histories will be displayed.
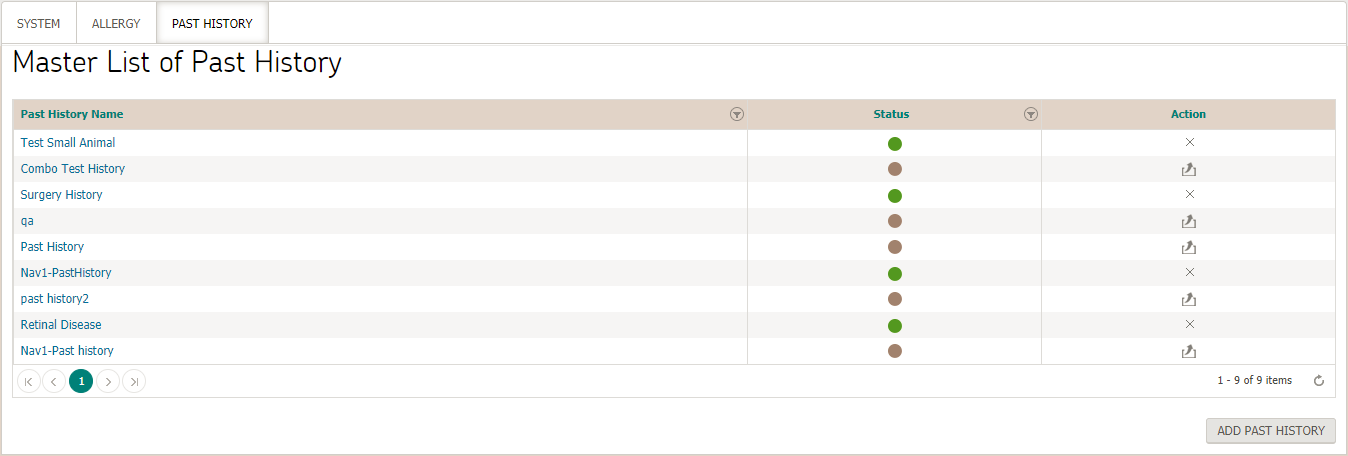
User can add a new allergy by clicking on  button. User must specify mandatory fields before clicking on save button for new past history to be added to master list.

Upon entering the necessary details and clicking on save button, a new section “Template list” appears right under history section

User can create template by clicking on “create template” button. User must specify mandatory information before saving it.
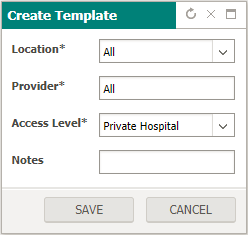
Upon saving, template screen is displayed
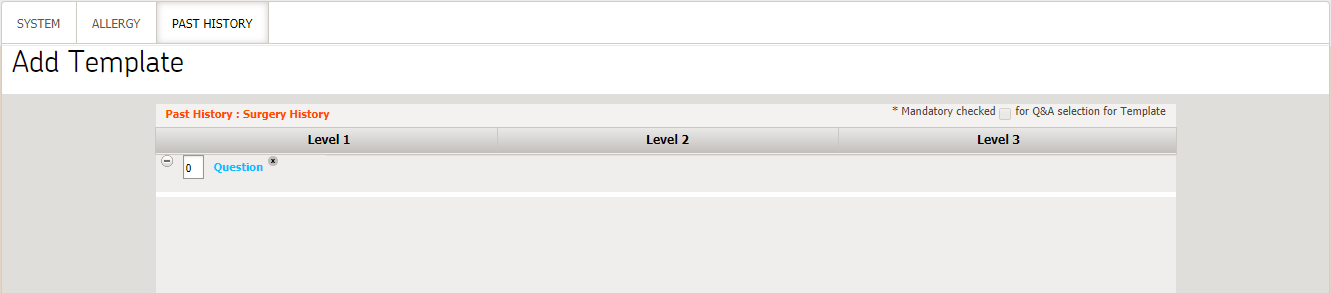
User can add a question to template by clicking on “question” hyperlink. Upon clicking, master list containing all already existing questions is displayed in a popup

User can select from the master list or add a new question by clicking on “add new question” button, following popup screen is displayed
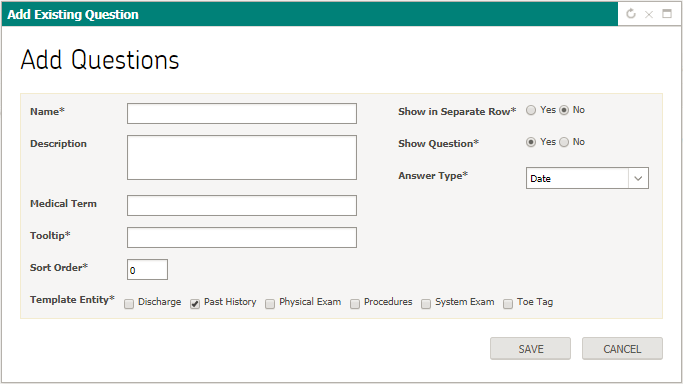
Upon save button, question will be added to template.
User can add answer to a question in a template by clicking on “answer” hyperlink. Upon clicking, master list containing all already existing answers is displayed in a popup
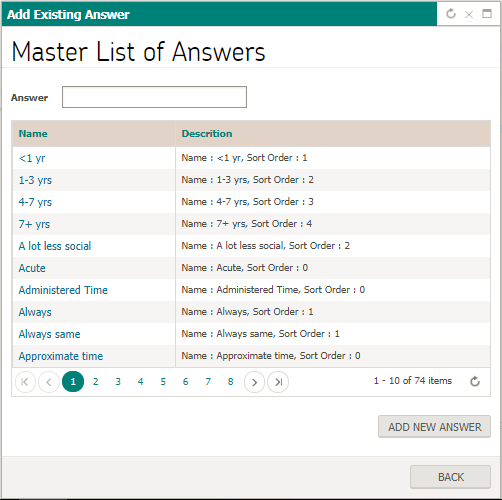
User can select from the master list or add a new answer by clicking on “add new answer” button, following popup screen is displayed
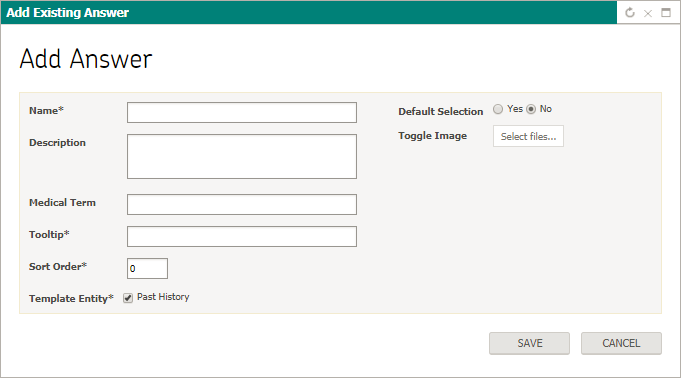
Once done, user can click on close button to navigate back to “update past history” page. Template will also be added under template list for past history being added
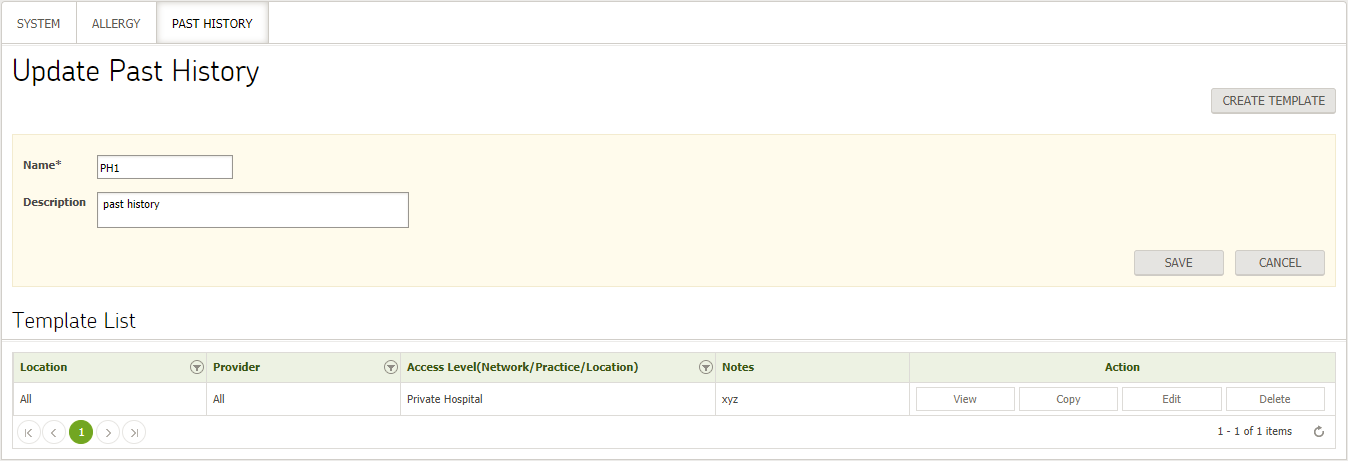
User can edit a past history in master list by clicking on past history name and following the same steps as mentioned above for adding a new past history, changes will be updated upon saving provided necessary information is entered.
Exam
User navigates to Settings > EMR > Exam, master list containing existing exams is displayed
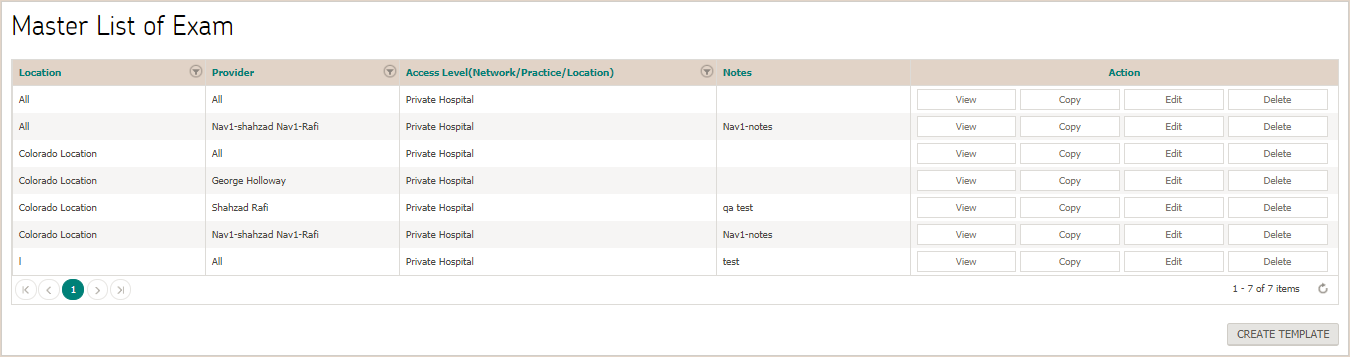
User can perform following actions on existing templates:
- View
- Copy
- Edit
- Delete
View
To view an existing template, user clicks on view button, following popup screen is displayed
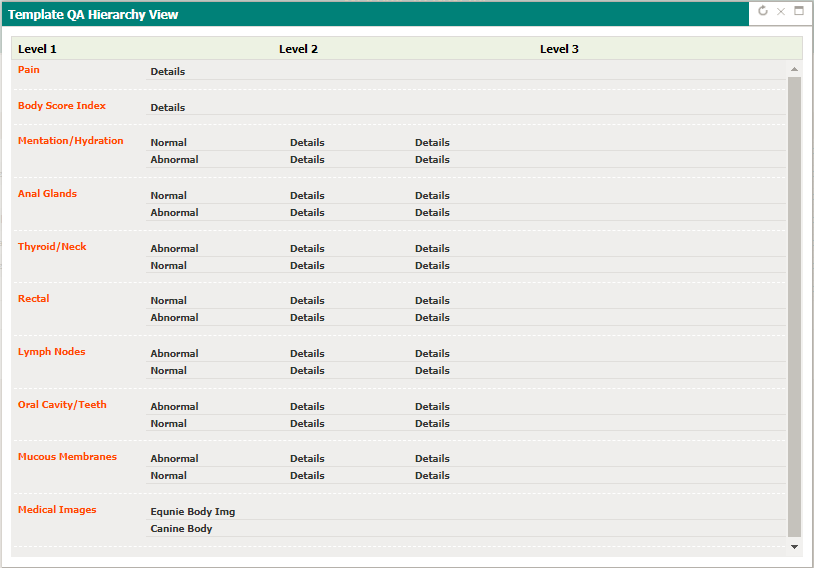
Copy
To create a copy of an existing template, user clicks on copy button, following prompt is displayed.
On clicking OK button, following popup is displayed
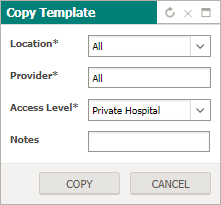
User must specify necessary details different from the existing template and click on copy button, following screen is displayed
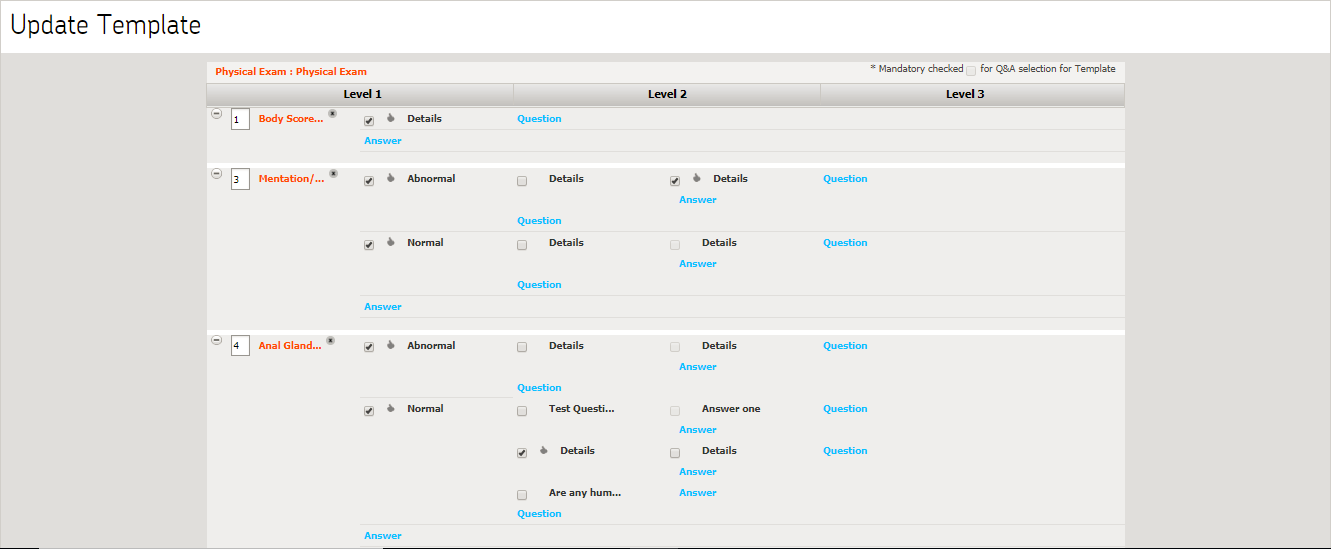
User can click on close button to return to template page.
Edit
On clicking edit button, user is navigated to update template screen
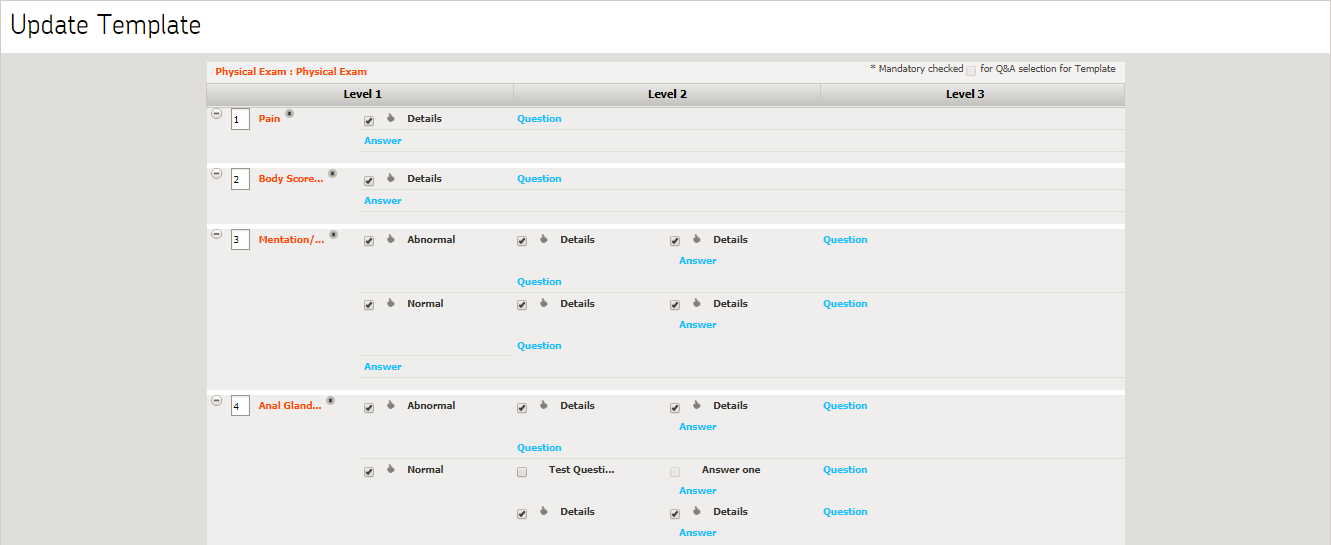
User can make the necessary changes and click on close button to return to template page
Delete
On clicking delete button, following prompt is displayed
On clicking OK button, template is deleted it does not have any reference data otherwise following prompt is displayed
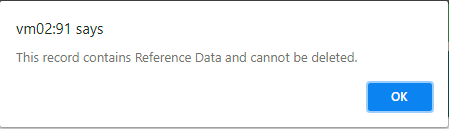
Health Service Plan
User navigates to Settings > EMR > Health service plan
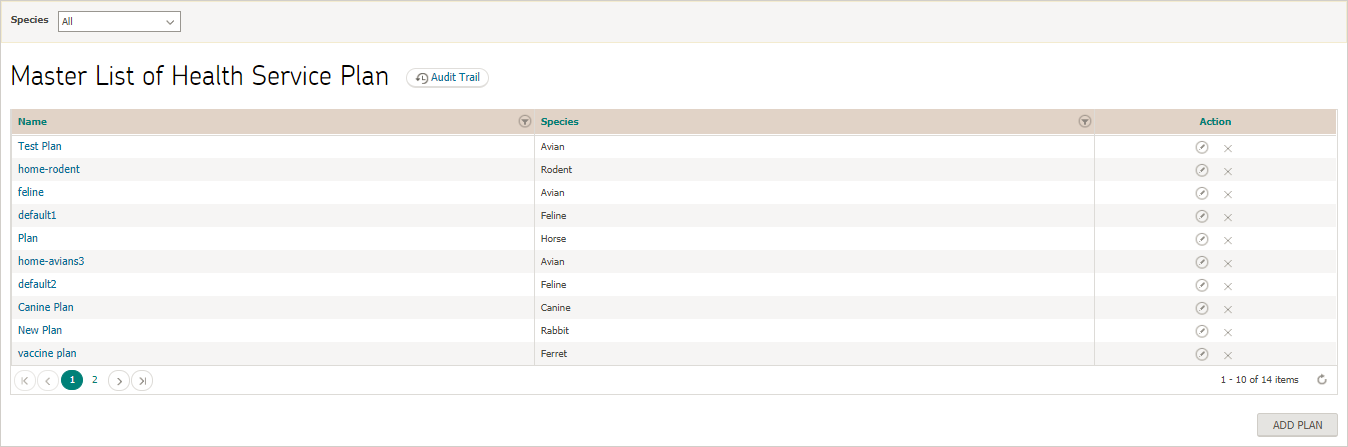
User can now add/edit a health service plan.
Add Health Service Plan
User clicks on add plan button, following screen is displayed

User must enter necessary details before clicking on save button. Upon clicking, a new section plan item(s) appear as shown in following screen
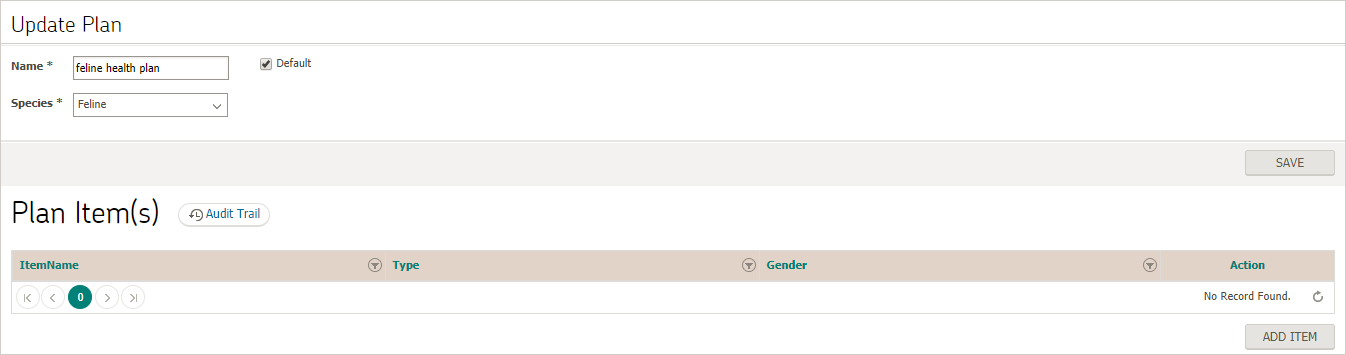
User can add items to plan by clicking on add item button. Item can be of following types
- Inventory
- Lab Test
- Procedure
- Vaccine
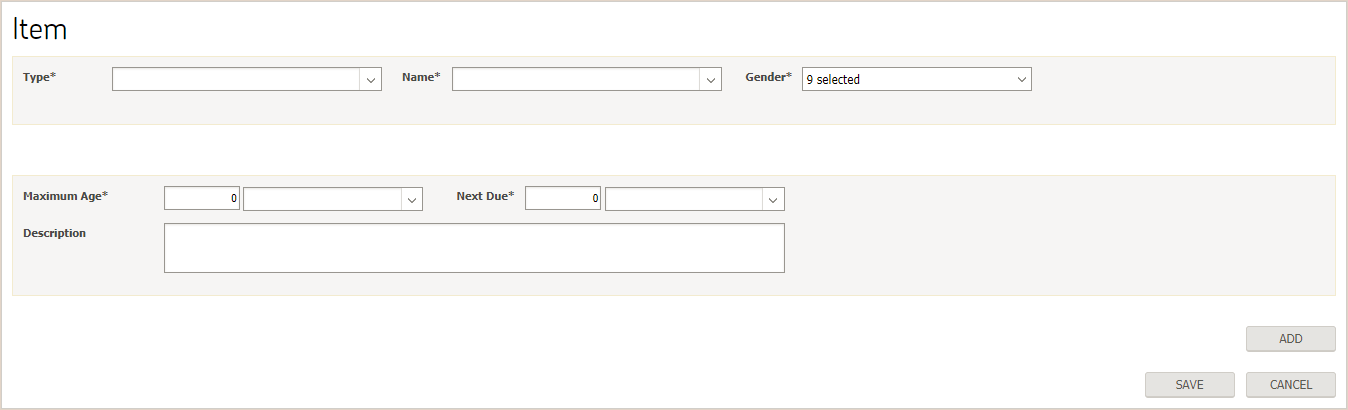
User can add multiple doses by clicking on add button
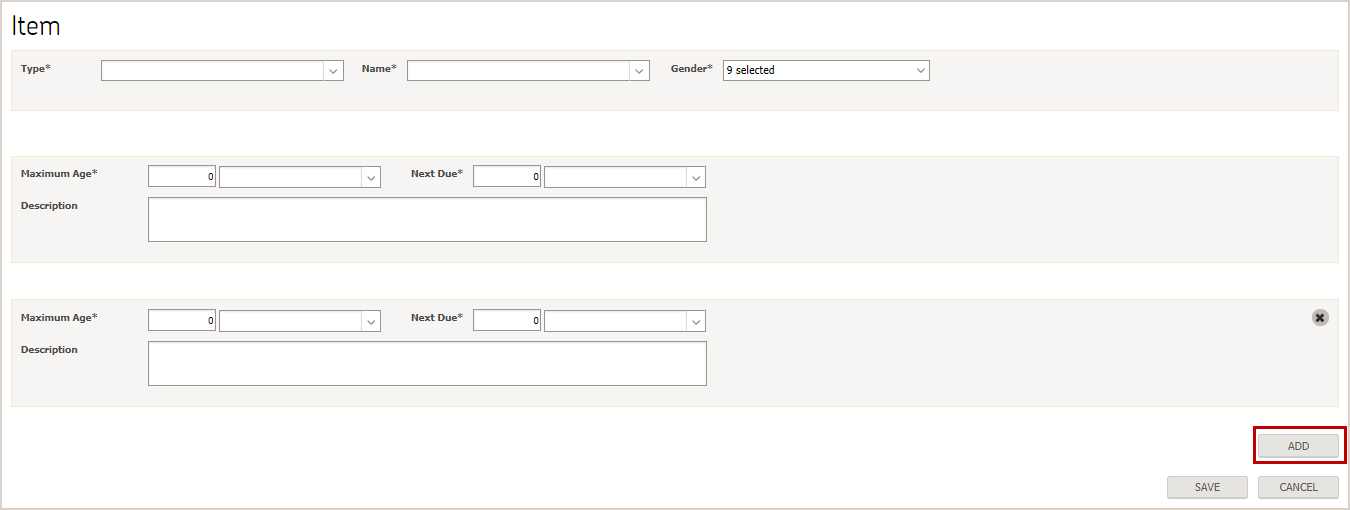
User must specify mandatory details before clicking on save button. Upon clicking, item is added under plan items section.
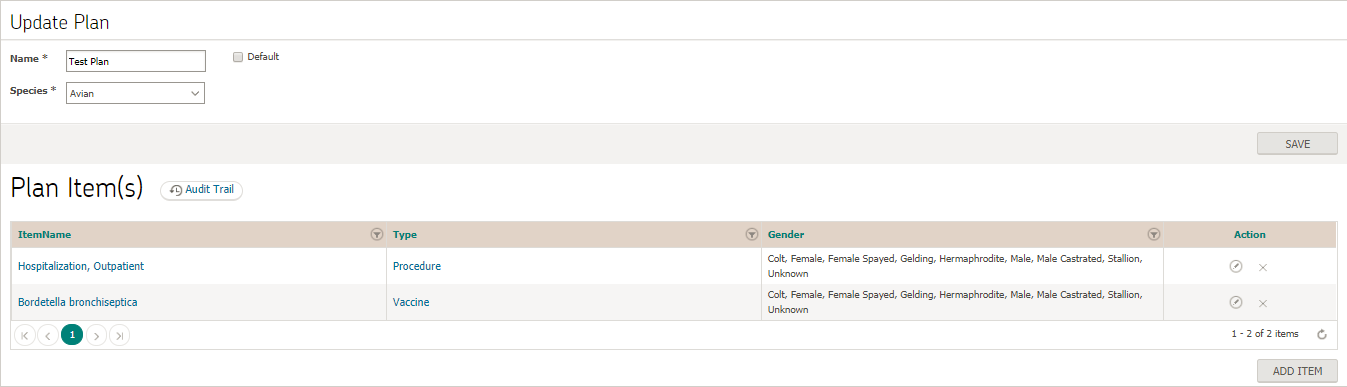
Specie specific health service plan is applicable on patients belonging to that specie. The default plan selected for that specie will be automatically associated with already registered patients belonging to that specie. However user can modify this from patient demographics popup as shown in following screen

For a new patient, user can specify the HSR plan at the time of registering the patient as shown in following screen
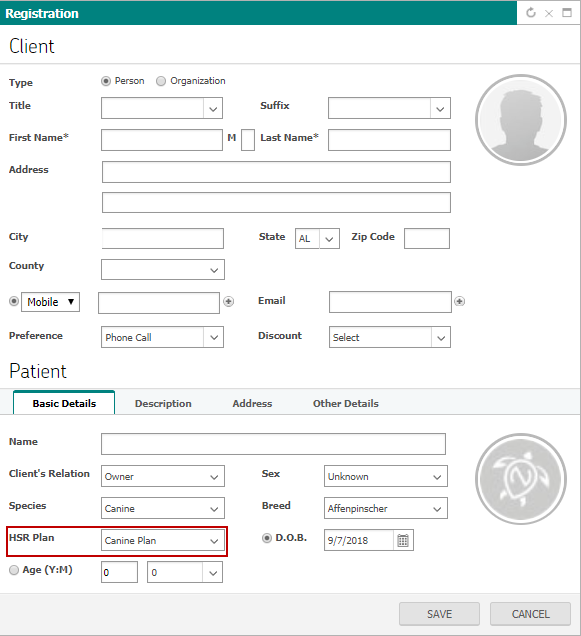
When a HSR plan is associated to the patient, eligible plan items are added to patients clinical history based on the rules defined for plan items to take effect. The reminders for these items are recalculated at the time of checkout when invoiced for a specific vaccine, procedure or inventory item.
Patient health service reminders can be tracked from following workflows:
- Notifications icon on patient banner:
- Reminders section in patient Dashboard
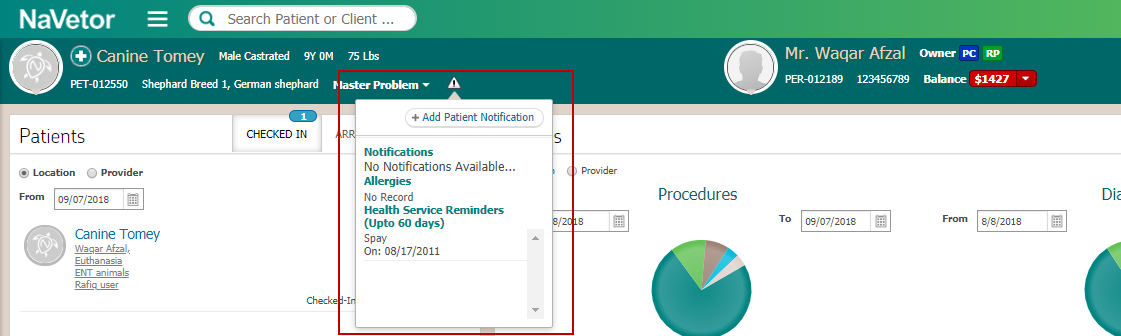
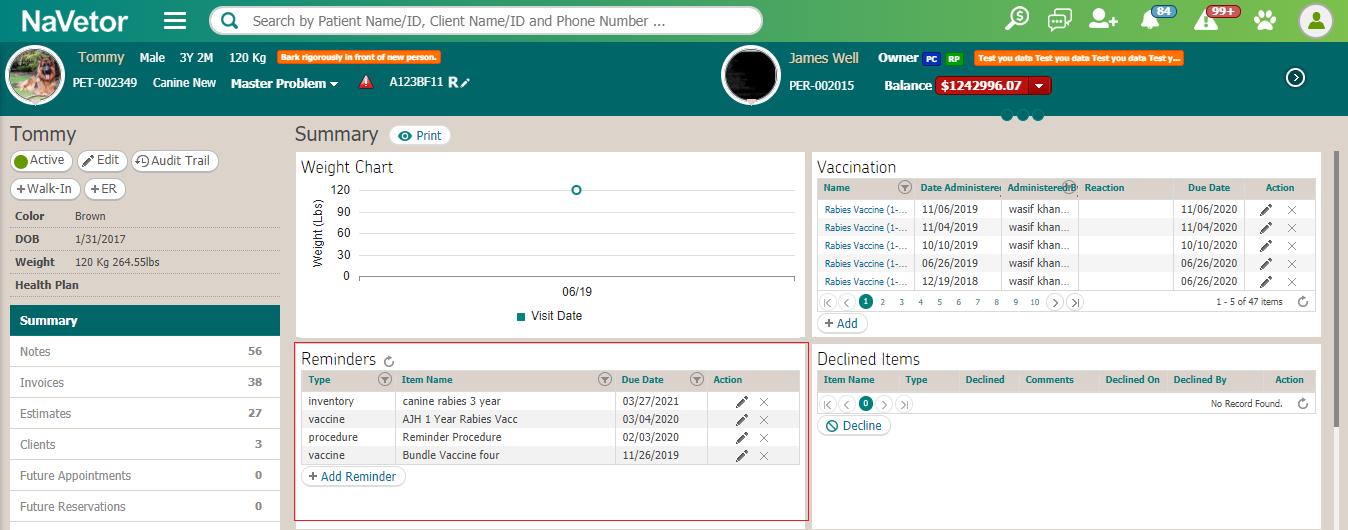
User can view reminders (all overdue and patient reminders)
Assessment
User navigates to Settings > EMR > Assessment
Diagnosis
Diagnosis tab will be displayed as default landing page showing master list of diagnosis
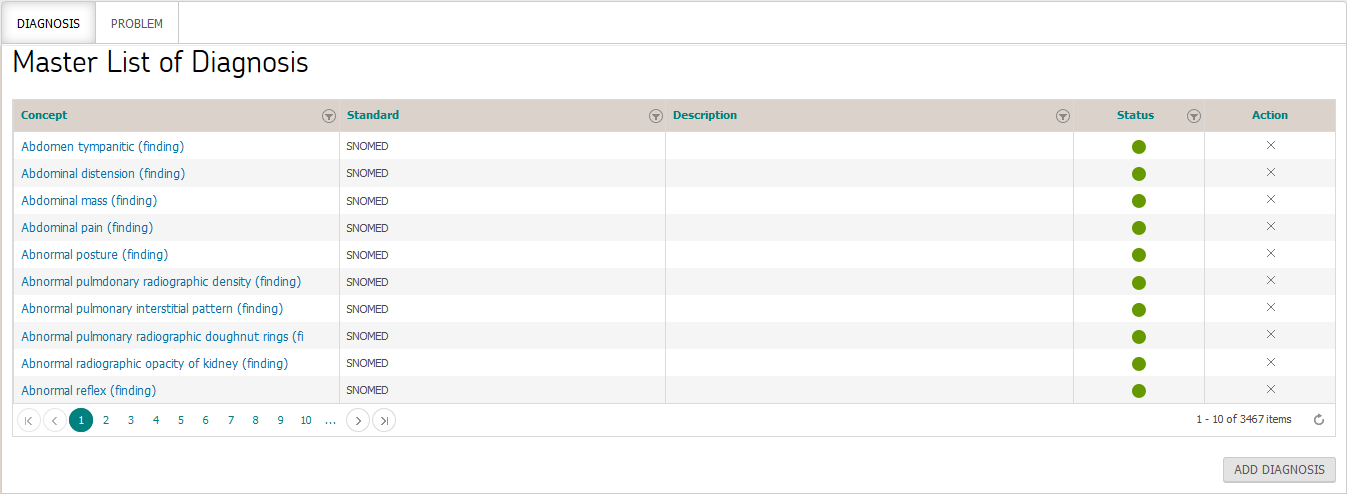
User can add a new diagnosis by clicking on  button. User must specify mandatory fields before clicking on save button for new system to be added to master list.

User can edit a diagnosis in master list by clicking on diagnosis name and following the same steps as mentioned above for adding a new system, changes will be updated upon saving provided necessary information is entered
Problem
User navigates to Settings > EMR > Assessment > Problem tab, master list containing all problems will be displayed
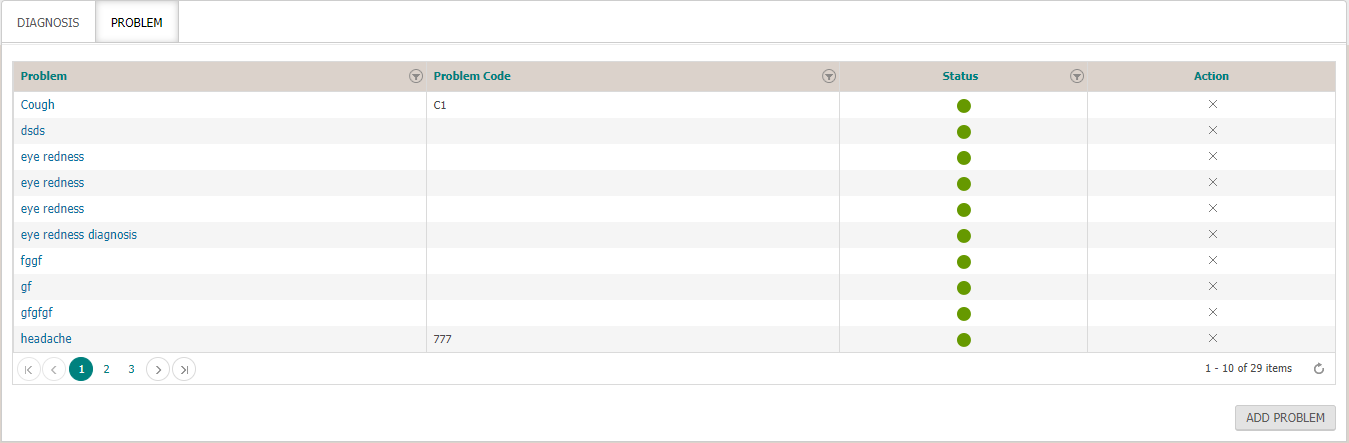
User can add a new problem by clicking on  button. User must specify mandatory fields before clicking on save button for new problem to be added to master list.

User can edit a problem in master list by clicking on problem name and following the same steps as mentioned above for adding a new problem, changes will be updated upon saving provided necessary information is entered.
Procedure
Master list of all procedures can be viewed by navigating to Settings > EMR > Procedure

To add a new procedure, user clicks on  button. User must enter mandatory information before clicking on save button for new procedure to be added to master list.
Note:
User can add multiple codes and their respective detail for a procedure by clicking on add button at the bottom of the screen and fee schedule will also be available after saving a code and user can provide details.
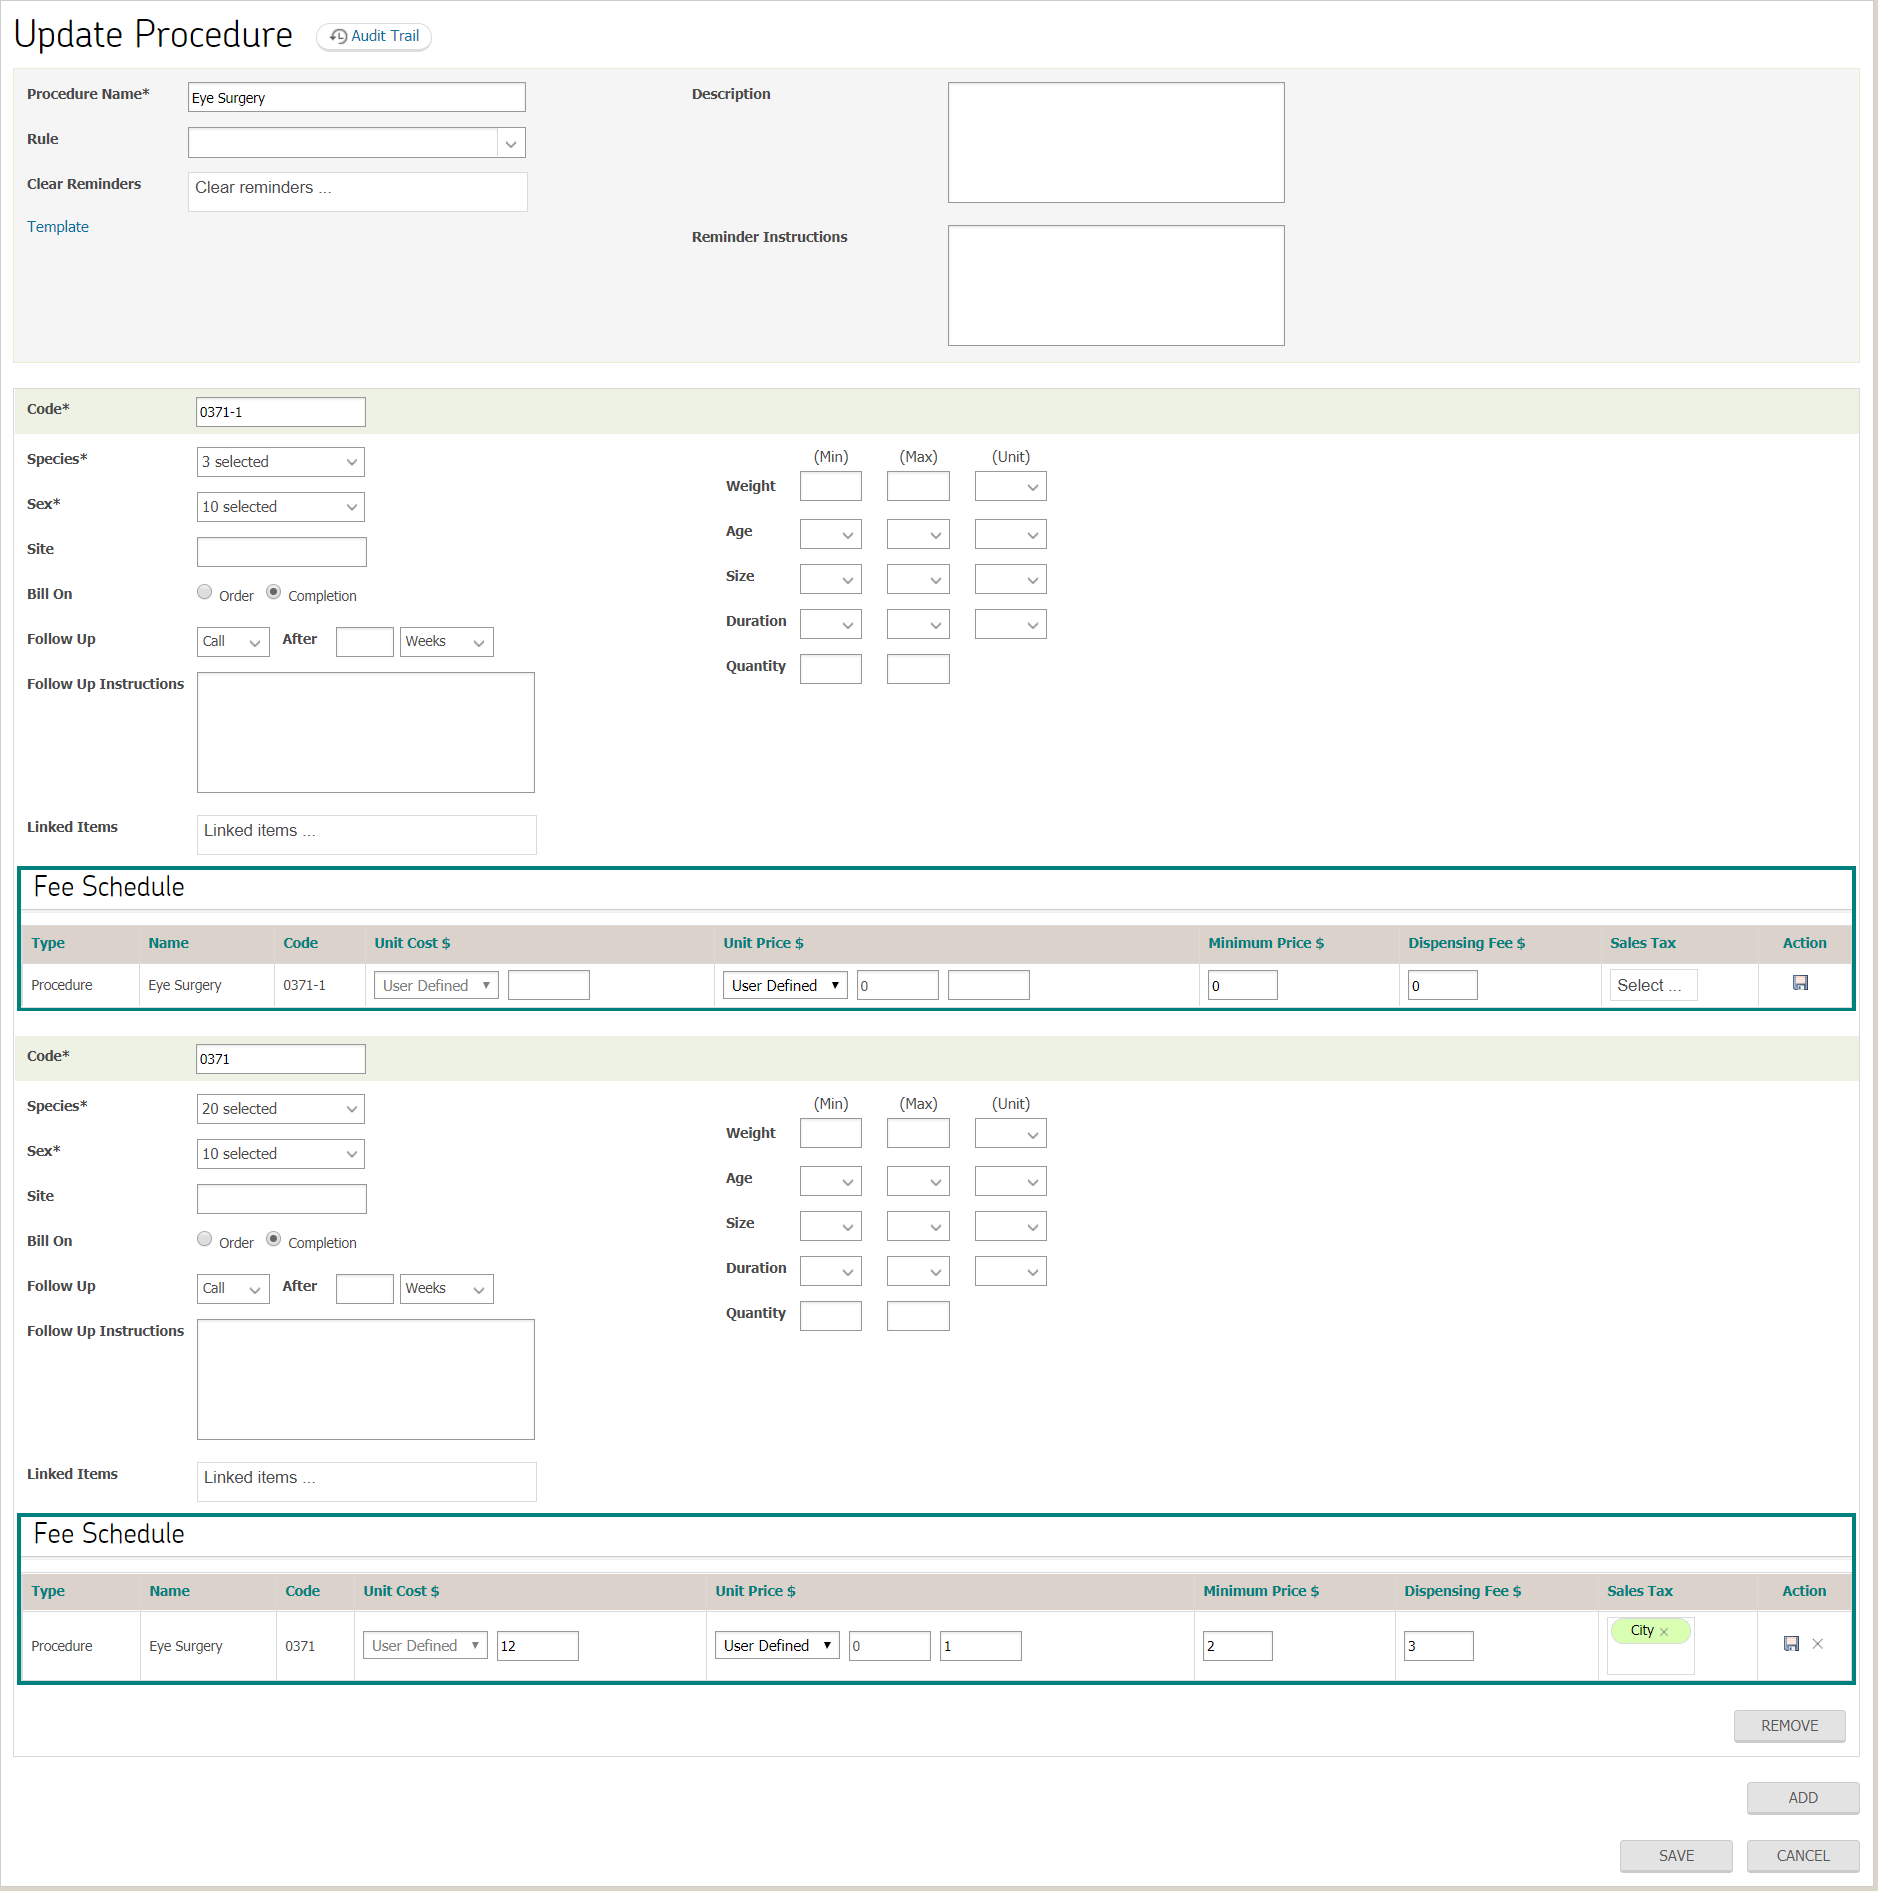
User can edit a procedure by clicking on procedure name and following the same steps as mentioned above for adding a visit reason, changes will be updated upon saving provided necessary information is entered.
Prescriptions
User navigates to Settings > EMR > Prescriptions
Generic Drug
Generic Drug tab will be displayed as default landing page showing master list of generic drug

User can add a new generic by clicking on  button. User must specify mandatory fields before clicking on save button for new generic to be added to master list.
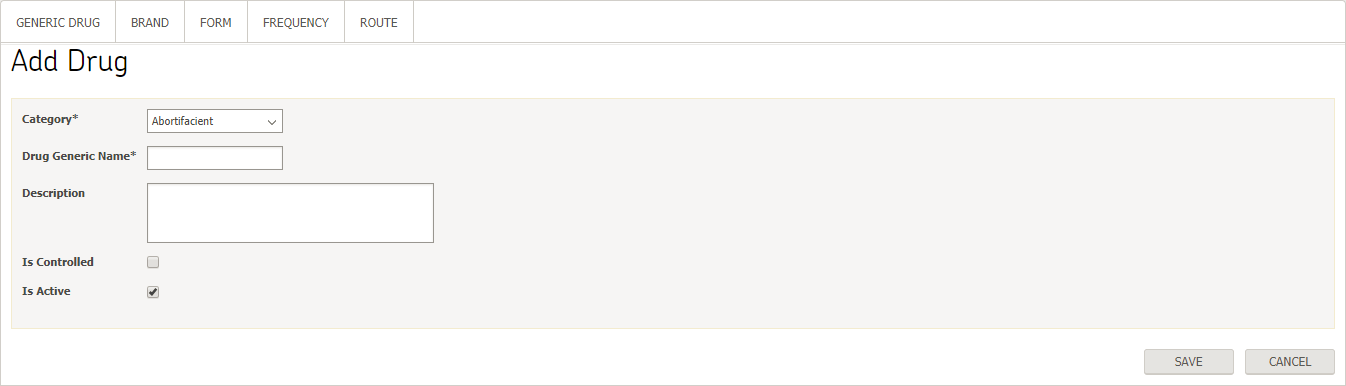
User can edit a generic drug in master list by clicking on generic drug name and following the same steps as mentioned above for adding a new generic, changes will be updated upon saving provided necessary information is entered.
Brand
User navigates to Settings > EMR > Prescriptions > Brand tab, master list containing all brands will be displayed

User can add a new brand by clicking on add brand button. User must specify mandatory fields before clicking on save button for new brand to be added to master list.
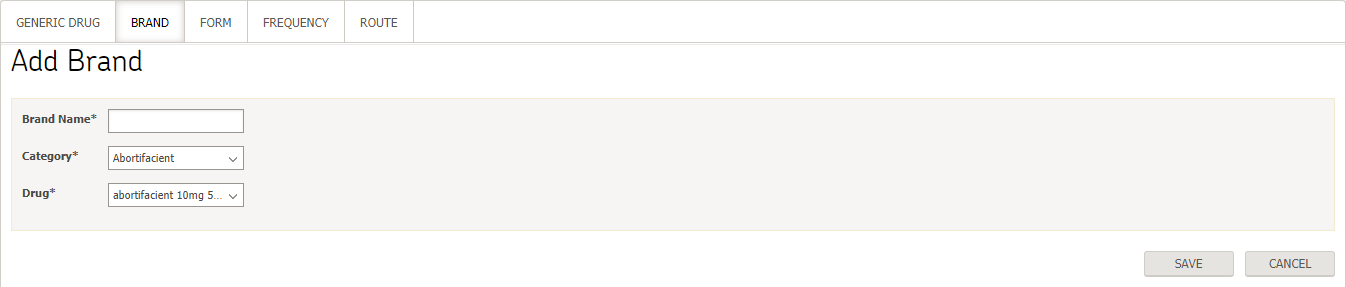
User can edit a brand in master list by clicking on brand name and following the same steps as mentioned above for adding a new brand, changes will be updated upon saving provided necessary information is entered.
Drug Form
User navigates to Settings > EMR > Prescriptions > Form tab, master list containing all drug forms will be displayed
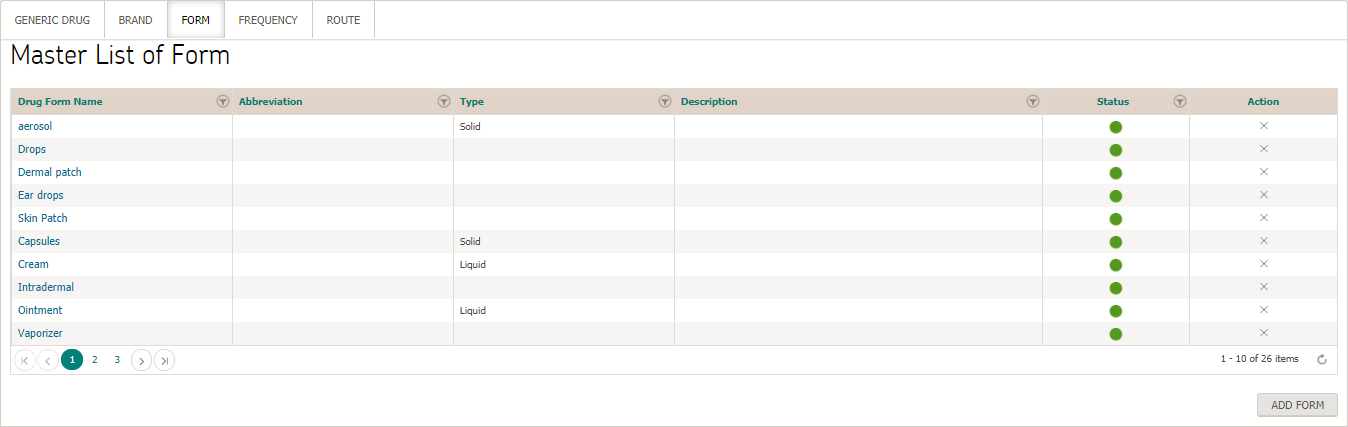
User can add a new drug form by clicking on add form button. User must specify mandatory fields before clicking on save button for new drug form to be added to master list.
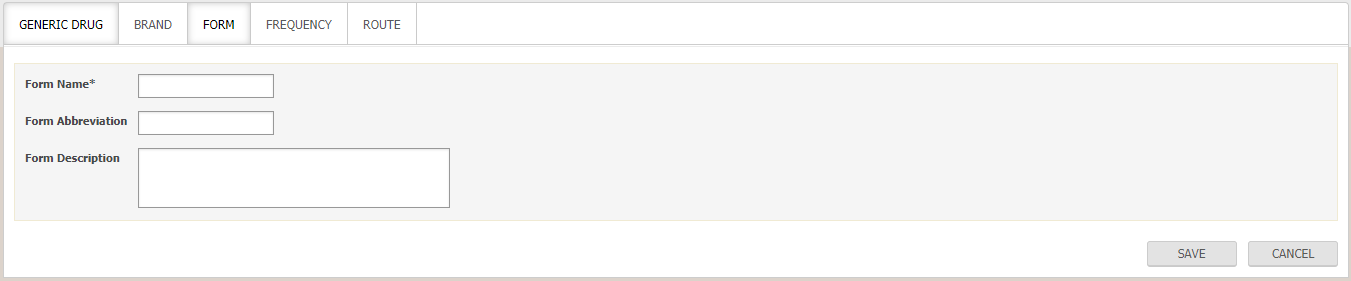
User can edit a drug form in master list by clicking on its name and following the same steps as mentioned above for adding a new drug form, changes will be updated upon saving provided necessary information is entered.
Drug Frequency
User navigates to Settings > EMR > Prescriptions > Frequency tab, master list containing all drug frequencies will be displayed
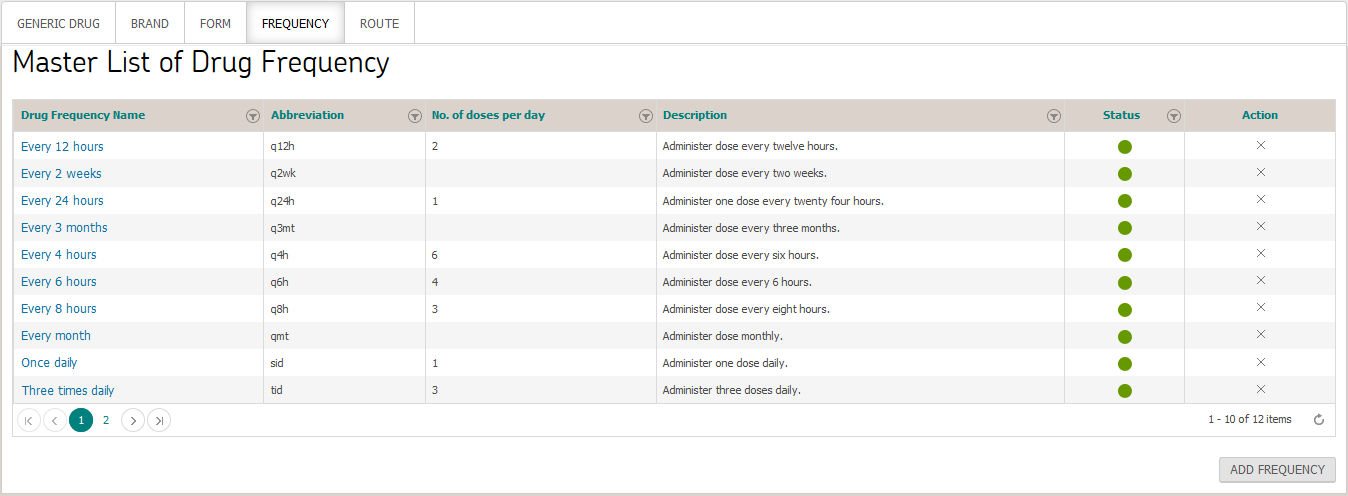
User can add a new drug frequency by clicking on add frequency button. User must specify mandatory fields before clicking on save button for new drug frequency to be added to master list.
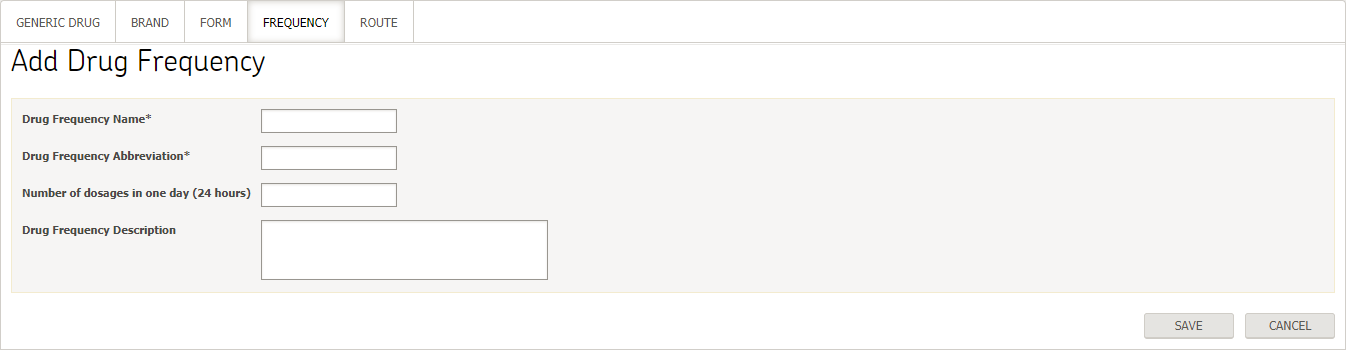
User can edit a drug frequency in master list by clicking on its name and following the same steps as mentioned above for adding a new drug frequency, changes will be updated upon saving provided necessary information is entered.
Drug Route
User navigates to Settings > EMR > Prescriptions > Drug Route tab, master list containing all drug routes will be displayed
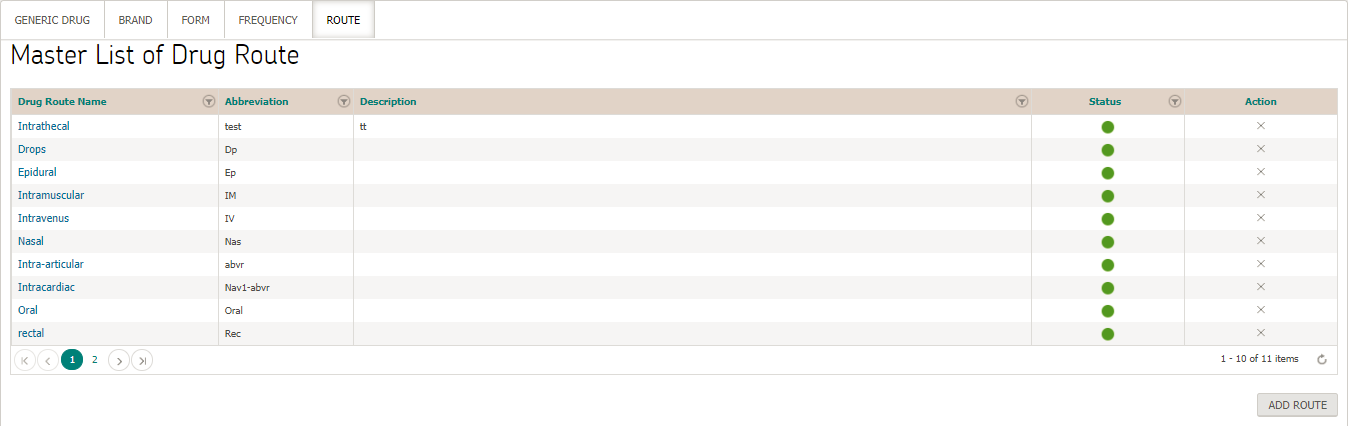
User can add a new drug route by clicking on add route button. User must specify mandatory fields before clicking on save button for new drug route to be added to master list.

User can edit a drug route in master list by clicking on its name and following the same steps as mentioned above for adding a new drug route, changes will be updated upon saving provided necessary information is entered.
Lab
User navigates to Settings > EMR > Lab
Lab Tests
Lab Tests tab will be displayed as default landing page showing master list of lab tests.
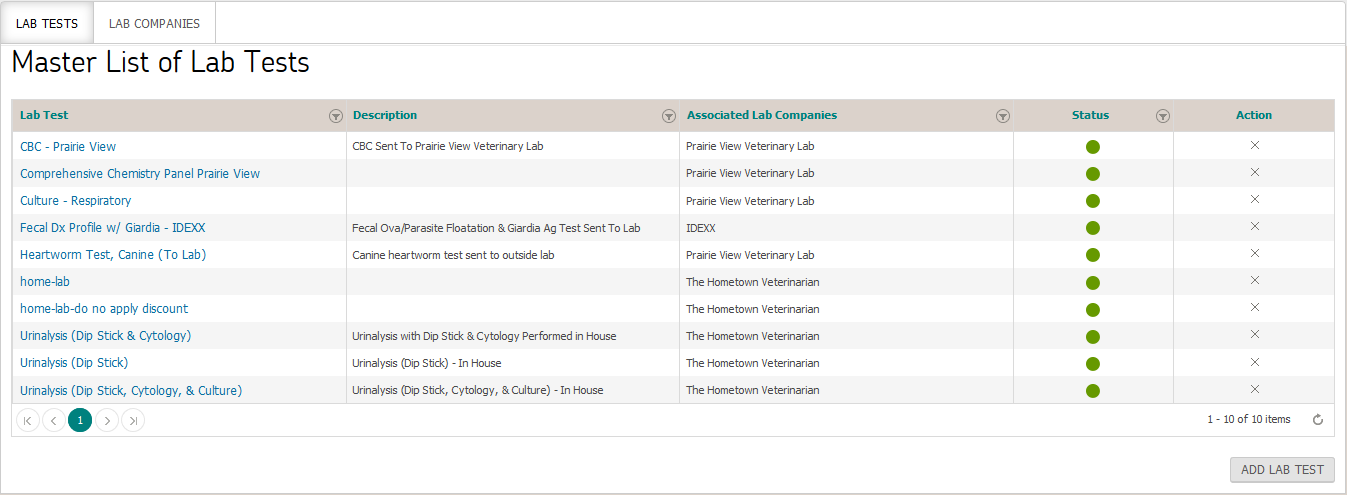
User can add a new lab test by clicking on  button. User must specify mandatory fields before clicking on save button for new lab test to be added to master list.

User can edit a lab test in master list by clicking on test name and following the same steps as mentioned above for adding a lab test, changes will be updated upon saving provided necessary information is entered.
Lab Companies
User navigates to Settings > EMR > Labs > Lab Companies tab, master list containing all lab companies will be displayed
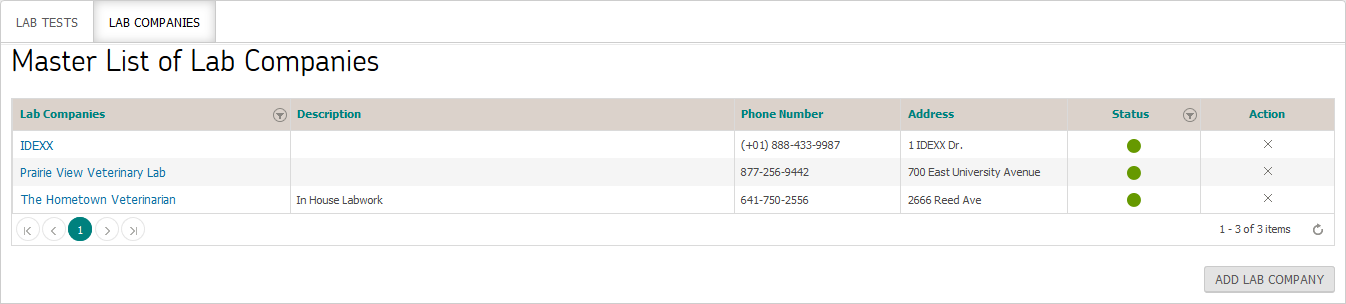
User can add a lab company by clicking on  button. User must specify mandatory fields before clicking on save button for new lab company to be added to master list.
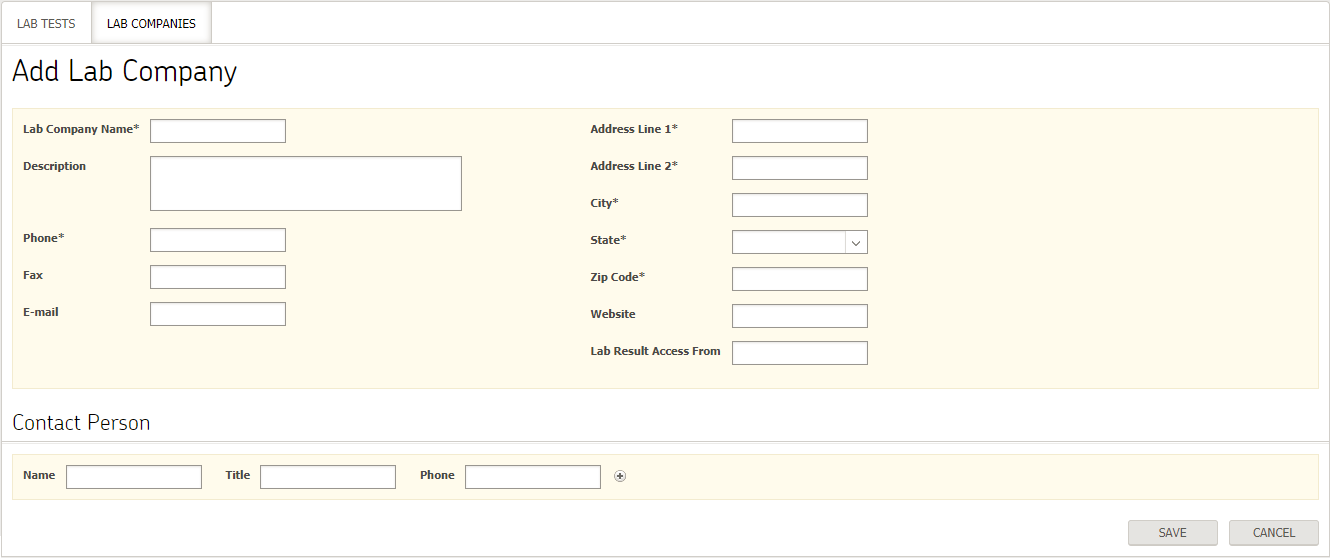
User can edit a lab company in master list by clicking on its name and following the same steps as mentioned above for adding a new lab company, changes will be updated upon saving provided necessary information is entered.
Template
User navigates Settings > EMR > Template
Questions
Questions tab will be displayed as default landing page showing master list of questions
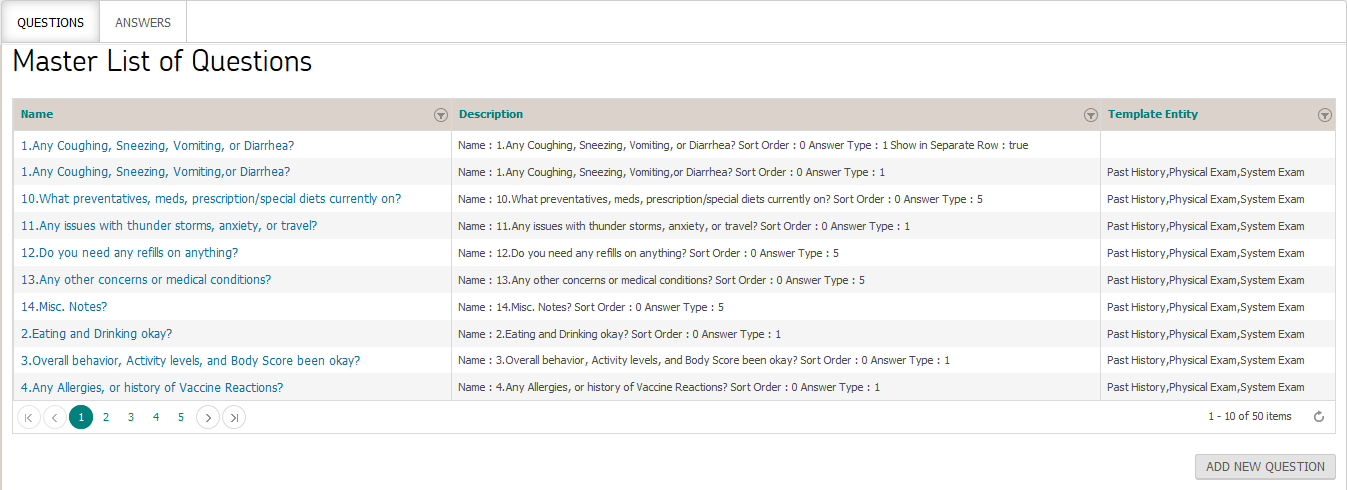
User can add a new question by clicking on add new question button, following screen is displayed
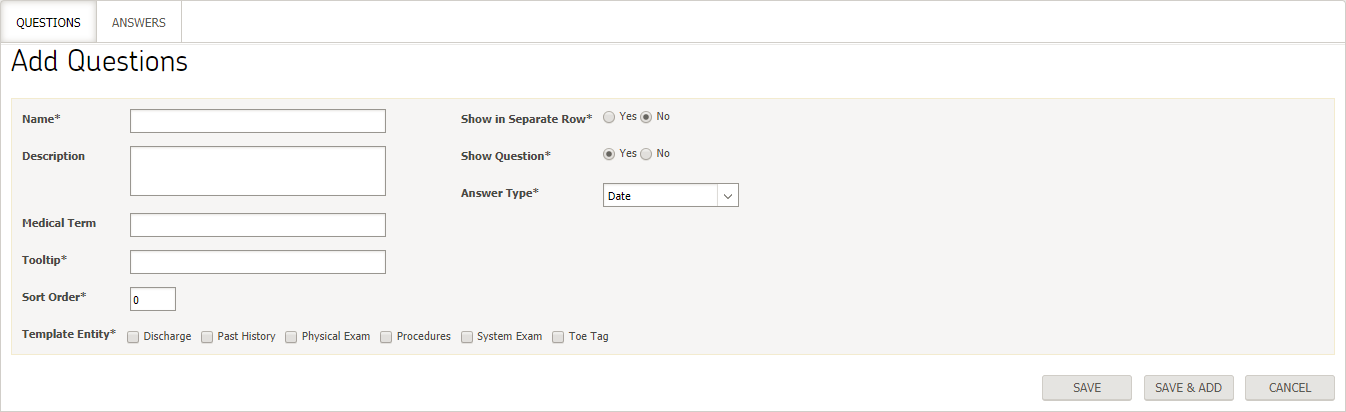
User must enter necessary details before clicking on save button for question to be added to master list. If user clicks on “save and add” button then question will be added to master list and user can add more questions.
To edit an existing question, user can select from the master of questions and make necessary changes to it.
Answers
Answers tab will display master list of all existing answers
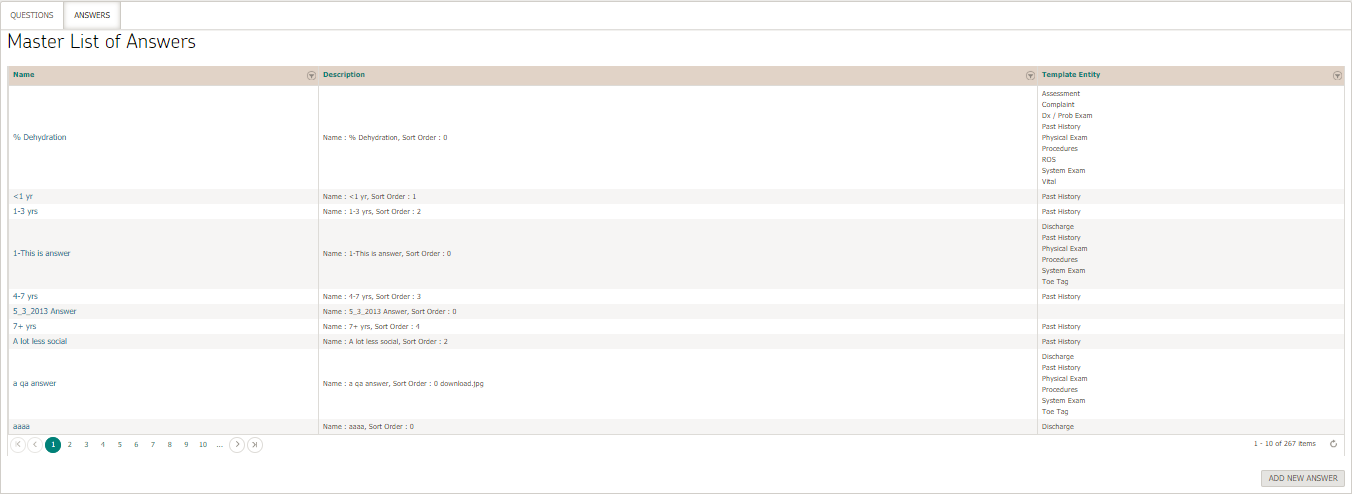
User can add a new answer by clicking on add new answer button, following screen is displayed
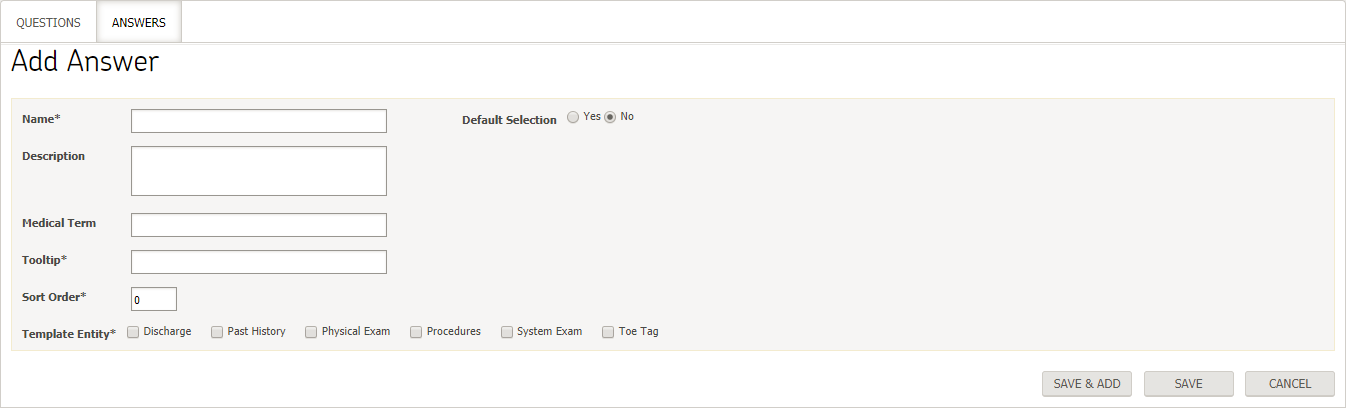
User must enter necessary details before clicking on save button for answer to be added to master list. If user clicks on “save and add” button then answer will be added to master list and user can add more answers.
To edit an existing question answer, user can select from the master of answers and make necessary changes to it.
Vaccines
Master list of all vaccines can be viewed by navigating to Settings > EMR > Vaccines > Vaccines

To add a new vaccine, user clicks on  button. User must specify mandatory fields before clicking on save button for new vaccine to be added to master list.
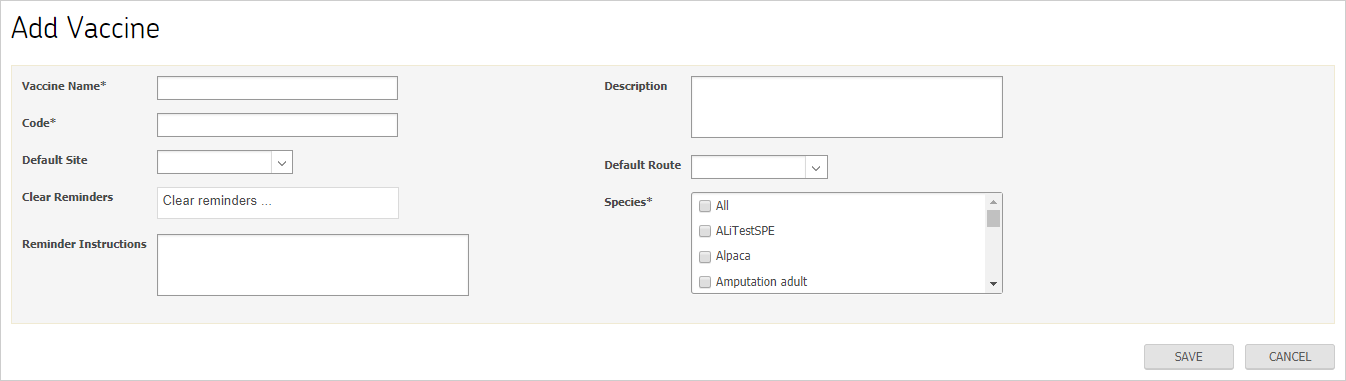
User can edit a vaccine in master list by clicking on vaccine name and following the same steps as mentioned above for adding a vaccine, changes will be updated upon saving provided necessary information is entered.
Communication Types
Master list of all Communication Types can be viewed by navigating to Settings > EMR > Communication Types
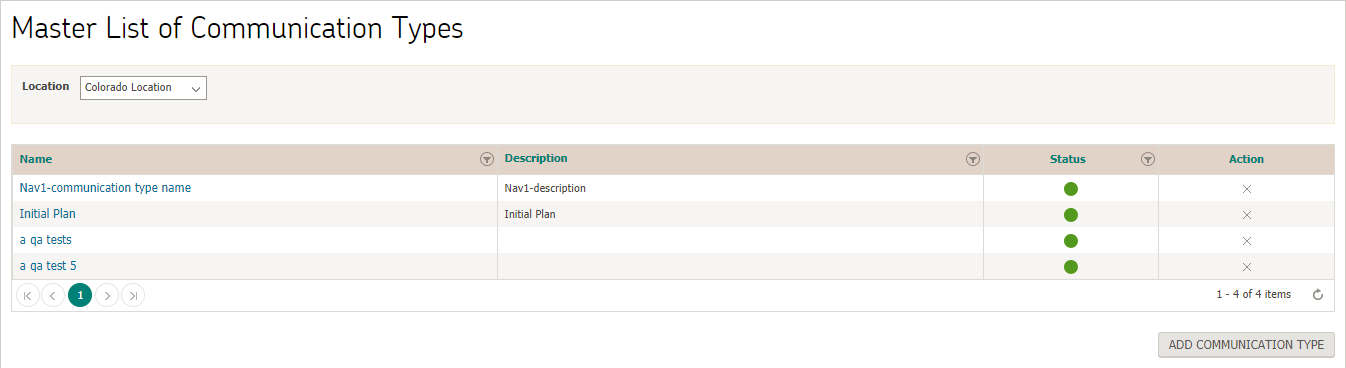
To add a new Communication Type, user clicks on  button. User must specify mandatory fields before clicking on save button for new Communication Type to be added to master list.
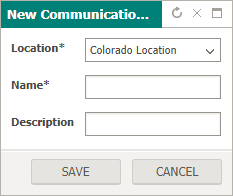
User can edit a Communication Type in master list by clicking on Communication Type name and following the same steps as mentioned above for adding a Communication Type, changes will be updated upon saving provided necessary information is entered.
Vital Ranges
User can define vital ranges by navigating to Settings > EMR > Vital Ranges.
Note:
- Species dropdown will be populated with values based on location.
- Vital ranges are defined for each location-specie combination.
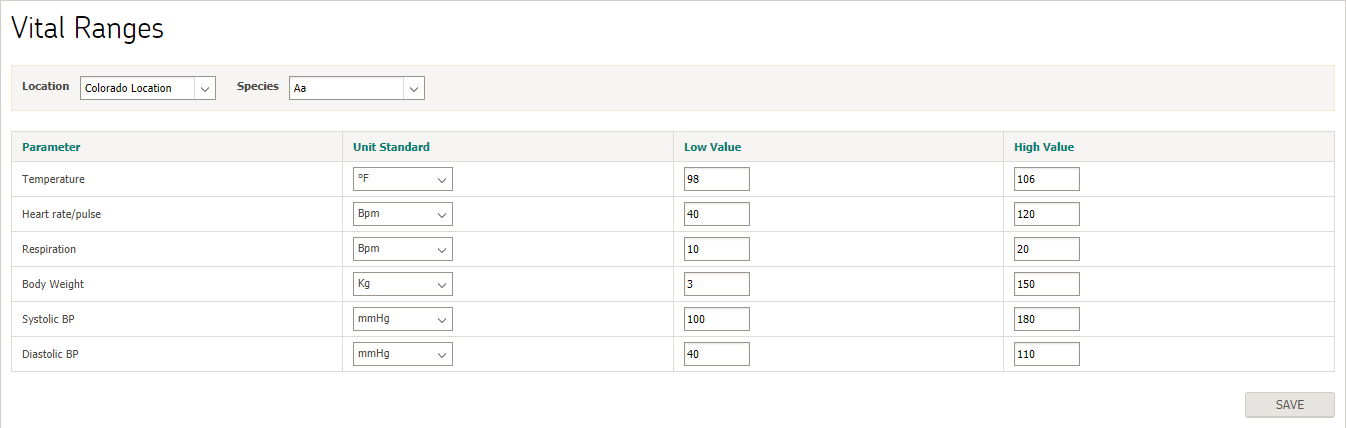
User can edit vital ranges for any location-specie combination by selecting relevant values from their respective dropdowns.
Alerts
Master list of all alerts can be viewed by navigating to Settings > EMR > Alerts
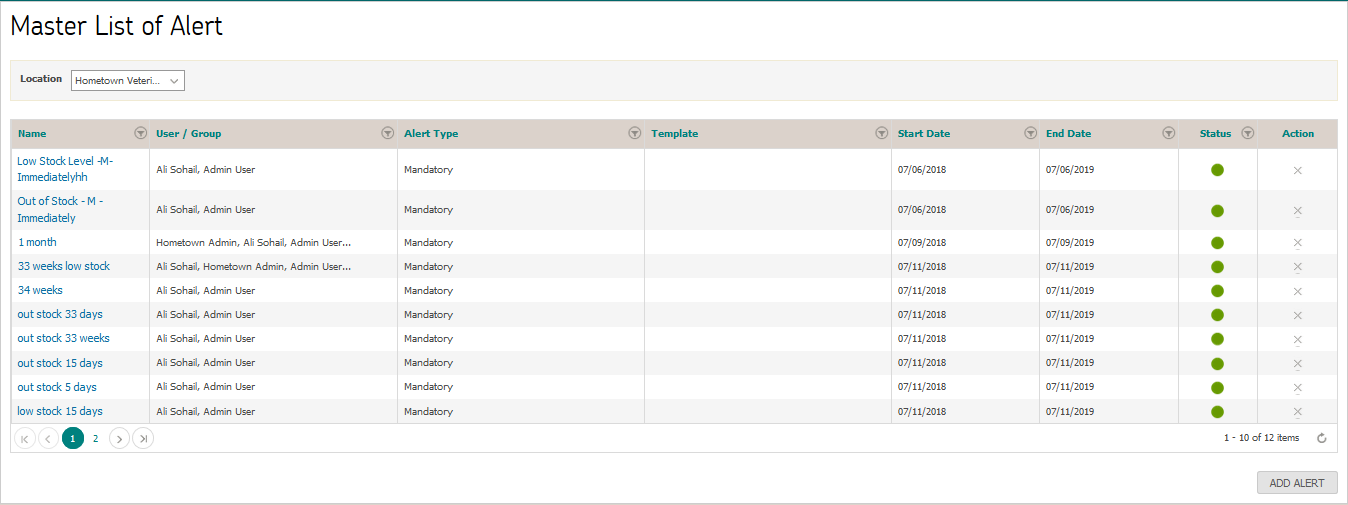
To add a new alert, user clicks on  button. User must specify mandatory fields before clicking on save button for new alert to be added to master list.
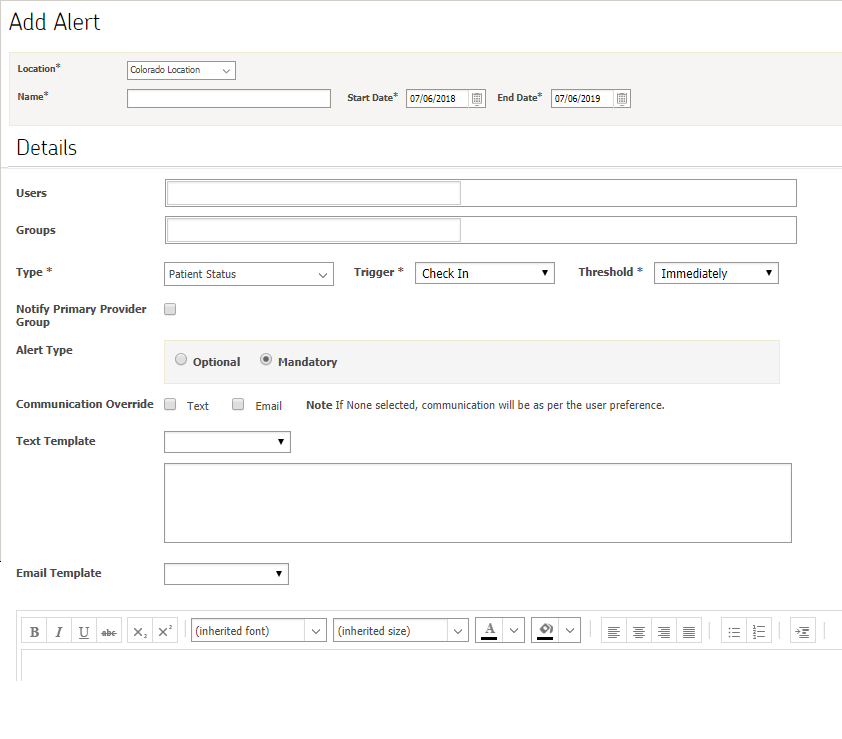
User can edit an alert in master list by clicking on alert name and following the same steps as mentioned above for adding an alert, changes will be updated upon saving provided necessary information is entered.
IV Catheter
Master list of Catheter can be viewed by navigating to Settings > EMR > IV Catheter.
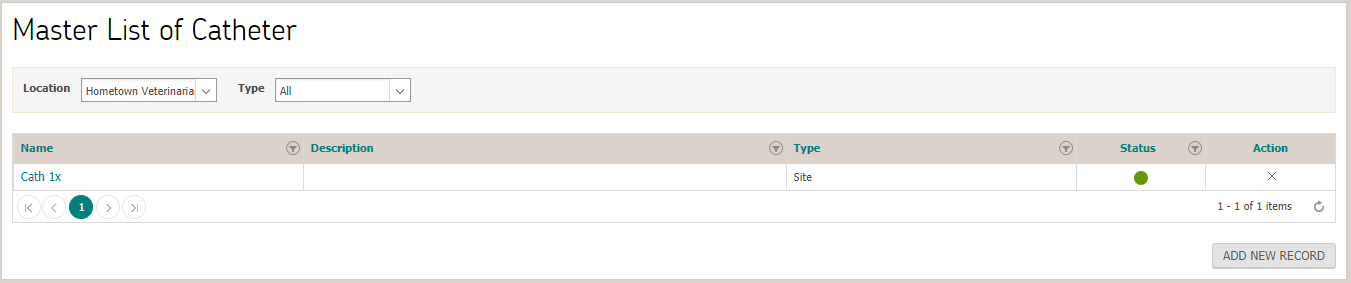
To add IV Catheter, user clicks on button. User must specify mandatory fields before clicking on save button for Catheter to be added to master list.
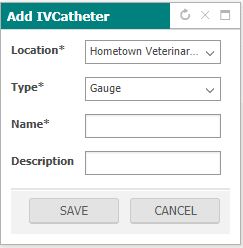
User can edit an IV Catheter in master list by clicking on its name and following the same steps as mentioned above for adding a Catheter, changes will be updated upon saving provided necessary information is entered. Note that on edit, the location and type will be read-only and Name/Description should be editable.
Pulse and Respiration
Master list of all pulse and respiration can be viewed by navigating to Settings > EMR > Pulse and Respirations.
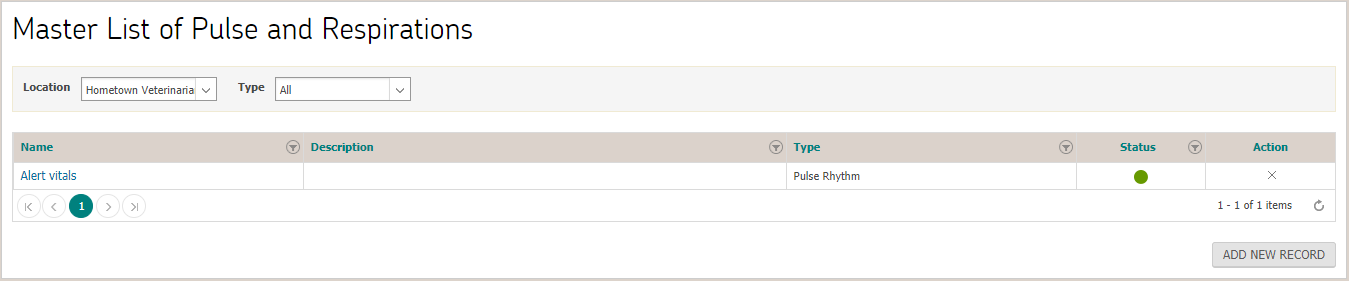
To add a new pulse and respiration, user clicks on button. User must specify mandatory fields before clicking on save button for new pulse and respiration to be added to master list.
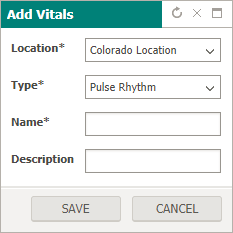
User can edit a pulse and respiration in master list by clicking on pulse and respiration name and following the same steps as mentioned above for adding pulse and respiration, changes will be updated upon saving provided necessary information is entered.
Billing
Billing settings enable user to configure following sections
- Bundle
- Adjustment types
- Fee Schedule
- Sales Tax
- Discount
Bundle
Master list of all bundles can be viewed by navigating to Settings > Billing > Bundle
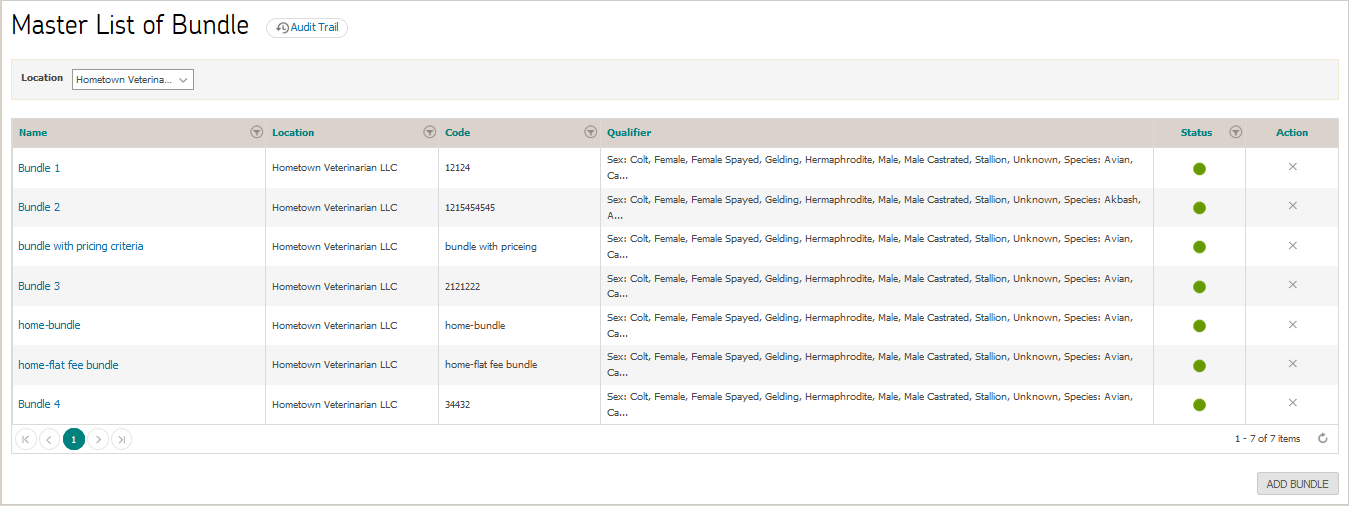
To add a new bundle, user clicks on  button. User must specify mandatory fields before clicking on save button for new bundle to be added to master list.
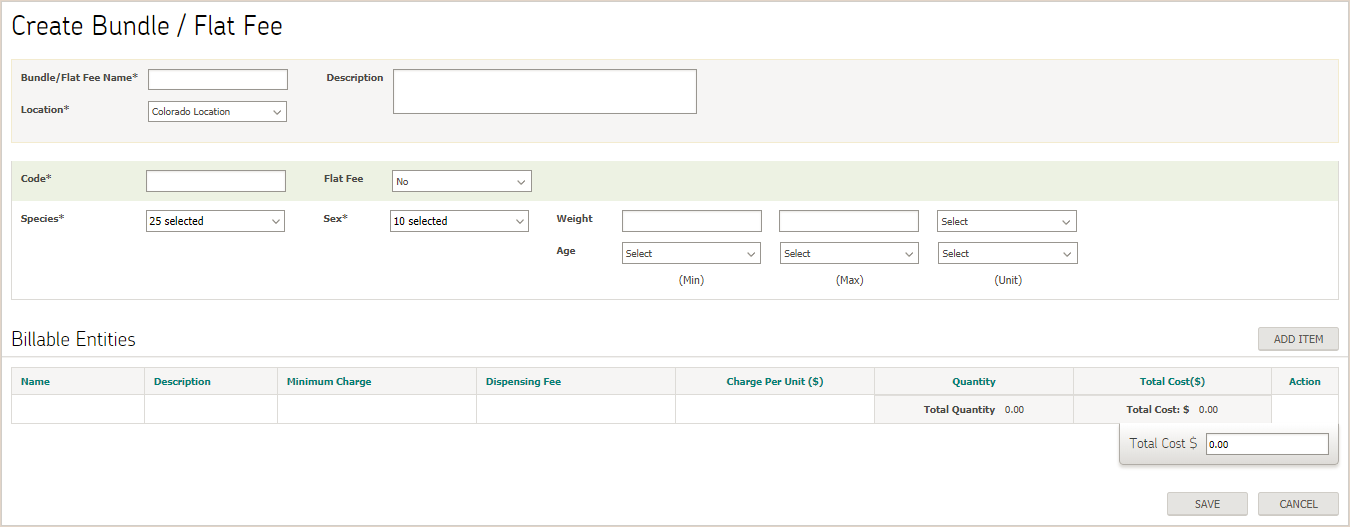
User can edit a bundle in master list by clicking on bundle name and then following the same steps as mentioned above for adding a bundle, changes will be updated upon saving provided necessary information is entered.
Adjustment Type
Master list of all adjustment types can be viewed by navigating to Settings > Billing > Adjustment Type
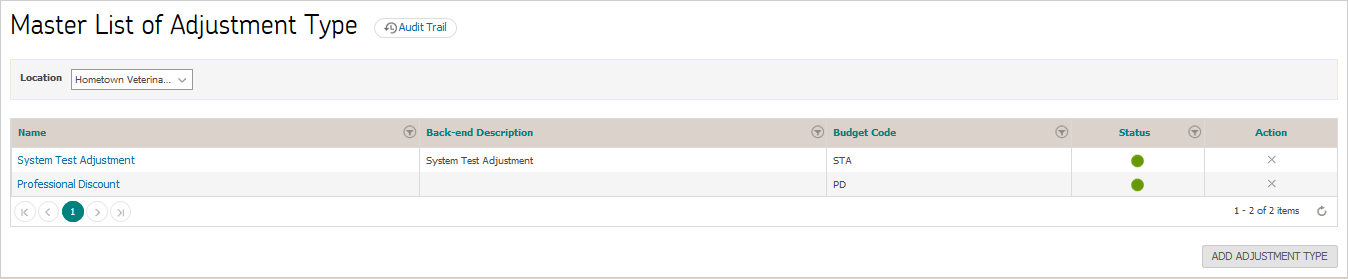
To add a new adjustment type, user clicks on  button. User must specify mandatory fields before clicking on save button for new adjustment type to be added to master list.
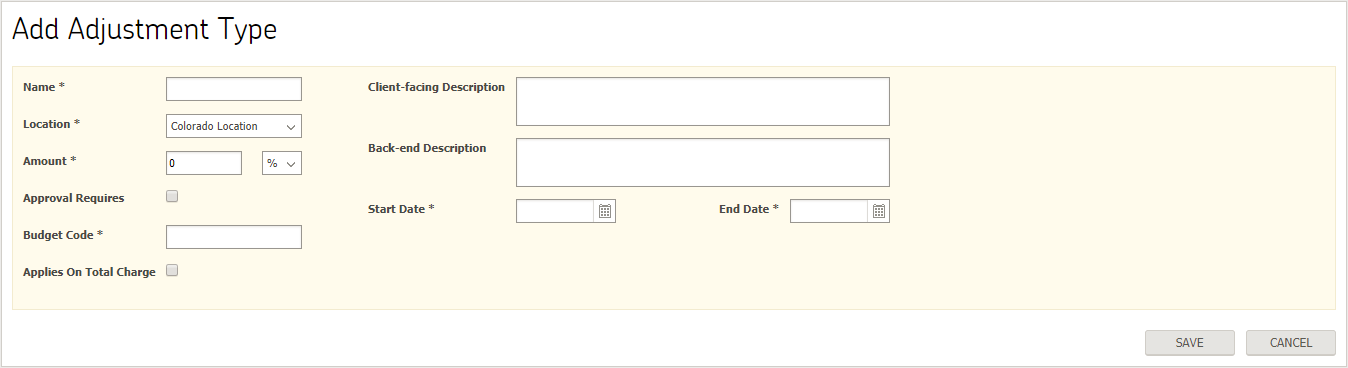
User can edit an adjustment type in master list by clicking on adjustment type name and following the same steps as mentioned above for adding an adjustment type, changes will be updated upon saving provided necessary information is entered.
Fee Schedule
Master list of all Fee Schedules can be viewed by navigating to Settings > Billing > Fee Schedule
Note:
- Fee Schedule will display separate rows for each inventory item, procedure and lab added from their respective sections in settings module.
- Rows will be filtered based on the selection in dropdown corresponding to location in search filters. It will contain following values
- Inventory
- Lab
- Procedure
- Values defined in fee schedule will be populated on charge estimate for respective line items.
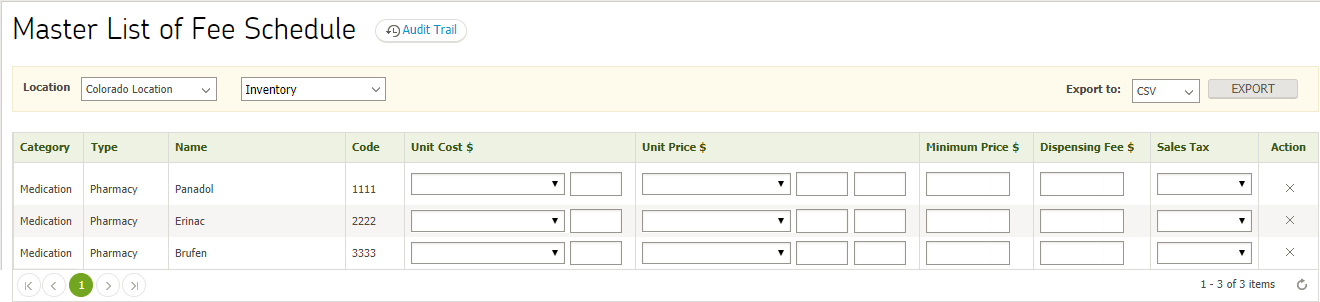
User can edit different line items in fee schedule simply by making changes in their respective column on grid. Once user made a change then system will highlight the row with light red background.
Sales Tax
Master list of all sales tax can be viewed by navigating to Settings > Billing > Sales Tax
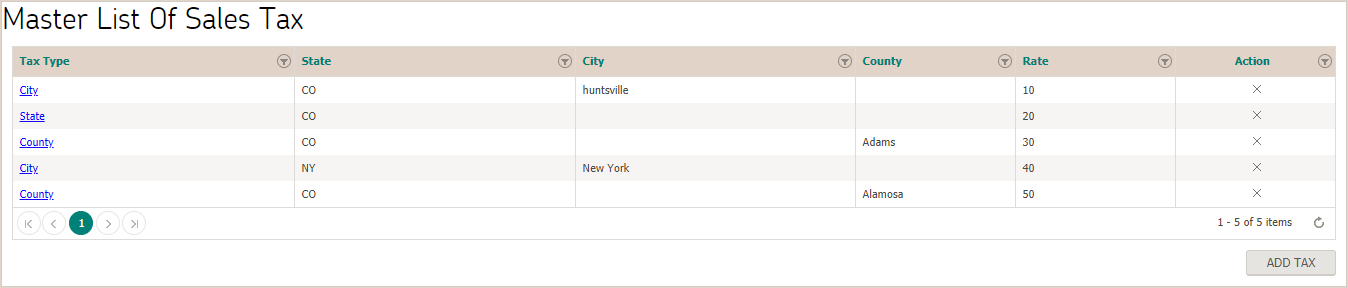
To add a new sales tax, user clicks on “Add Tax” button. User must specify mandatory fields before clicking on save button for new sales tax to be added to master list. Sales tax rate can be upto 4 decimal numbers.
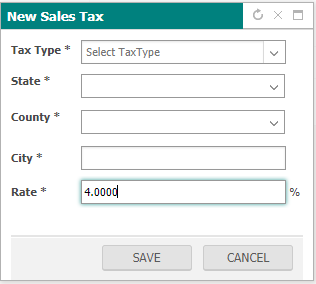
User can edit a sales tax in master list by clicking on sales tax name and following the same steps as mentioned above for adding a sales tax, changes will be updated upon saving provided necessary information is entered.
Discounts
Master list of all discounts can be viewed by navigating to Settings > Billing > Discounts

To add a new discount, user clicks on  button. User must specify mandatory fields before clicking on save button for new discount to be added to master list.
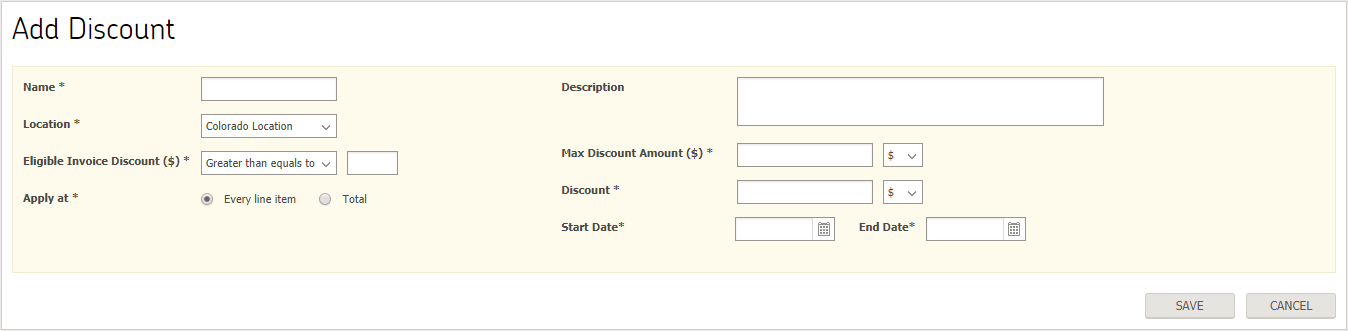
User can edit discount in master list by clicking on discount name and following the same steps as mentioned above for adding a discount, changes will be updated upon saving provided necessary information is entered.
Inventory
Inventory settings enable user to configure following sections
- Inventory Item Types
- Suppliers
- Manufacturer
- Inventory Dosage Info
Inventory Item Types
Master list of all inventory item types can be viewed by navigating to Settings > Inventory > Inventory Item Types
Note:
Inventory can be of following categories:
- Medication
- Vaccination
- Other
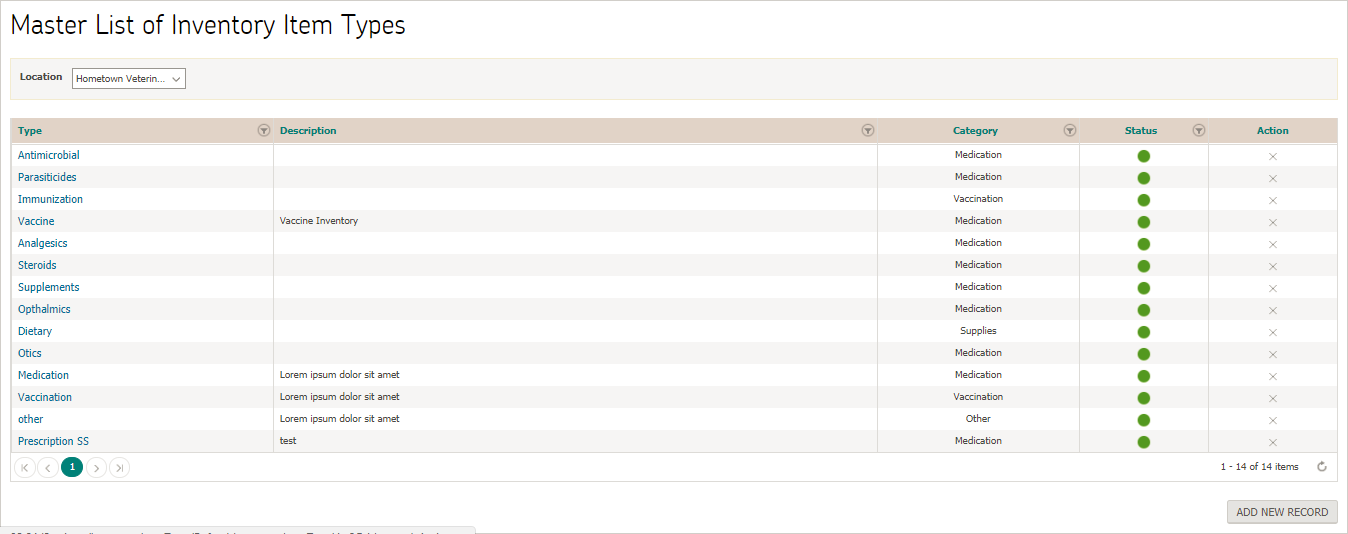
To add new inventory item type, user clicks on button. User must specify mandatory fields before clicking on save button for new type to be added to master list.
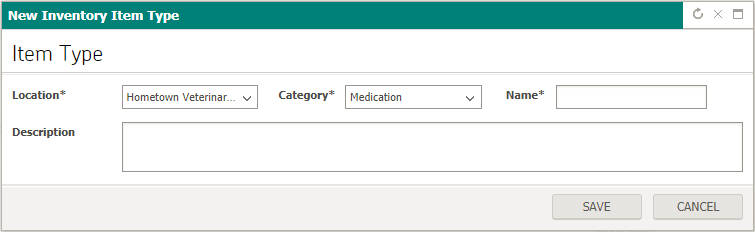
User can edit item type in master list by clicking on discount name and following the same steps as mentioned above for adding an item type, changes will be updated upon saving provided necessary information is entered. User can add same name of inventory with different inventory type.
Suppliers
Master list of all suppliers can be viewed by navigating to Settings > Inventory > Suppliers
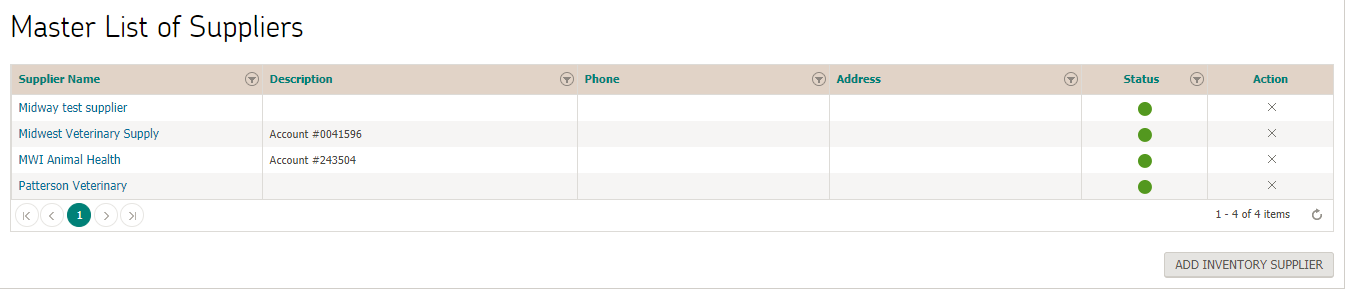
To add a new discount, user clicks on  button. User must specify mandatory fields before clicking on save button for new supplier to be added to master list.
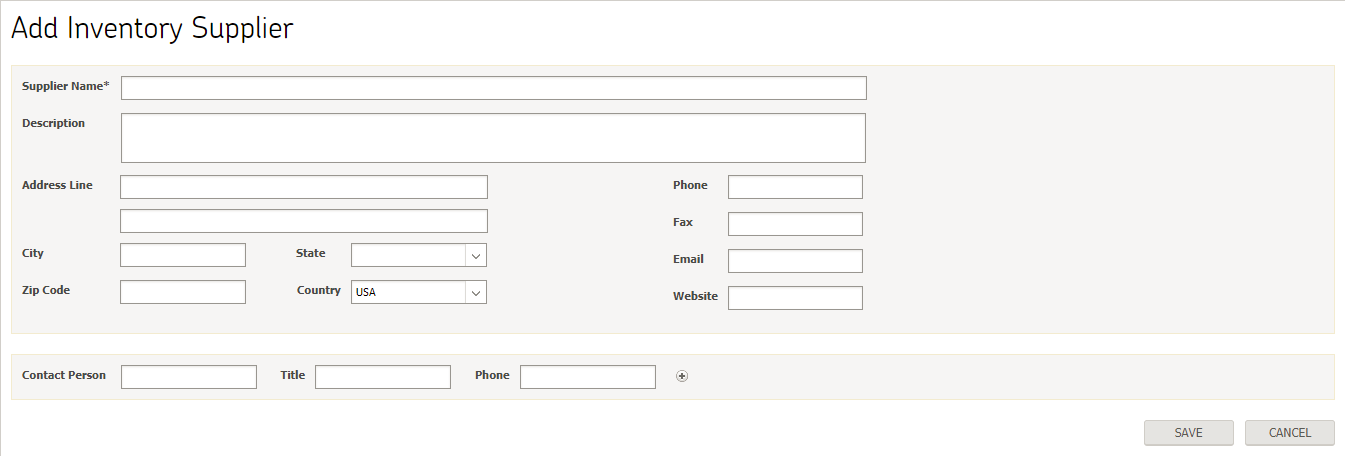
User can edit supplier in master list by clicking on supplier name and following the same steps as mentioned above for adding a supplier, changes will be updated upon saving provided necessary information is entered.
Manufacturer
Master list of all manufacturers can be viewed by navigating to Settings > Inventory > Manufacturer
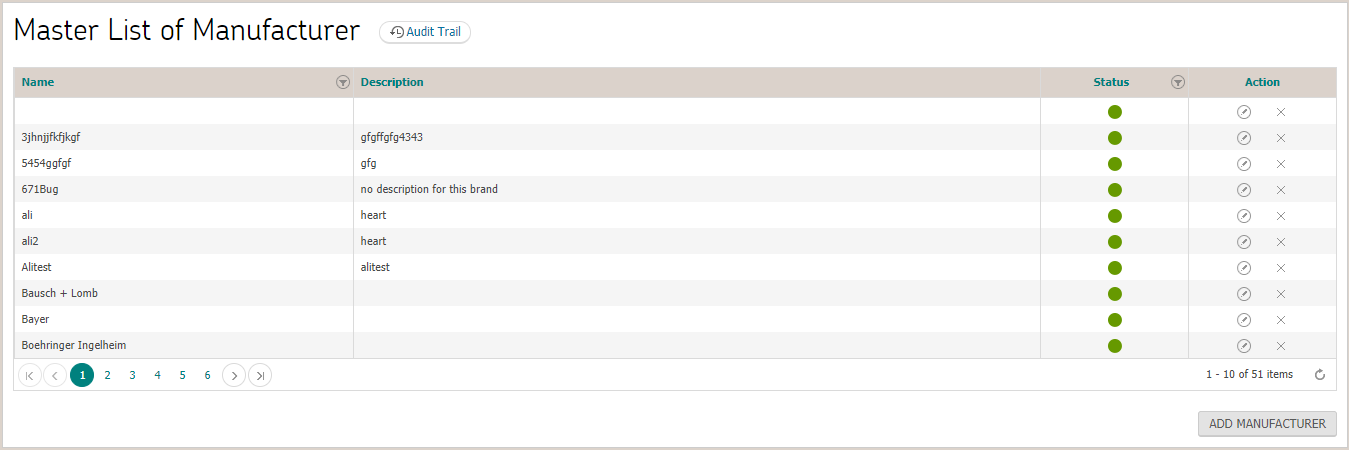
To add a new manufacturer, user clicks on  button. User must specify mandatory fields before clicking on save button for new manufacturer to be added to master list.
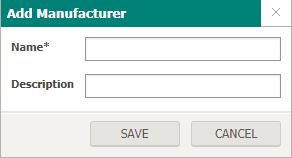
User can edit a manufacturer in master list by clicking on brand name and following the same steps as mentioned above for adding a manufacturer, changes will be updated upon saving provided necessary information is entered.
Inventory Dosage Info
Master list of all dosage info can be viewed by navigating to Settings > Inventory > Inventory Dosage Info

To add a new dosage info, user clicks on button. User must specify mandatory fields before clicking on save button for new dosage info to be added to master list.
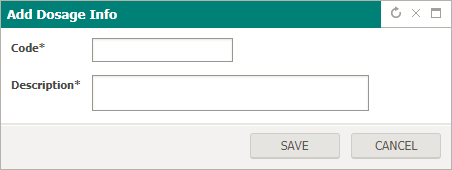
User can edit a dosage info in master list by clicking on dosage info name and following the same steps as mentioned above for adding a dosage info, changes will be updated upon saving provided necessary information is entered.
ADT/Whiteboard
ADT/Whiteboard settings enable user to configure following sections
- Discharge
- Patient Dispositions
- Discharge Templates
- Toe Tag Templates
- Transfer Reasons
Discharge
Patient Dispositions
Master list of all patient dispositions can be viewed by navigating to Settings > ADT/Whiteboard > Discharge > Patient Dispositions
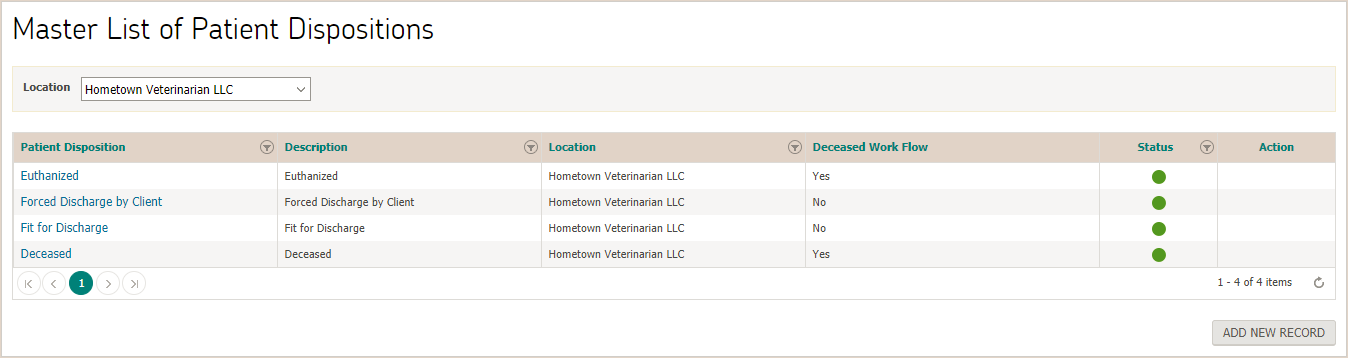
To add a new disposition, user clicks on button. User must specify mandatory fields before clicking on save button for new disposition to be added to master list.
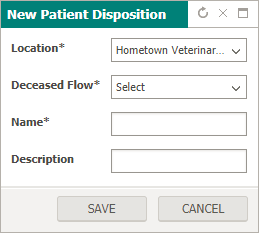
User can edit disposition in master list by clicking on disposition name and following the same steps as mentioned above for adding a disposition, changes will be updated upon saving provided necessary information is entered.
Pharmacy
Pharmacy settings enable user to configure following sections
- Pharmacy
Add Pharmacy
Master list of all pharmacies can be viewed by navigating to Settings > ADT/Whiteboard > Pharmacy > Pharmacy

To add a new pharmacy, user clicks on  button. User must specify mandatory fields before clicking on save button for new pharmacy to be added to master list.
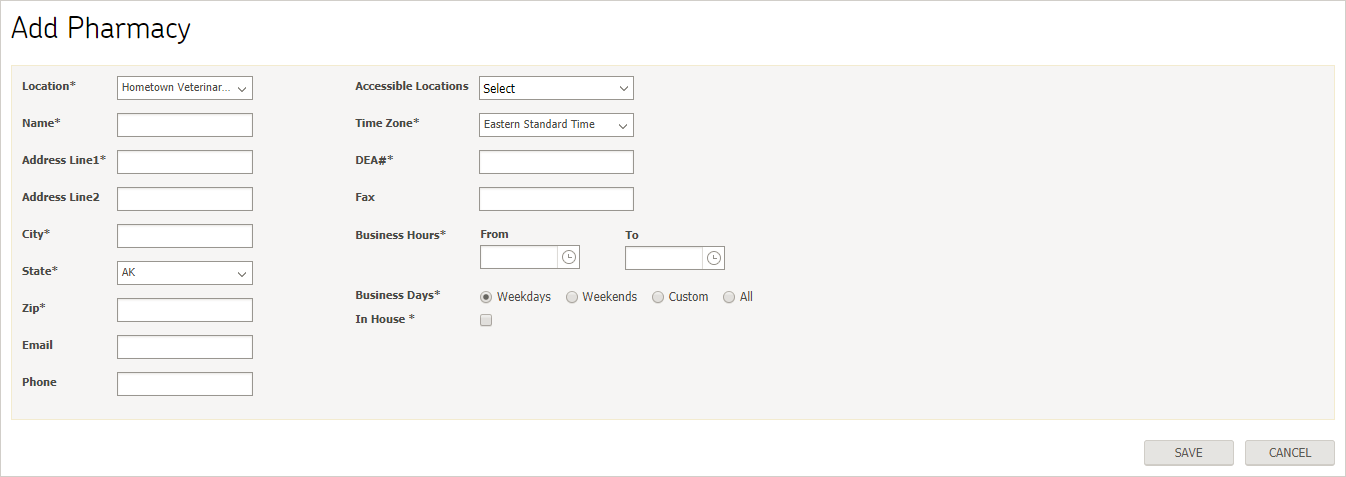
User can edit pharmacy in master list by clicking on pharmacy name and following the same steps as mentioned above for adding a pharmacy, changes will be updated upon saving provided necessary information is entered.
Document Designer
Document Designer settings enable user to configure following sections
- Label Template
- Letter Template
Label Template
Master list of label template can be viewed by navigating to Settings > Document Designer > Label Template

To add a new label template, user clicks on “add label template” button. User must specify mandatory fields before clicking on save button for new label template to be added to master list.
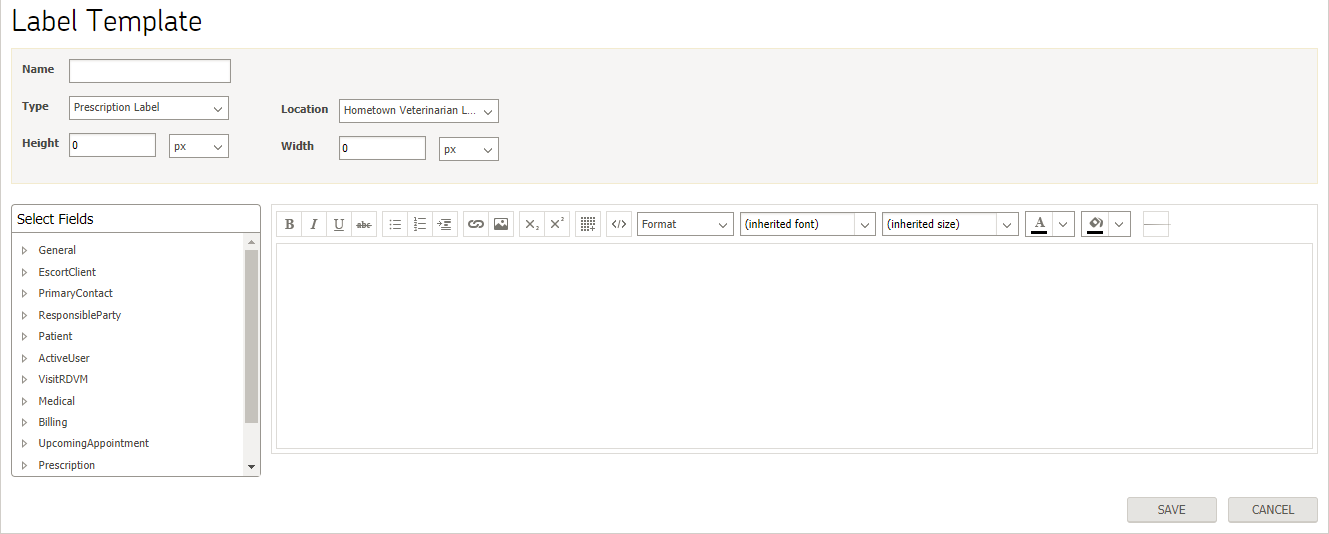
User can edit label template in master list by clicking on label template name and following the same steps as mentioned above for adding a label template, changes will be updated upon saving provided necessary information is entered.
Letter Template
Master list of letter template can be viewed by navigating to Settings > Document Designer > Letter Template
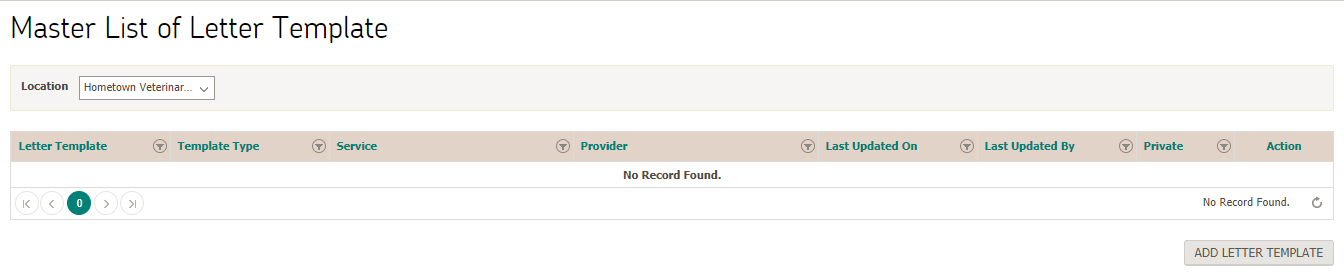
To add a new letter template, user clicks on “add letter template” button. User must specify mandatory fields before clicking on save button for new letter template to be added to master list.
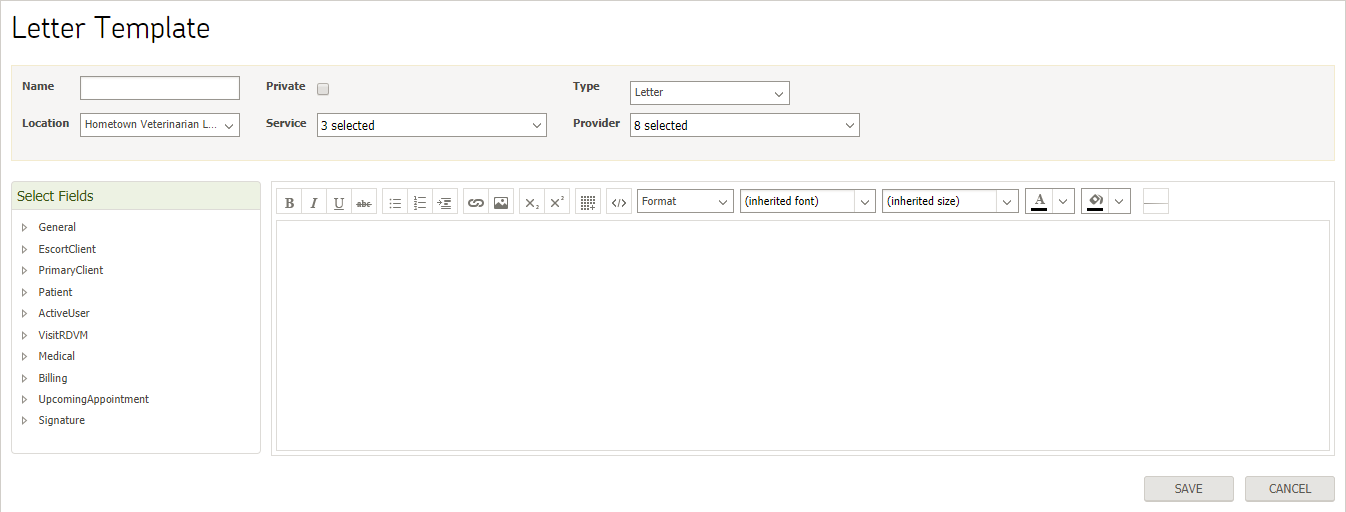
User can edit letter template in master list by clicking on letter template name and following the same steps as mentioned above for adding a letter template, changes will be updated upon saving provided necessary information is entered.
ePetLite Reminders
Reminders settings enable user to configure following sections
- Reminders
ePetLite Reminder Configuration
To configure reminder, user navigates to Settings > ePetLite Reminders > ePetLite Reminders
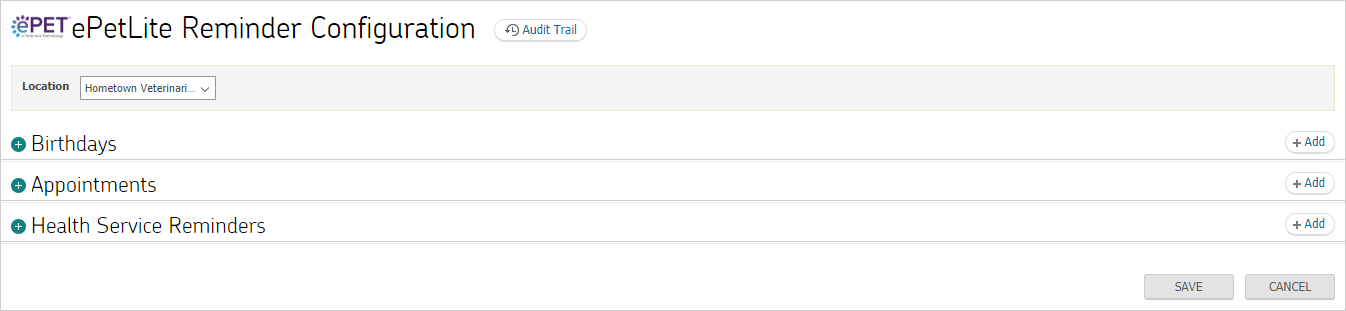
To configure reminder(s) against each accordion section, user can add multiple instances by clicking on “Add” button. Changes will take effect once user clicks on save button at the bottom of page.
Integration
Integration settings enable user to configure following section
- Merchants
- IDEXX
- Abaxis
- ANTECH
- PetLink
- eShelf
- Talkatoo
Merchants
Master list of merchants can be viewed by navigating to Settings > Integration > Merchants

To add a new merchant, user clicks on “Add Merchant” button. User must specify mandatory fields before clicking on save button for new merchant to be added to master list.

User can edit a merchant by clicking on merchant name and following the same steps as mentioned above for adding a merchant, changes will be updated upon saving provided necessary information is entered.
IDEXX
IDEXX configuration can be viewed by navigating to Settings > Integration > IDEXX
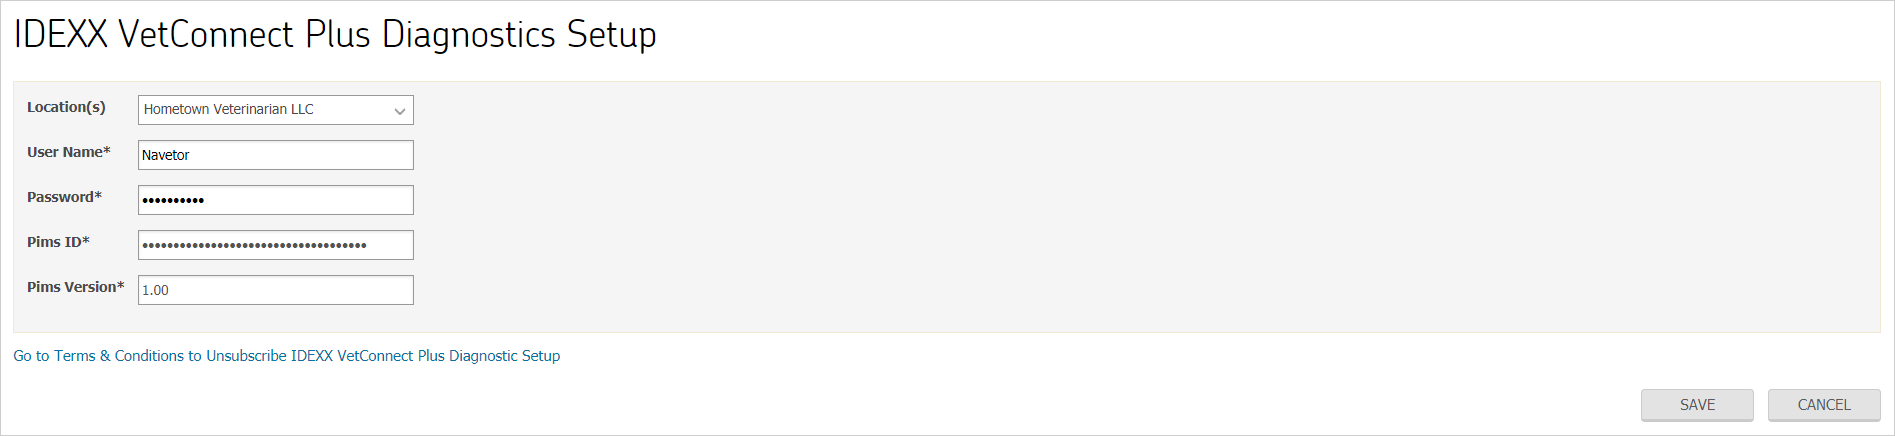
After providing in all the fields when user Click “Save” button. System will send this information to IDEXX for validation. After success of IDEXX lab integration, user can add lab orders in SOAP Note for that lab. Beside this user have to add lab tests in Setting > EMR > Lab. Those test will only be available while adding on SOAP Note.
“Click to Terms & Conditions to Unsubscribe IDEXX VetConnect Plus Diagnostic Setup” link will only available when practice have a successful setup with IDEXX. Upon clicking Unsubscribe Setup link, system will reset all the fields and remove connection with IDEXX.
Abaxis
For lab setup, admin user have to signup from Settings > Integration > Abaxis
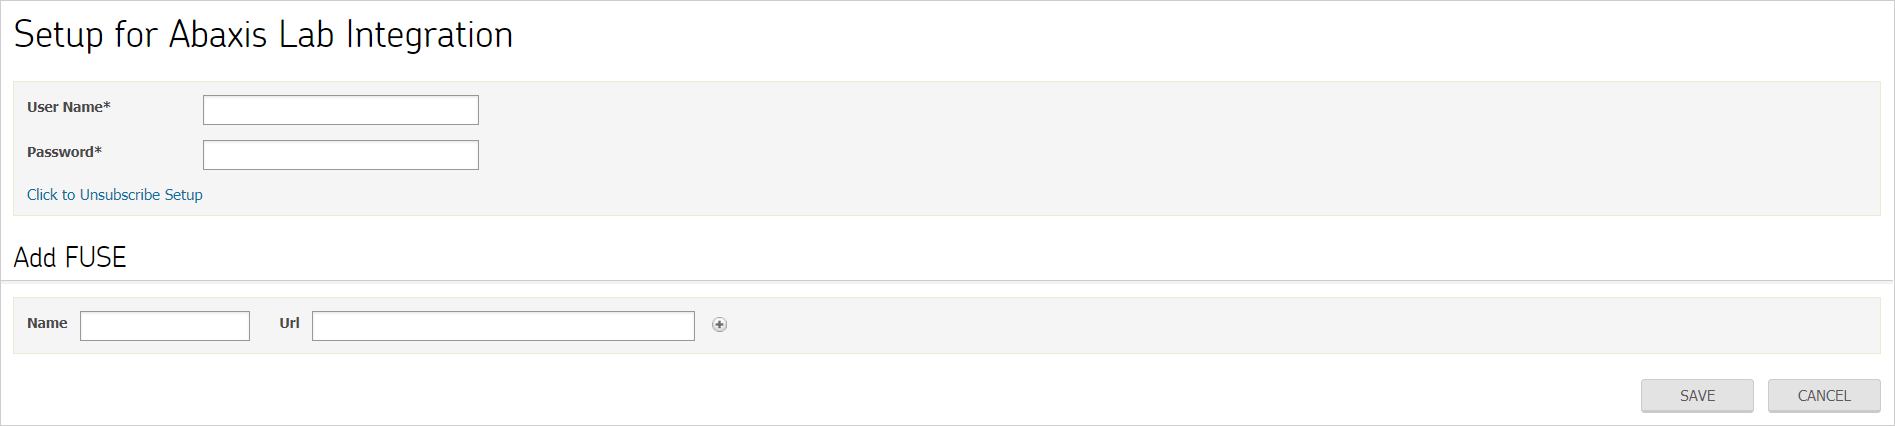
After providing details in all the fields when user Click “Save” button. System will send this information to Abaxis for validation. After success of Abaxis integration, user can add lab orders in SOAP Note for that lab. Beside this user have to add lab tests in Setting > EMR > Lab. Those test will only be available while adding on SOAP Note.
“Click to Unsubscribe Setup” link will only available when practice have a successful setup with abaxis. Upon clicking “Click to Unsubscribe Setup”, system will reset all the fields and remove connection with Abaxis.
ANTECH
ANTECH configuration can be viewed by navigating to Settings > Integration > ANTECH
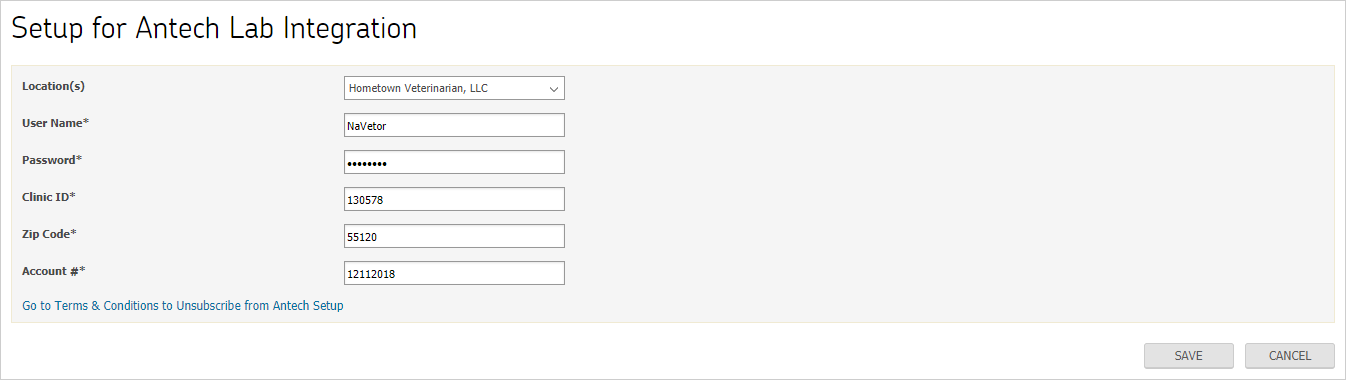
After providing in all the fields when user Click “Save” button. System will send this information to ANTECH for validation. After success of ANTECH lab integration, user can add lab orders in SOAP Note for that lab. Beside this user have to add lab tests in Setting > EMR > Lab. Those test will only be available while adding on SOAP Note.
“Go to Terms & Conditions to Unsubscribe from Antech Setup” link will only available when practice have a successful setup with ANTECH. Upon clicking Unsubscribe Setup link, system will reset all the fields and remove connection with ANTECH.
PetLink
PetLink configuration can be viewed by navigating to Settings > Integration > PetLink

After providing in all the fields when user Click “Save” button. System will send this information to PetLink for validation. After success of PetLink integration, user can view Register Microchip button on patient dashboard through which user can assign microchip to a patient. “Click to Unsubscribe Setup” link will only available when practice have a successful setup with PetLink Portal.
Upon clicking “Click to Unsubscribe Setup” will reset all the fields and remove connection with PetLink Portal.
After successful integration of PetLink, “+ |Register Microchip” button will appear in patient dashboard. Through which user can register a valid microchip number to a patient.
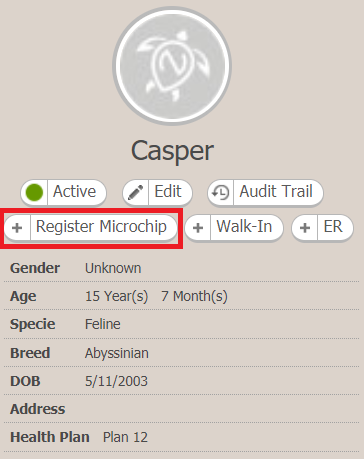
If patient microchip is already registered or PetLink setup has not been configured then, this button will not available.
When user clicks on “+ |Register Microchip” button through patient dashboard or click “Save” button for registering new client/patient, then a popup window will appear.
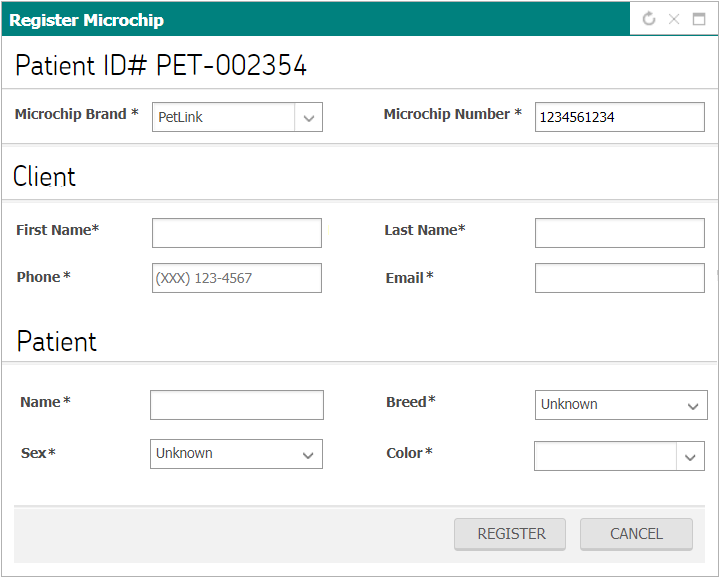
This popup will show pre-filled existing data of client and patient which has been added on client/patient registration. Rest of the fields will remain blank and user have to provide information of all mandatory fields to register microchip. After successful registration, system will update client/patient information in demographics if updated at the time of registering microchip.
eShelf
eShelf configuration can be viewed by navigating to Settings > Integration > eShelf
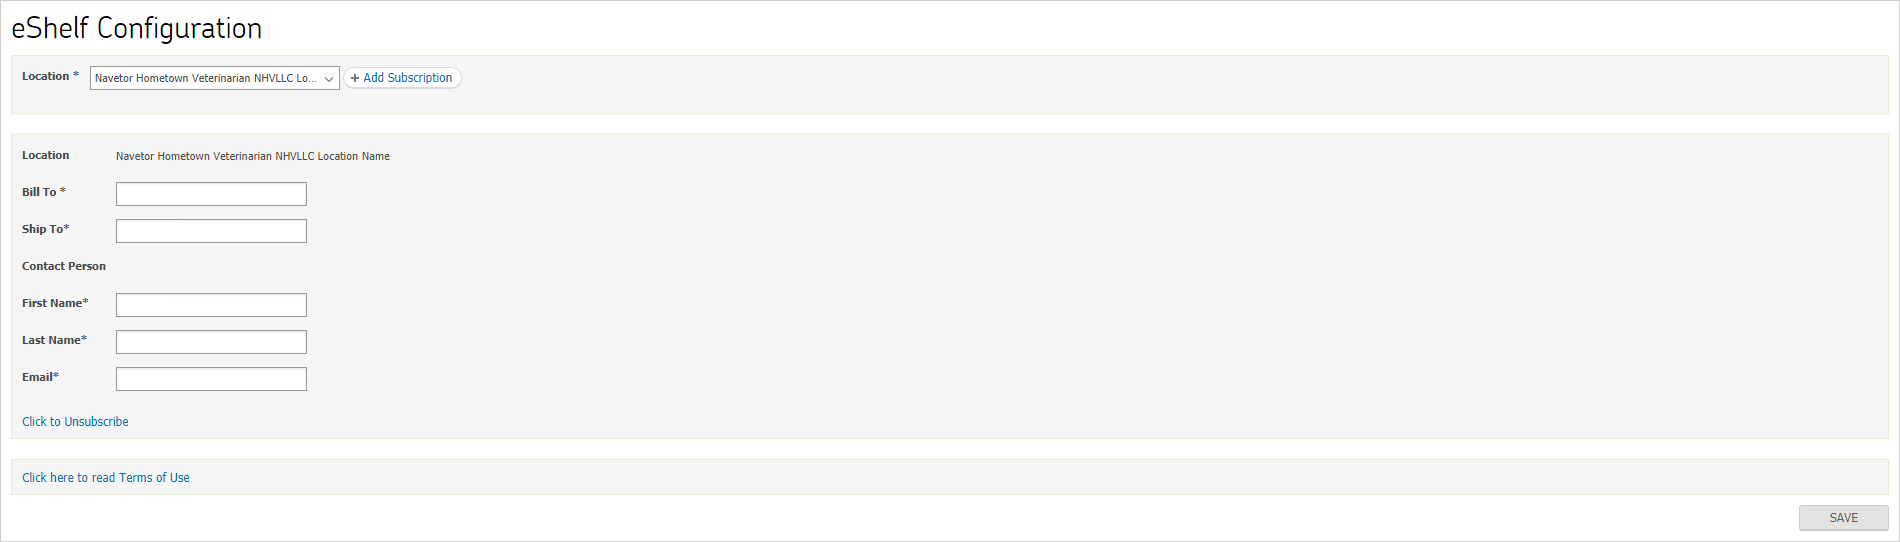
After providing in all the fields when user Click “Save” button. System will send this information to eShelf for validation. After success of eShelf integration, user can view Patterson Code Lookup button on master list of inventory item. “Click to Unsubscribe Setup” link will only available when practice have a successful setup with eShelf Portal.
Upon clicking “Click to Unsubscribe Setup” will reset all the fields and remove connection with eShelf Portal.
Talkatoo
Talkatoo configuration can be viewed by navigating to Settings > Integration > Talkatoo.

User can then sign up for talkatoo to use it in the application.
Reports
Reports settings enable user to configure following section
- Monthly Report
- Certificate
Monthly Report
Master list of report configurations can be viewed by navigating to Settings > Reports > Monthly Report

To add a new report configuration, user clicks on “add configuration” button. User must specify mandatory fields before clicking on save button for new report configuration to be added to master list.
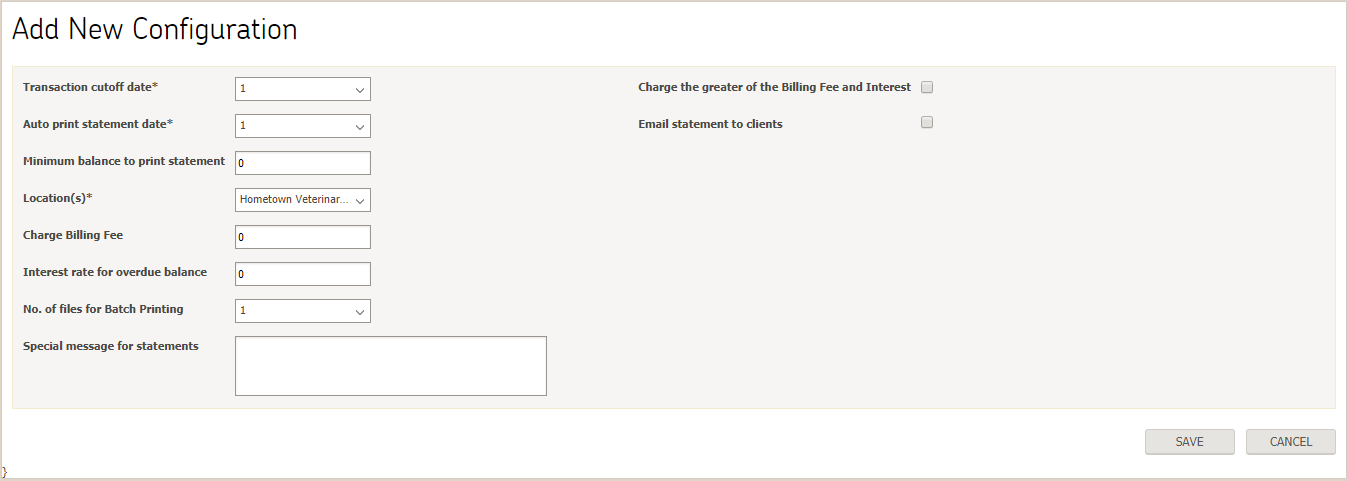
User can edit a report configuration by clicking on location name and following the same steps as mentioned above for adding a report configuration, changes will be updated upon saving provided necessary information is entered.
Certificate
Master list of certificates can be viewed by navigating to Settings > Reports > Certificate
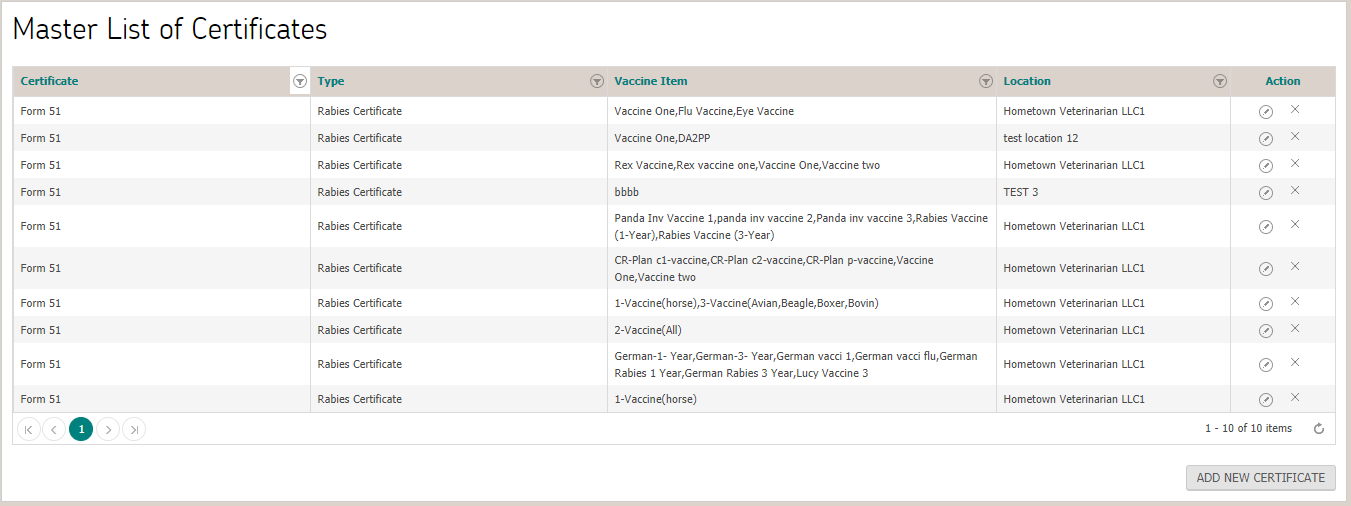
To add a new certificate, user clicks on  button. User must specify mandatory fields before clicking on save button for new certificate to be added to master list.
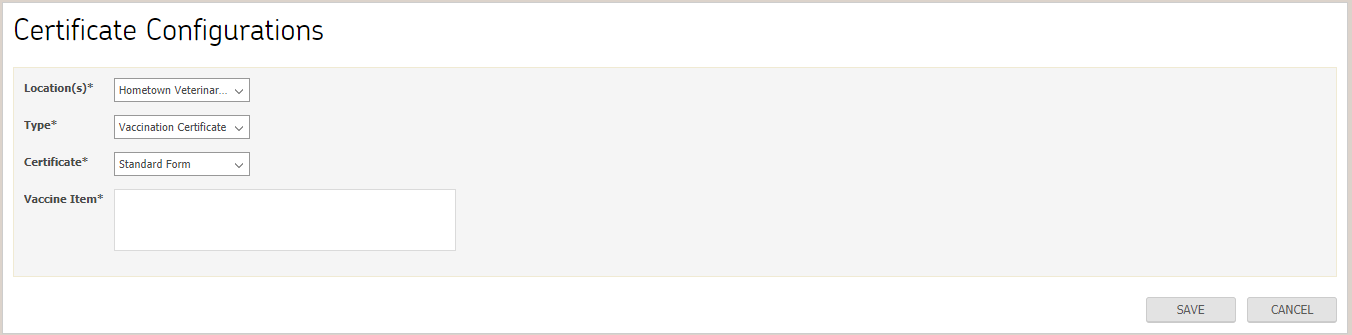
User can edit a certificate by clicking on button and following the same steps as mentioned above for adding a certificate, changes will be updated upon saving provided necessary information is entered.
Client/Patient
Client/Patient section allows user to perform delete, merge and transfer of a client and/or patient. It contains following sections:
- Delete
- Client
- Patient
- Merge
- Client
- Patient
- Transfer
- Client
- Patient
- Logs
- Client
- Patient
Delete Client
On deleting client then the client and all corresponding patients will deleted. The delete client button is available on the client dashboard.
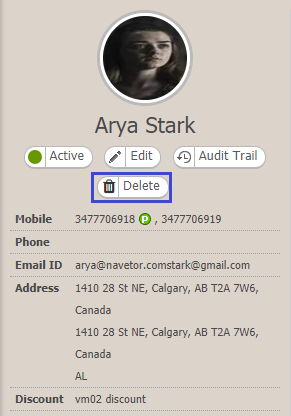
When user click ‘Delete’ button then system will a prompt that all client and associated patient data will deleted and the text field for reason.
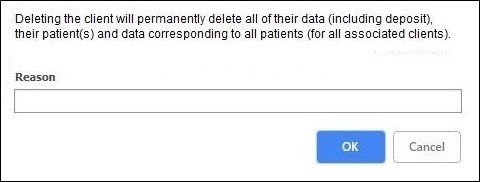
In case of unpaid invoice(s) of associated patient(s) exists then system will prompt that all client and associated patient data will deleted and text field for reason.

If user clicks ‘OK’, then confirmation popup will open otherwise on clicking “Cancel” system will discard reason and navigate to Client Dashboard.
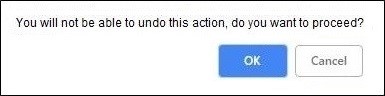
Delete Patient
On deleting patient then the patient and corresponding data (Invoices, schedules, medical records (EMR), Health Service Reminder etc.) will deleted. The delete patient button is available on the patient dashboard.

When user click ‘Delete’ button then system will a prompt that patient data will deleted and the text field for reason.
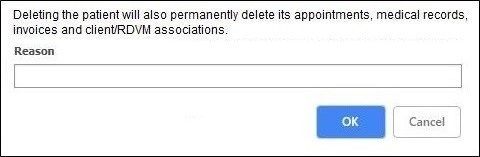
In case of unpaid invoice(s) of patient exists then system will prompt that patient data will deleted and text field for reason.

If user clicks ‘OK’, then confirmation popup will open otherwise on clicking “Cancel” system will discard reason and navigate to Client Dashboard.

Merge Clients
Merge client allow user to move a client’s data to another client. This data includes client demographics, payment history, deposit history, refund history, credit history, financial history & statement history, his/her patients and all data of those patients including demographics, medical record, appointments and balance.
Master list of Client (Merge) can be viewed by navigating to Settings > Client/Patient > Merge
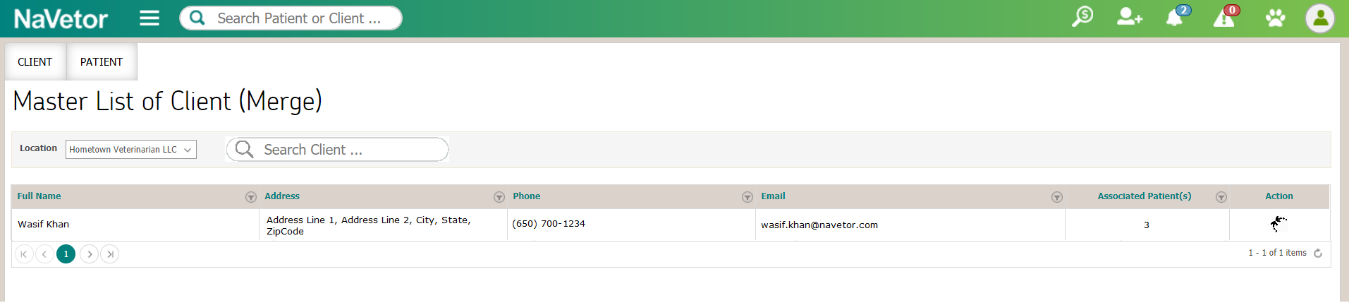
When user clicks on merge icon against any client, a pop-up will open which will used to merge the client to a different record called ‘To Client. On selecting the Client from list, user can click ‘OVERRIDE’ or ‘MERGE” button. The data of the client will moved and “From Client” record will deleted.
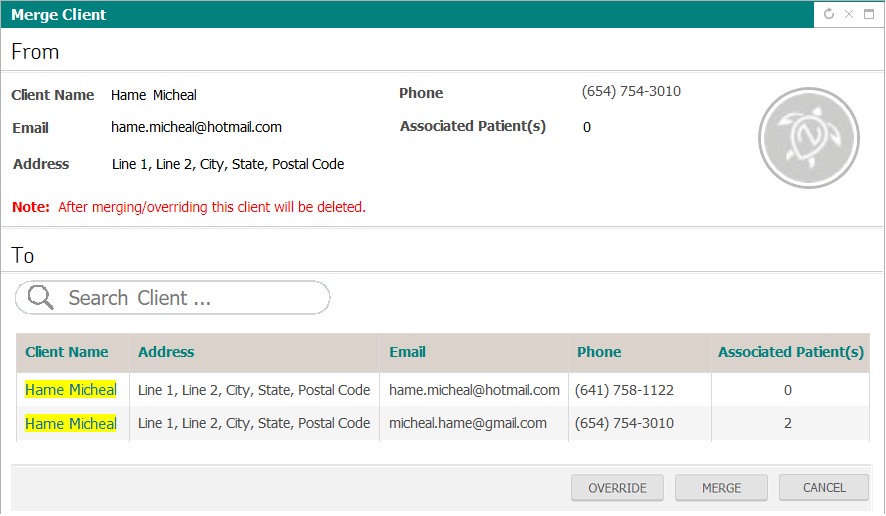
In case of OVERRIDE, all the data of demographics “From Client” will replaced with the data of “To Client” and “From Client” record will deleted.
- Payment history, deposit history, refund history, credit history, financial history & statement history and associated patient(s) will moved from “From Client” to “To Client” as separate records. Do not perform any merge/override operation on these items.
In case of MERGE, the missing data of “To Client” will replaced with the data of “From Client”, associated patient(s) will shifted to “To Client” and “From Client” record will deleted.
- Payment history, deposit history, refund history, credit history, financial history & statement history and associated patient(s) will moved from “From Client” to “To Client” as separate records. Do not perform any merge/override operation on these items.
When user clicks on OVERRIDE/MERGE button then a confirmation popup will appear.

Merge Patients
Merge patient allow user to move a patient’s data to another patient. This data includes patient demographics, Invoices, medical records, appointments etc.
Master list of Patient (Merge) can be viewed by navigating to Settings > Client/Patient > Merge
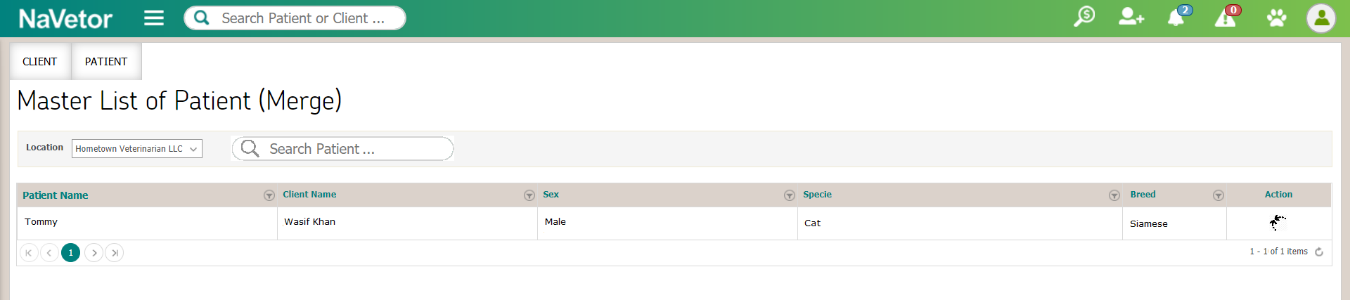
When user clicks on merge icon against any patient, a pop-up will open which will used to merge the patient to a different record called ‘To Patient’. On selecting the patient from list, user can click ‘OVERRIDE’ or ‘MERGE” button. The data of the patient will moved and “From Patient’ record will be deleted.
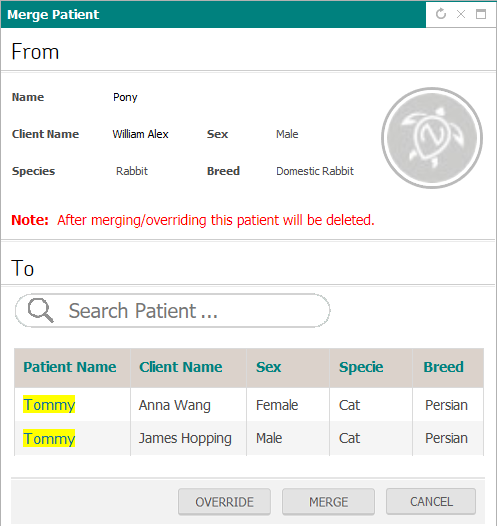
In case of OVERRIDE, all the data of demographics “From Patient” will replaced with the data of “To Patient” and “From Patient” record will deleted.
- Invoice(s), Appointment(s) and Medical Record(s) and Balance will moved from “From Patient” to “To Patient” as separate records. Do not perform any merge/override operation on these items.
In case of MERGE, the missing data of demographics “To Patient” will replaced with the data of “From Patient” and “From Patient” record will deleted.
- Invoice(s), Appointment(s) and Medical Record(s) and Balance will moved from “From Patient” to “To Patient” as separate records. Do not perform any merge/override operation on these items.
When user clicks on OVERRIDE/MERGE button then a confirmation popup will appear.

Transfer Patient
The system allow user to transfer a patient from one client to another. In transfer user can change association of a patient with another client. Transfer includes demographics, EMR and appointments of a patient.
Master list of Patient (Transfer) can be viewed by navigating to Settings > Client/Patient > Transfer
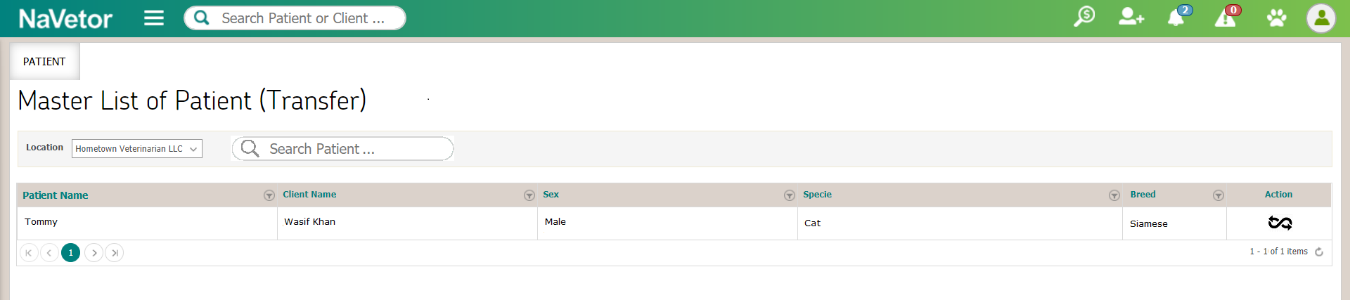
When user clicks on transfer icon against any patient, a pop-up will open to transfer the patient to a different record called ‘To Client’.
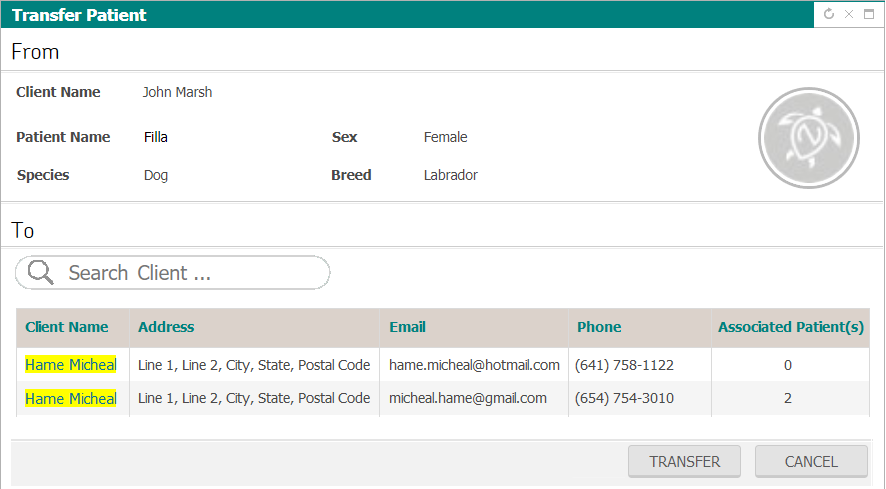
On selecting the client from list and clicking the ‘TRANSFER’ button, then a confirmation popup will open.

All the data (i.e demographics, appointments and EMR related to the selected patient should be transfer (as a new patient) to “To Client”.
Clients Log
Client log will contain the information of delete or merge of client performed by which user and the time on which action performed with the reason (if added by user).
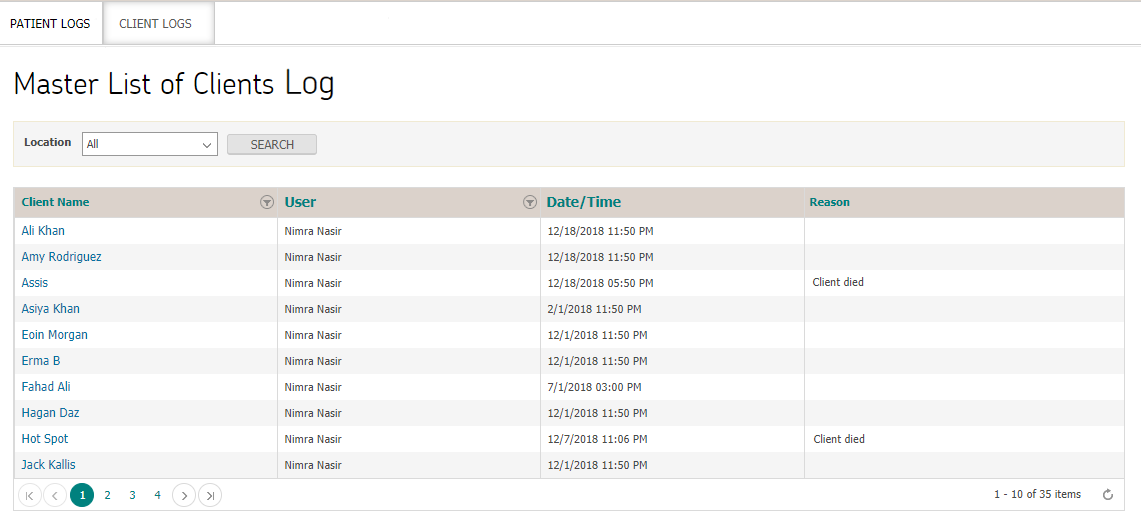
Patients Log
Patient log will contain the information of delete, merge or transfer of client performed by which user and the time on which action performed with the reason (if added by user).

© 2018 NaVetor - All Rights reserved. No reproduction or redistribution without written authorization of TPI
User Manual - Mobile App
Login
User can login using same credentials as in web application (email and password).
User can also use TouchID in case user’s fingerprints are registered on the iPhone.
Terms of User and Privacy Policy
Upon first login “Terms and Condition” popup will appear. When user checks “Agree to Terms of Use & Privacy Policy” and clicks “Done” she will be able to proceed to the Main Menu screen.
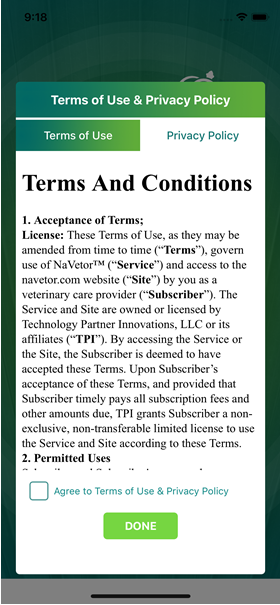
Forgot Password
User can enter user name to get password reset code.
The password reset code is sent as an SMS on the cell number of the user. Then user will enter the code on screen as below.
After adding the valid code, system will navigate to change password screen.
Main Menu
After initial successful login, system will ask to access location. This information is used to show weather updates on main menu.

Main Menu has the following features.
- Search Client/Patient: On clicking search icon, search bar will replace the weather widget and user can search any patient or client by name.
- Add New Client/Patient: On Clicking “+” icon, Client/Patient registration screen will appear where user can register a new client and patient by providing details.
- Scheduler: Where user can create or edit existing appointments.
- Patients: List of all patients with associated clients will be available where user can search any patient by name or scroll through the screen to view registered patients.
- Clients: List of all clients with associated patients will be available where user can search any patient by name or scroll through the screen to view registered clients.
- Invoice: In this screen user can search invoices by either client name or patient name.
- Messaging: Provider can chat with any other provider of the same location. In this screen, all the recent chats will be available whereas user can search any provider by name.
- Info Icon: This will open a popup that display NaVetor website details.
- Boarding: Where user can view weekly/monthly boarding appointments.
- Alerts & Tasks: Showing list of alerts and tasks generated from web and mobile application.
- Announcement: Showing list of announcements created from web and mobile app.
- Bell Icon: Showing list of appointment requests from consumer app.
Search Client Patient
User can search for a patient or client by name, id, phone number, and microchip number.
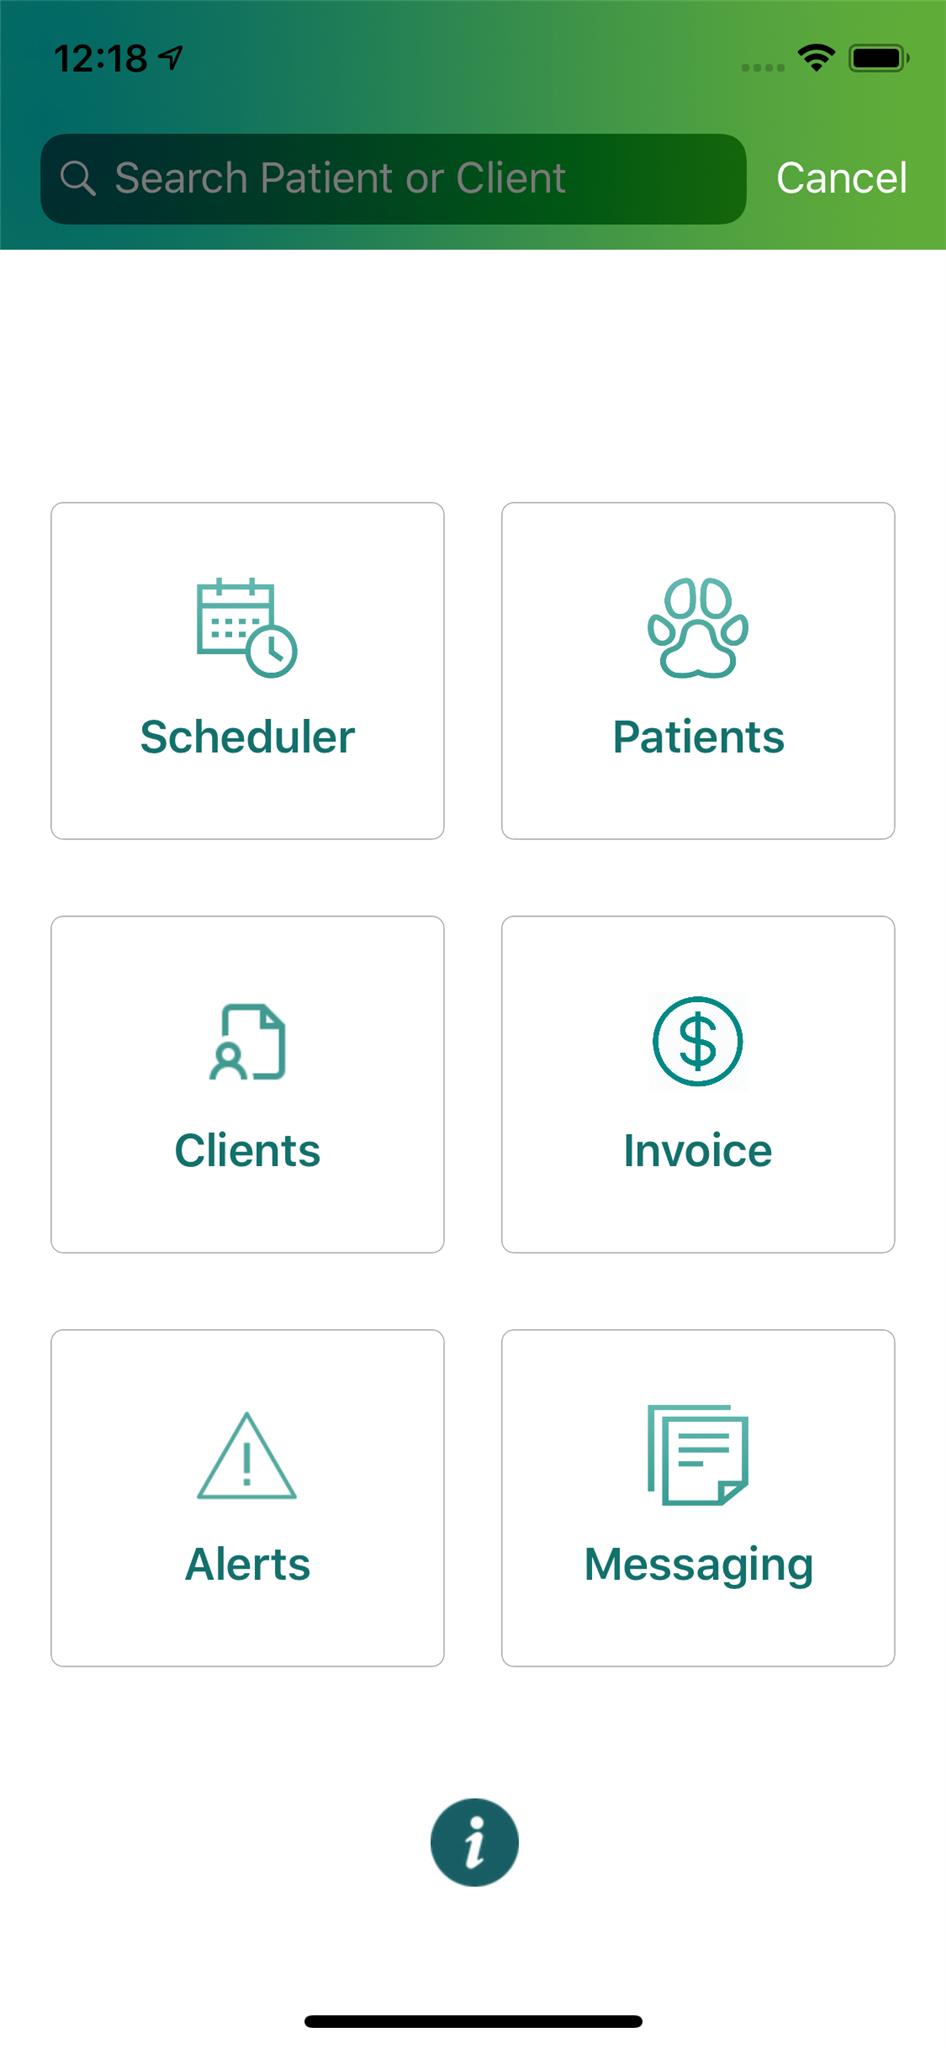
Add New Client Patient
On clicking “+” icon, client/patient registration screen to add a new client and patient on this screen.
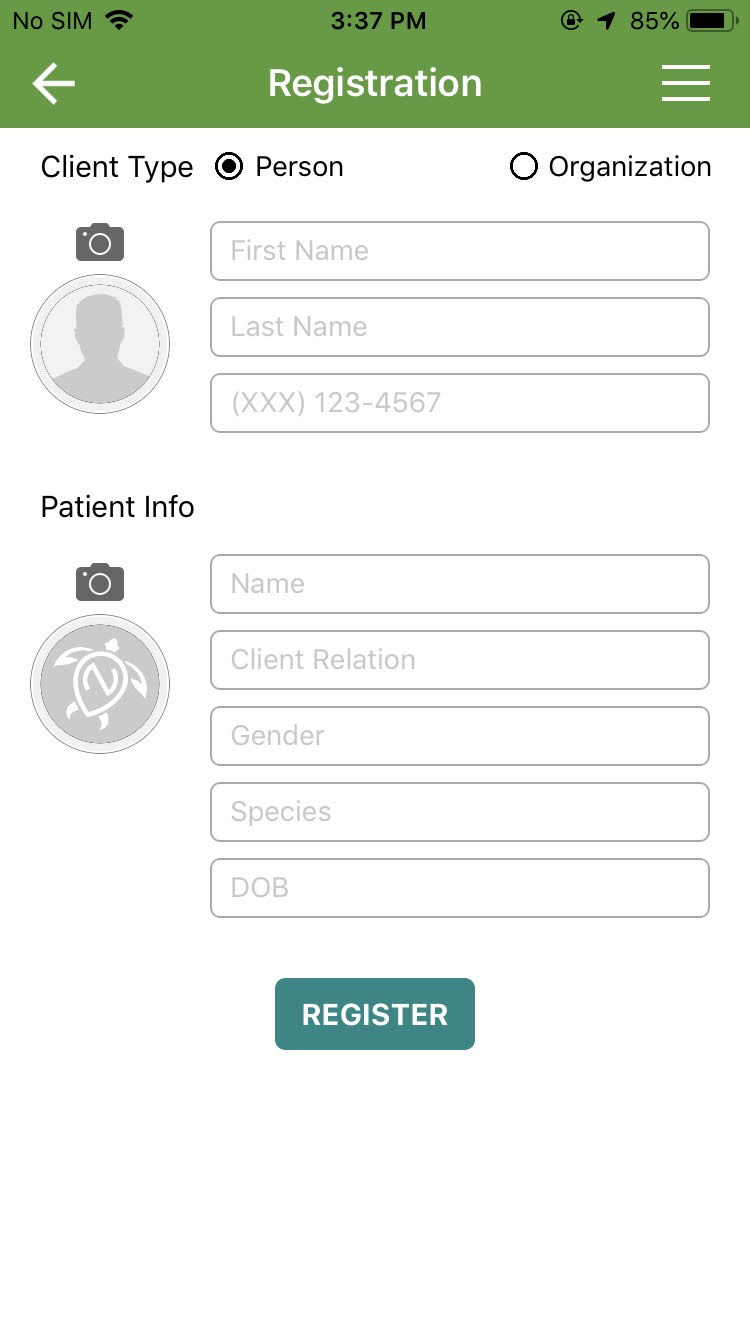
Scheduler
On scheduler screen, user can click on any schedule appointment to edit or click “+” icon to add new appointment. User can change provider or date to view particular appointments based on selection.

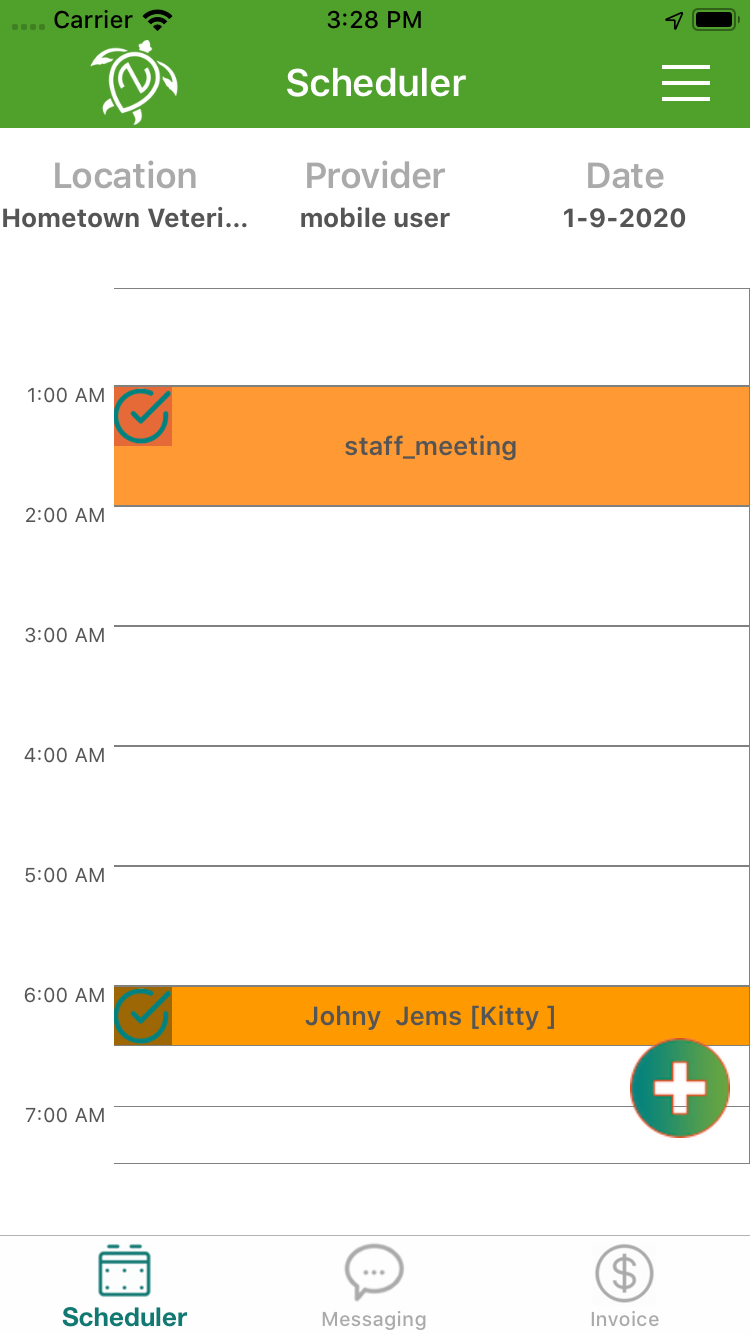
When appointment is created, a background and text color is set for that appointment depending on the appointment type. Also user can view blocks in the scheduler and so appointment cannot be created in that particular slot.
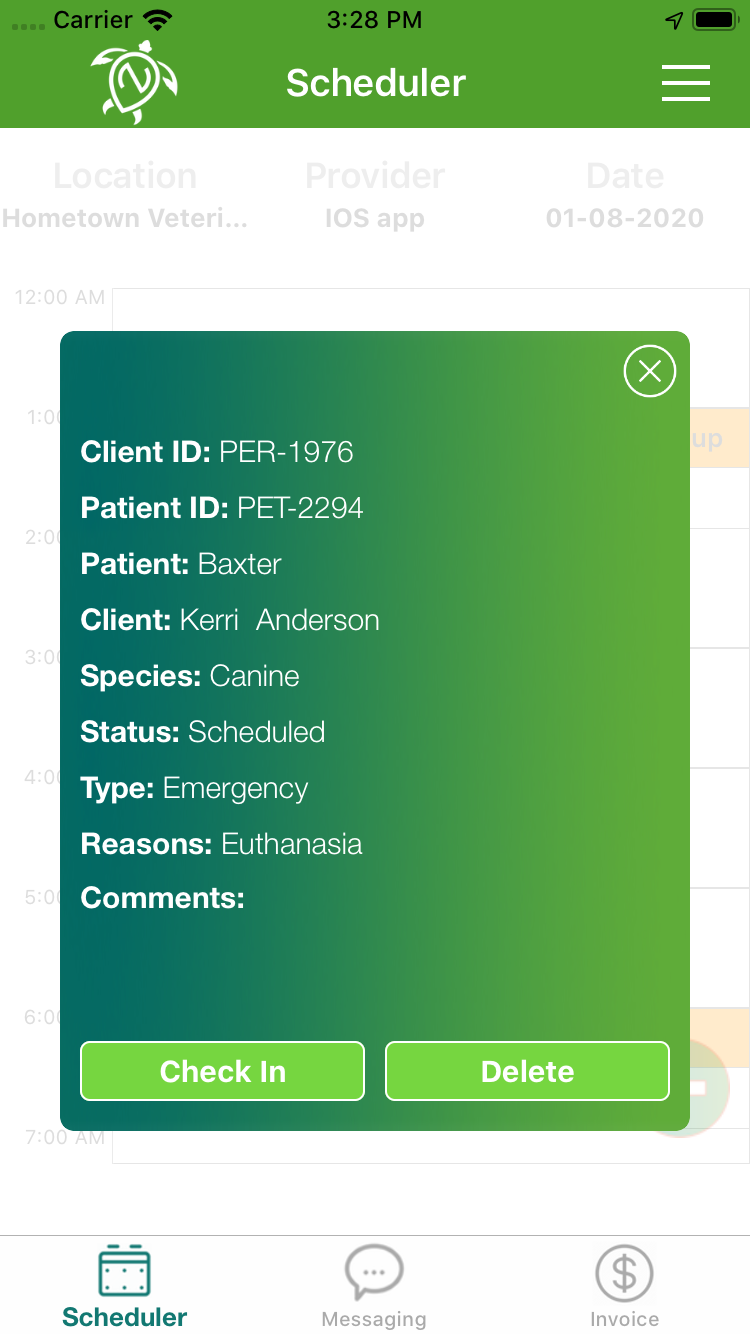
User can also view appointment details like patient name, client name, species etc. and can also make check in and delete that particular appointment. The status of appointment can also be seen by the color of status icon on top left corner of an appointment.
Scheduler will have following features.
- Add Appointment
- Edit Appointment
Add Appointment
In this user can add new appointment by providing details in the screen to schedule the appointment. Before scheduling user needs to select patient, whom appointment s/he wants to schedule.
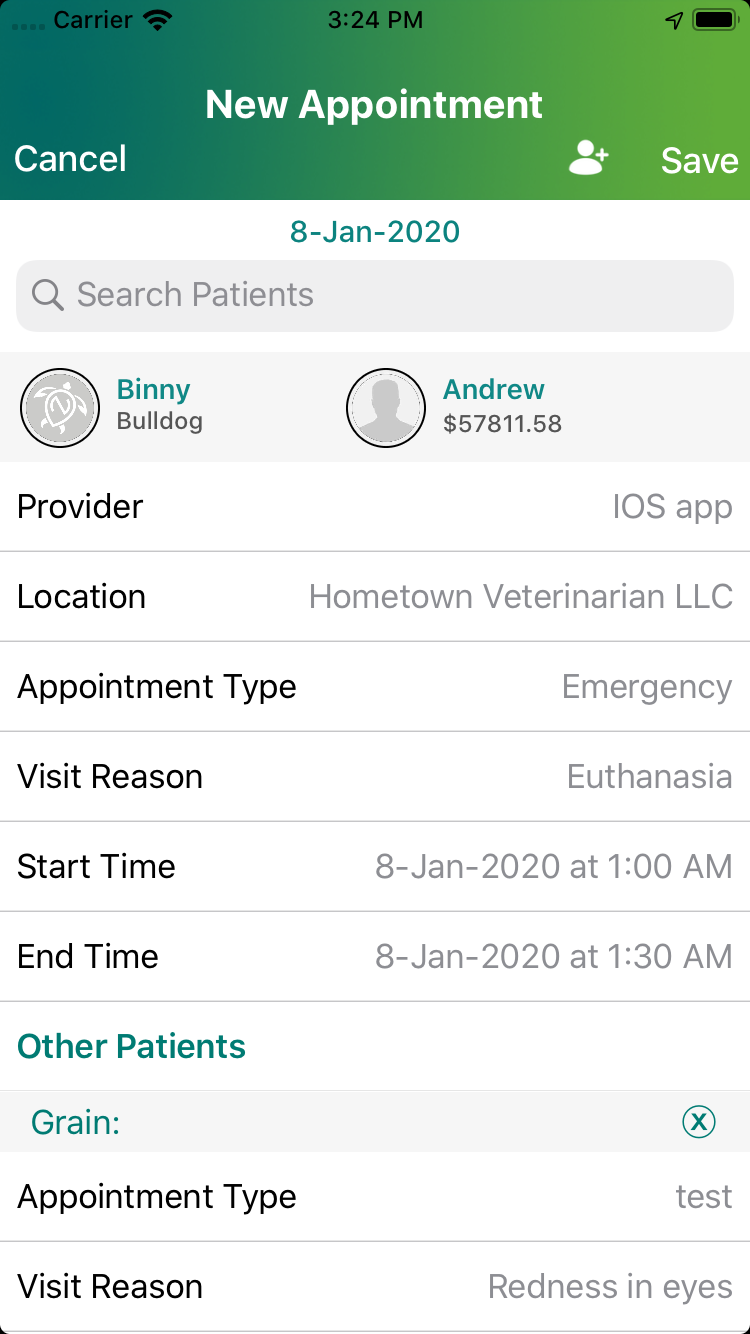

After selecting patient, user provide details about the appointment to save. Also user can view other patients associated to that client and create an appointment with multiple patients.
Edit Appointment
When user click on any appointment available in scheduler, then that appointment will open in editable mode with all the data pre filled as provided before scheduling the appointment. User can change detail on this screen. User can also change details for its other patients and also delete them.
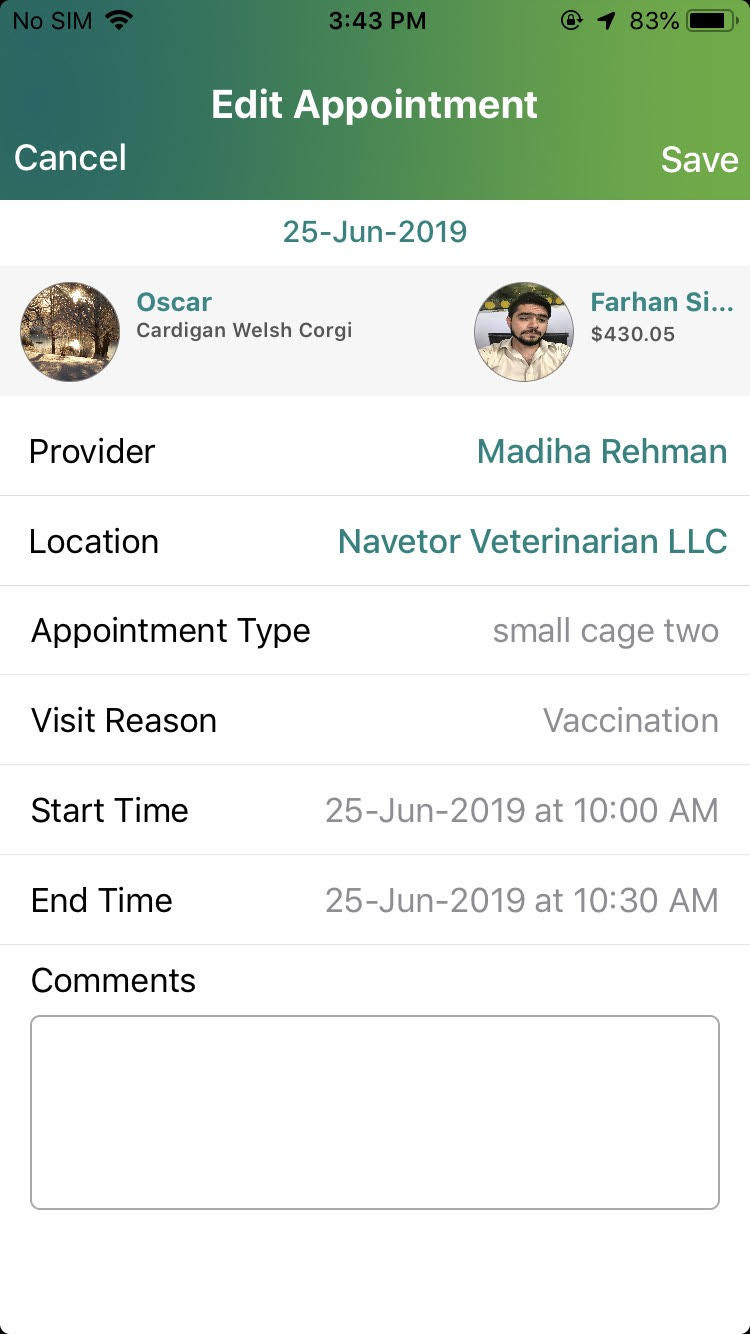
Patients
In the screen list of patients will be available in scrollable screen. Where user can scroll through any patient or search a patient by name.
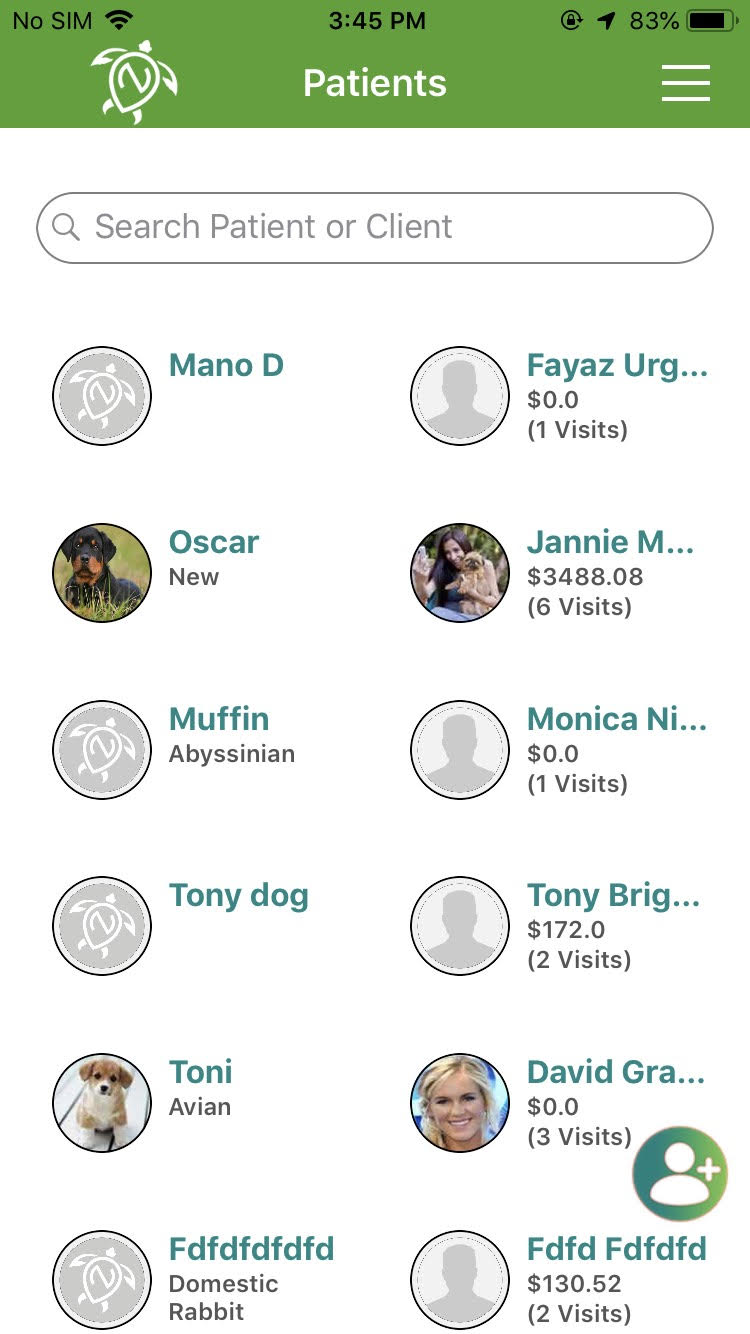
On selecting a patient, Patient dashboard will open. Where all the details related to inventory items, associated client, next appointments, vaccination, weight chart and reminders will be available in collapsible menu. User can scroll screen to view details related to any particular section.
Edit Patient: The user can edit the patient profile information by clicking the edit icon on Patient Banner. On edit screen user can update all the details.
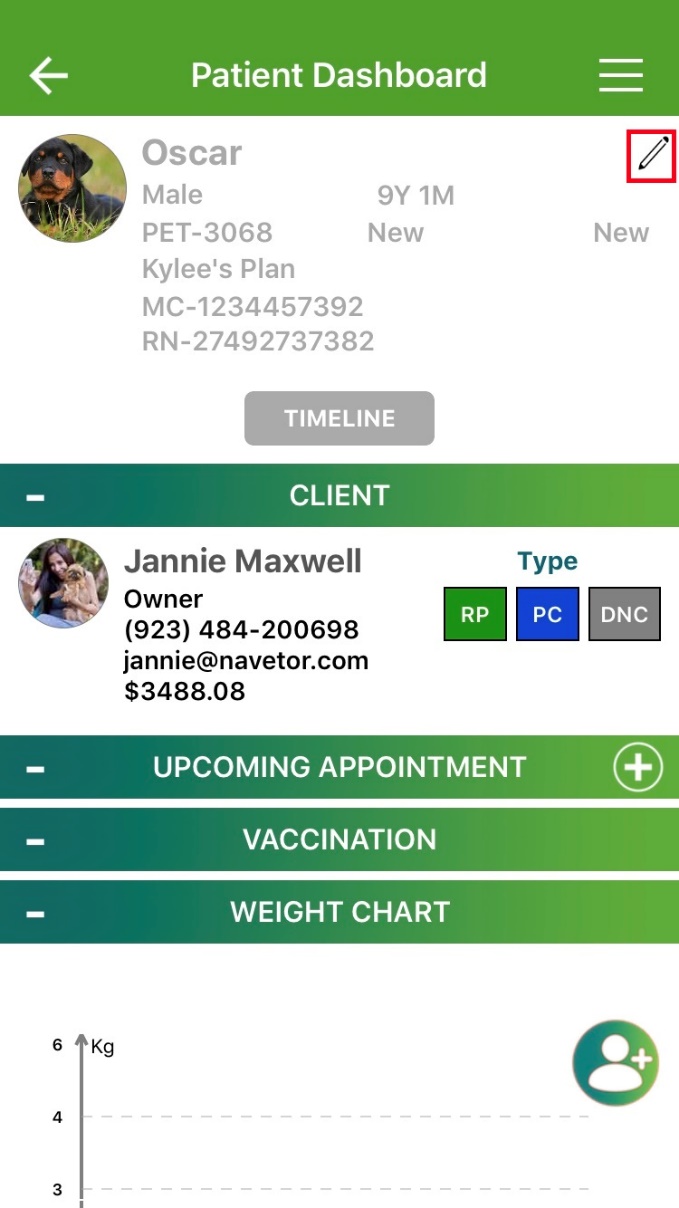
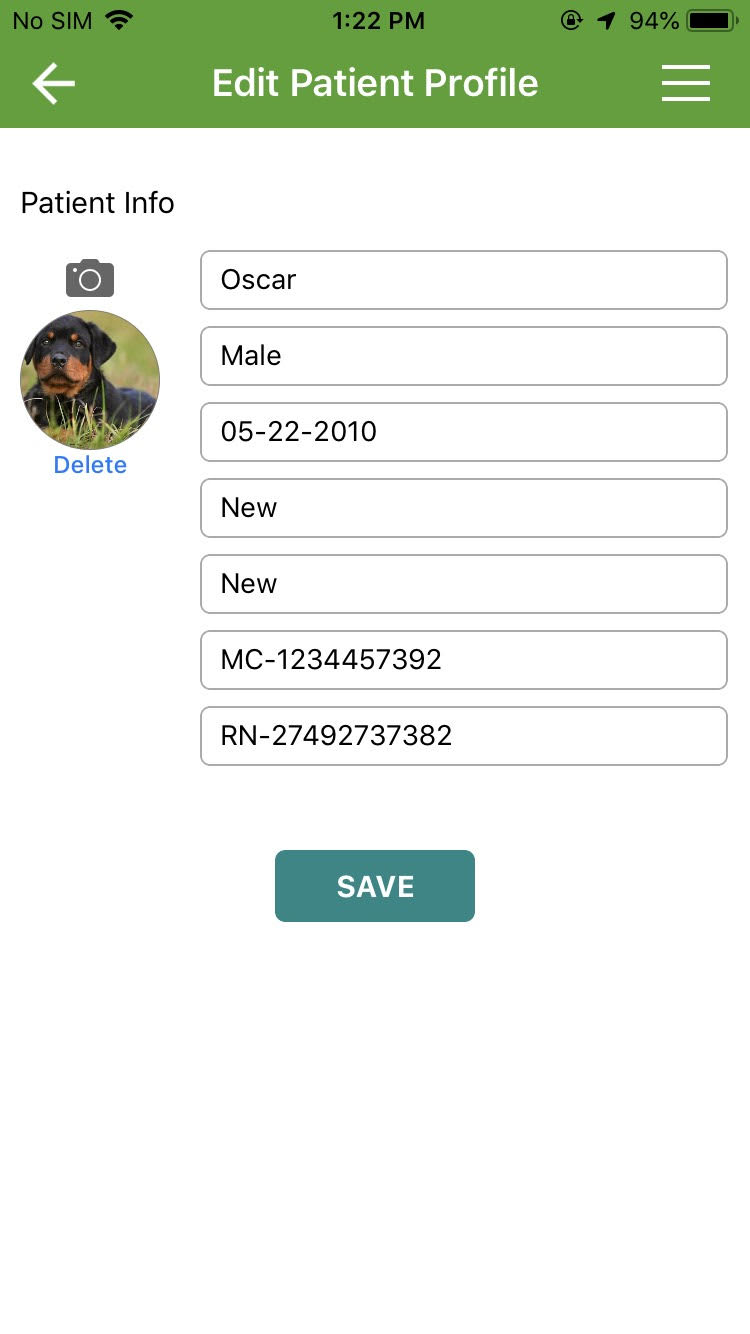
Clients
In the screen list of Clients will be available in scrollable screen. Where user can scroll through any client or search a client by name.
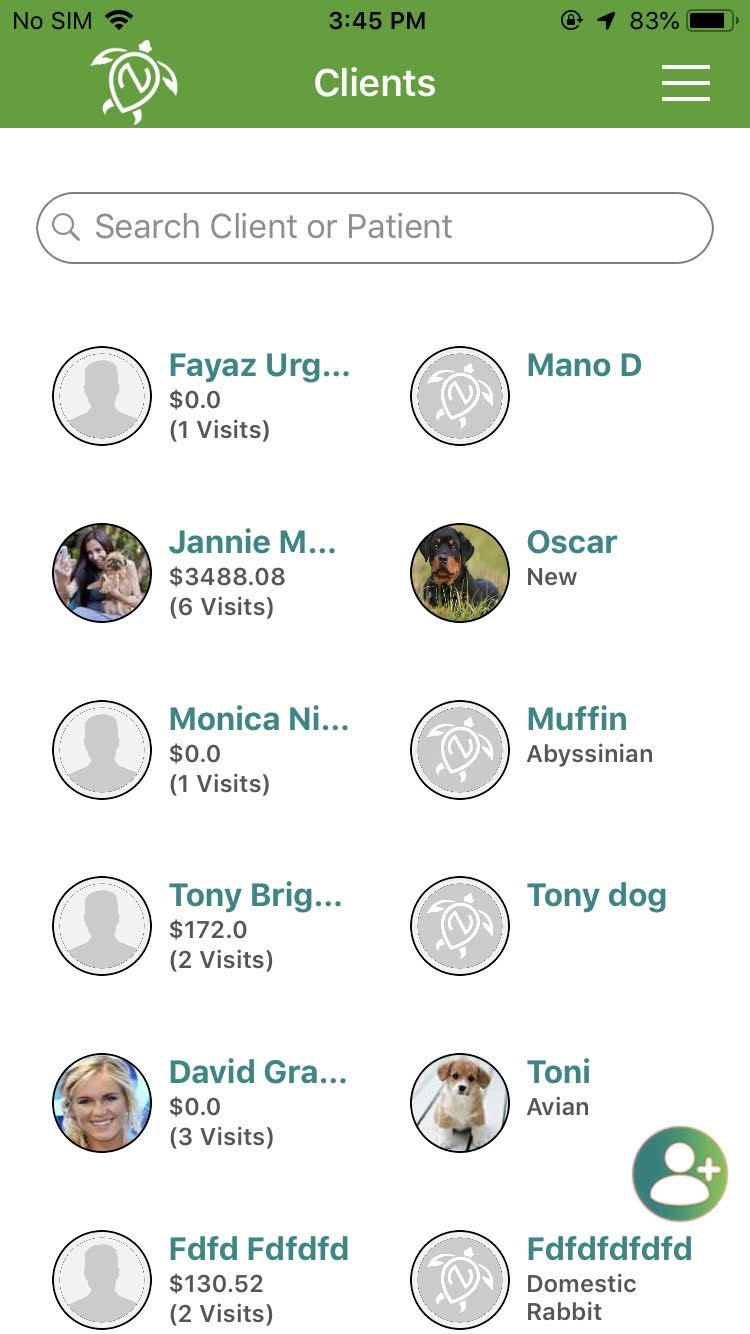
On selecting a client, Client dashboard will open. Where client details will display in header and Collapsible list will display, which contains associated patients and can add a new patient, financial history of client and statement history of client.
Edit Client: The user can edit the client profile information by clicking the edit icon on Client Banner. On edit screen user can update all the details.
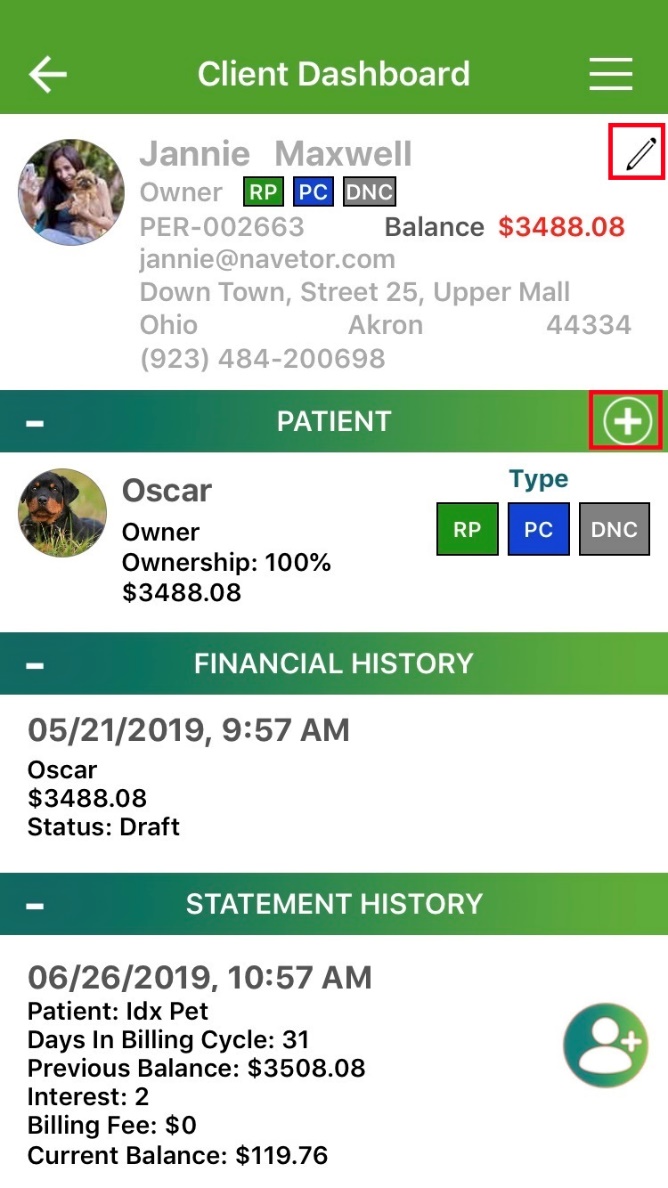
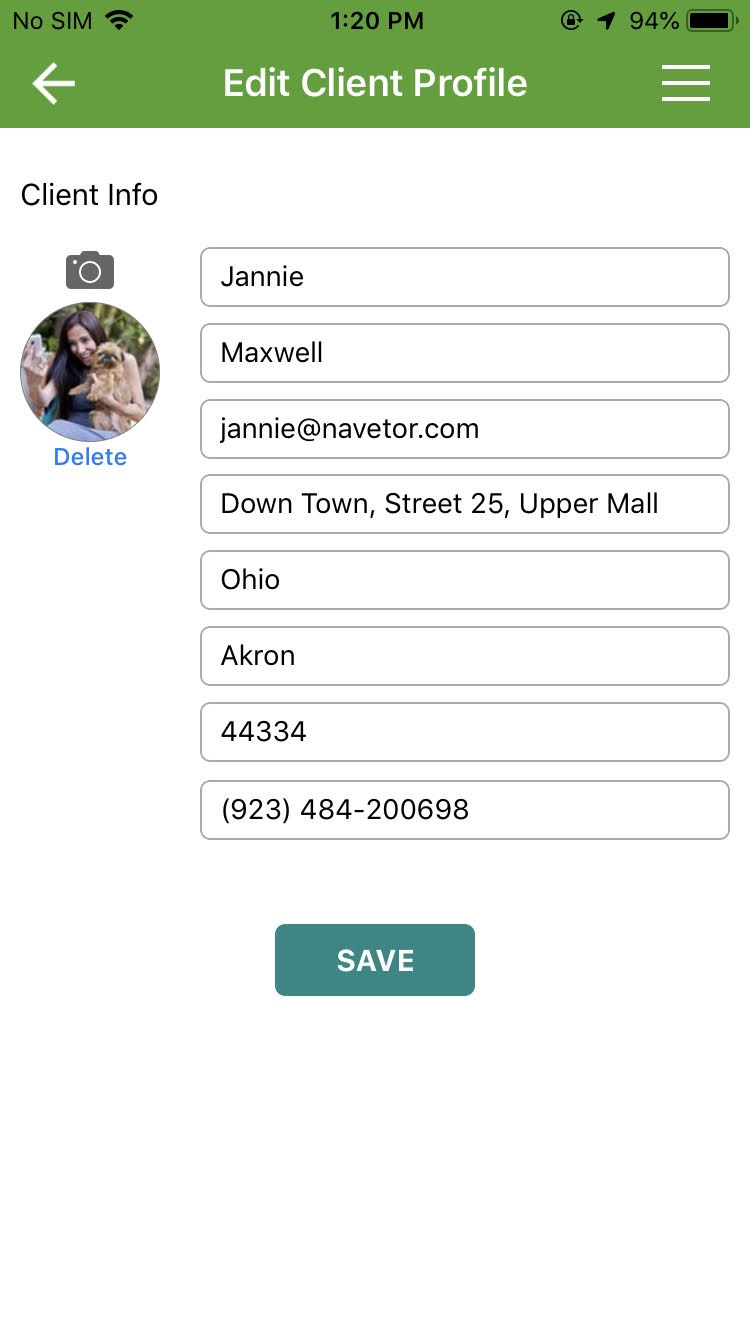
Add Patient: The user can add a new patient by clicking the add icon on Patient Section. On add screen user can enter all the details and save the new patient.
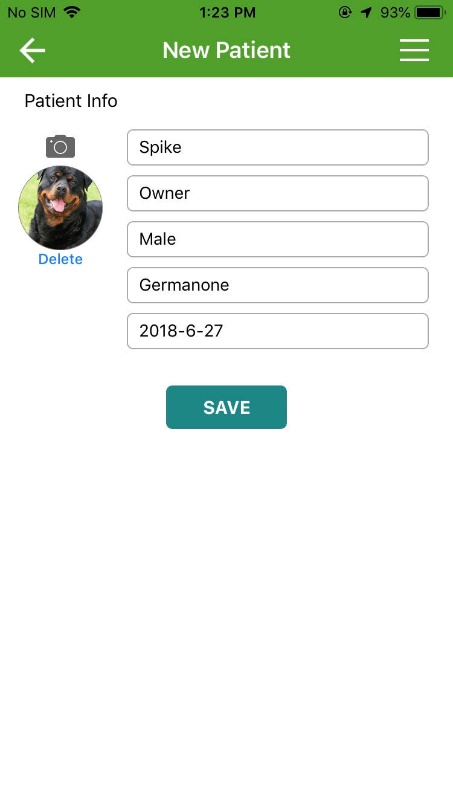
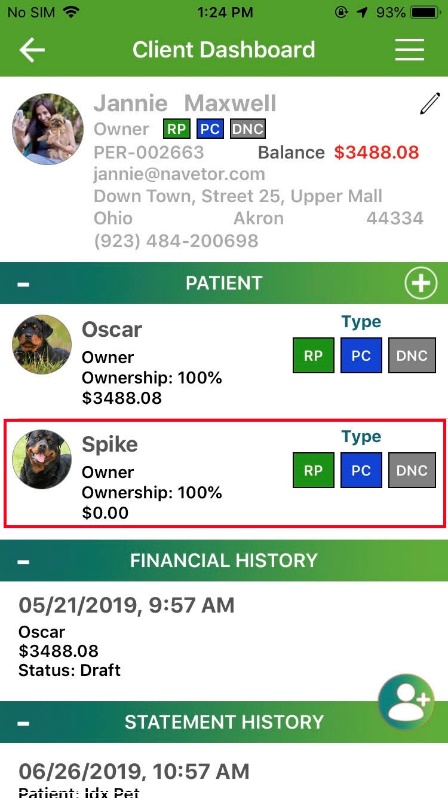
Invoice and Payment
In this screen user can view all the invoices associated with any patient by searching patient name in the search bar. Invoices are listed showing invoice number, amount and date. On clicking, any invoice user can view list of items with their name, quantity and total price of that item. Also user can view bundle items and invoice summary. User can also view overall balance, payable and amount paid for all the invoices. Invoice summary also lists multiple clients, their responsibilities and the total amounts associated. User can also create an invoice by clicking on the create invoice button in the invoice screen.
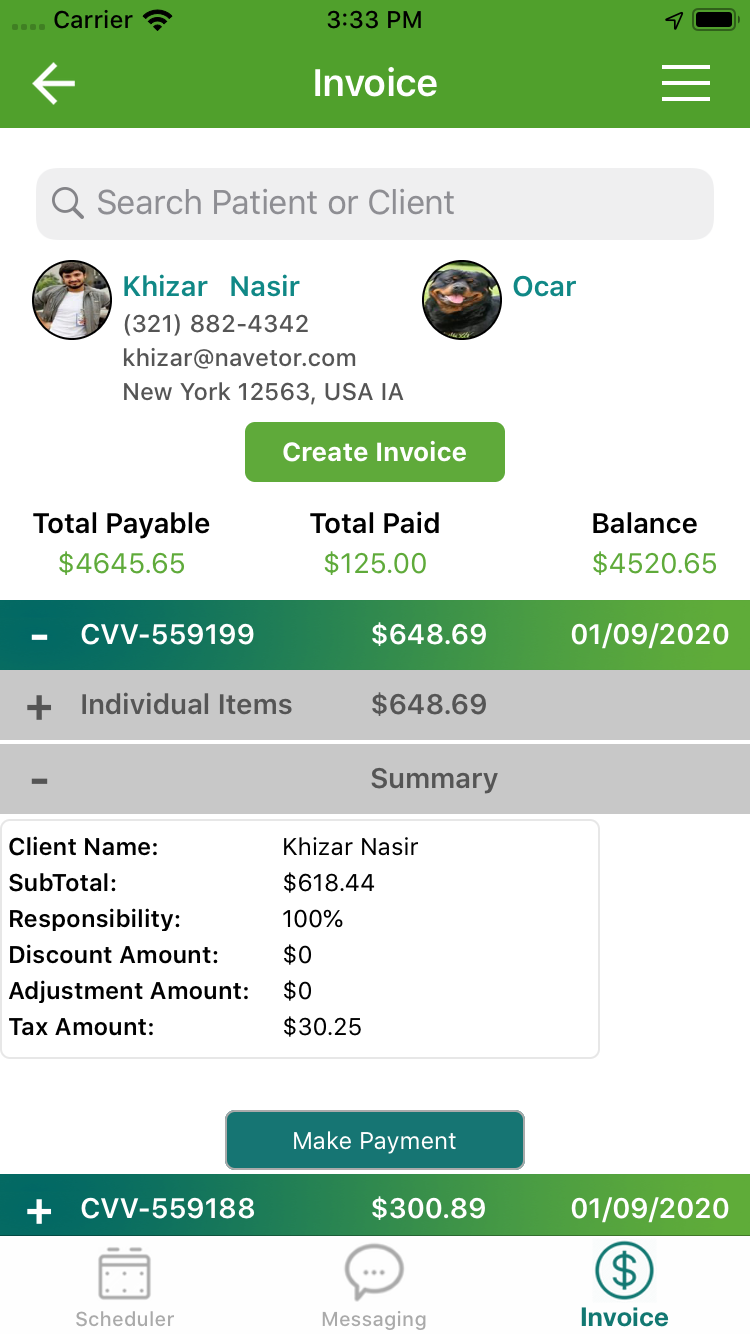
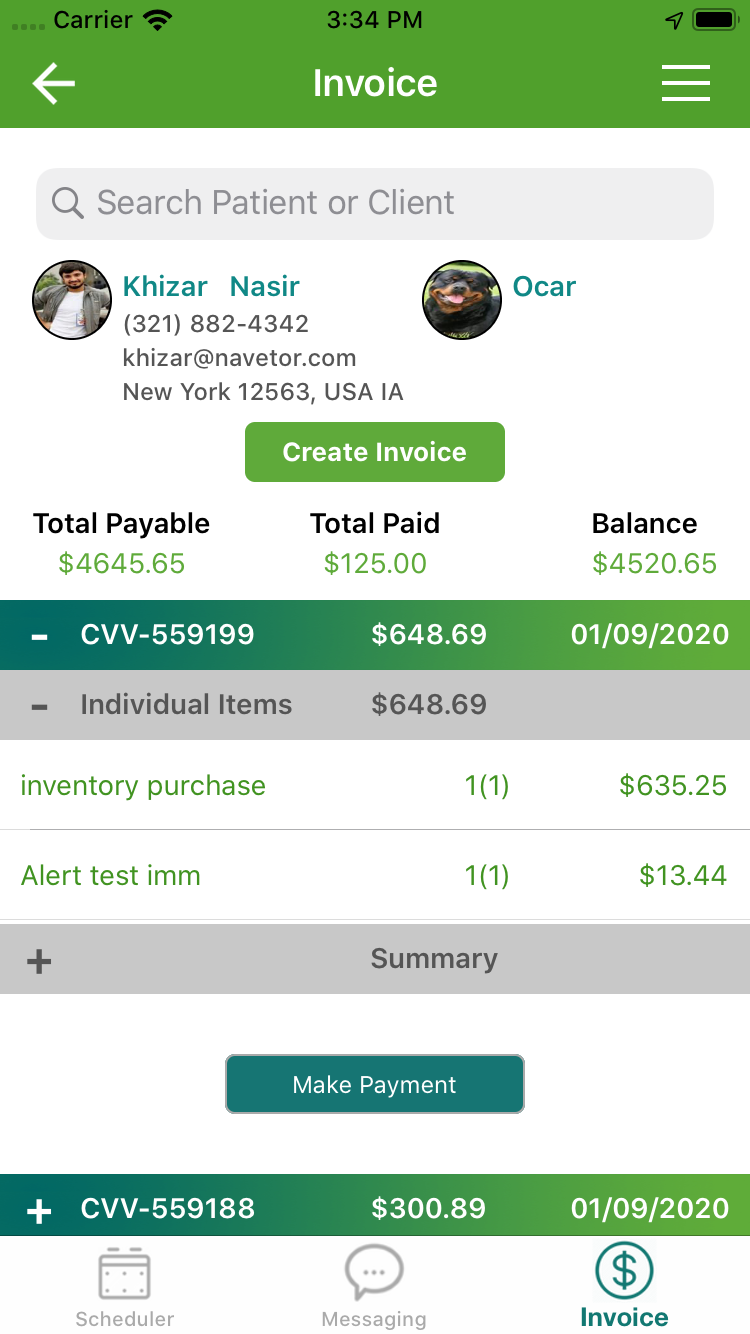
The user can search invoice items (Procedure, Inventory or Bundle) and select them to be added into the invoice. Before saving the invoice we can add adjustments and discounts if available to that client. Quantity can also be changed along with base units for inventory items. Same can be done to the bundle items and user can view overall discounts with tax and subtotals. After saving the most recent invoice can be viewed on top.
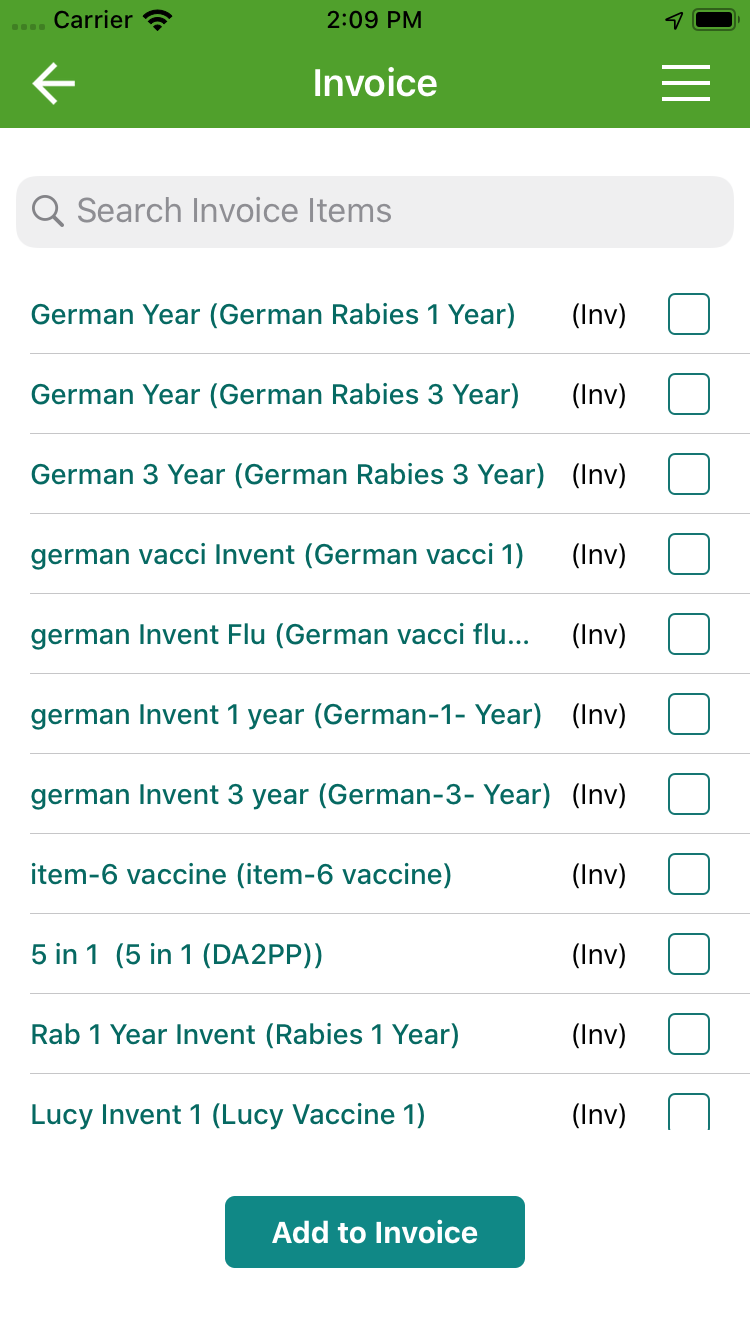
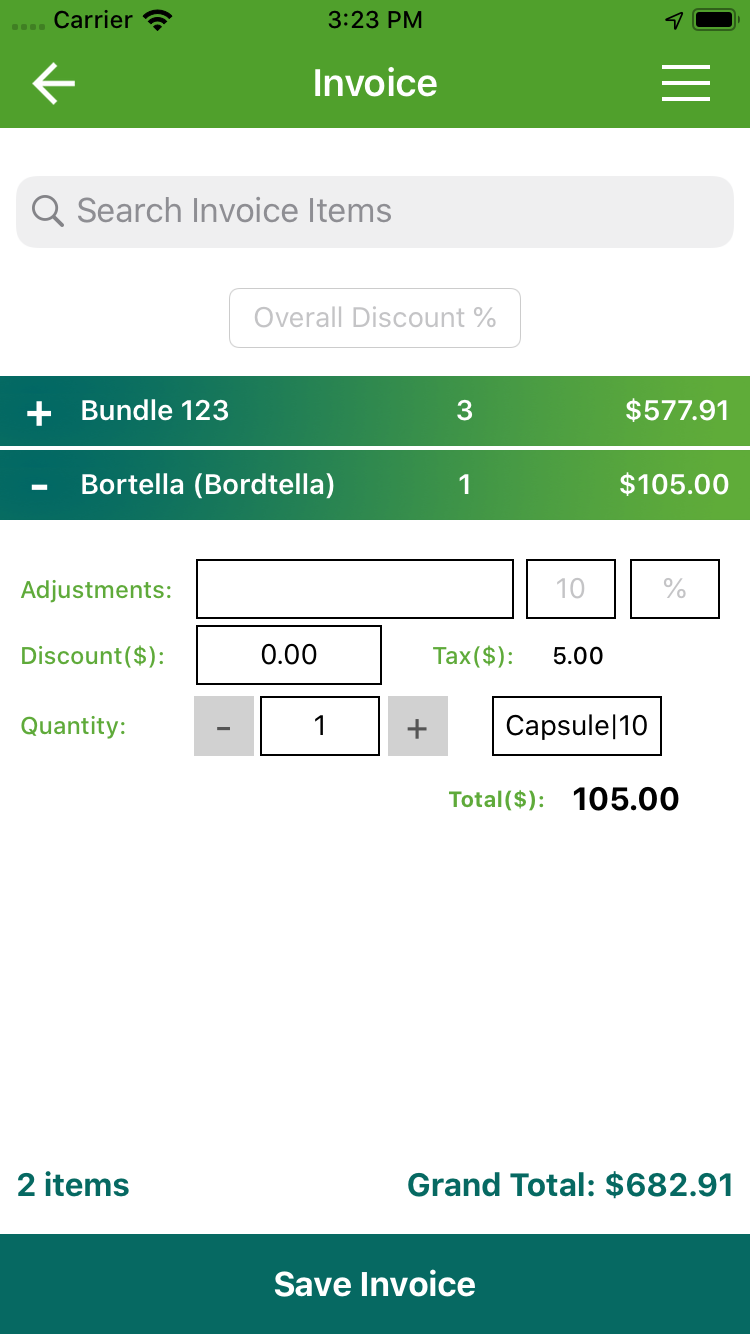
User can also see make payment button at the bottom of individual invoices that is used to make payment to that particular invoice. User can view the payable amount, invoice ID, client name, patient name, responsibility and date. Payment amount, payment type and payment method fields are editable. User can also change the client for that patient and view its responsibility and payment amount. User can perform payment using credit card, debit card, cash or cheque. Also to make payment through credit and debit cards.
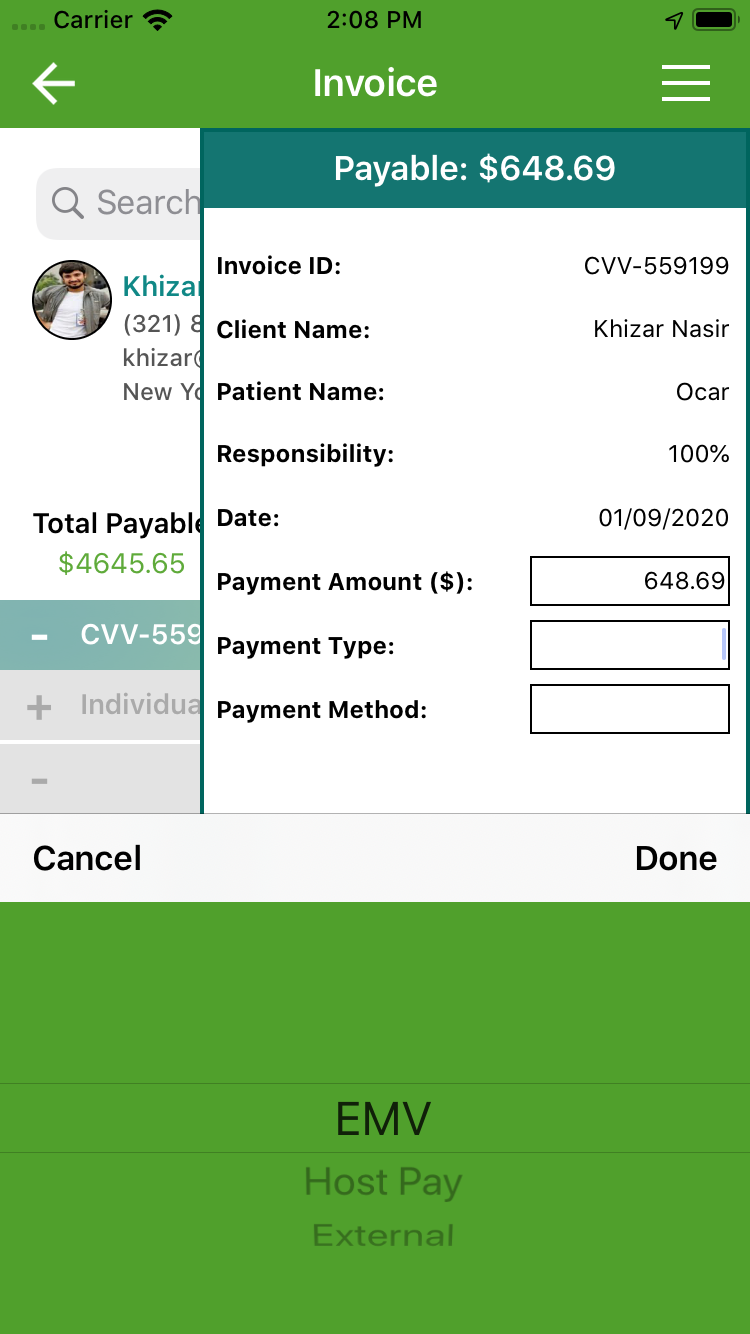
Messaging
On this screen user can view list of previous chats with the providers. User can search any provider by name to start new chat or resume previous chat. User can also view any chat by clicking on any available chat.
Create Group: User can also create a group and add as many member as s/he want, when clicked on create group icon, user will be directed to a new screen where group details will be entered.
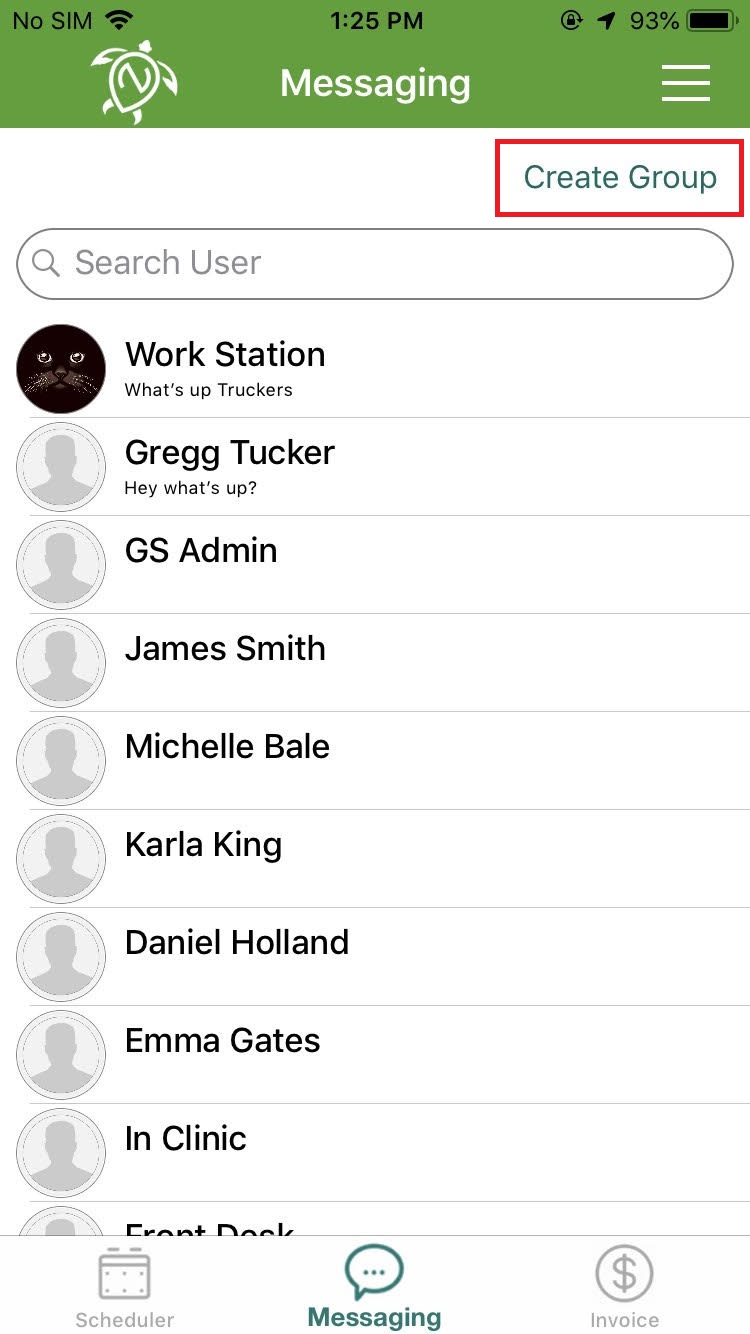
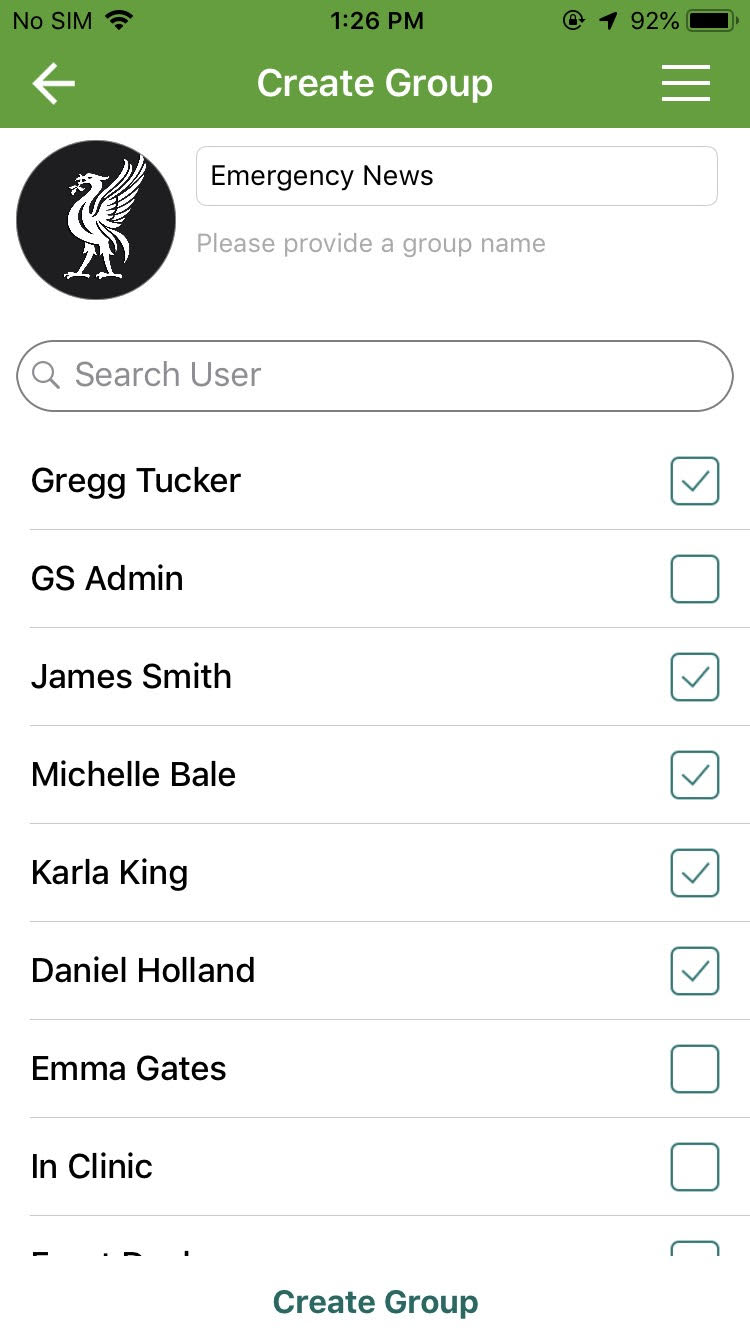
Following screens shows the group created and the auto generated message in the chat of a group.
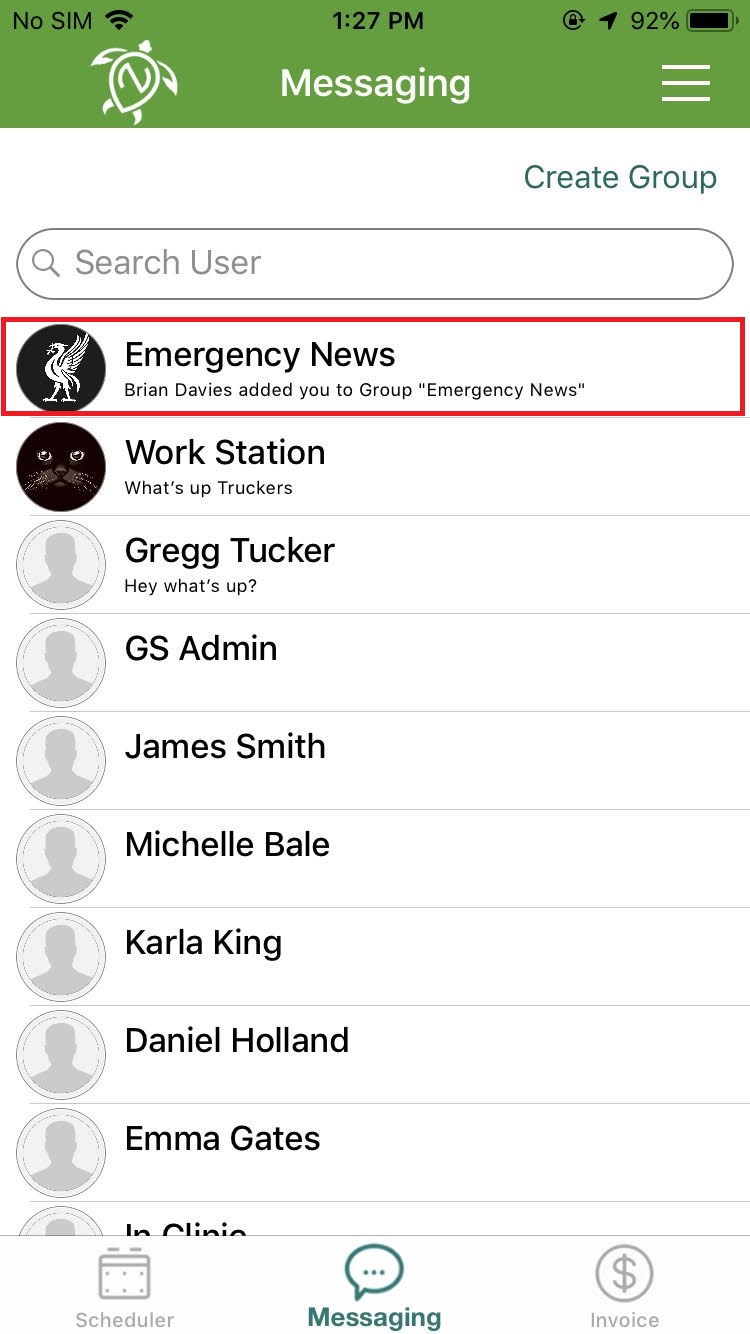
Push Notifications For Messaging
When a message is sent from consumer app to provider app, a push notification is sent to the provider app notifying the provider that a particular client wants to chat. On clicking that notification the app jumps to the messaging screen showing new messages or photos sent. Same way the provider can also sent attachments, text messages, photo messages and audio messages to the client.
Push Notifications for Appointment Requests from Consumer App
A push notification is received in provider app showing appointment request from consumer. Provider can also see two buttons on notification banner of schedule and cancel. So the provider can directly perform the desired action on this request notification from consumer. If he clicks on cancel then the appointment is cancelled. If he clicks on schedule then he will navigate to add appointment screen in the app where appointment can be saved. On saving a push notification is sent to the consumer confirming that your appointment has been scheduled by the provider.
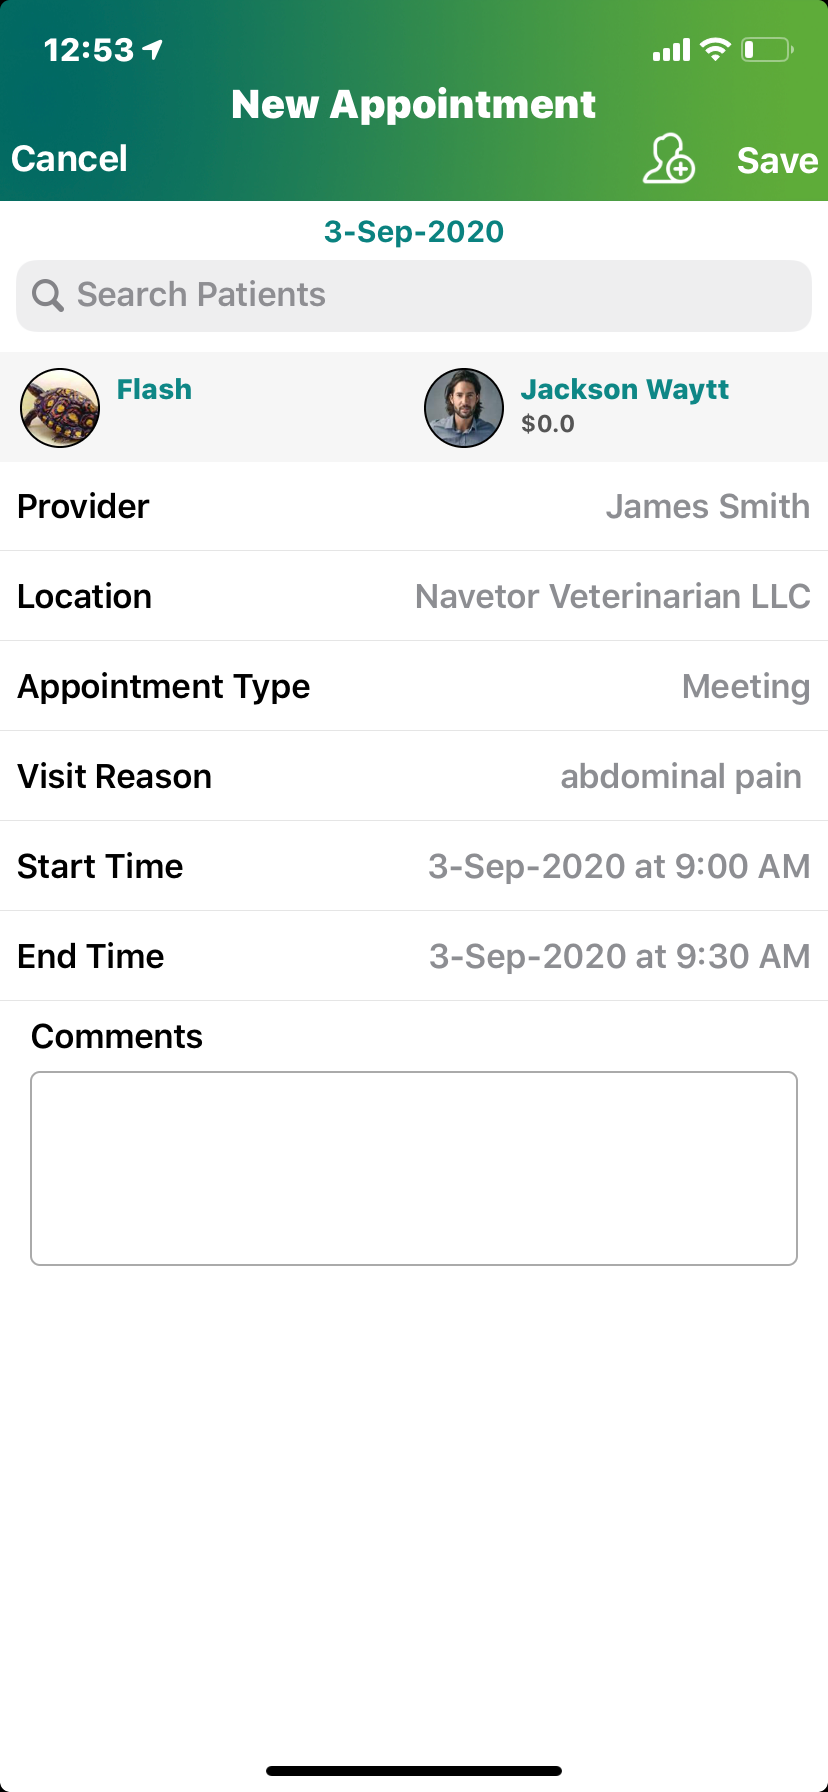
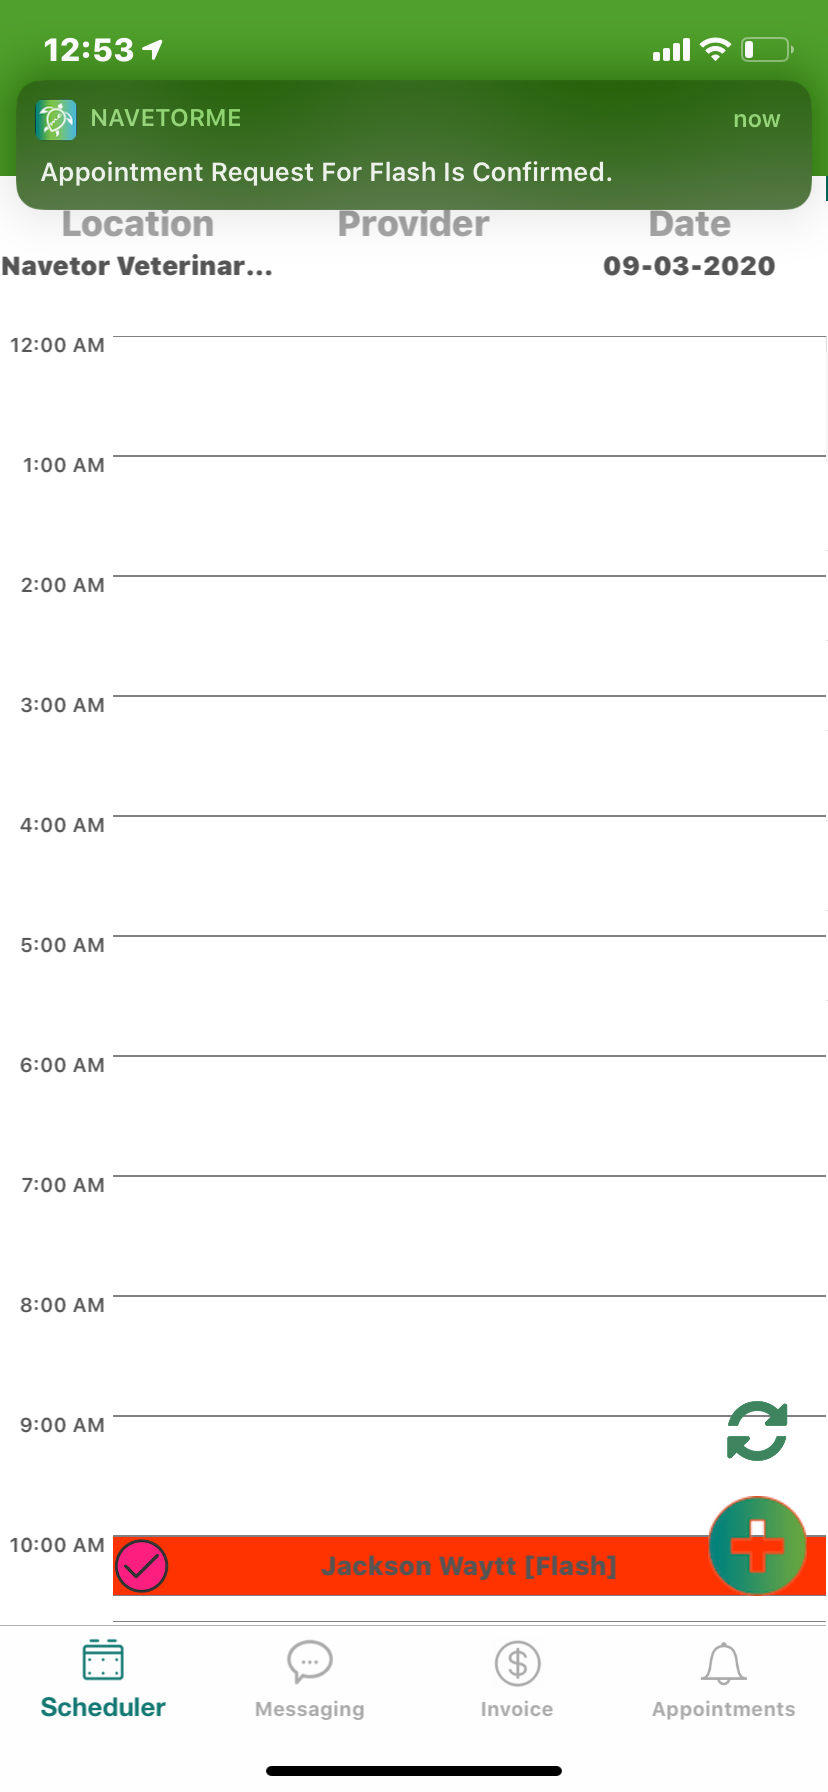
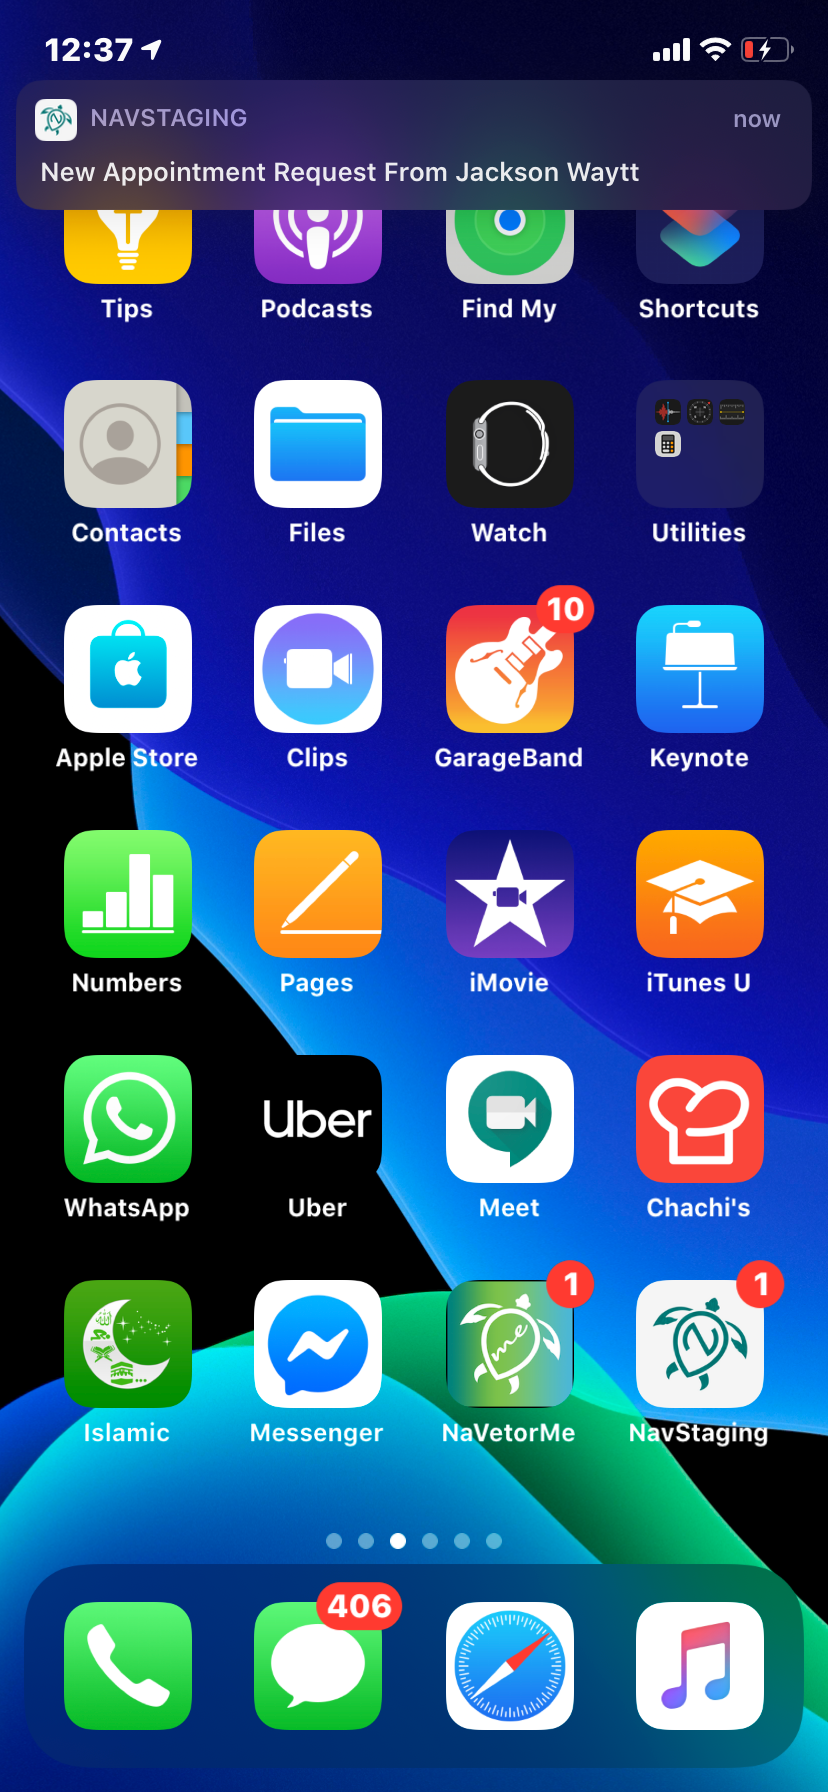
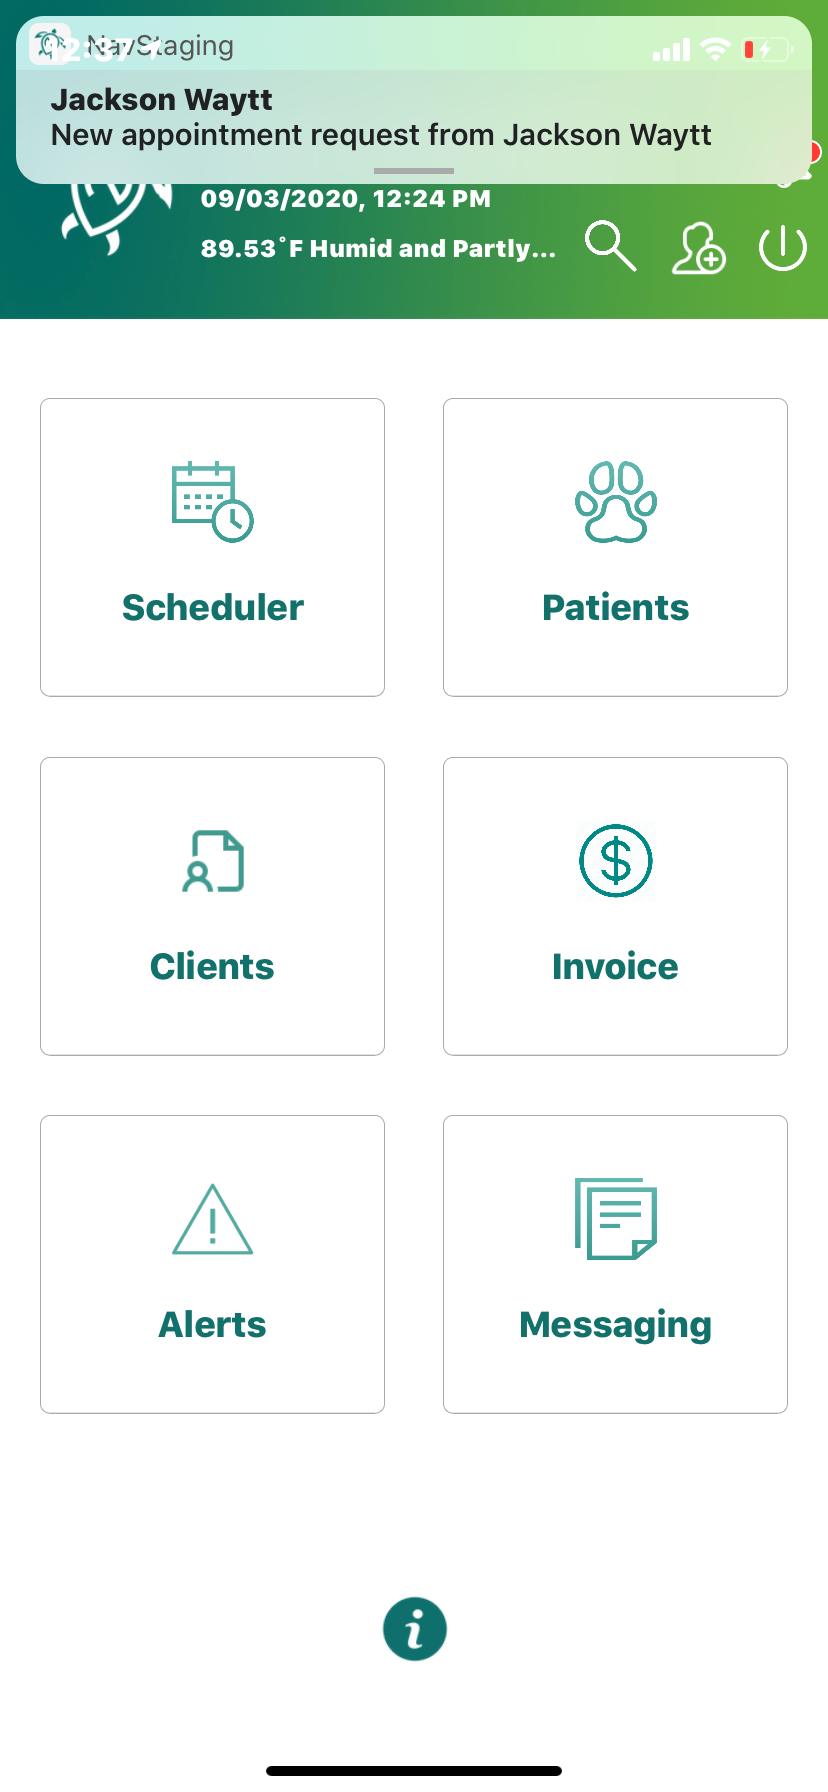
Consumer Appointments
If the provider is busy and push notification is missed then the provider app still maintains all the appointments. Alert will be available in main menu screen with a bell icon showing number of pending requests. On clicking the bell icon provider can see three different sections of appointments list I.e Pending, Scheduled and cancelled. On clicking a particular appointment from list two buttons are visible i.e schedule and cancel. So just like provider could schedule or cancel an appointment directly through push notification, same actions are available here against all the appointments in pending section.
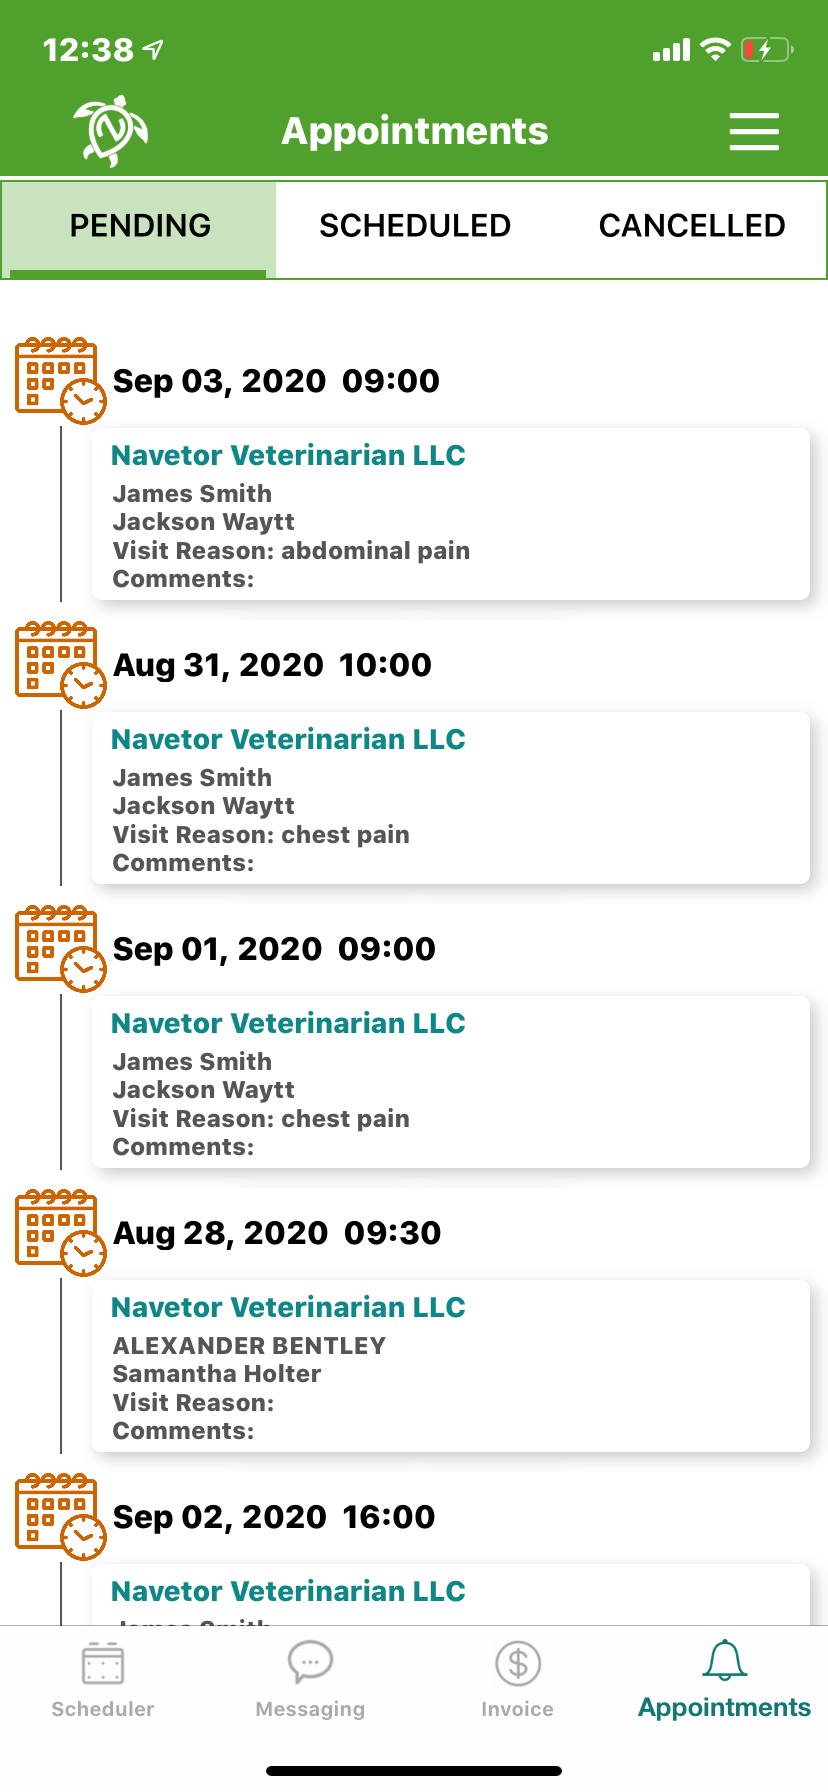
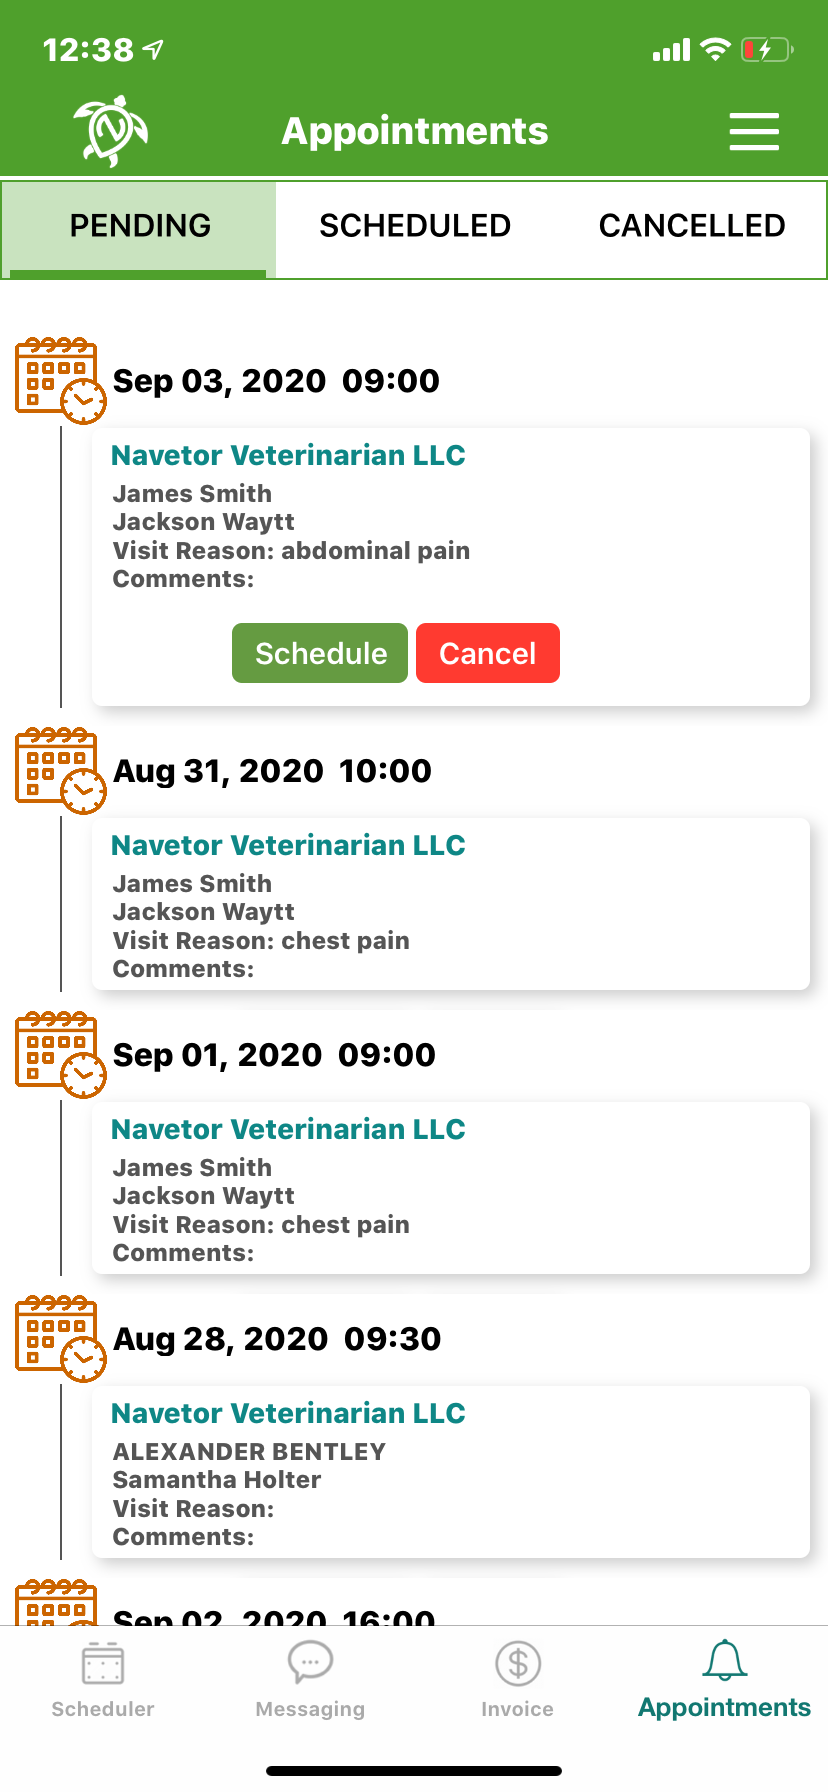
Boarding
When boarding screen opens user can see reservations against different resources with each reservation showing client name and patient species. On clicking a particular reservation user can see details of that reservation. Also user can scroll left or right to navigate through the week and see respective reservations. User can also change location and date from top to see reservations on that particular location and date. On clicking any empty slot against a particular resource a new screen is opened for add reservation. A yellow mark at the end of a boarding appointment means that this appointment is continued to another resource which can be seen in detailed info of that appointment. On clicking status icon of a boarding appointment you can see the options of admit, no show and cancel. You can also edit a boarding appointment and add multiple instances to that appointment with same provider name while editing an appointment. While adding a multiple instance to a boarding appointment while edit, the time in of next instance should be equal to the time out of previous instance in that reservation other wise a prompt is shown stating that there is a time gap between resource allocation. Also while saving a reservation we also check booking limit of that resource. You can also delete a reservation while editing or from main boarding screen. There is also a refresh button at bottom right corner of Boarding screen just like in Scheduler.
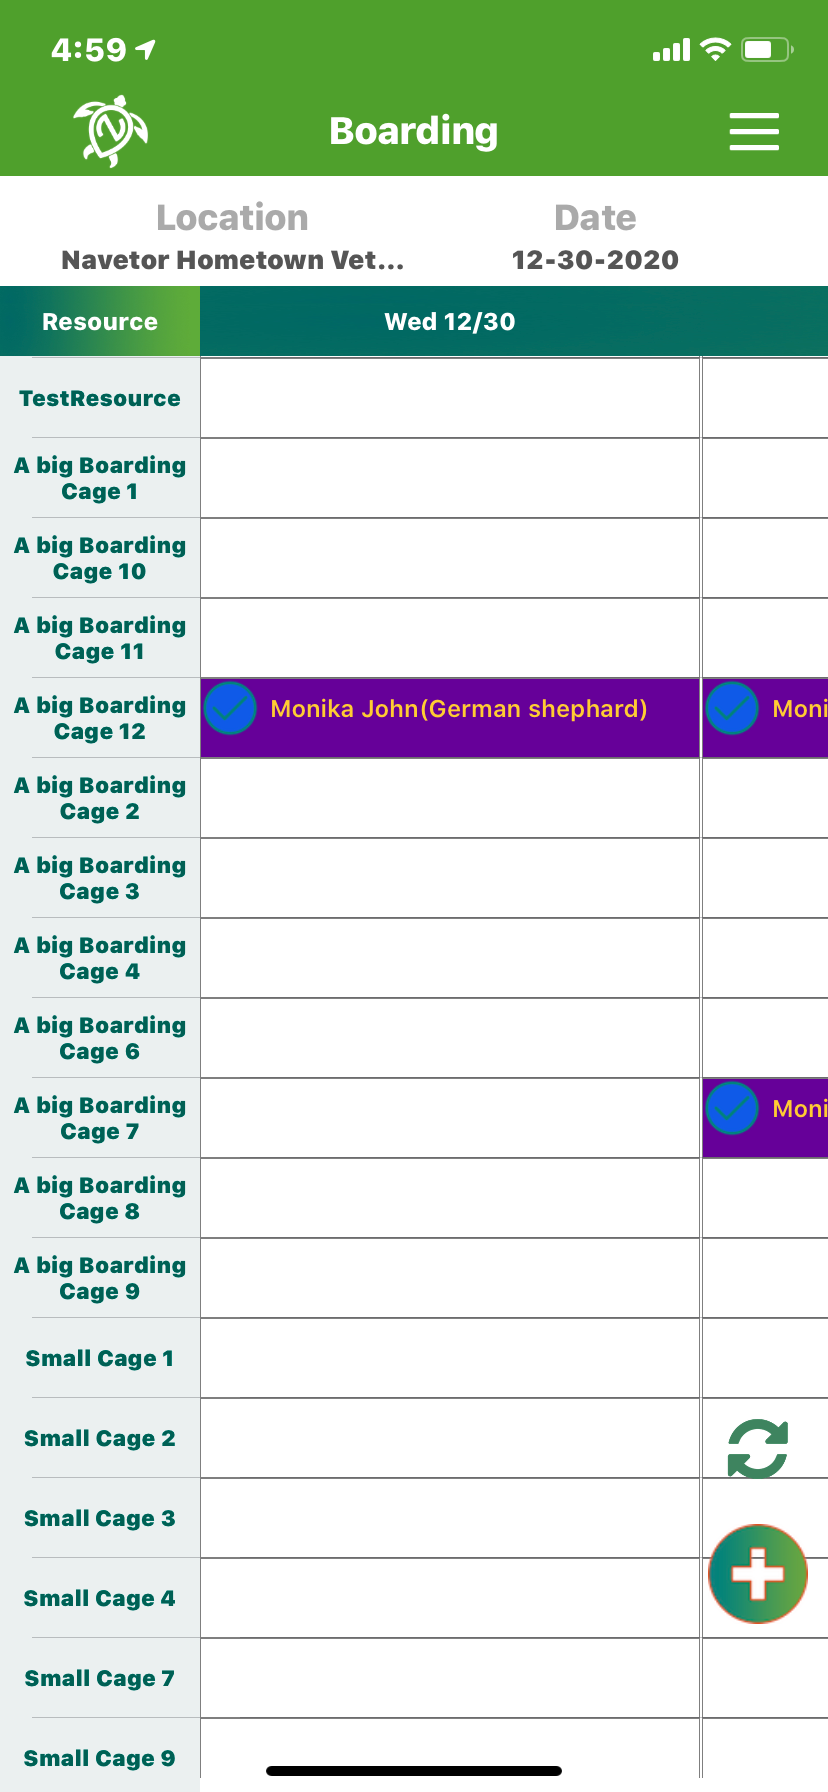
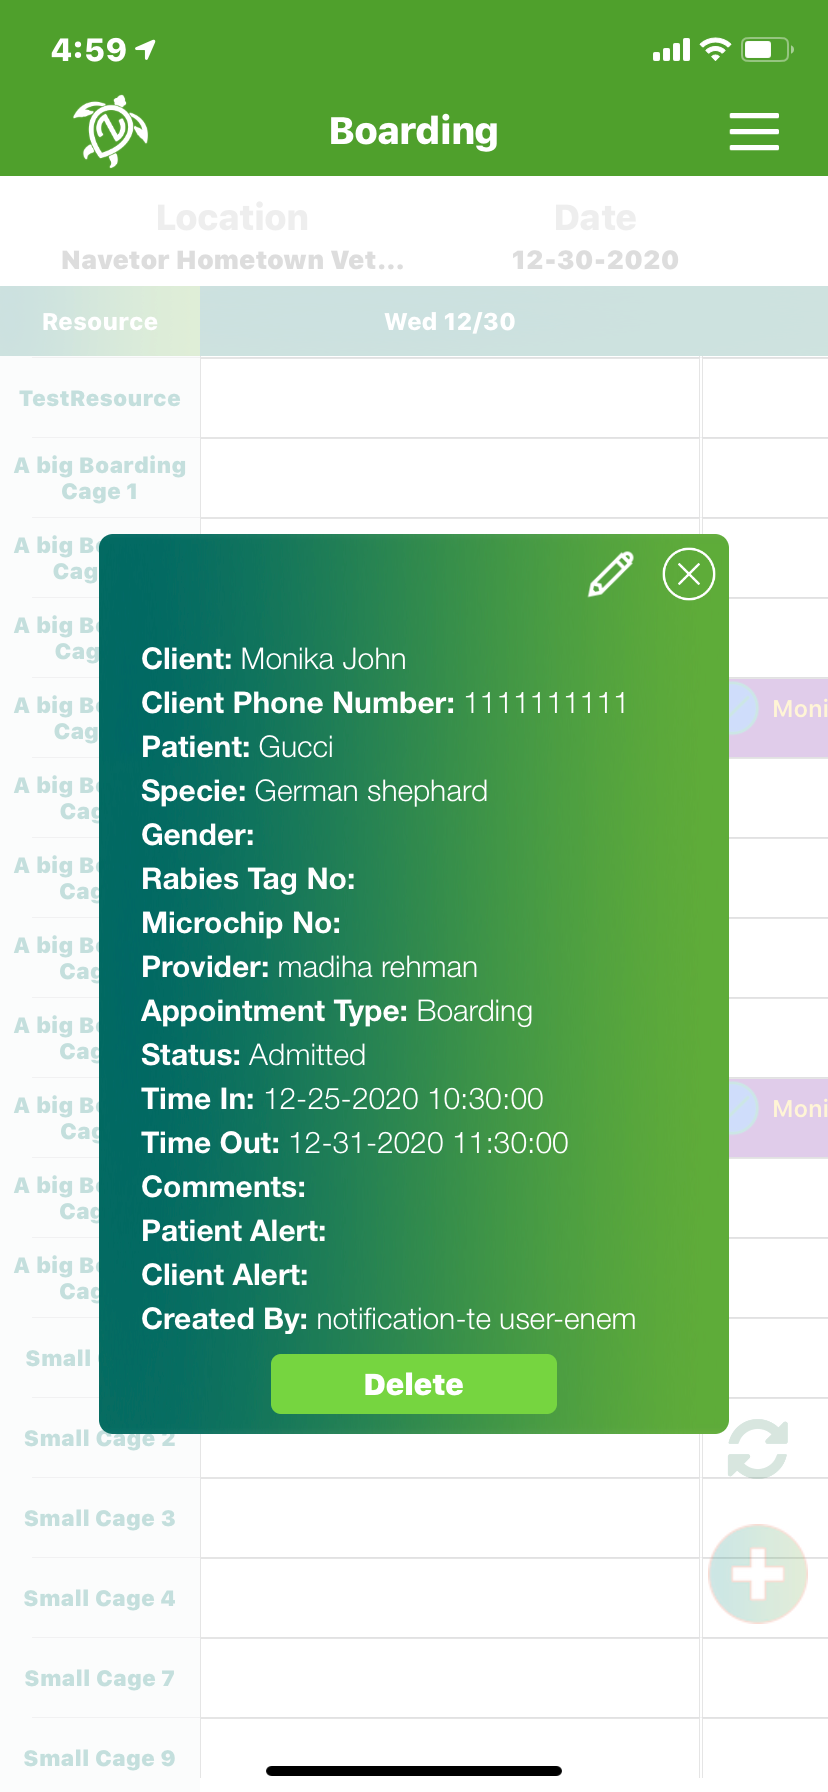
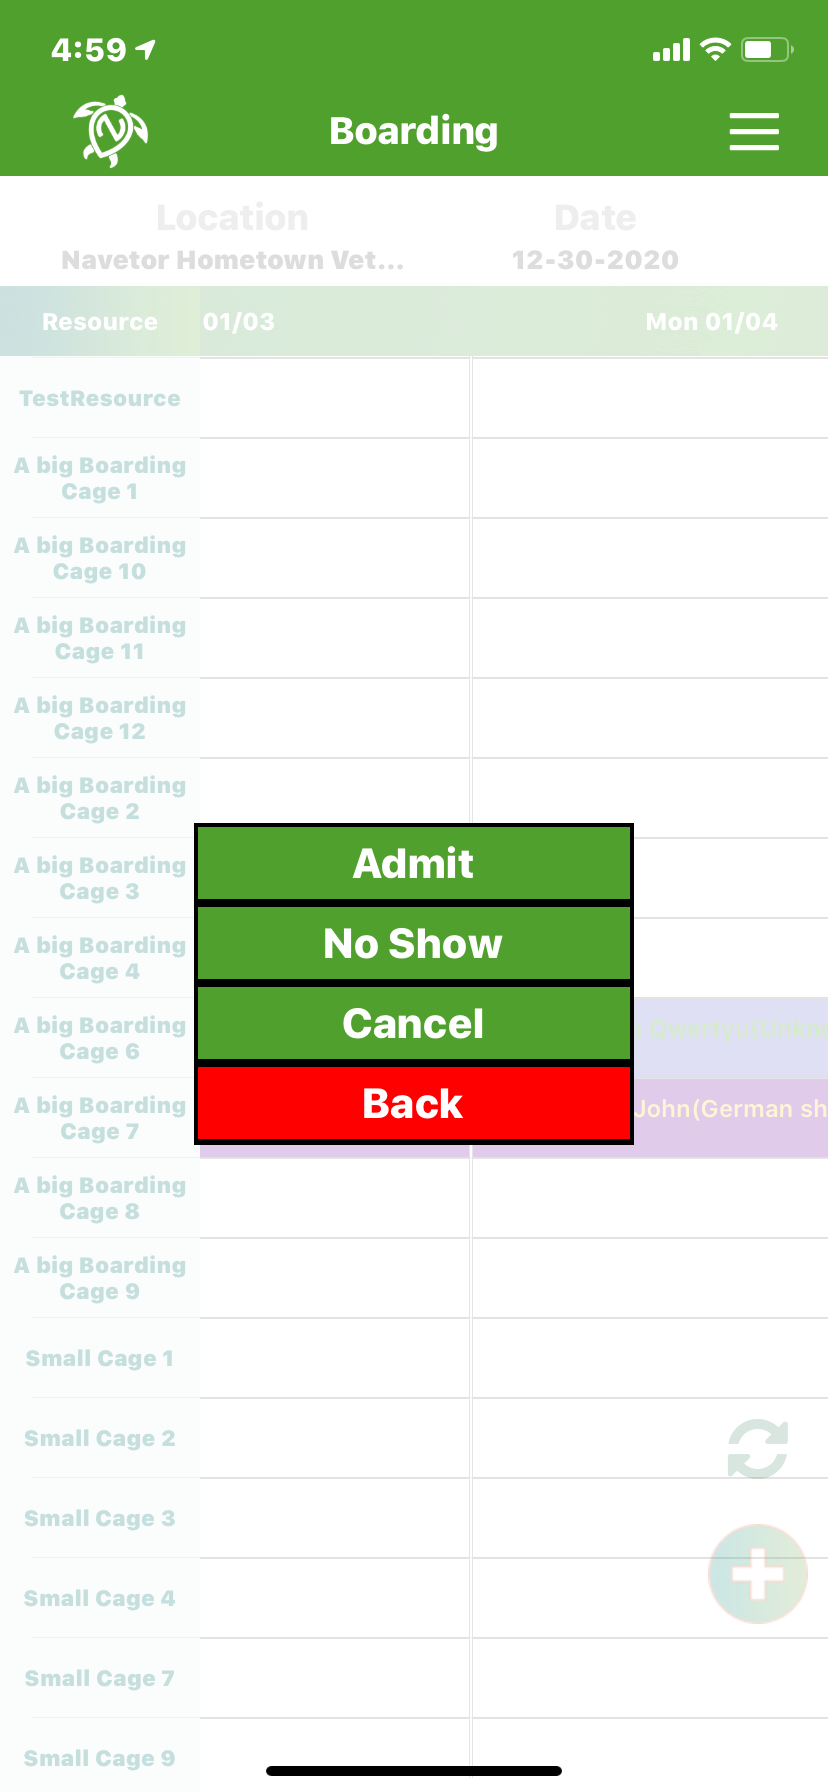
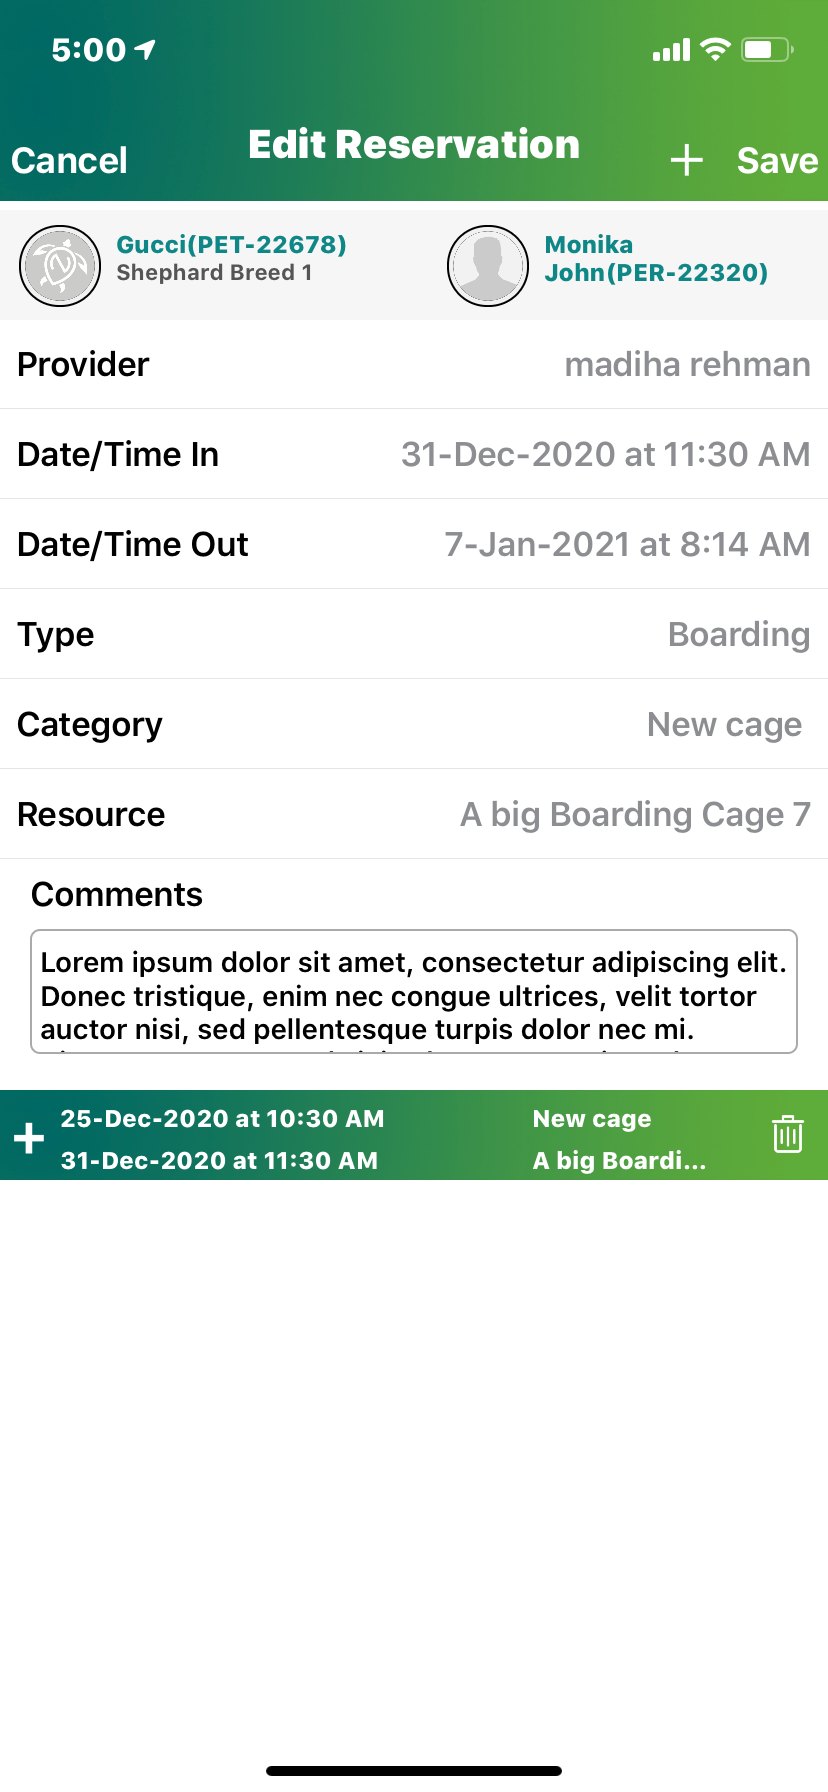
Alerts & Tasks
We have an option of alerts and tasks in main menu screen that takes us to a main screen showing three different tabs on the top. First tab is for alerts that are generated through web application showing time and date of alert generated and description of the alert. If you click on any alert a pop up is animated at the center of screen showing detailed info with alert name, patient, message alert and recipients. There is an option to go to patient dashboard of that particular patient. Second tab is for pending tasks showing a count of new pending tasks as well. Each task in the list shows task name, associated patient, pet ID, task description and assignee. On clicking a particular task a pop up is shown that contains detailed info with mark as done button. The mark as done button takes the task to third tab that is completed tasks. It also shows the same information as in pending tasks and is created when a pending task is marked as done.
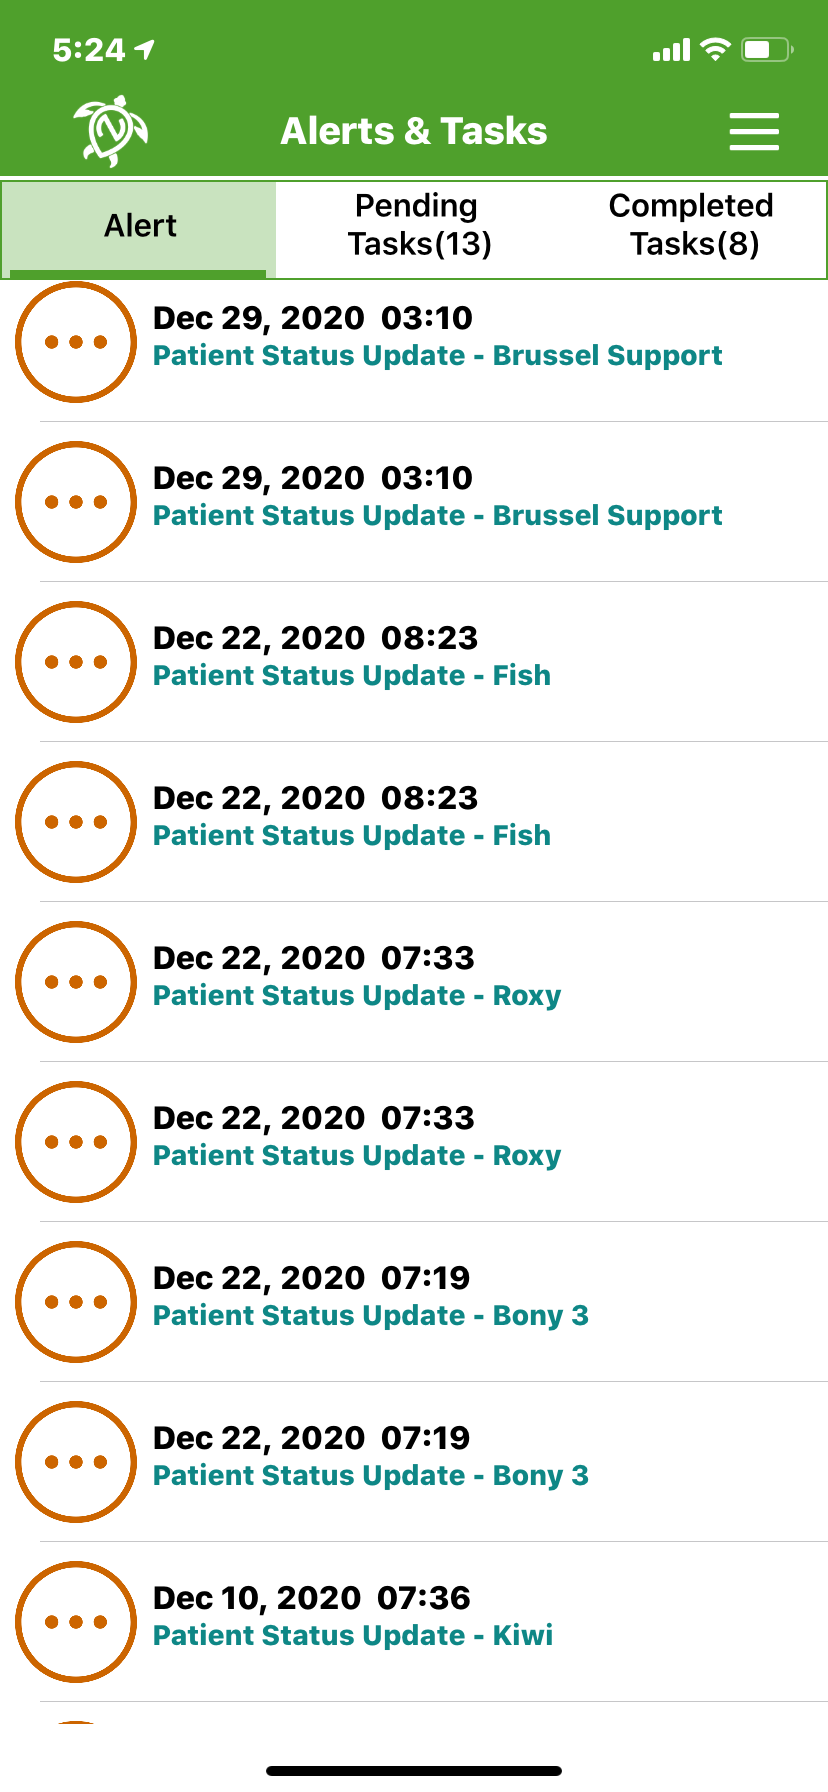
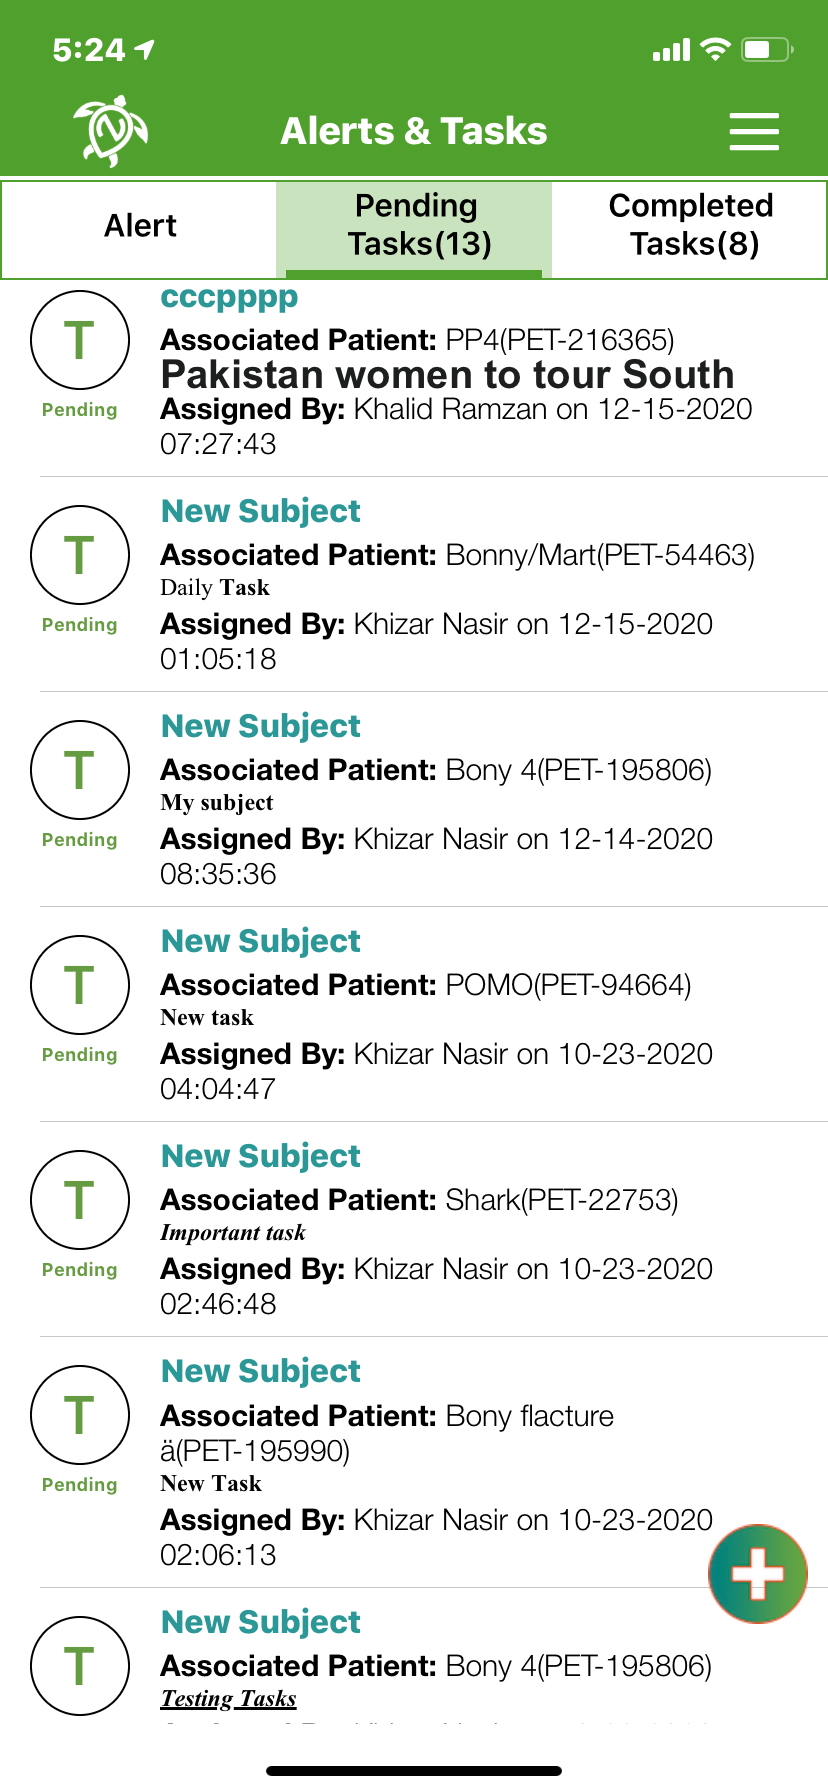
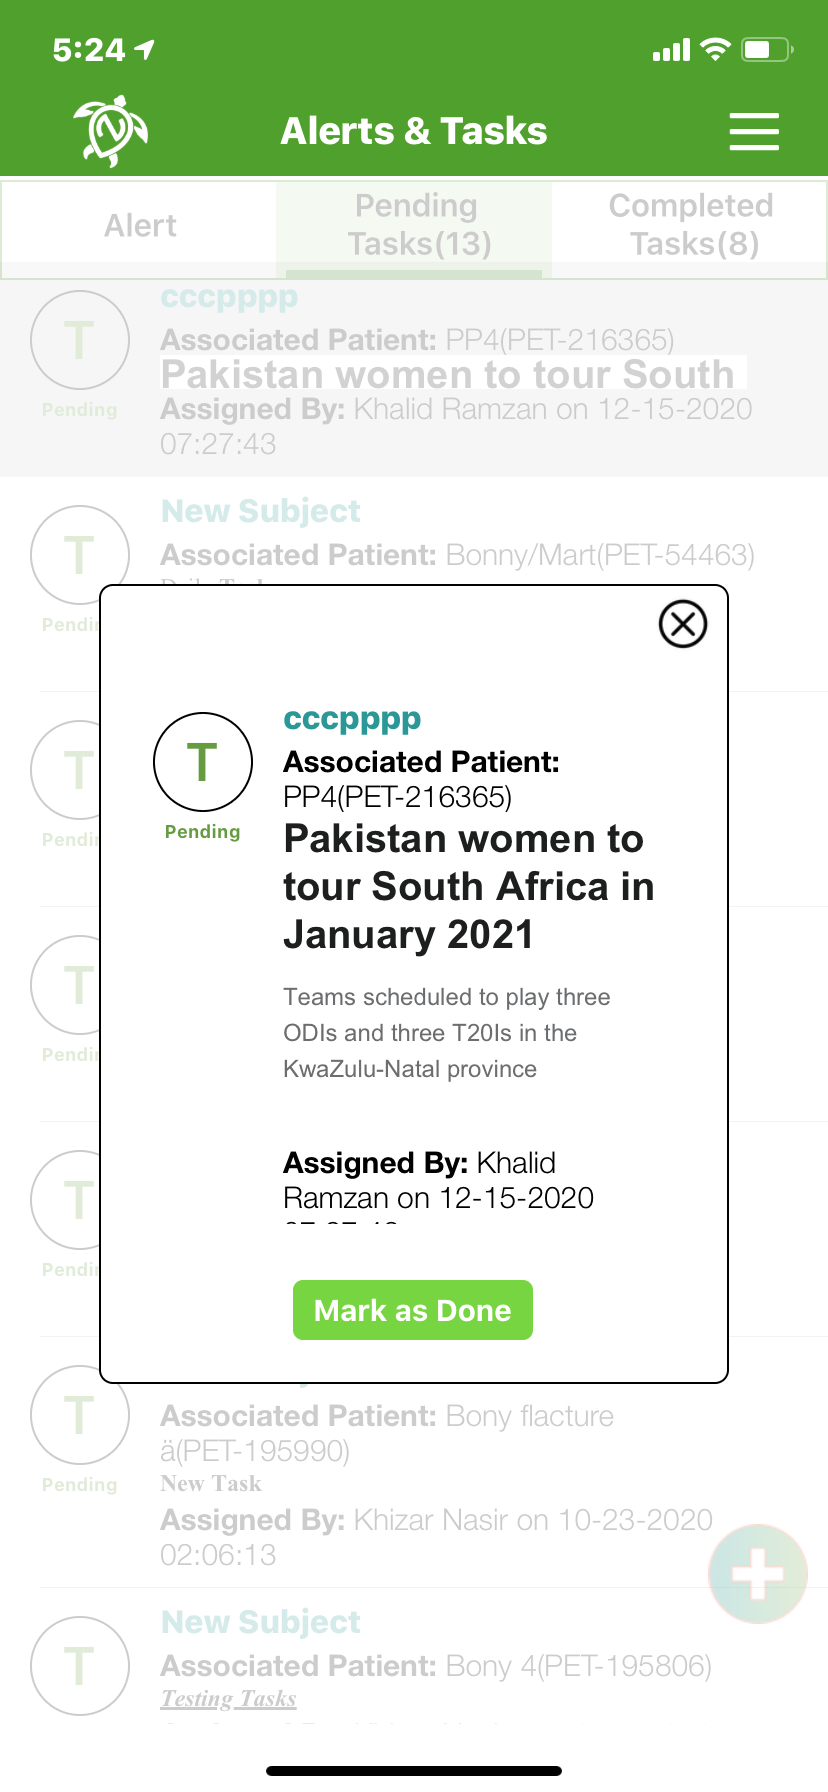
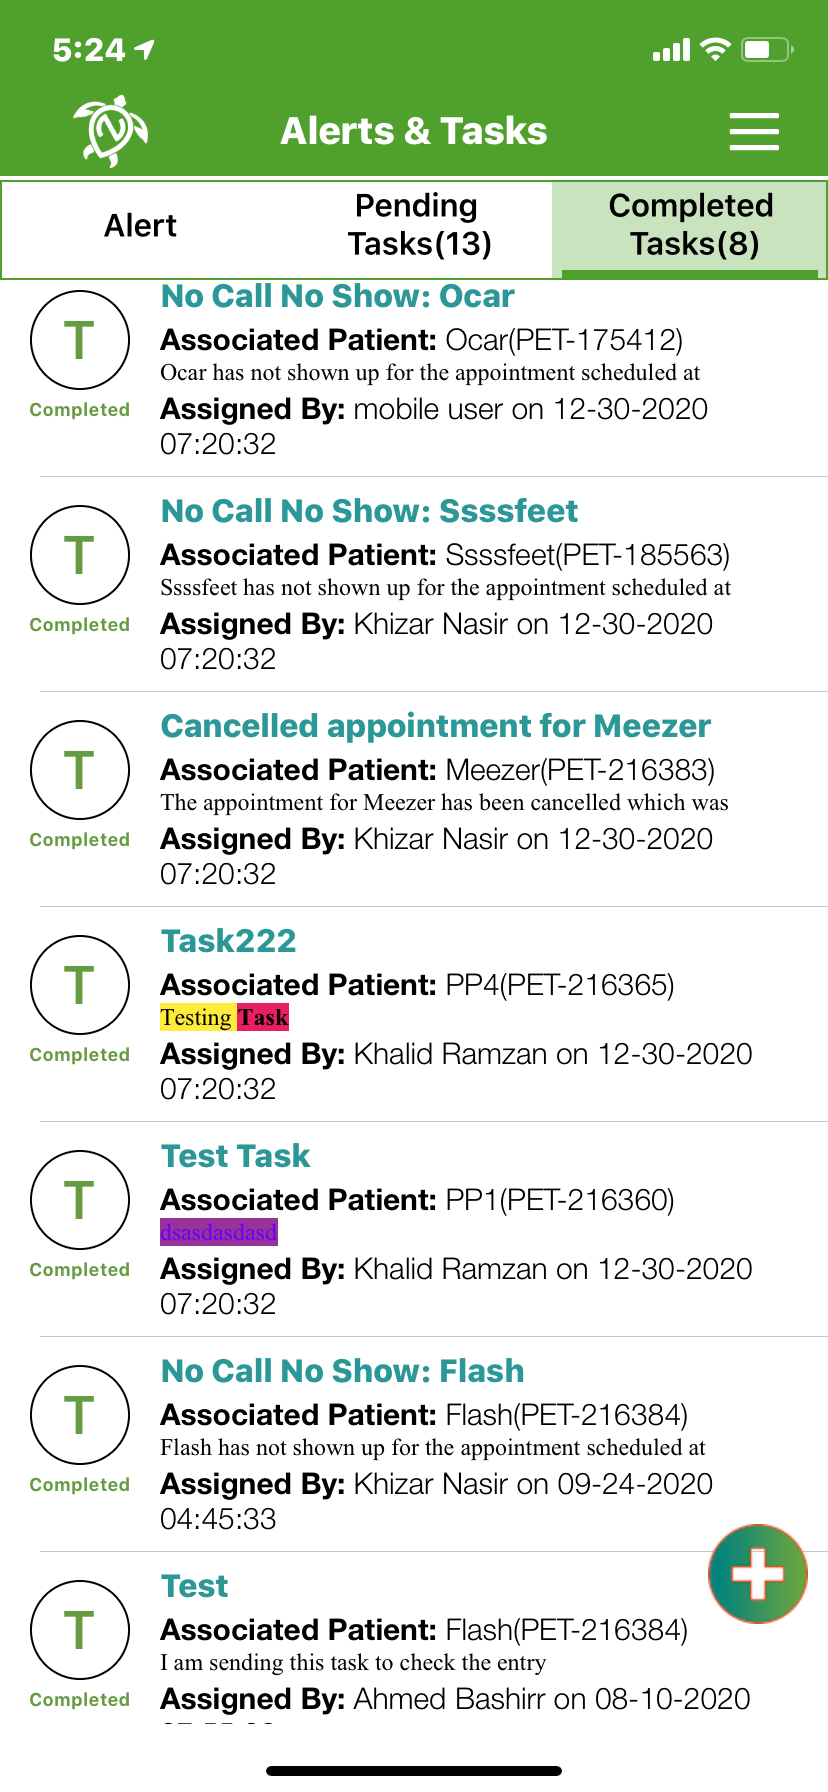
Announcement
We have an option of announcement in main menu showing list of announcements made from web and mobile application showing time and description of announcement. User can create a new announcement by clicking on plus button and can refresh the list by scrolling on top.
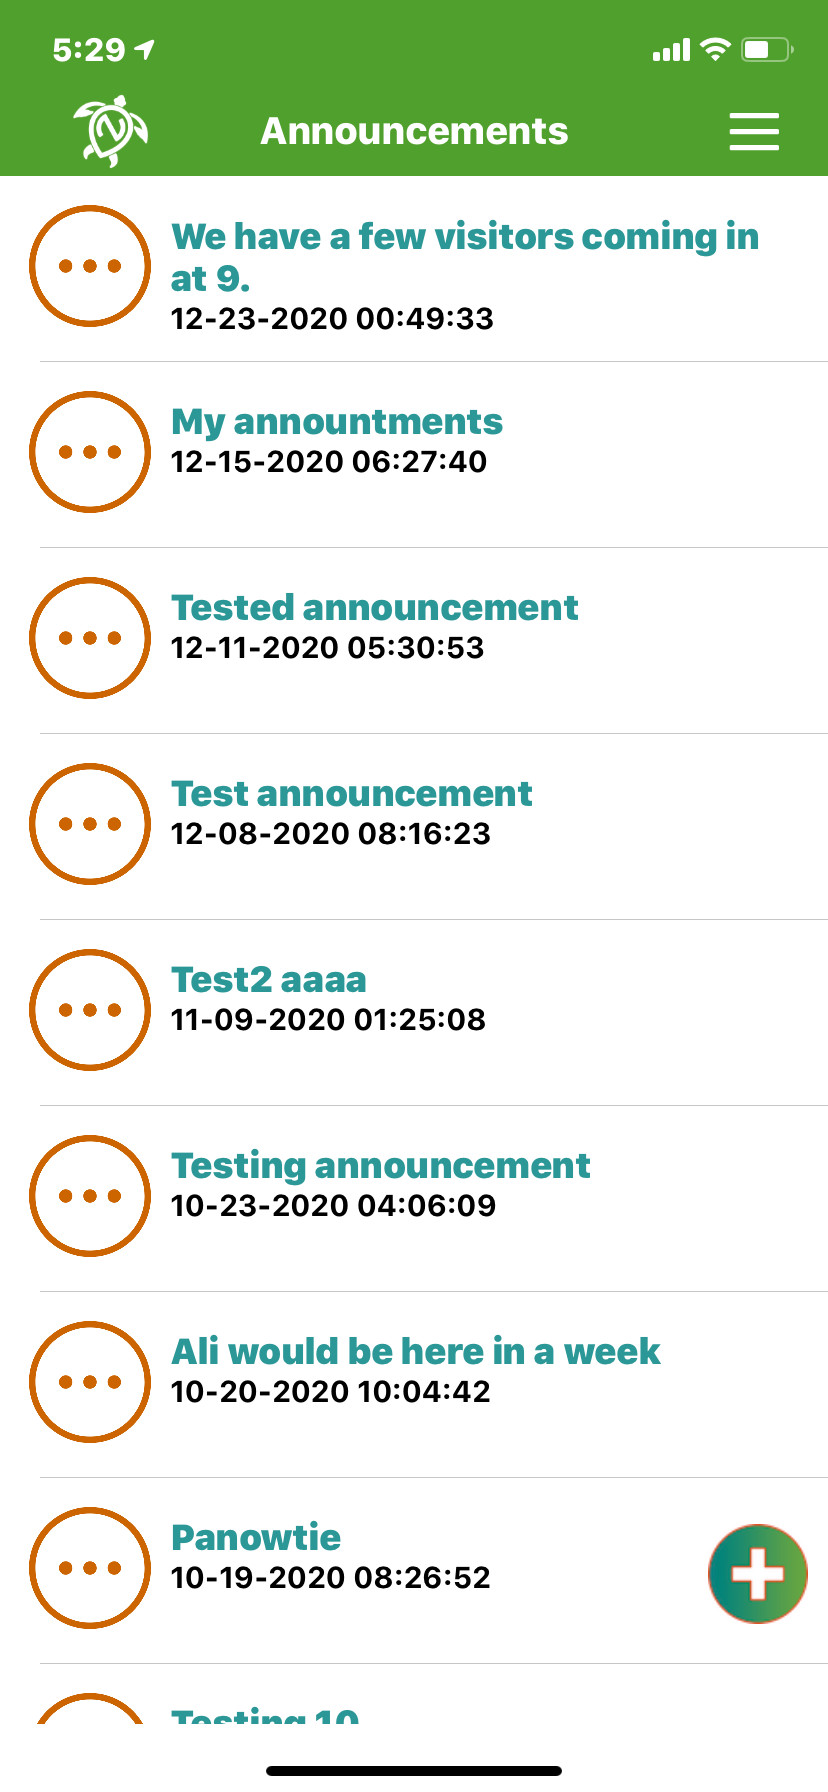
Resource Scheduler
We have added resource scheduler to the main scheduler module. Now you can view appointments for different resources selected just like we view appointments against providers selected from top lookup. If a provider is selected then Provider is highlighted in top lookup and if resource is selected then resource option is highlighted on top lookup. You can also add an appointment or edit an appointment for resource scheduler. If a resource was selected last then that resource is saved for next visit just like we save last provider selected. Also one more feature is added to the scheduler that it scrolls automatically to current time when its loaded for the first time with a red mark pointing on the current time.
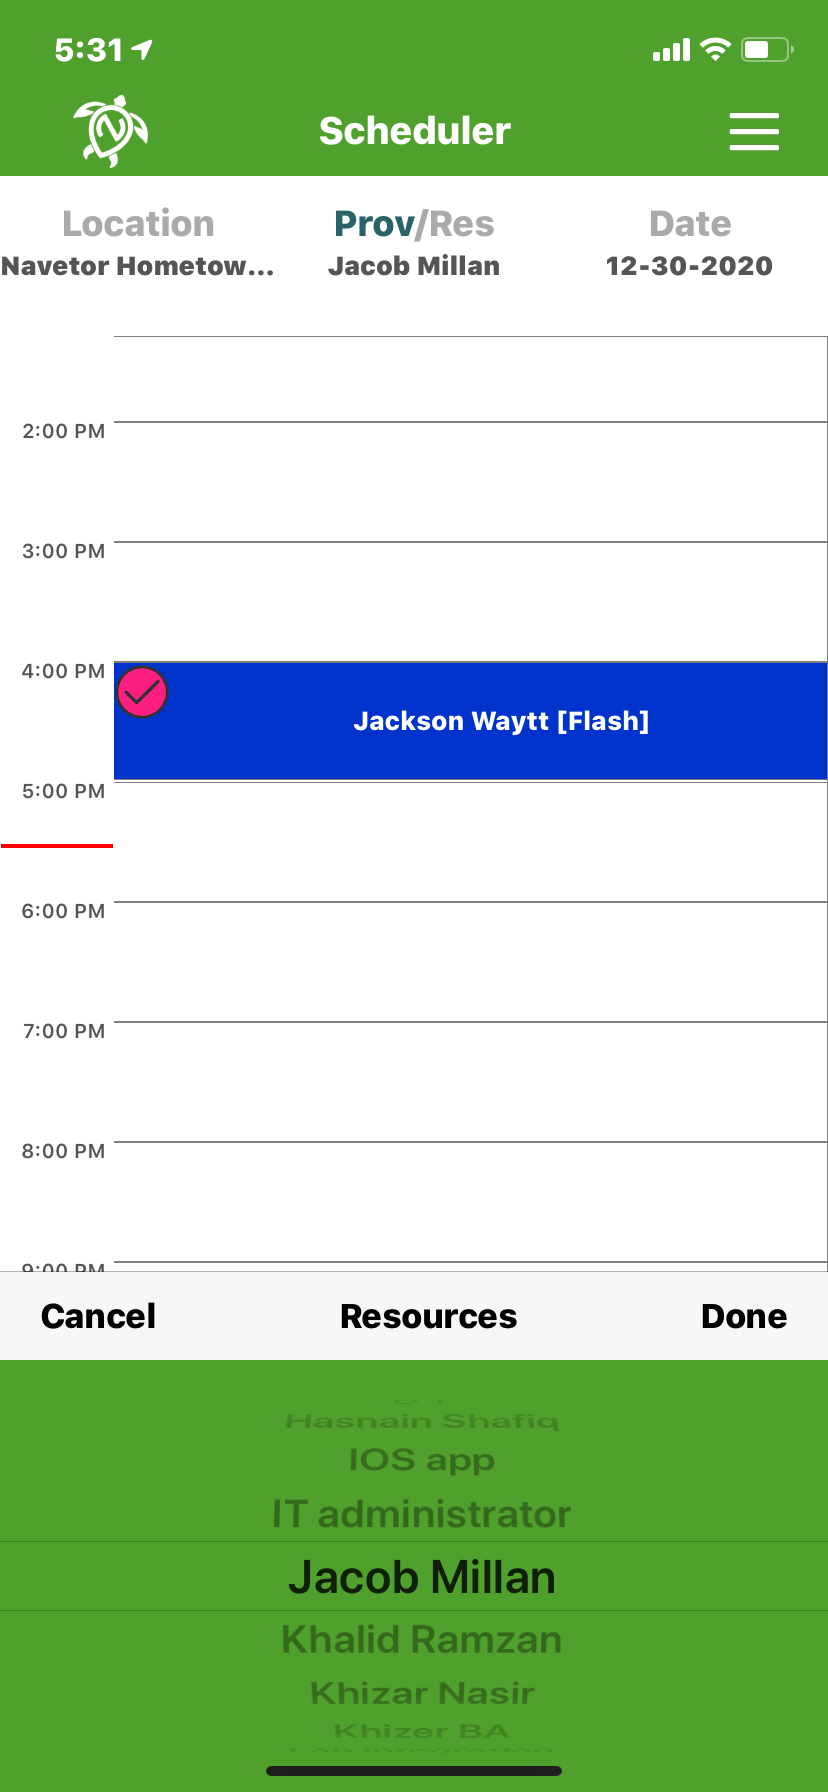
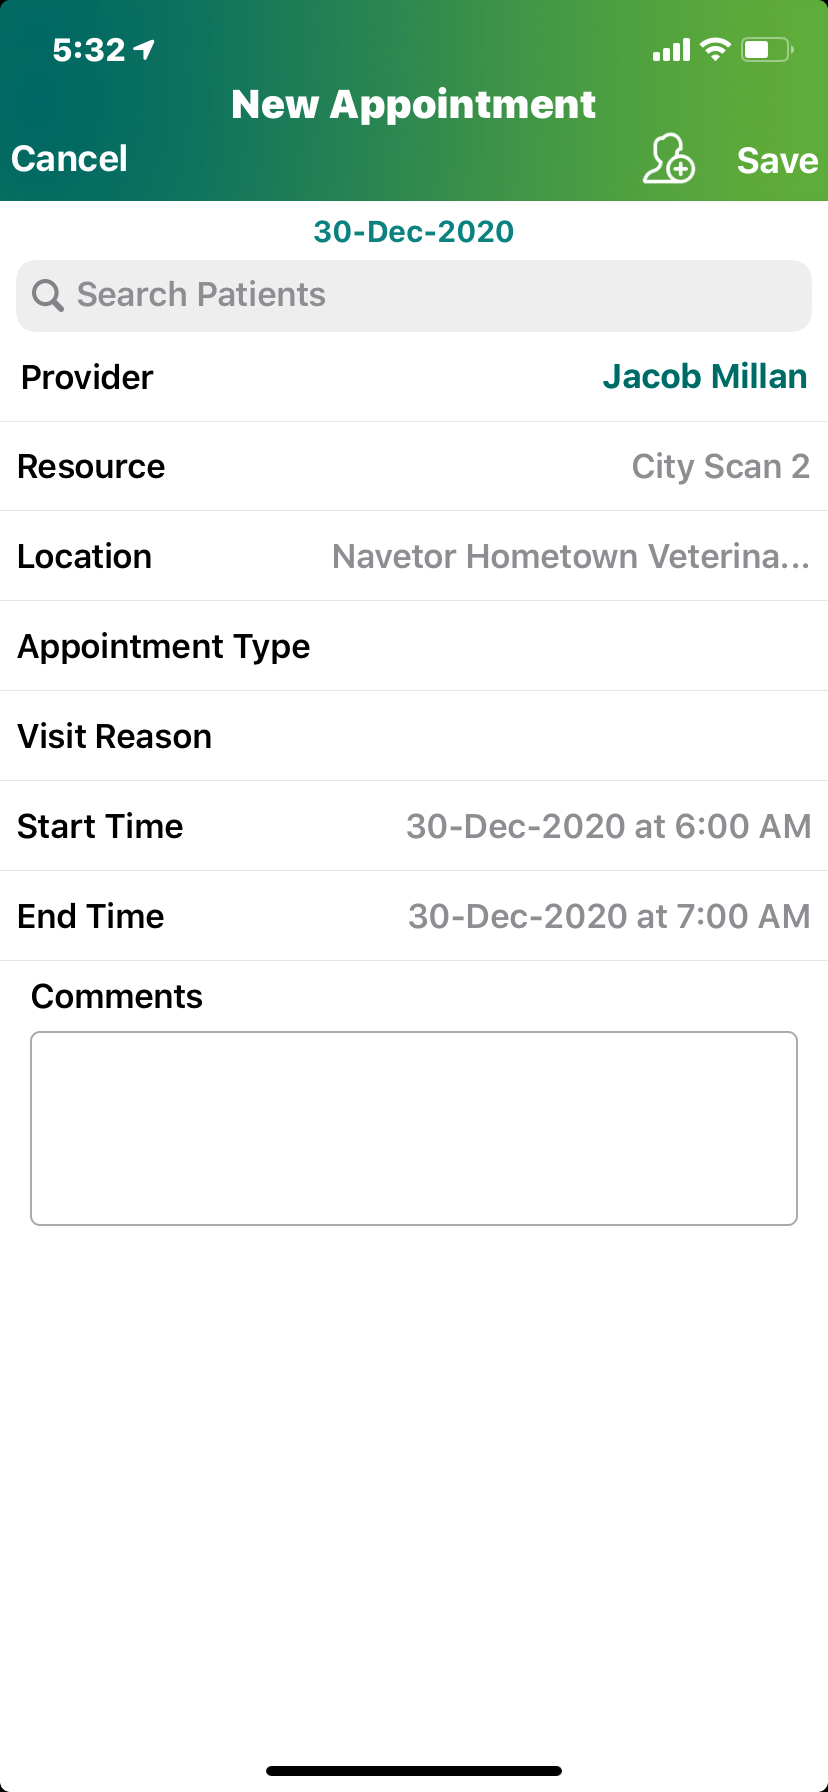
Info Icon
User can view NaVetor website by clicking on this icon. A popup window will open which display website. Through this popup user can use any feature of the website similar on the web view.

Side Menu
Side menu have all features of Main Menu and one additional feature “Support”.
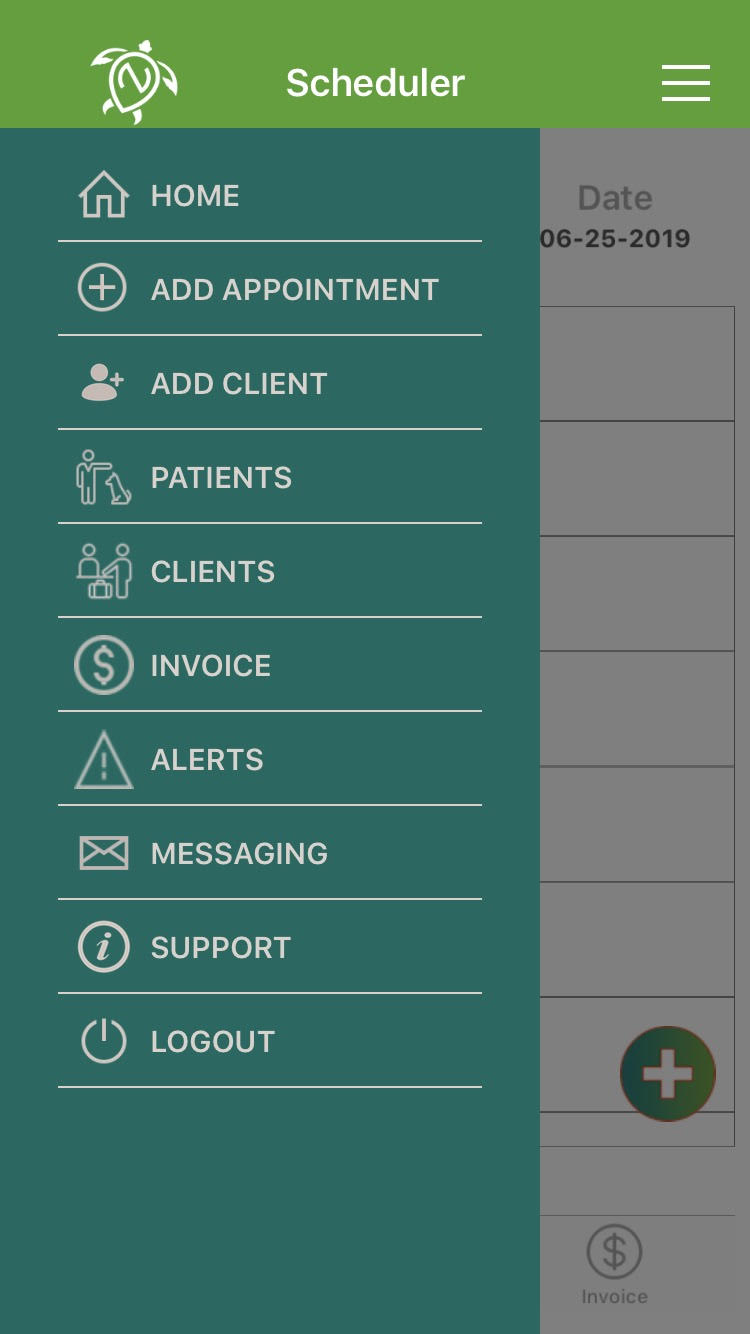
Support
On clicking support from side menu, a screen will open which have contact number and email, through which user can get support for NaVetor app.
Logout
User can logout from application through Logout button on Main Menu of select Logout from Side Menu.
© 2018 NaVetor - All Rights reserved. No reproduction or redistribution without written authorization of TPI
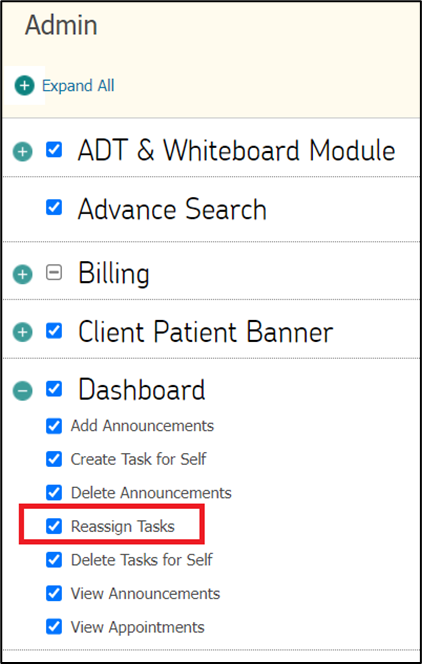


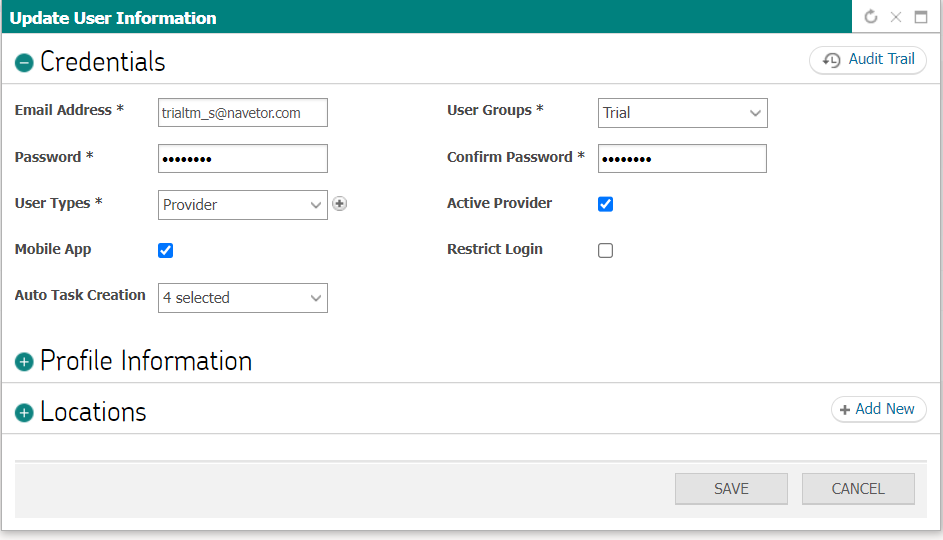


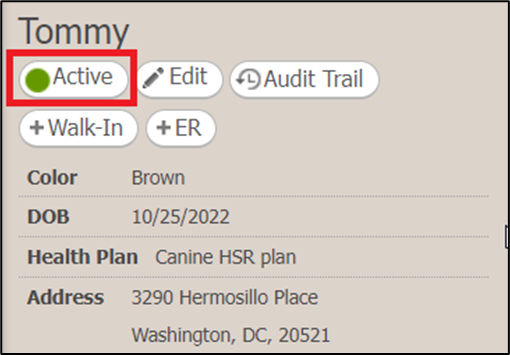
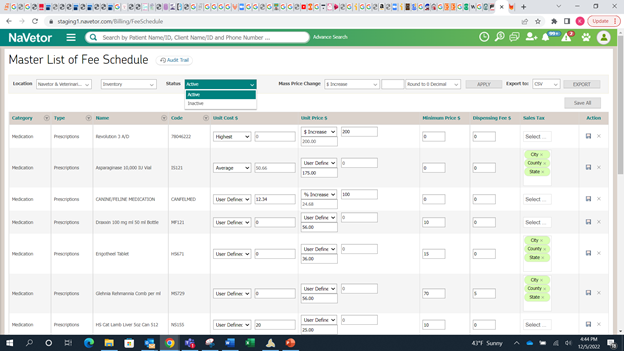

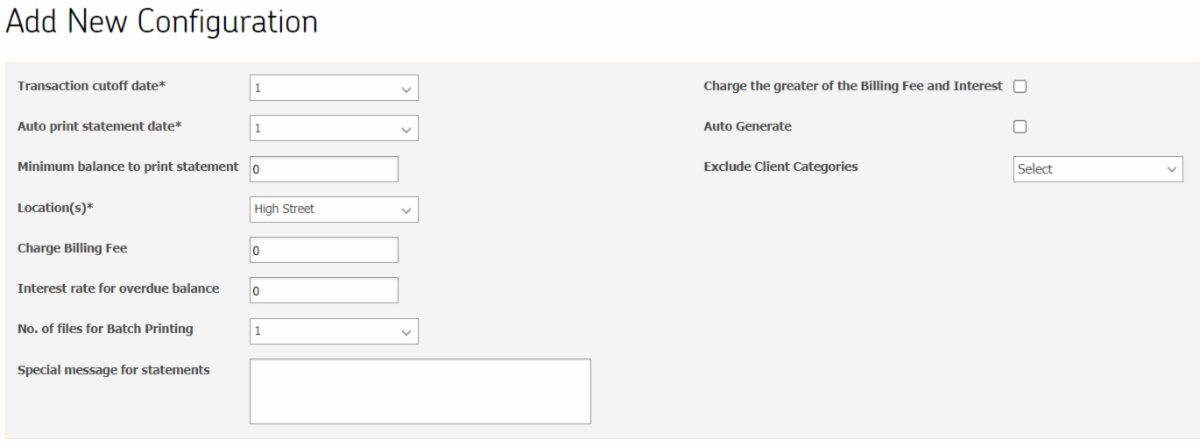
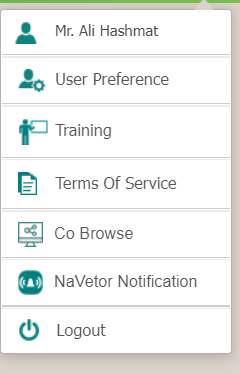
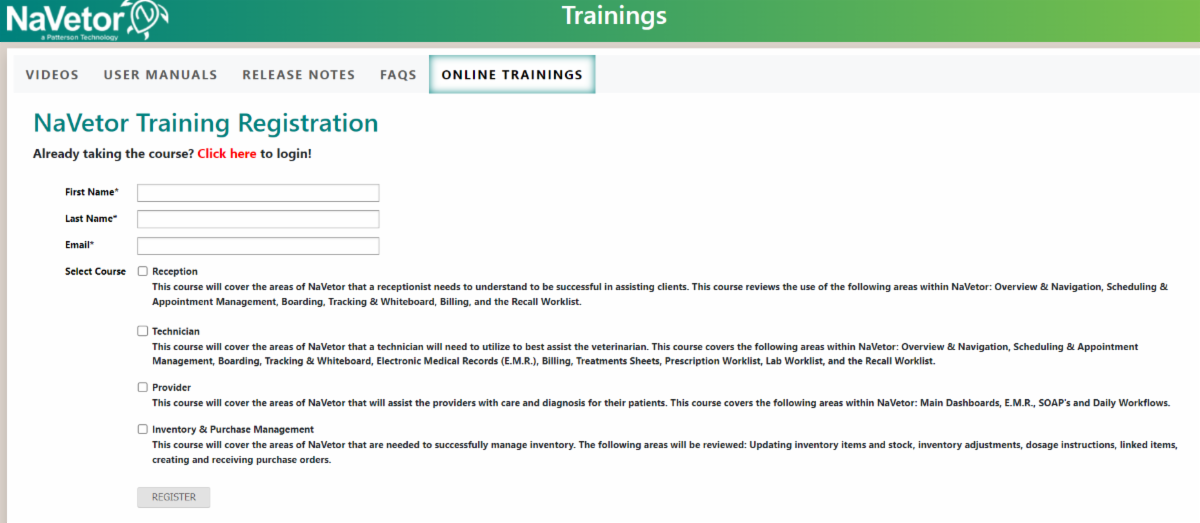
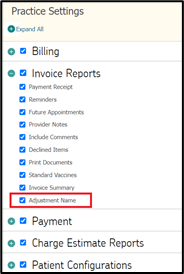
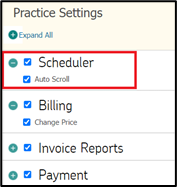
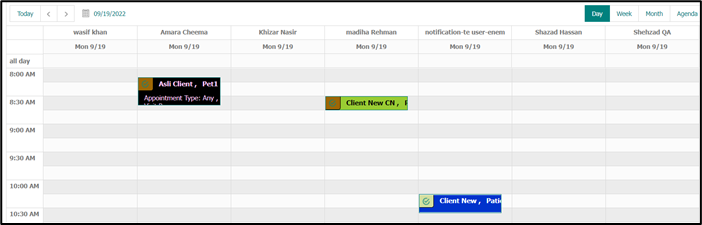
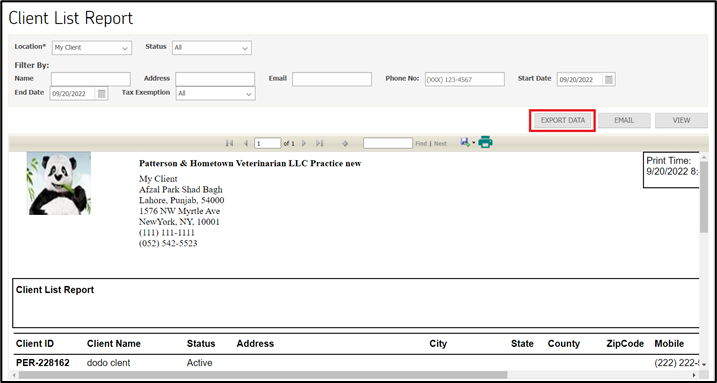
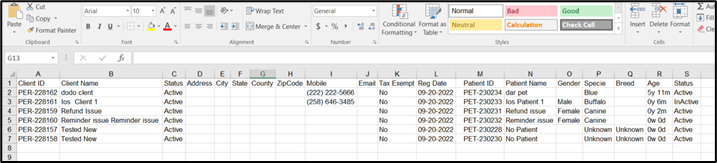
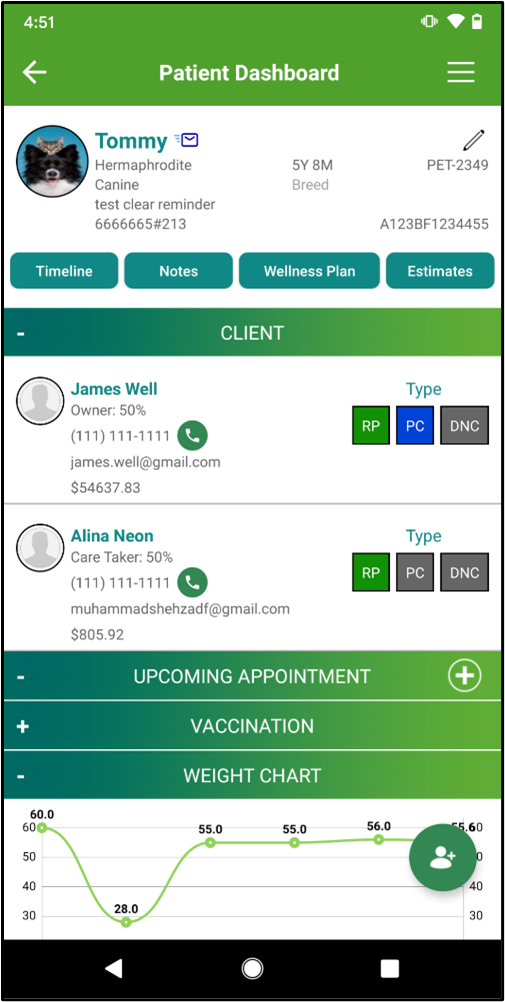

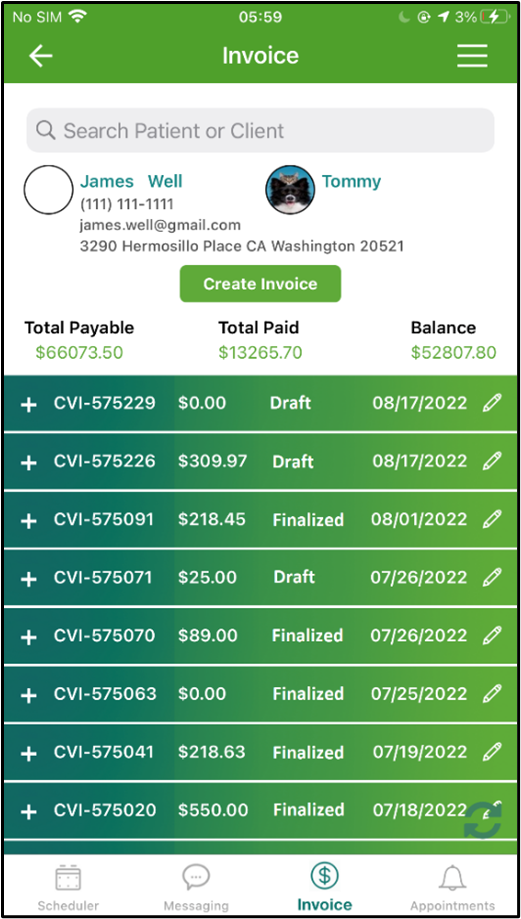
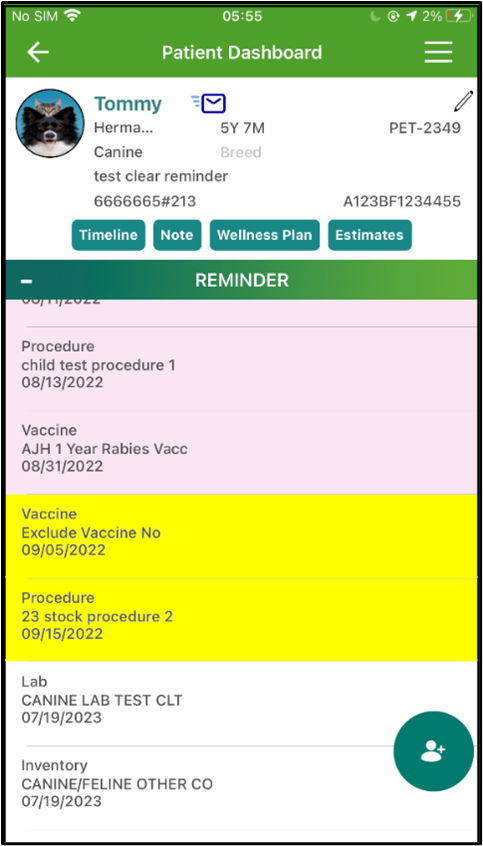
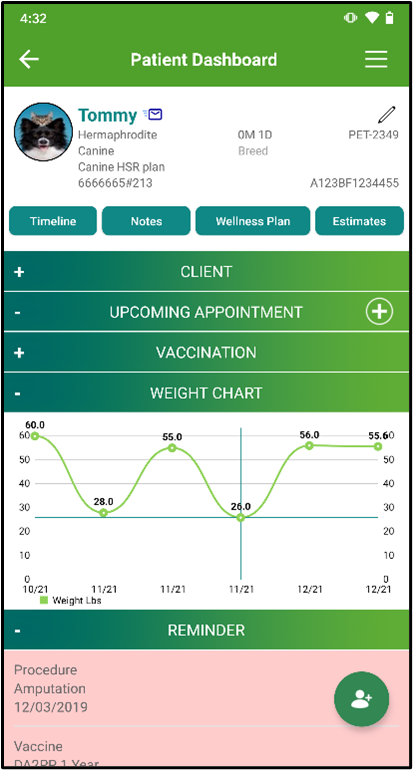
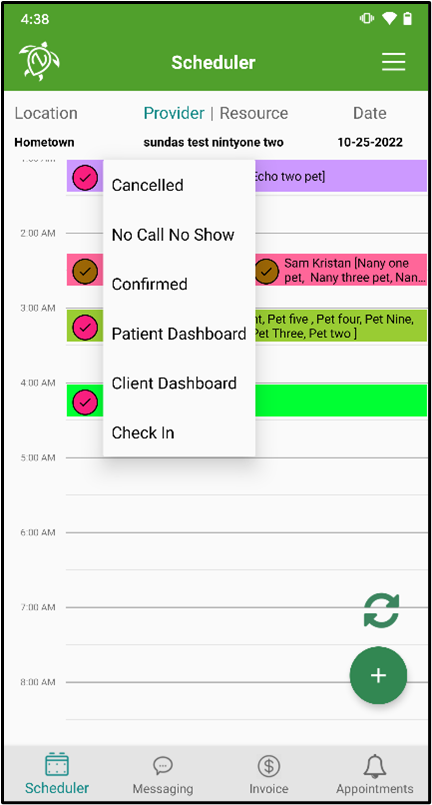
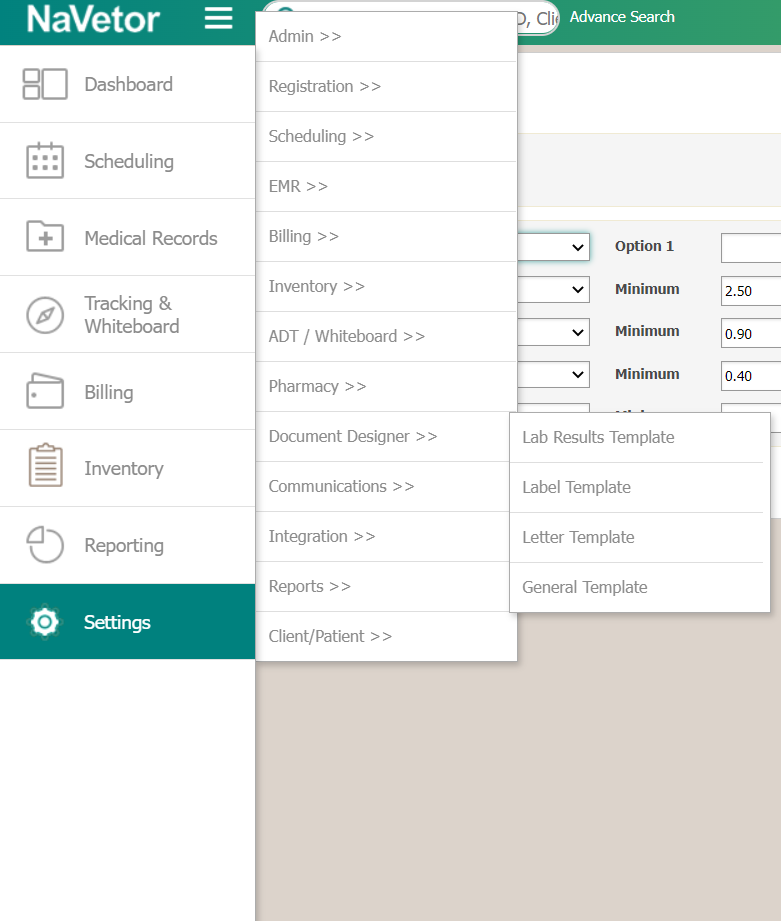


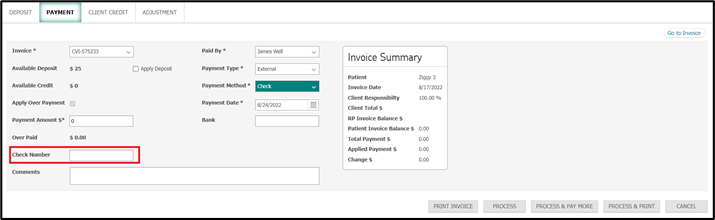
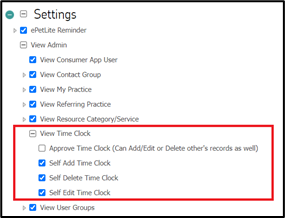
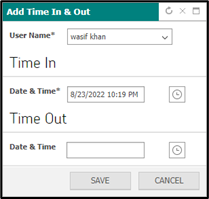

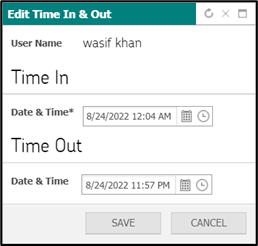

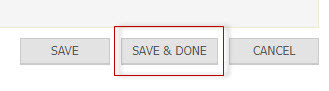
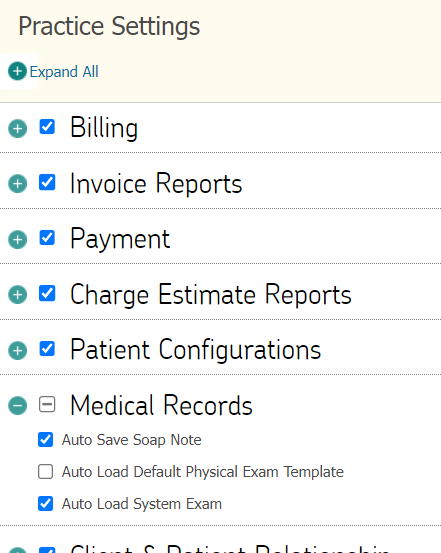
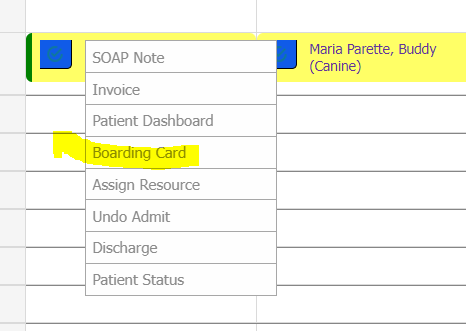
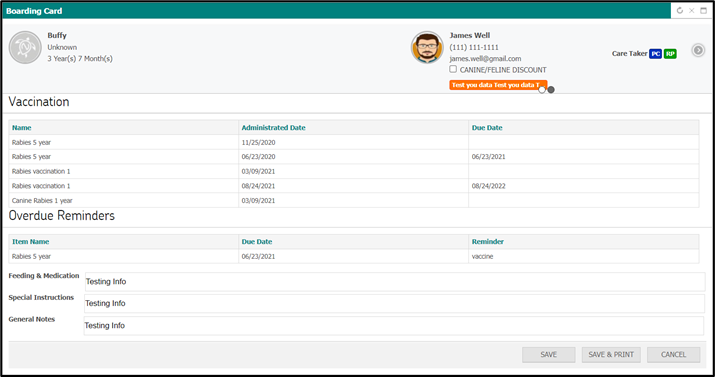

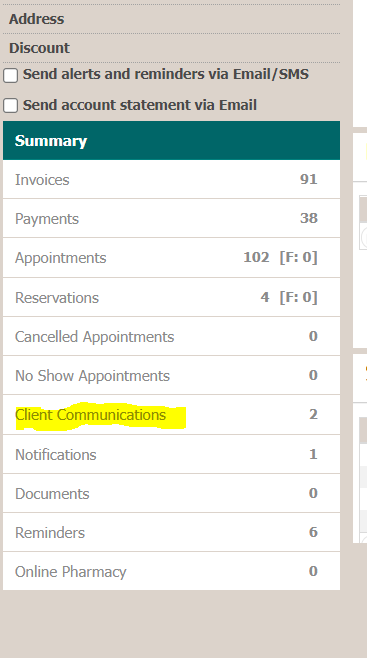
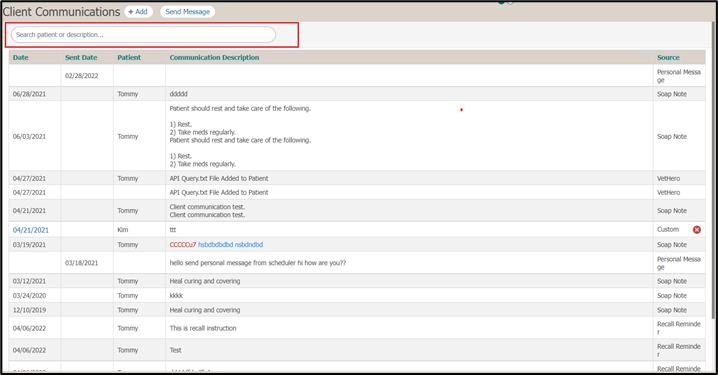
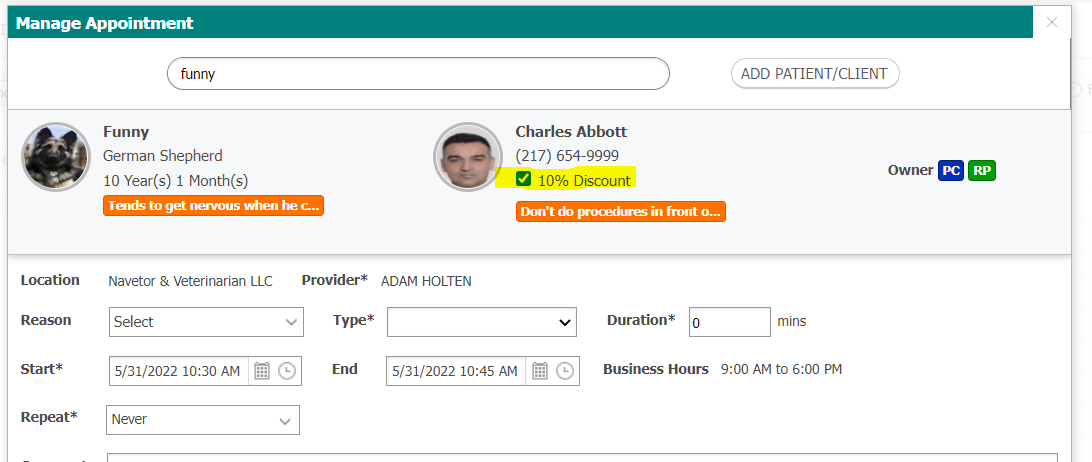
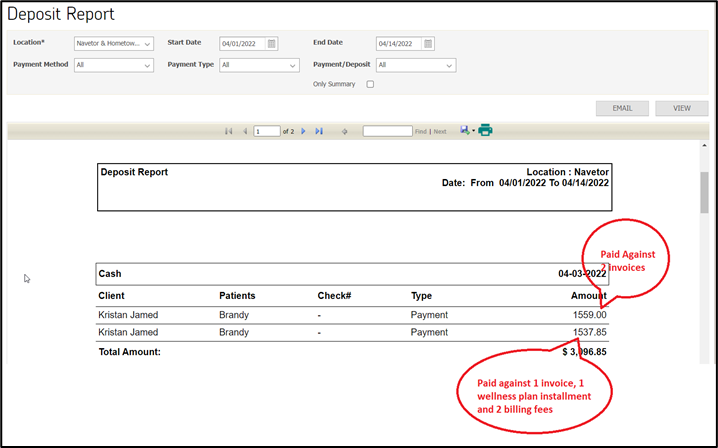

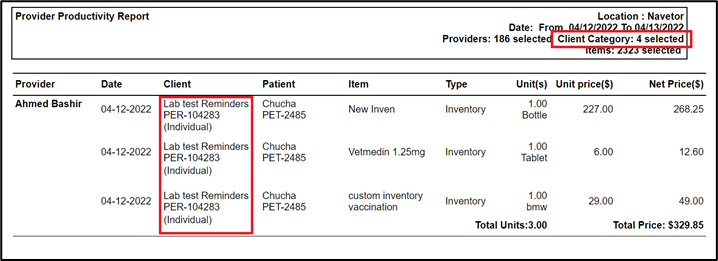
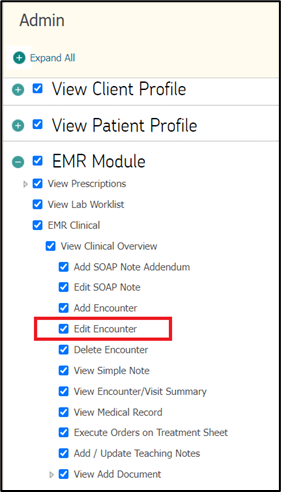


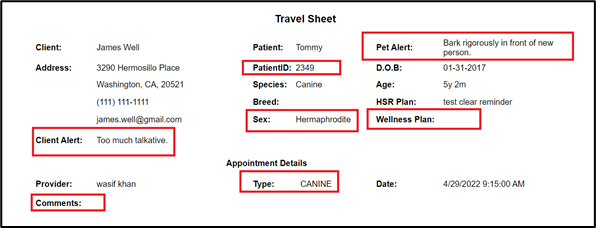
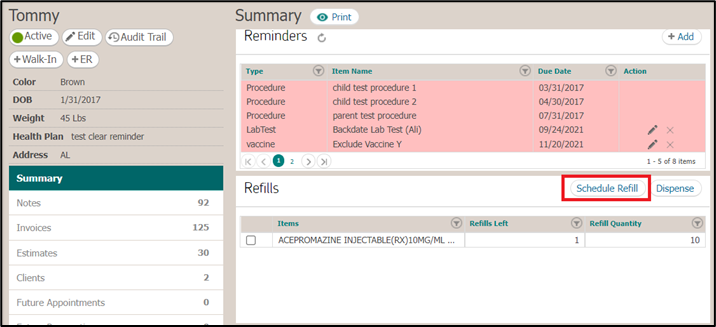
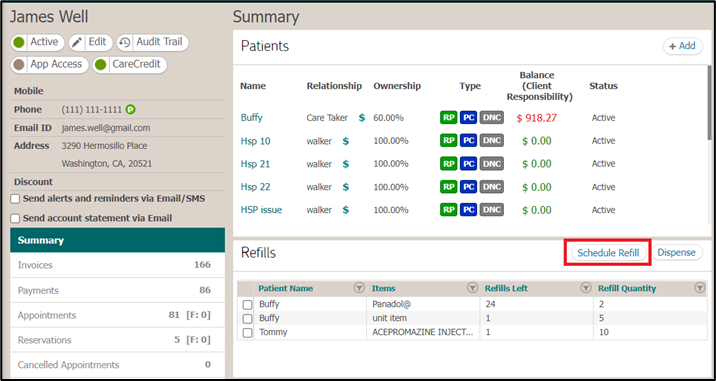

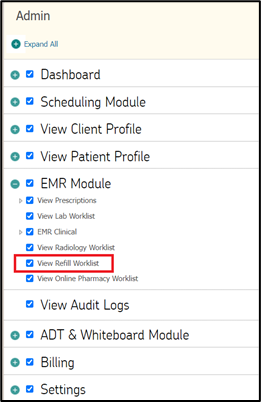
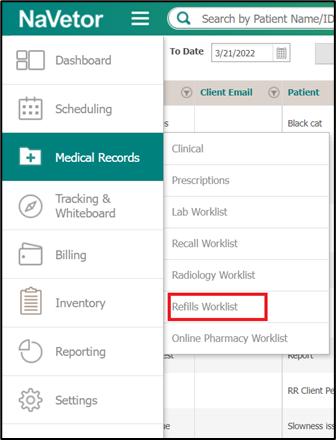


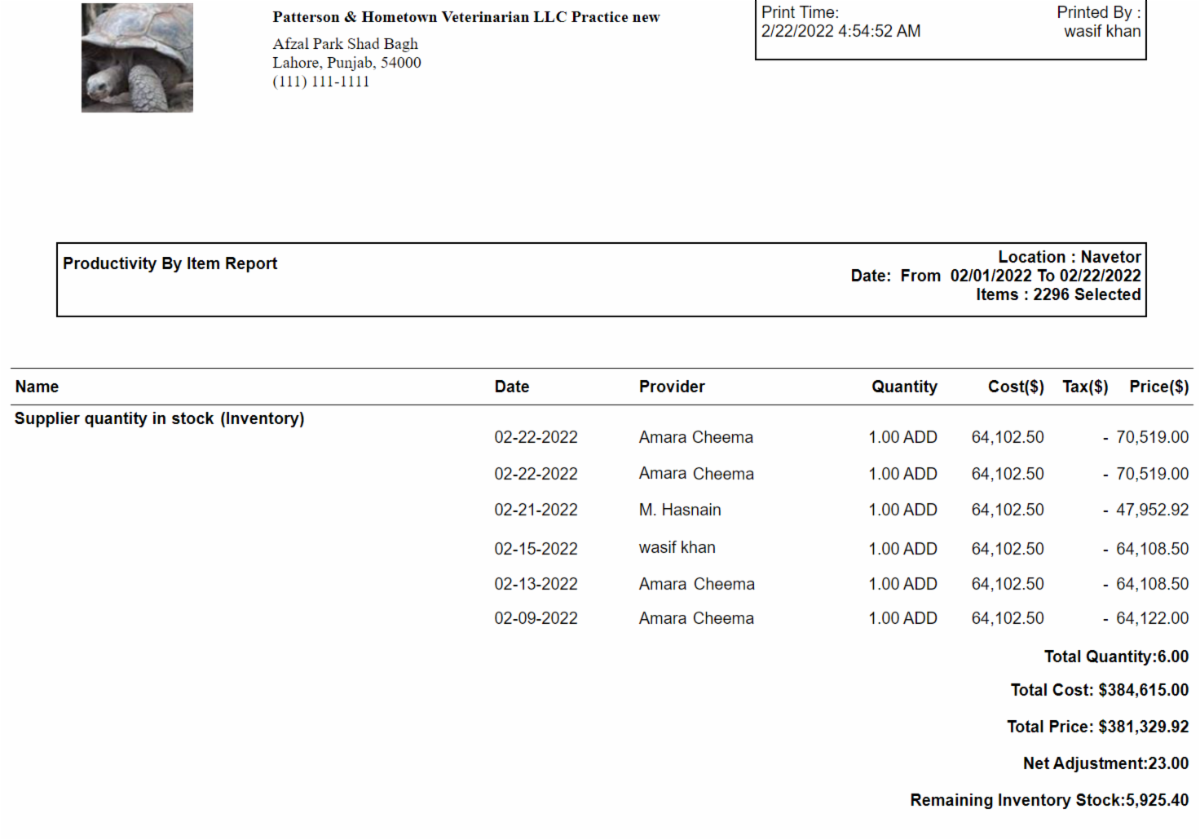
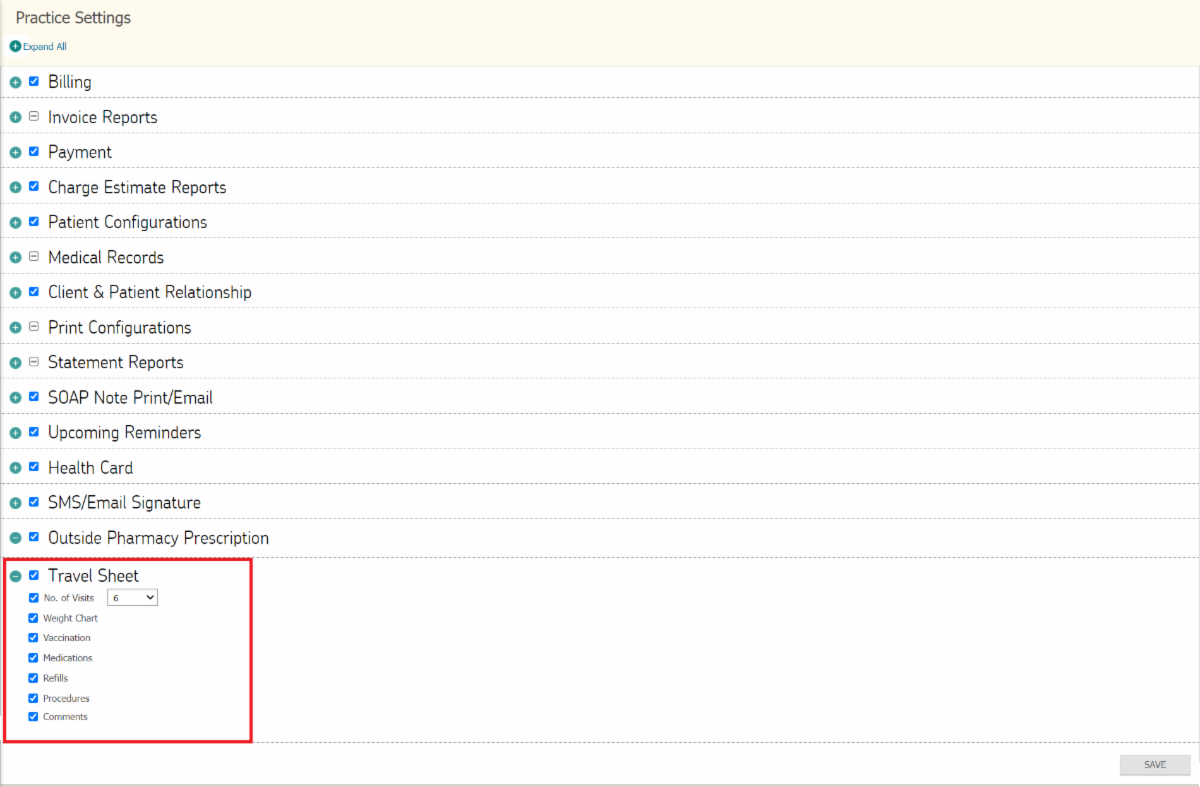


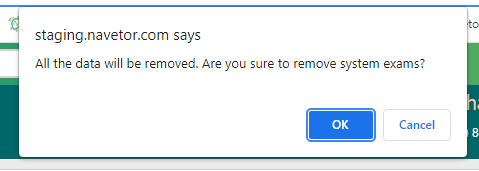
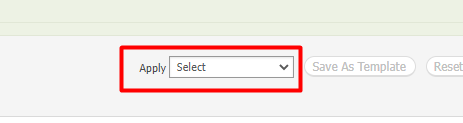

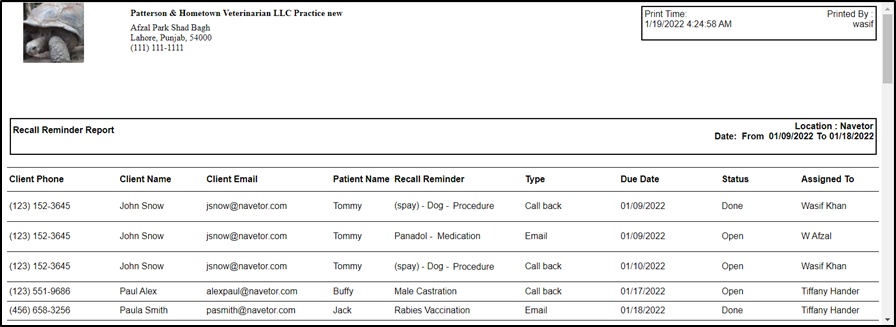
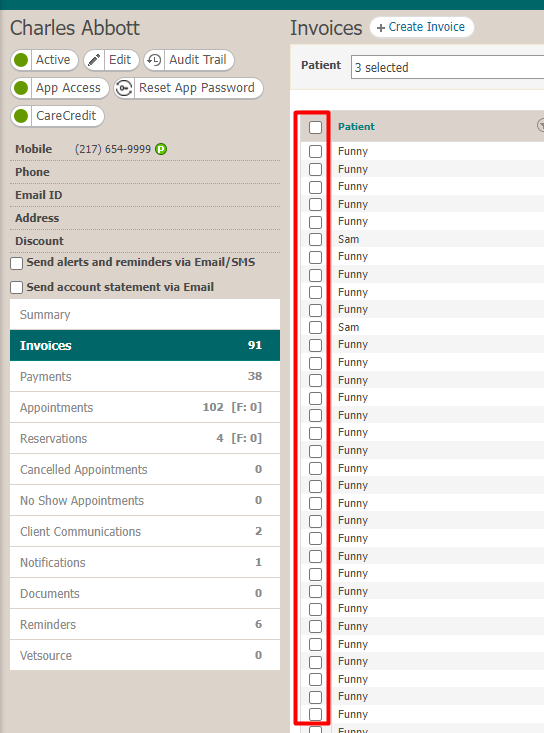
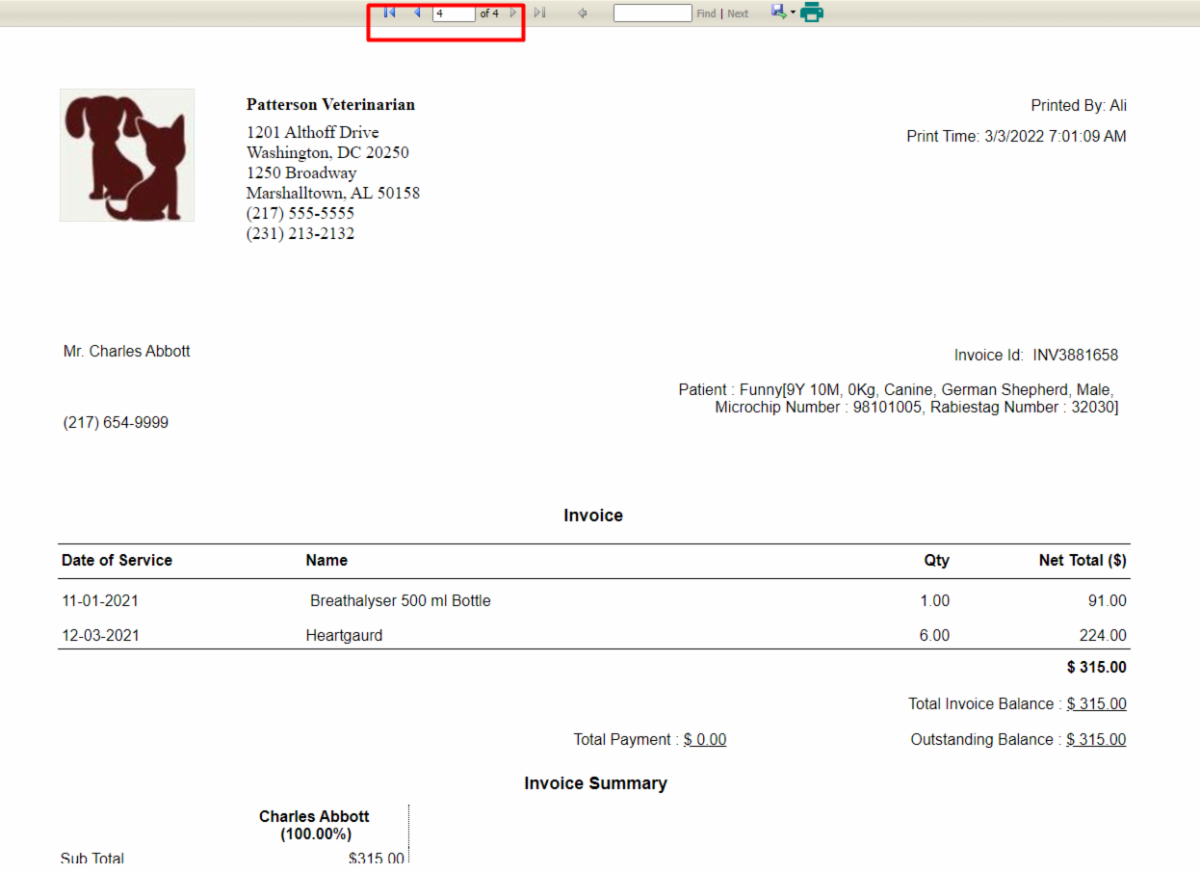
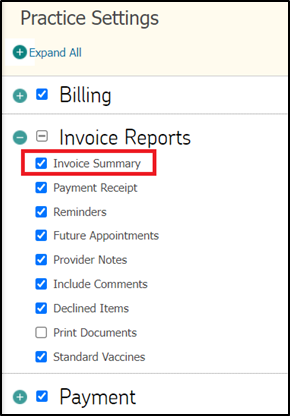
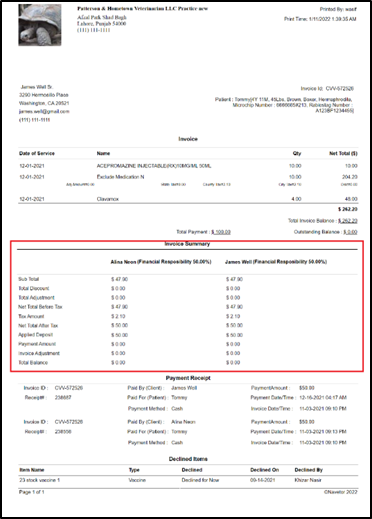

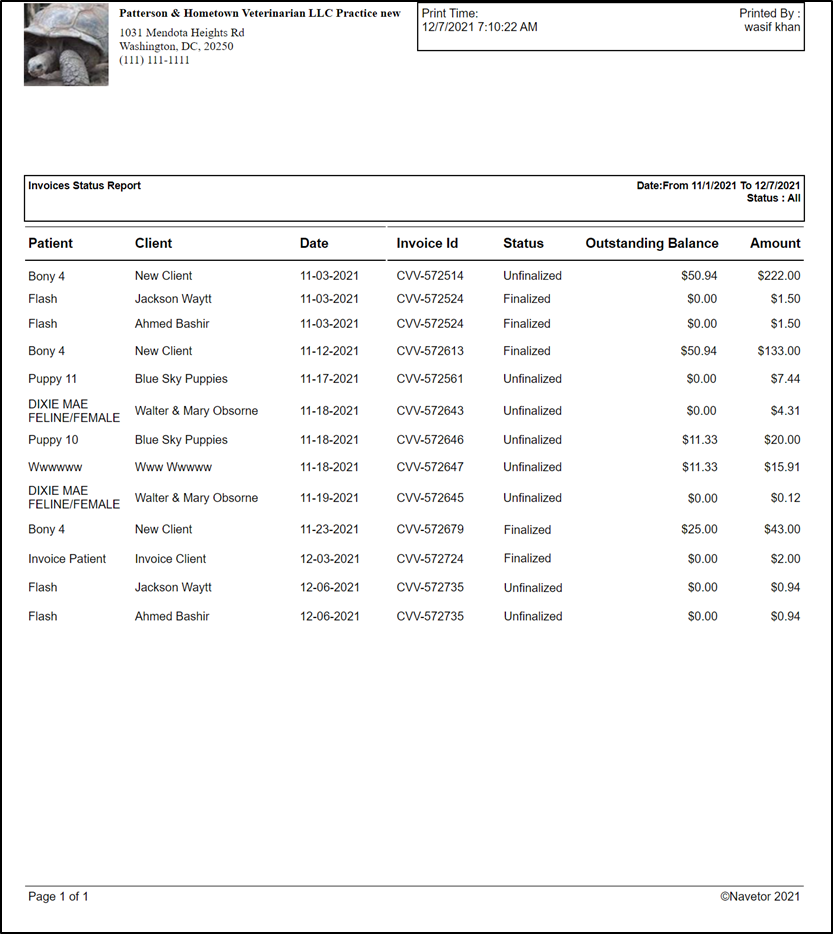
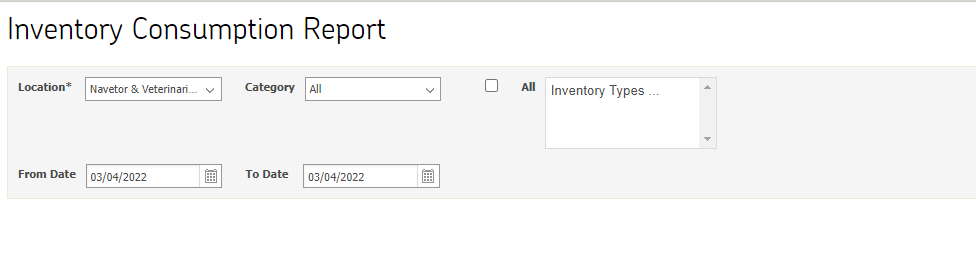
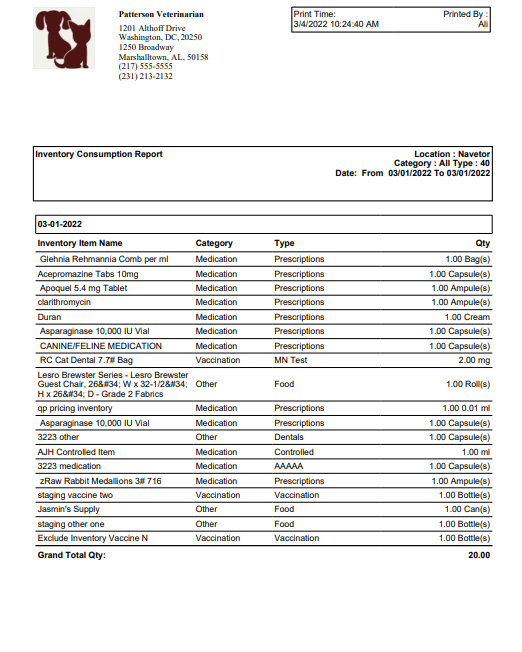

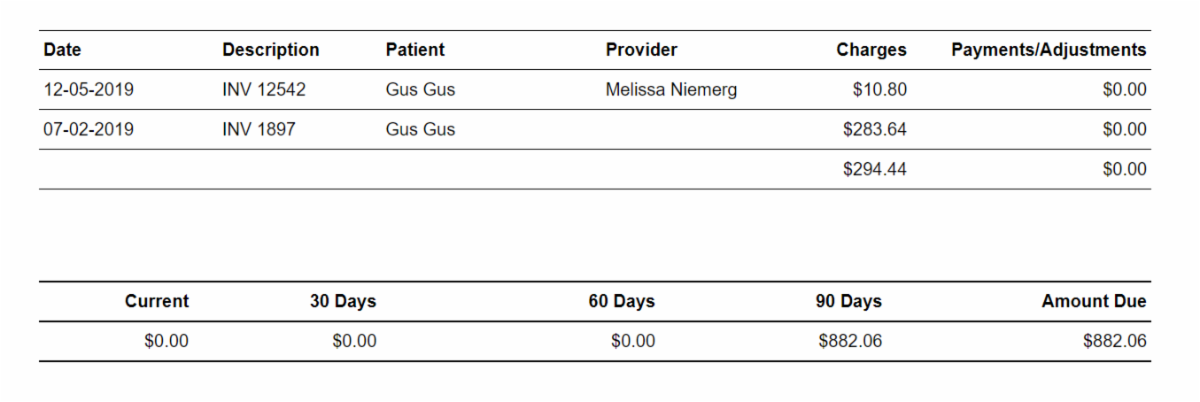
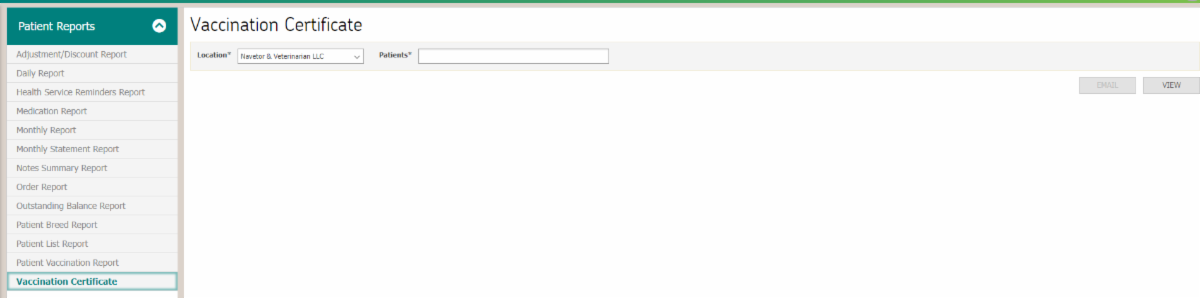
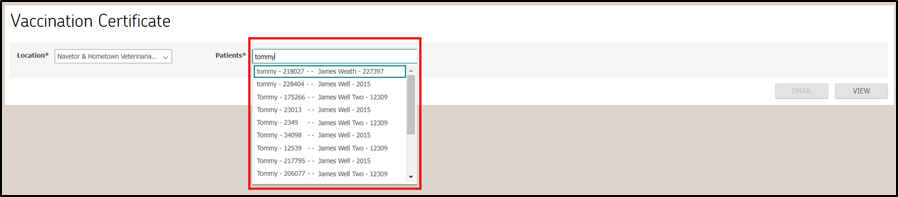
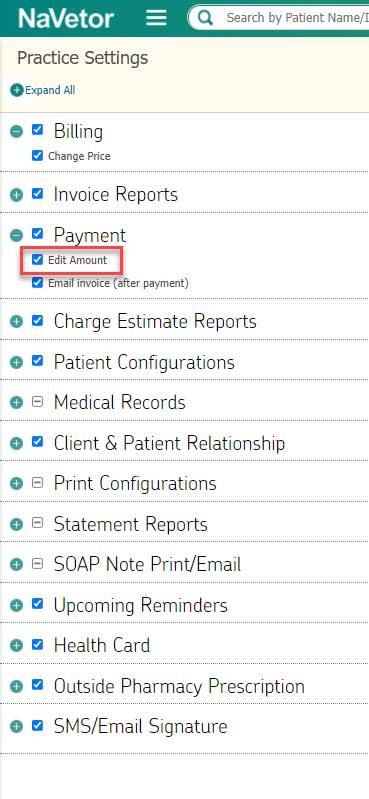
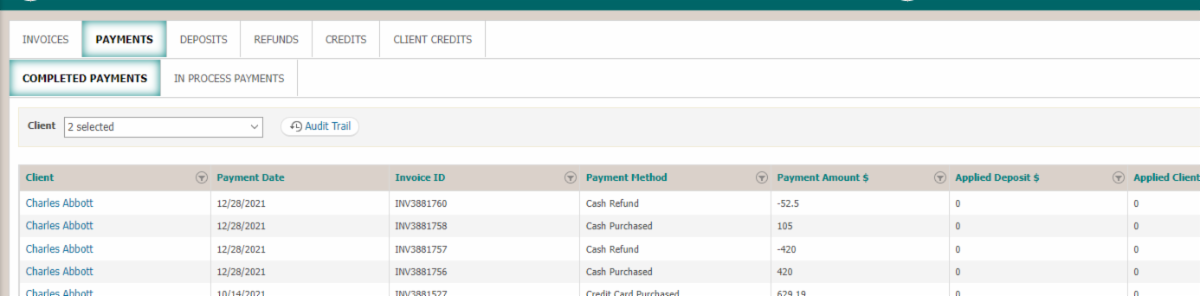

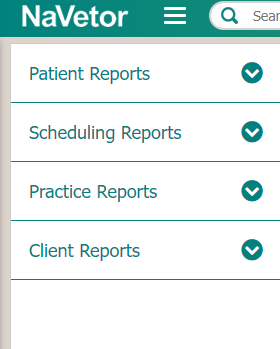

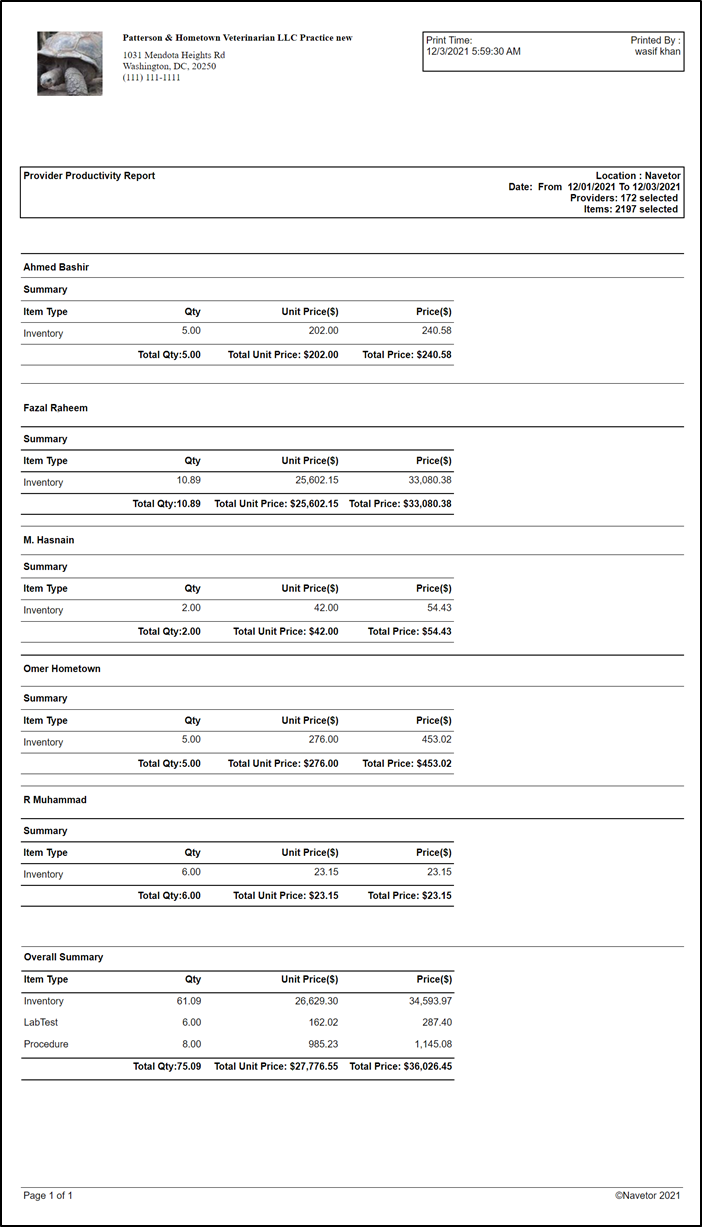
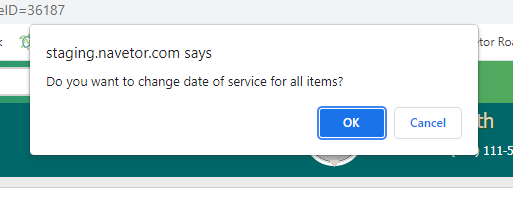
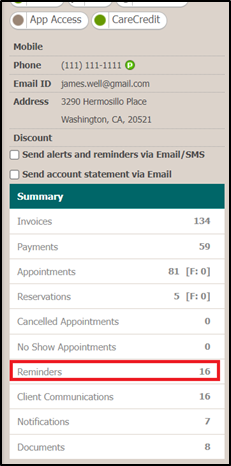
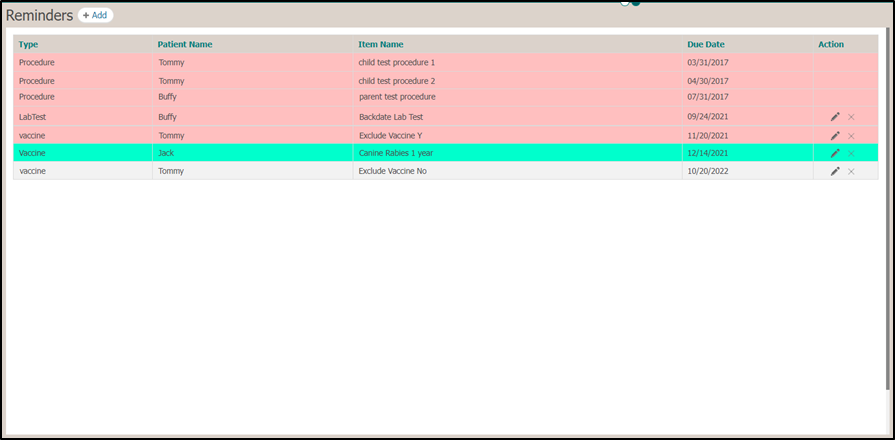
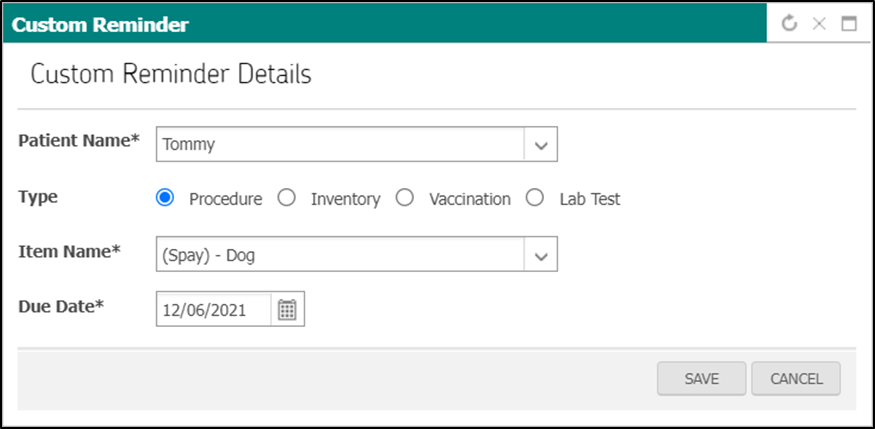
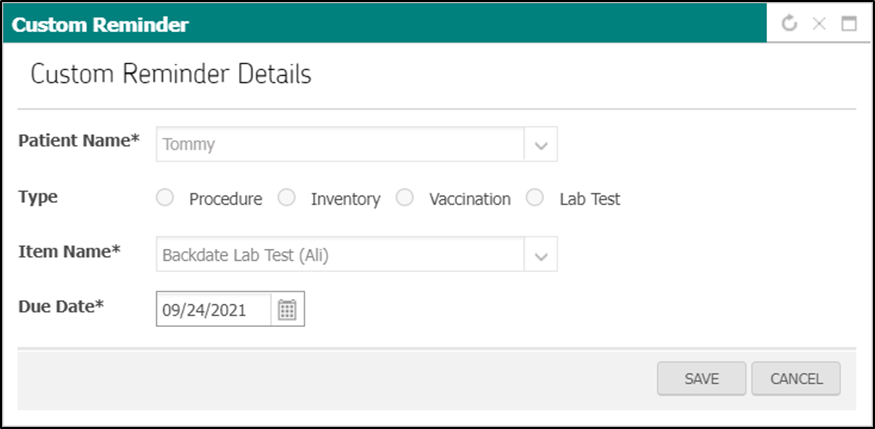


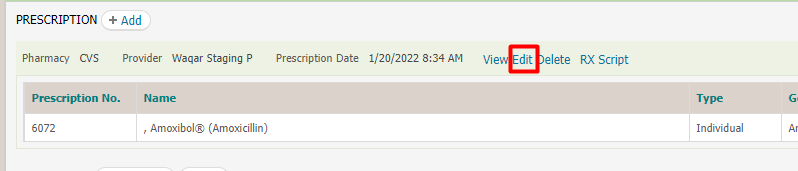
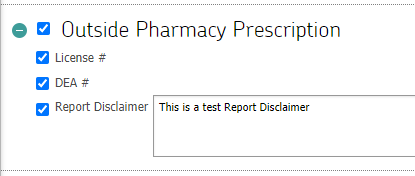
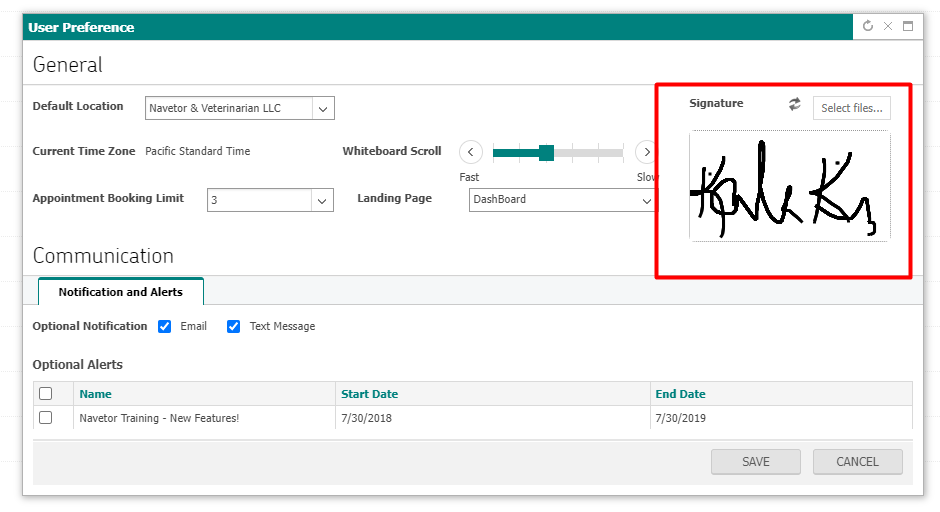

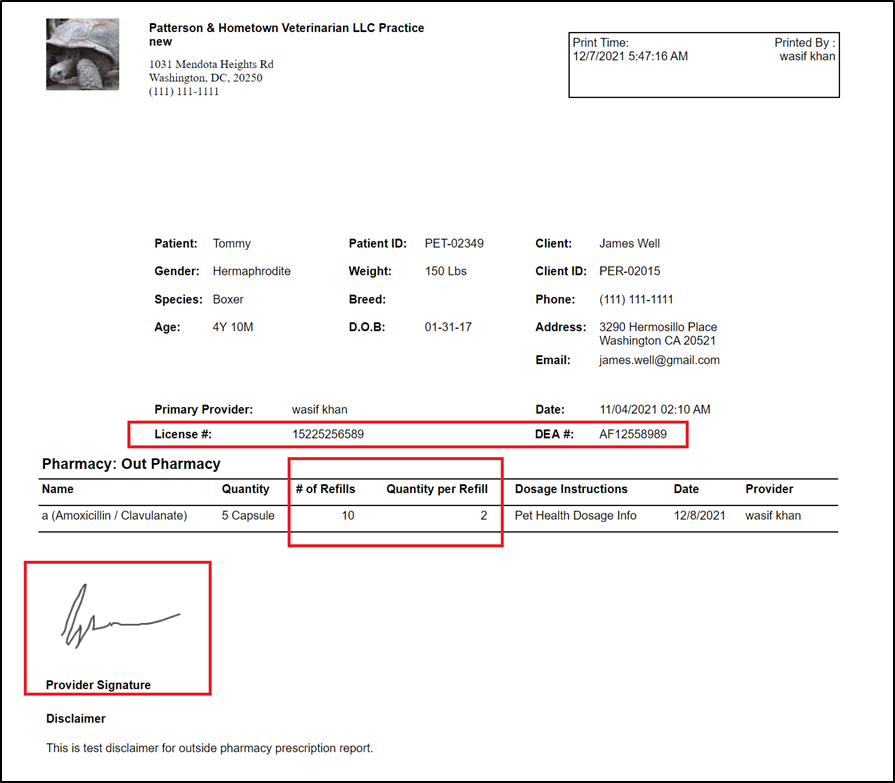
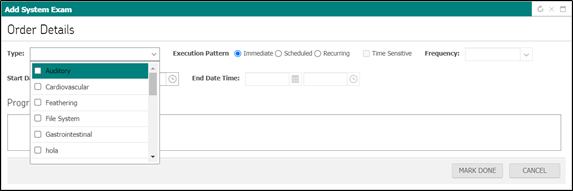
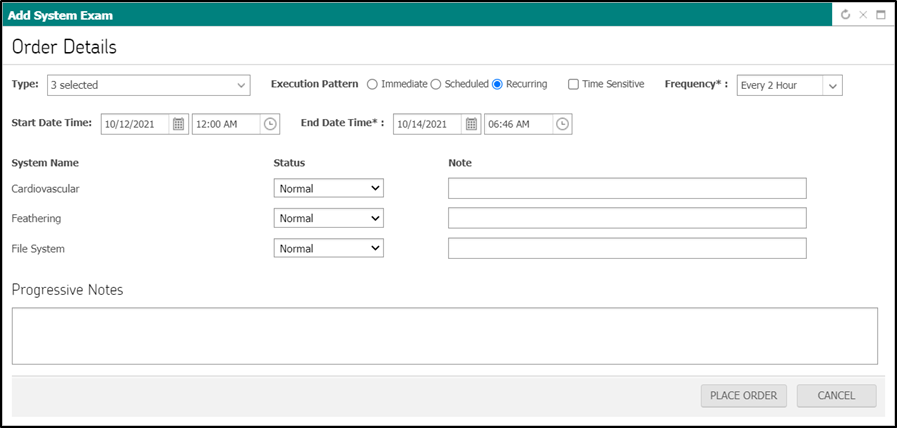
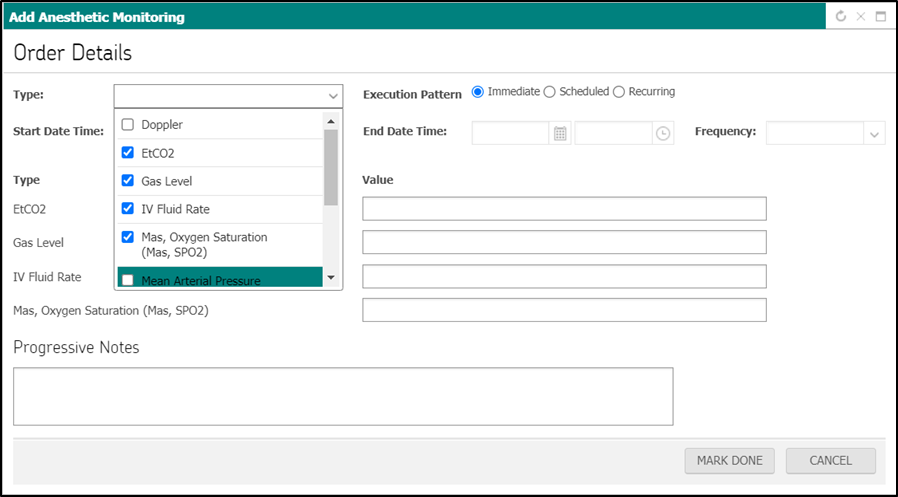
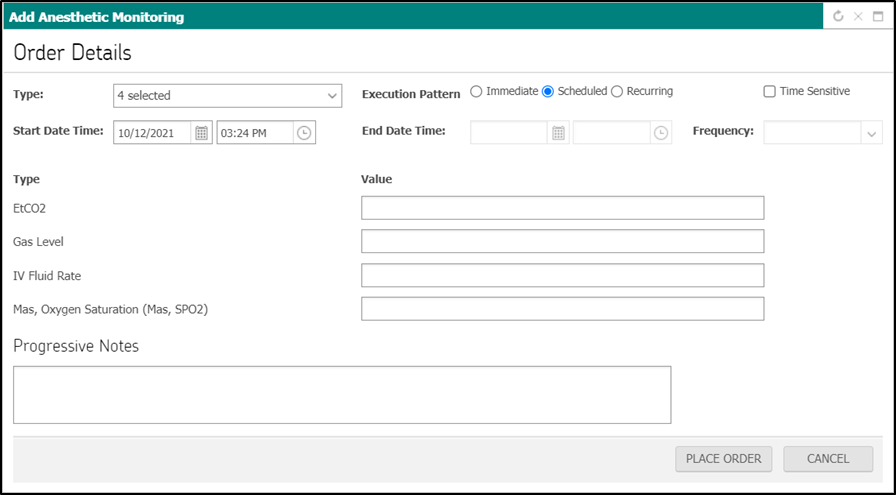
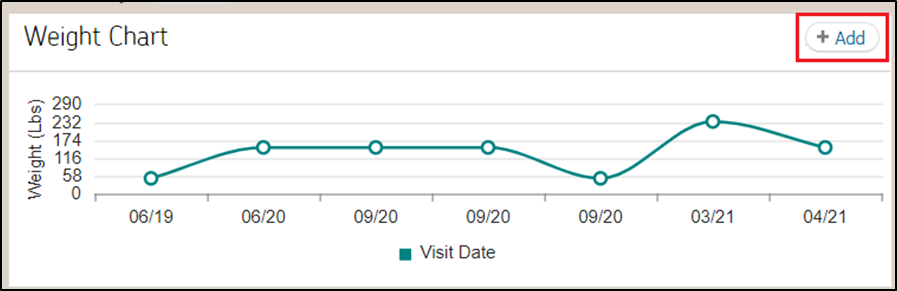
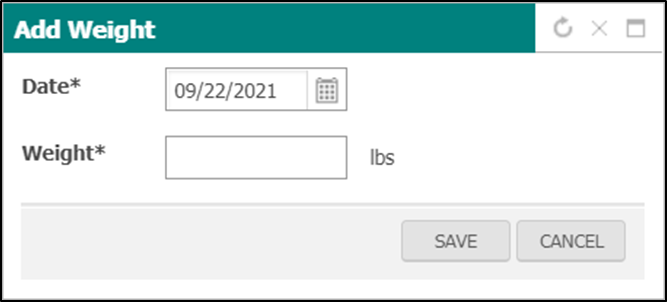
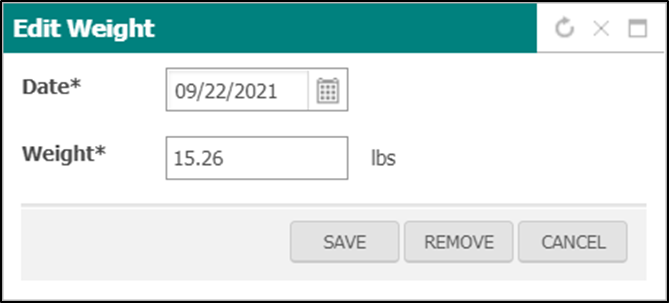

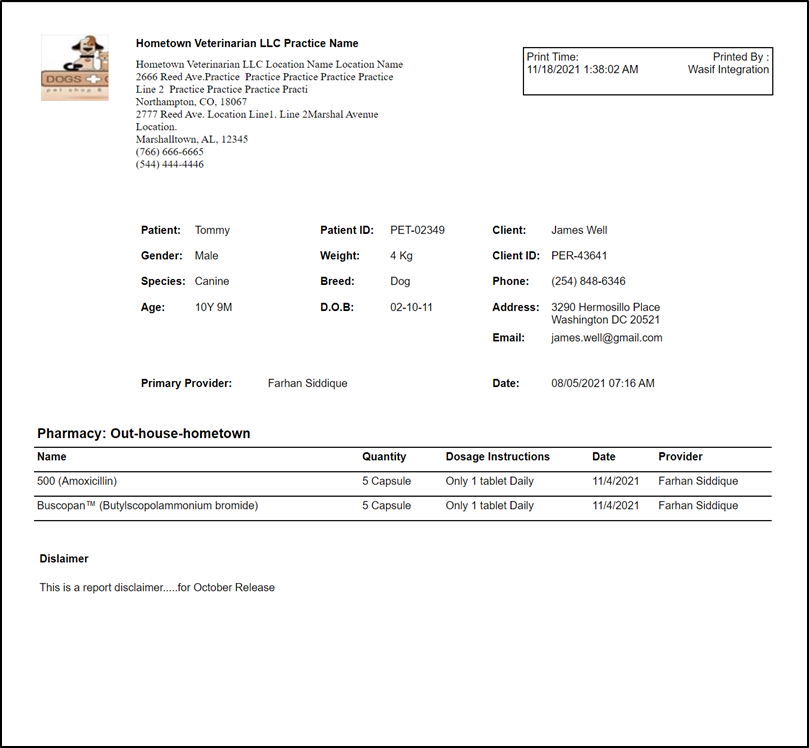
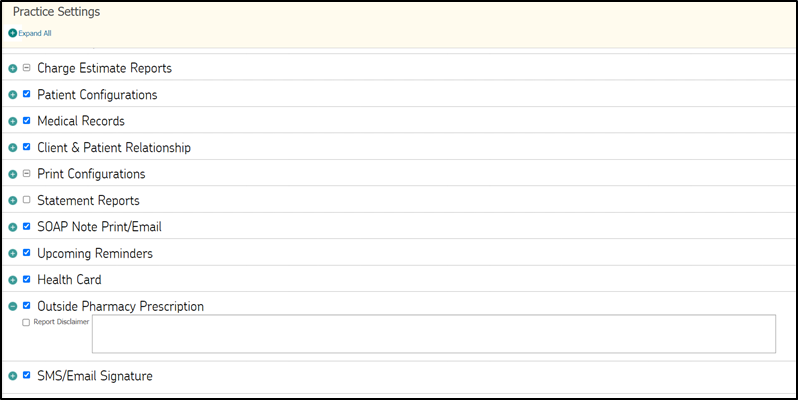
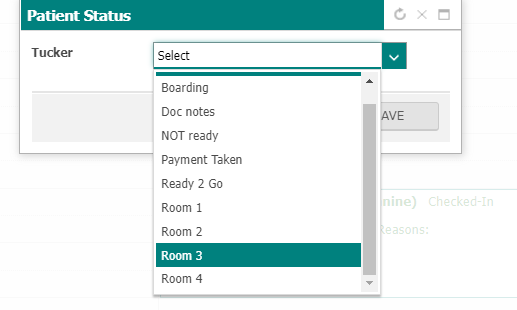
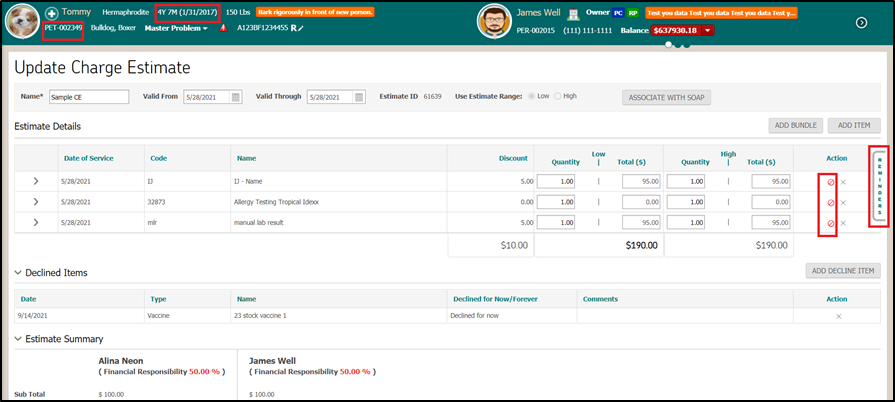
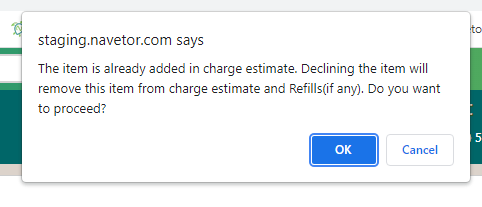

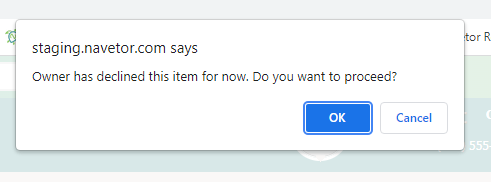
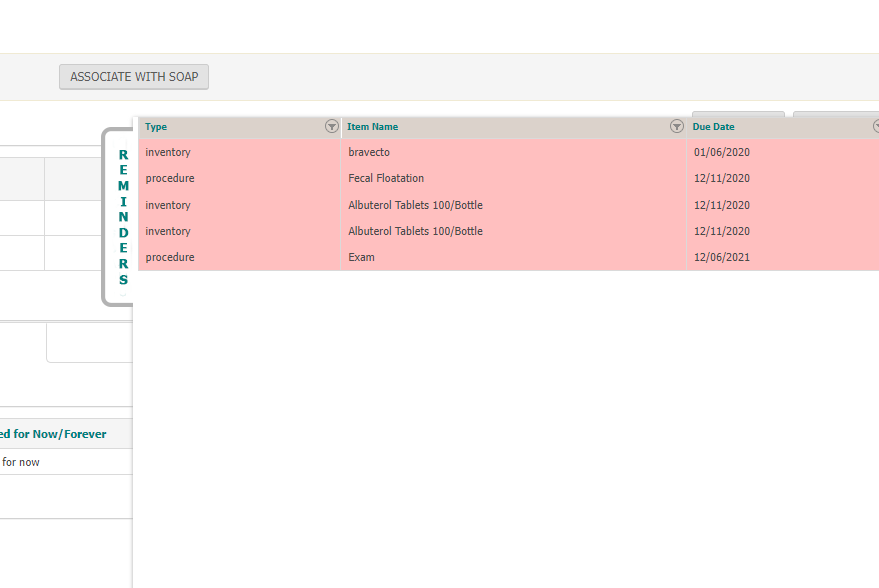
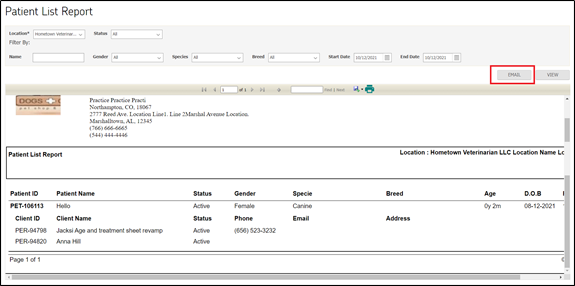
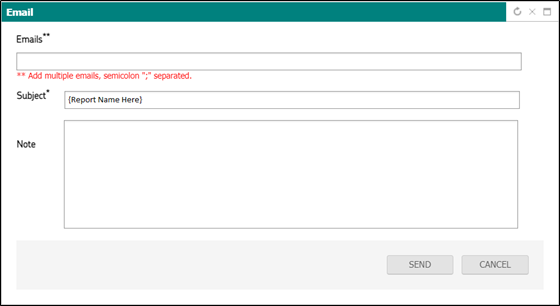
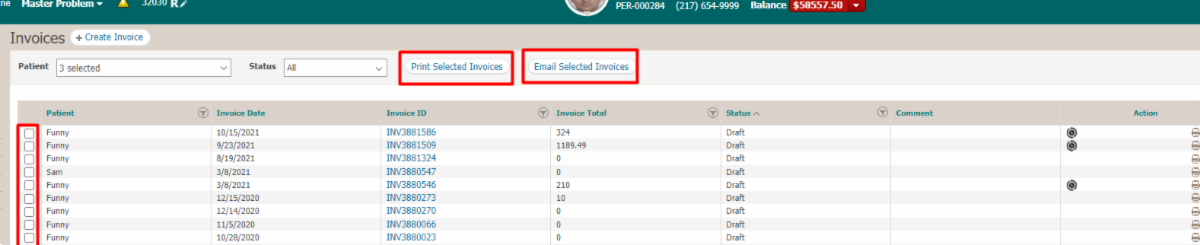
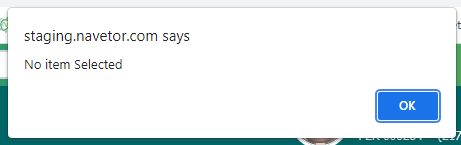
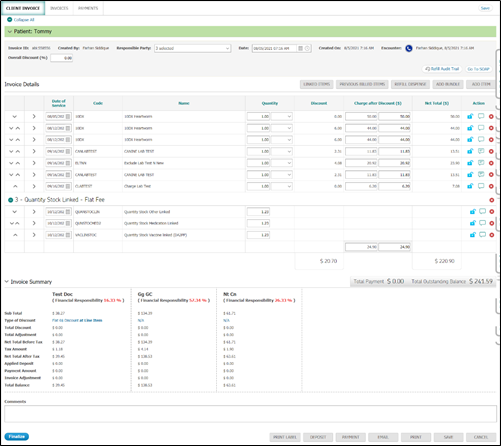
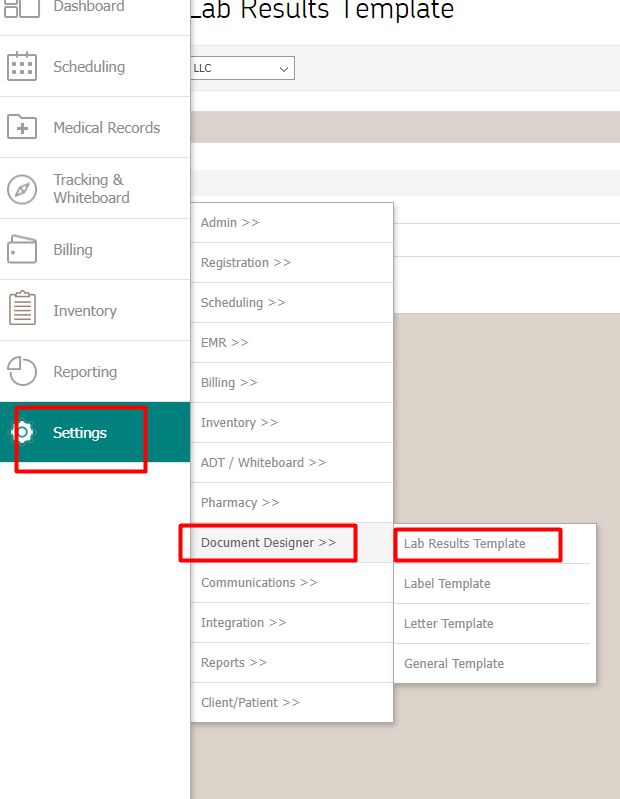


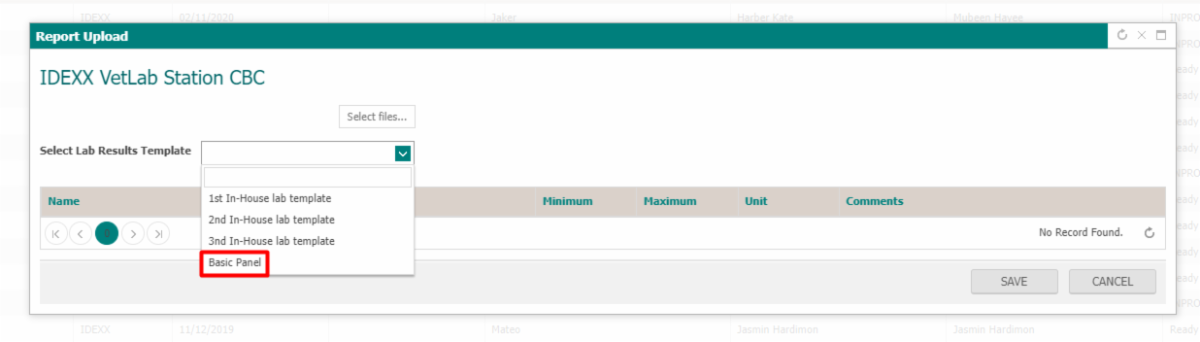

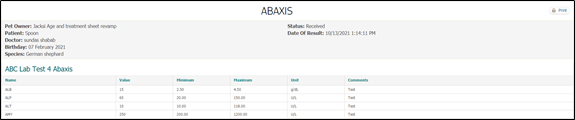


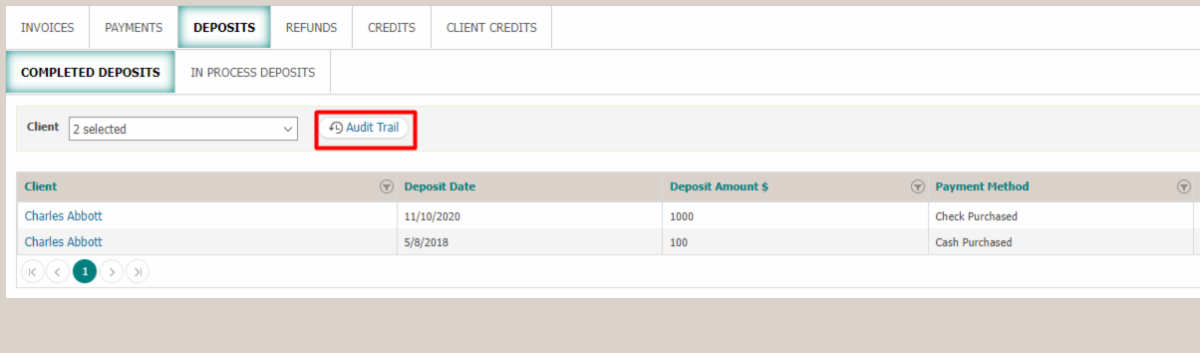
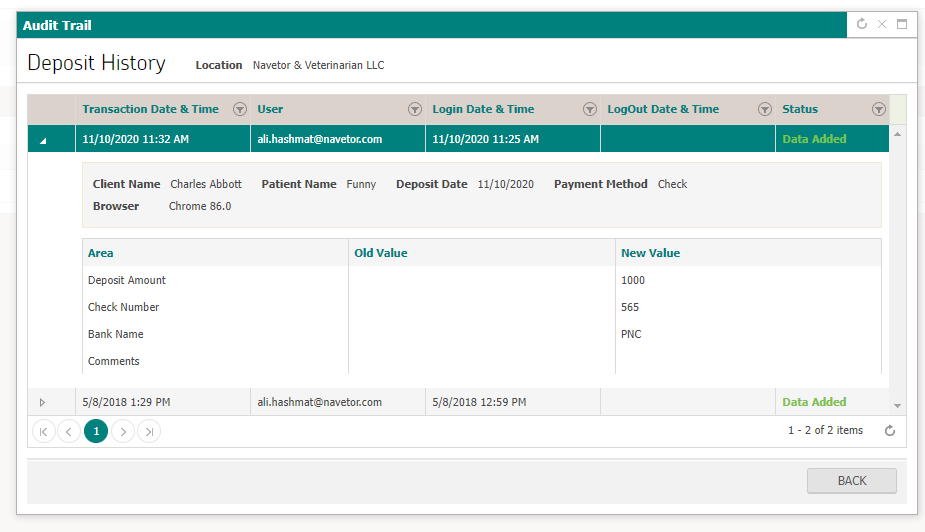
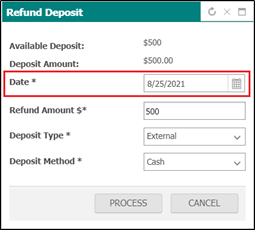
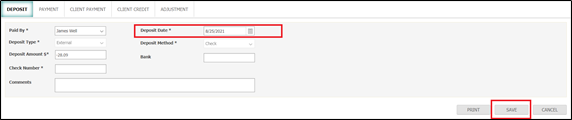
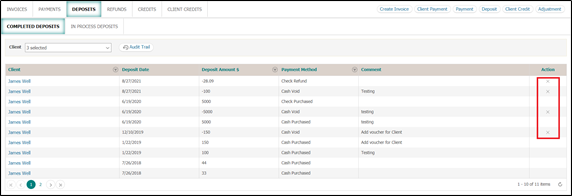


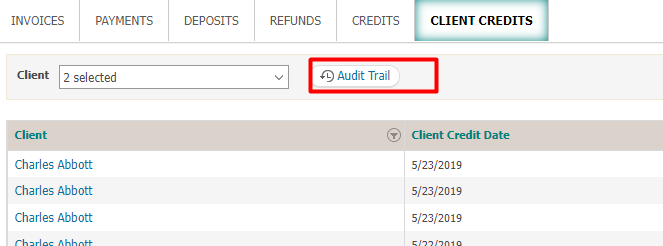
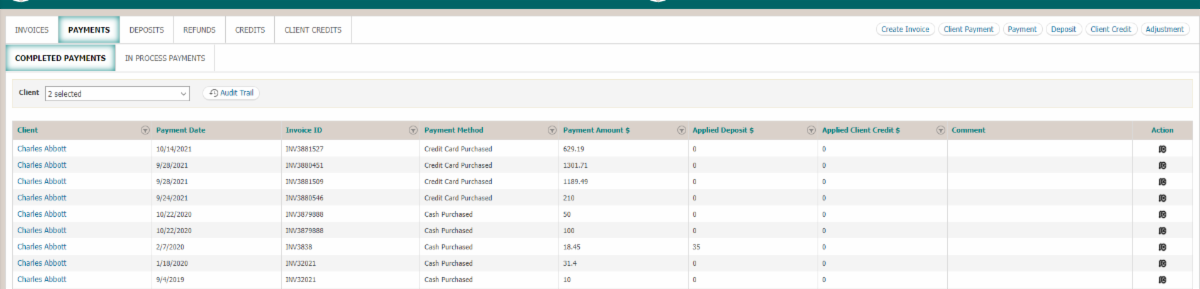
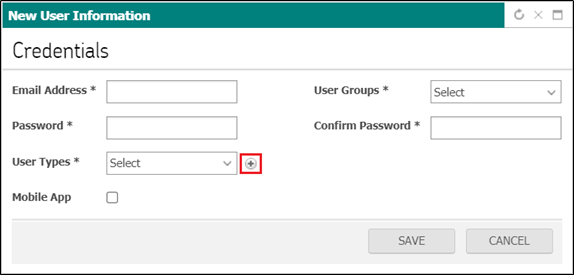
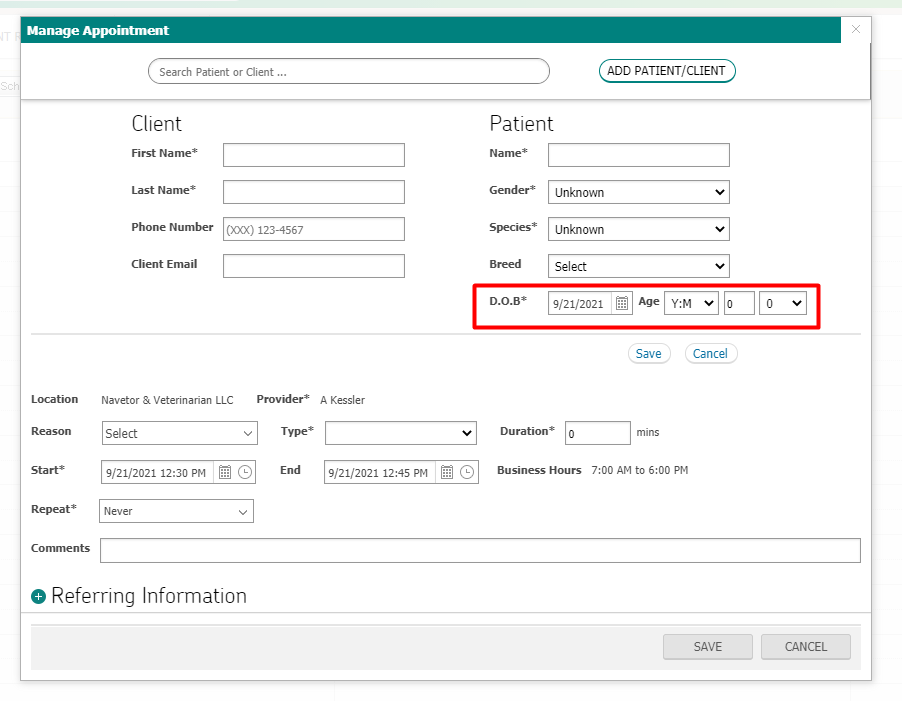
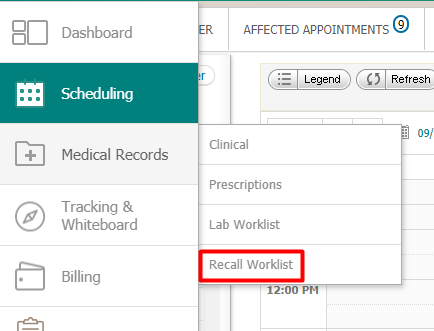
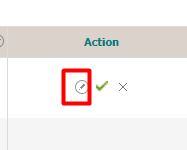
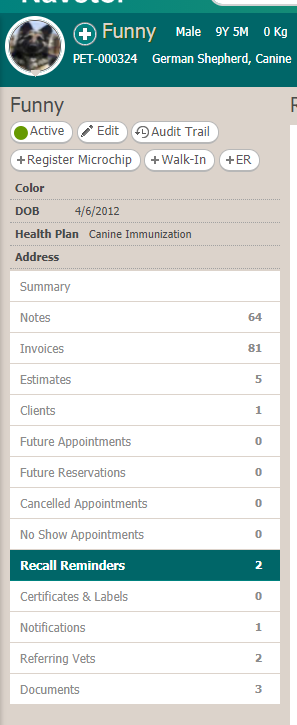
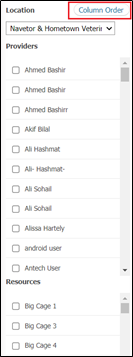
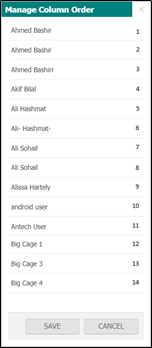
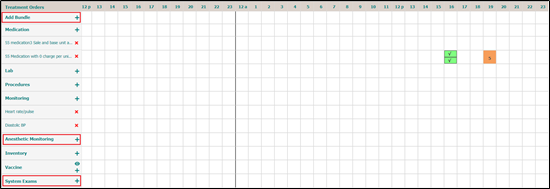
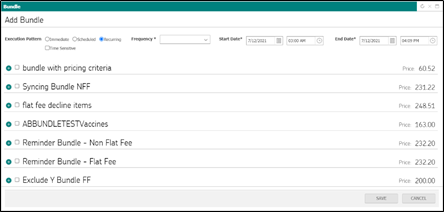
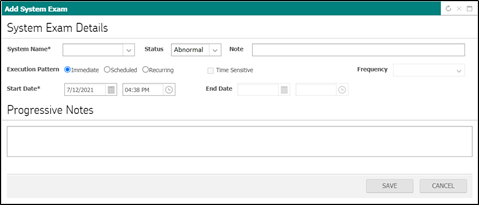
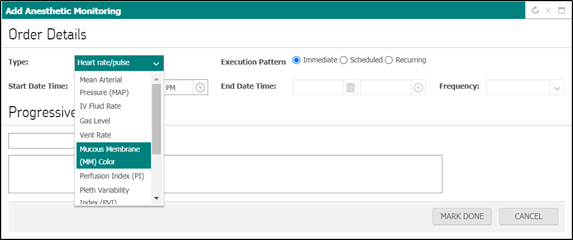

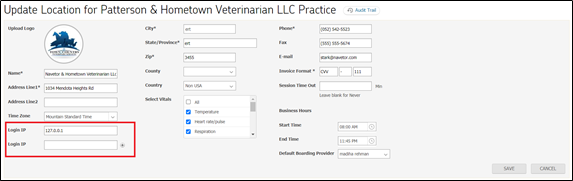
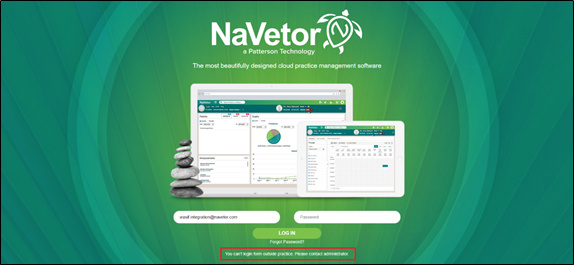
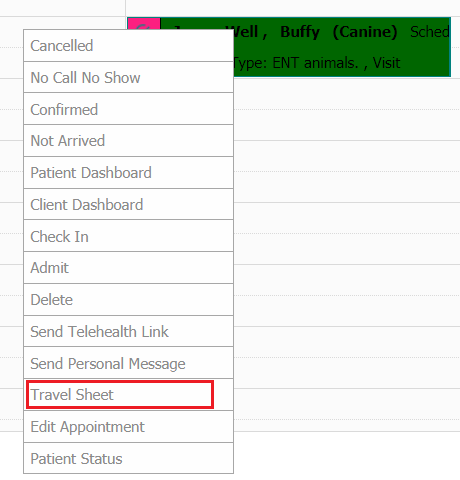
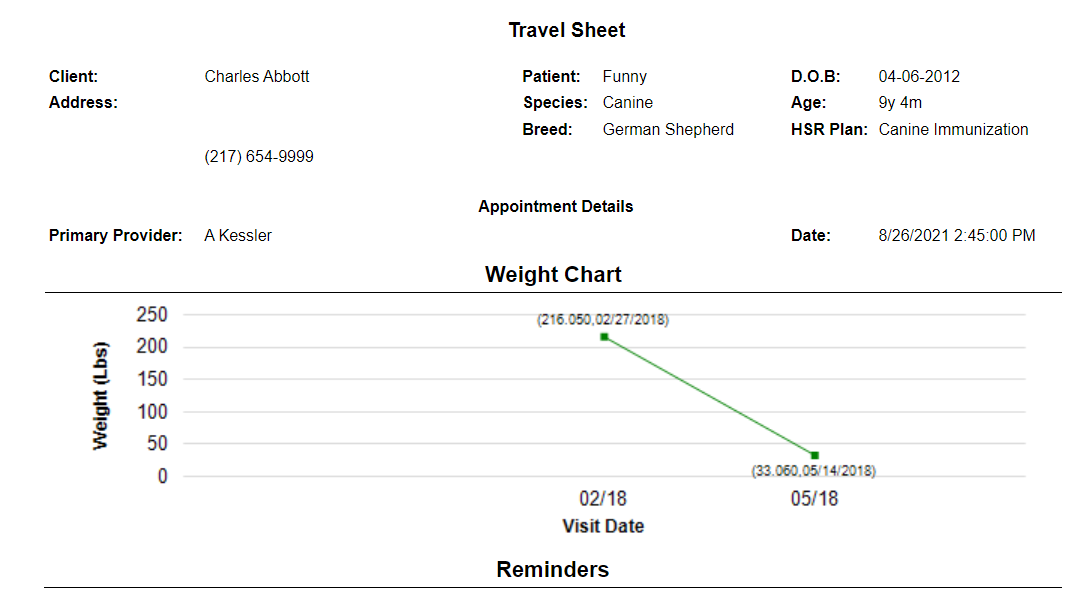
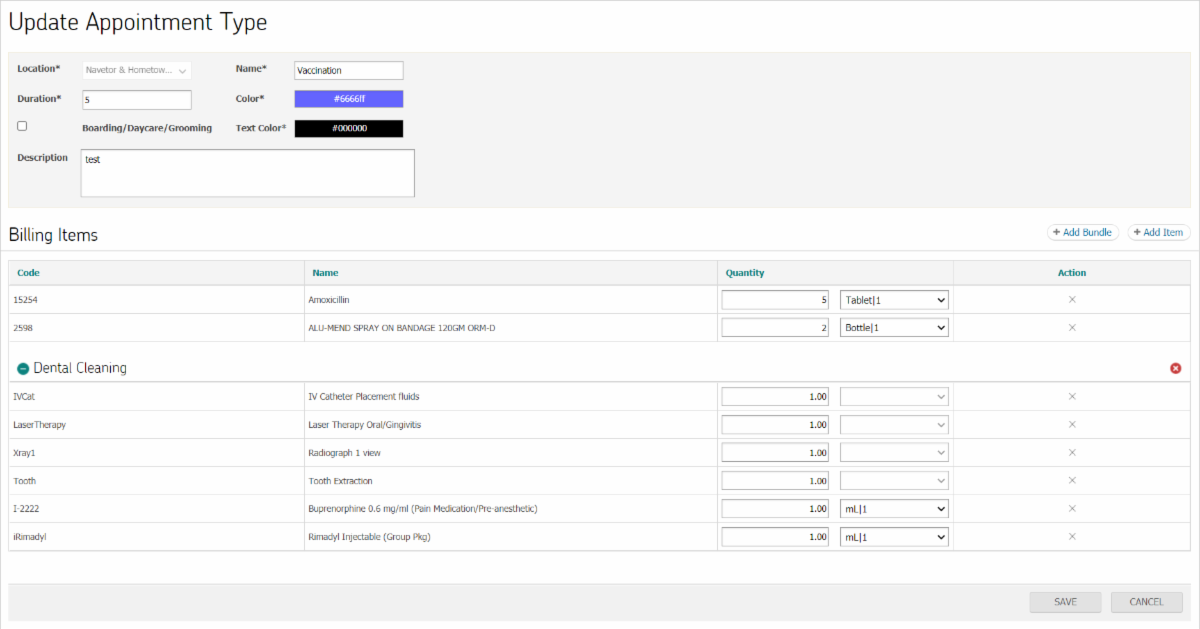
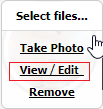
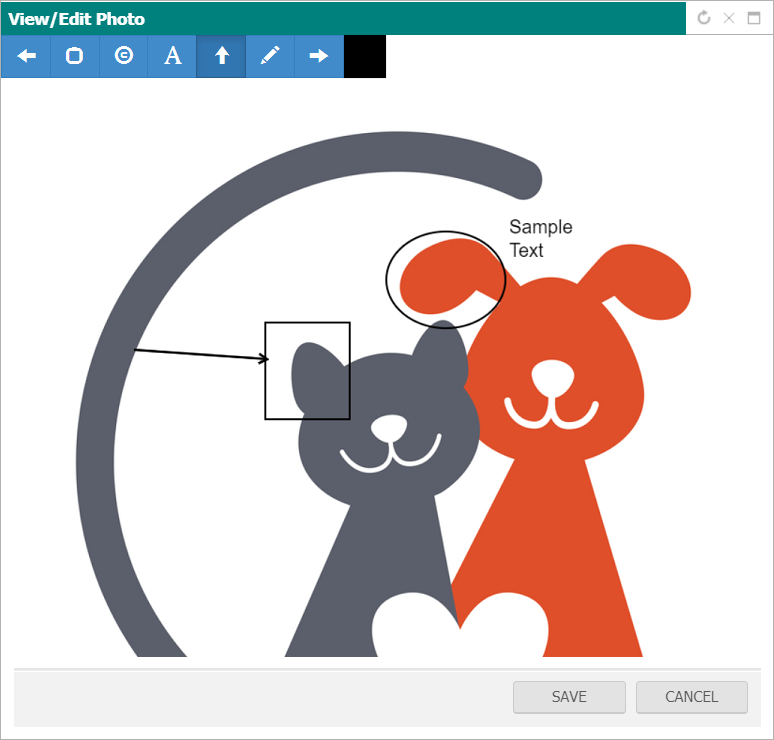
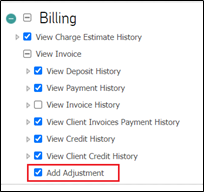
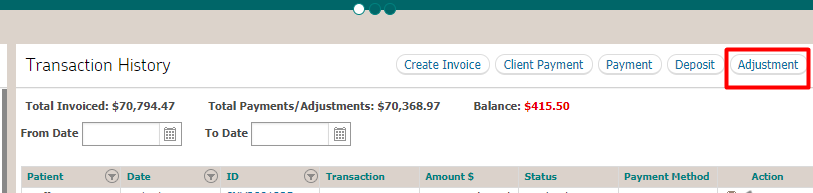

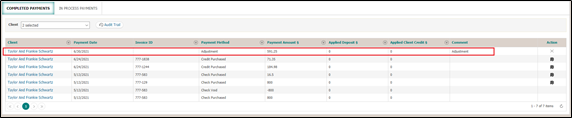
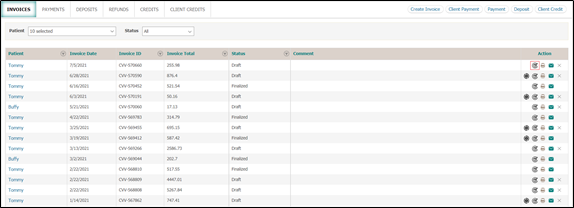
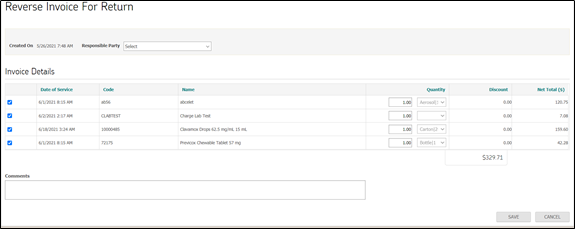
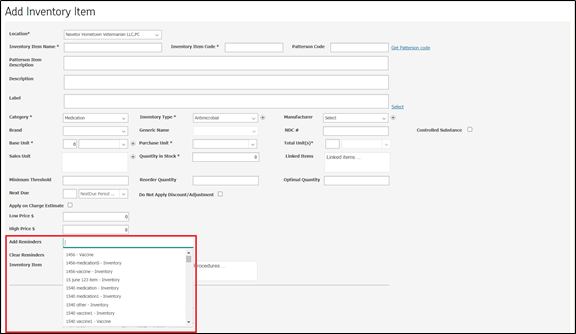


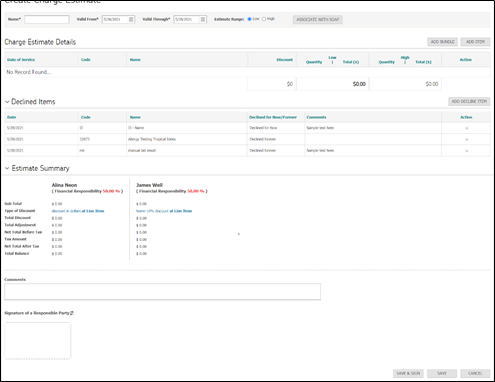


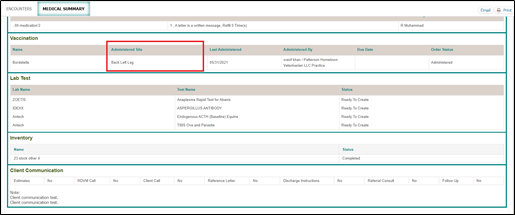
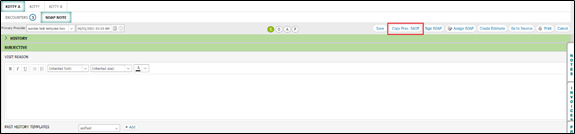
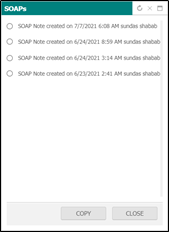
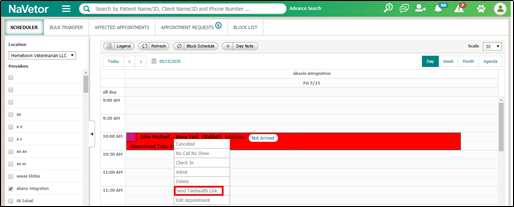
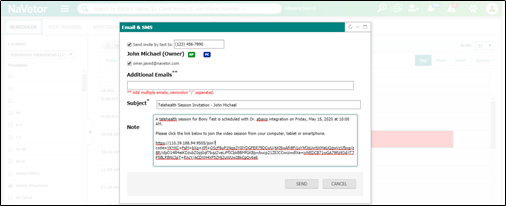
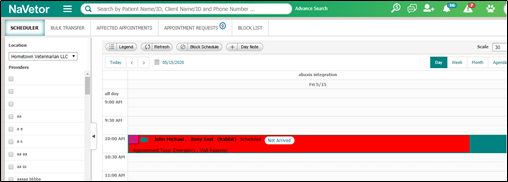
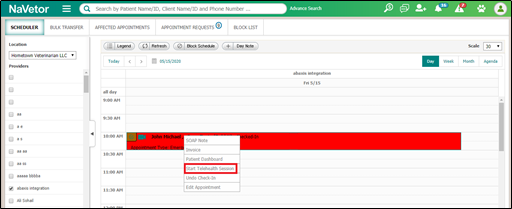
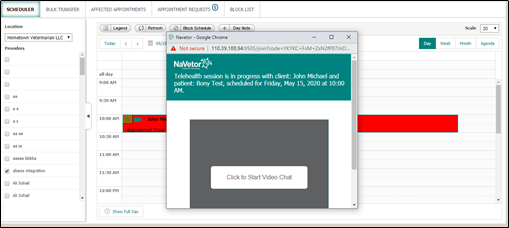
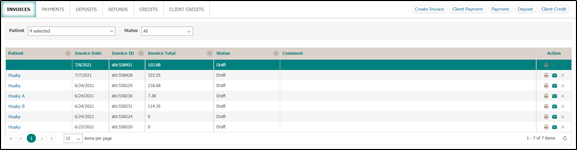


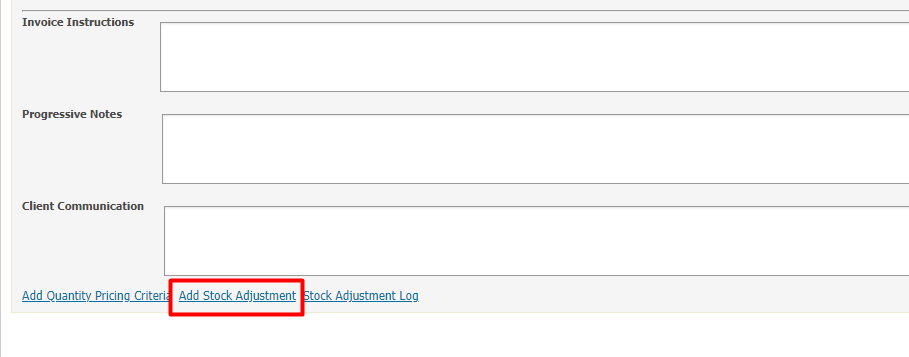
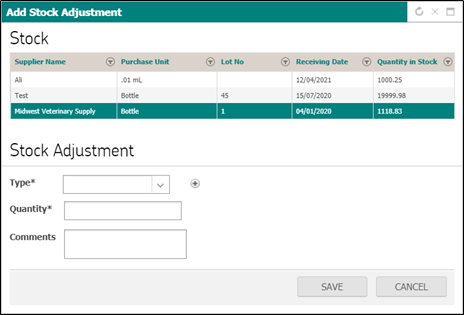
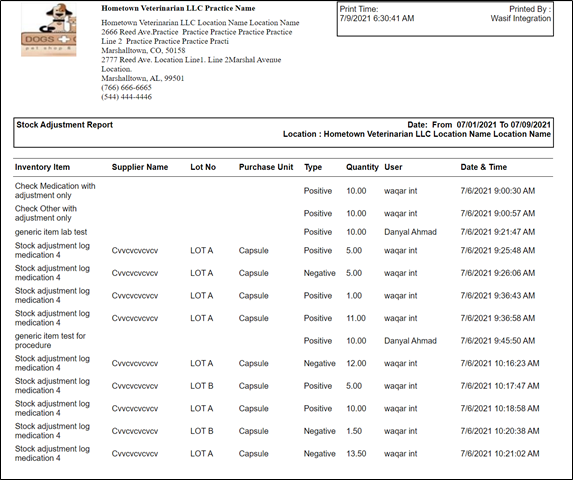
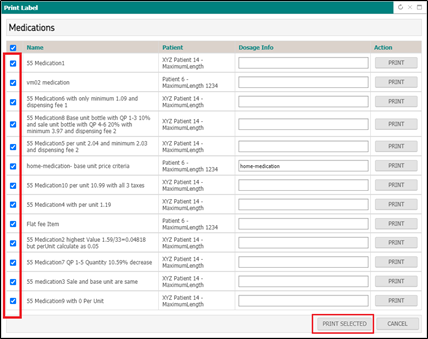
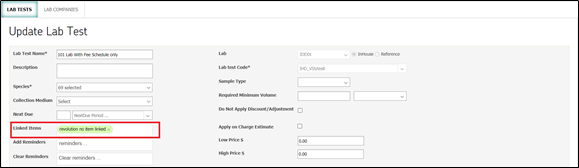

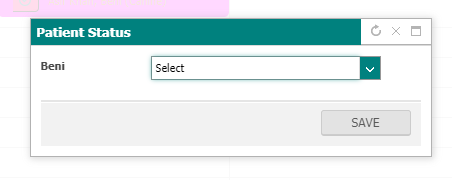
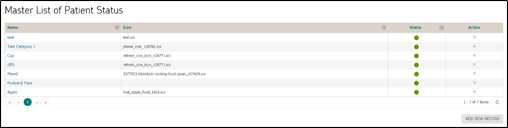

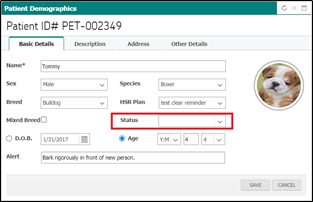
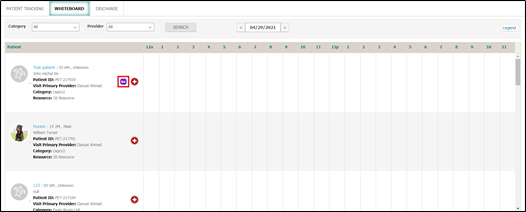
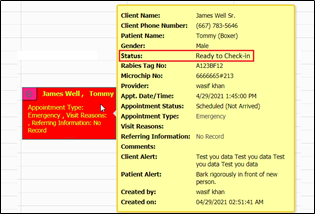
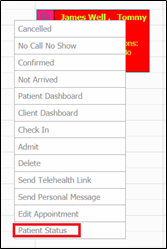
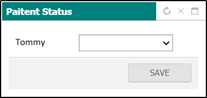
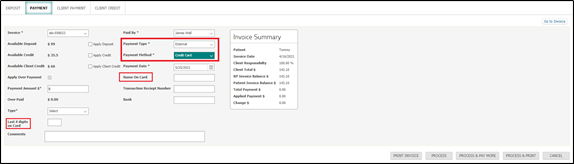
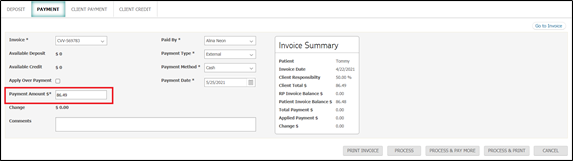
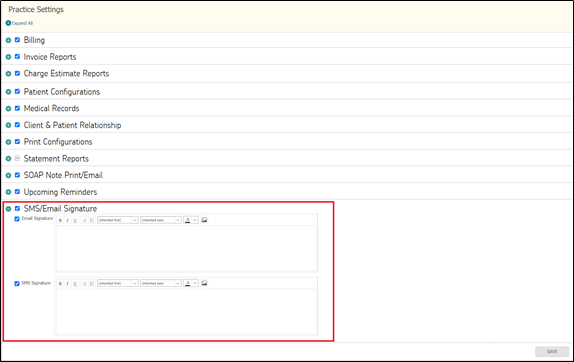
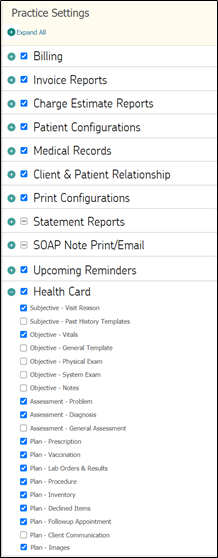


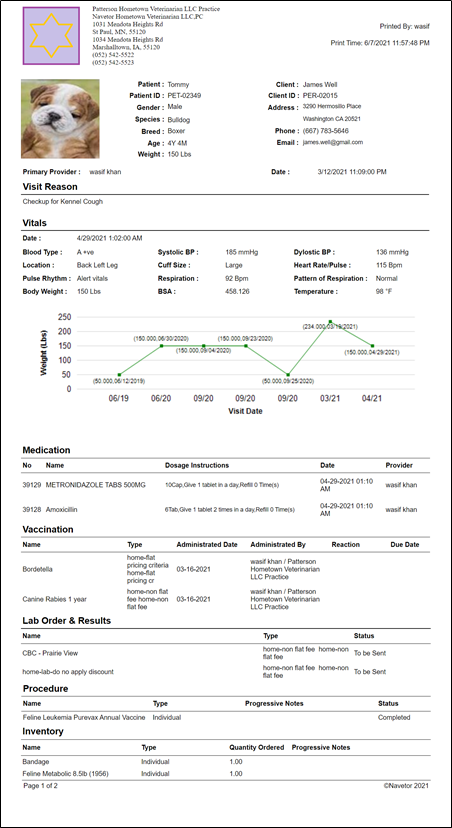

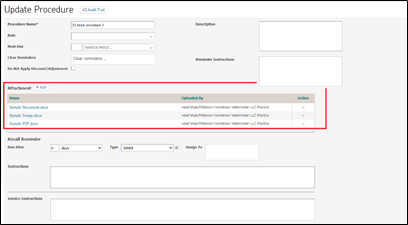
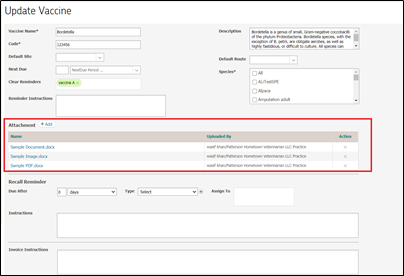
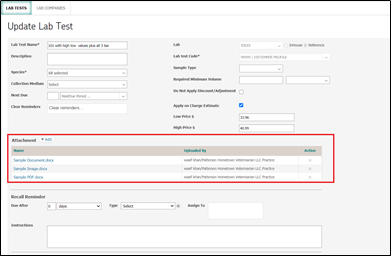
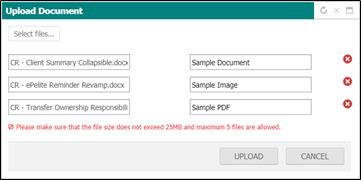

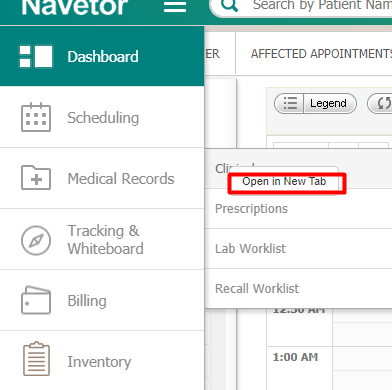

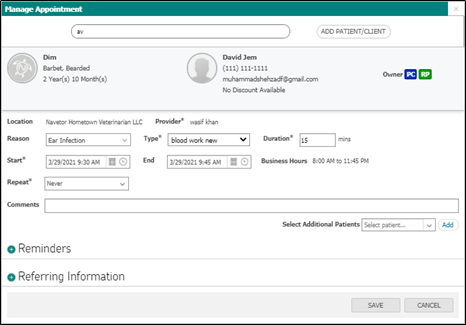
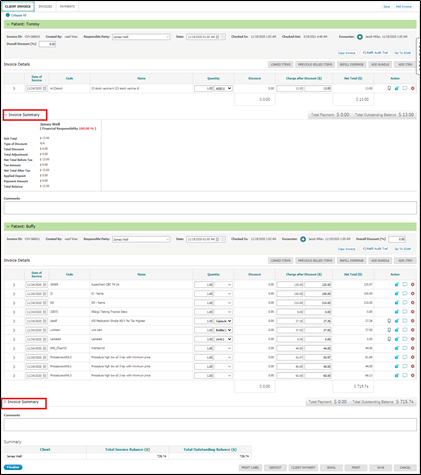
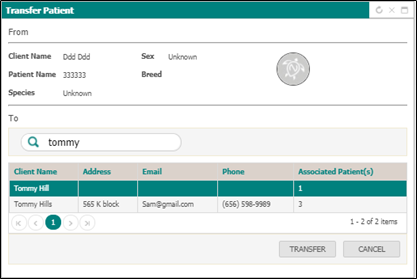
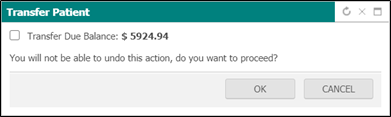
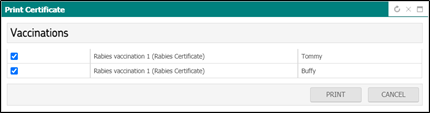
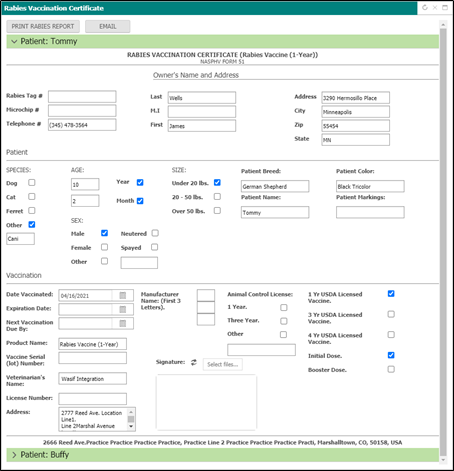
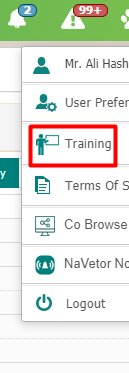


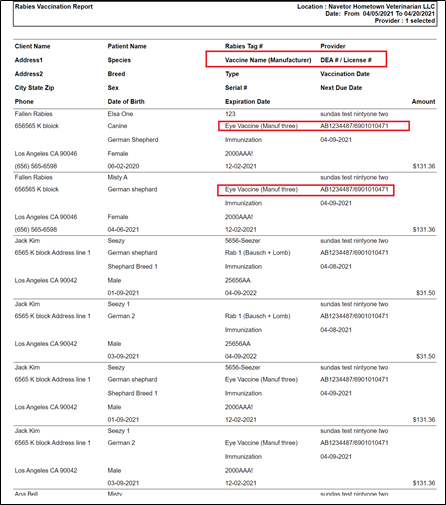


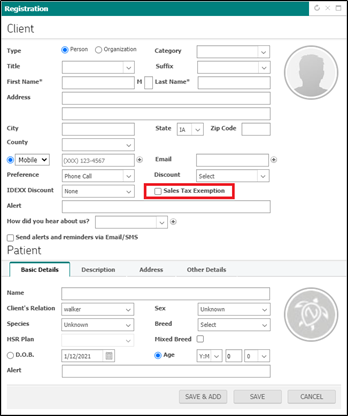
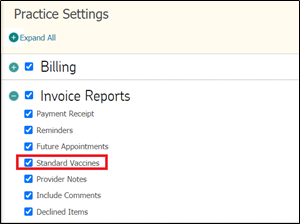

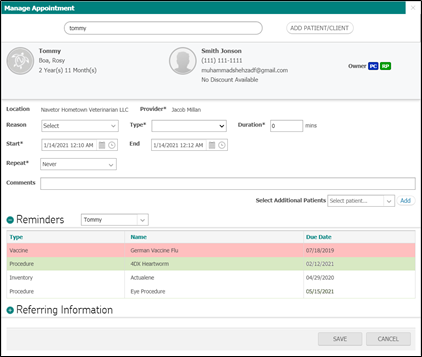
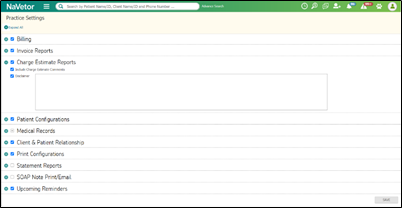
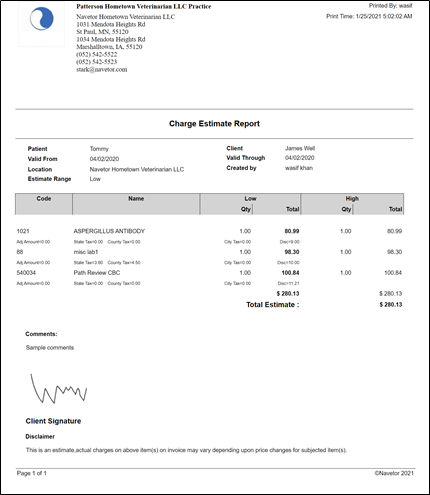

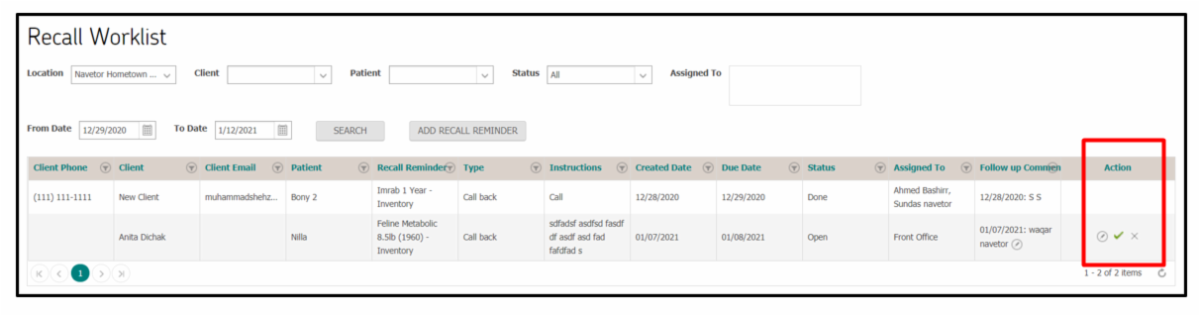
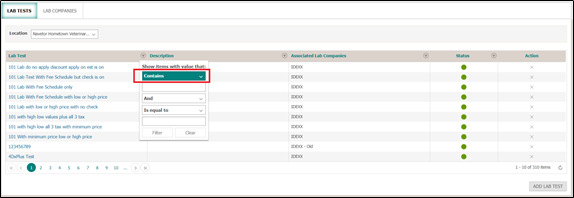

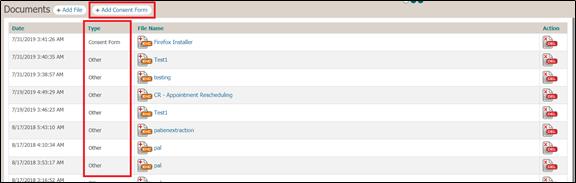
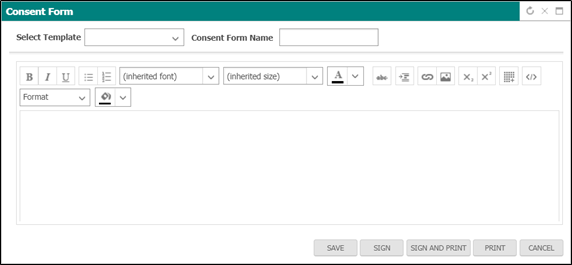


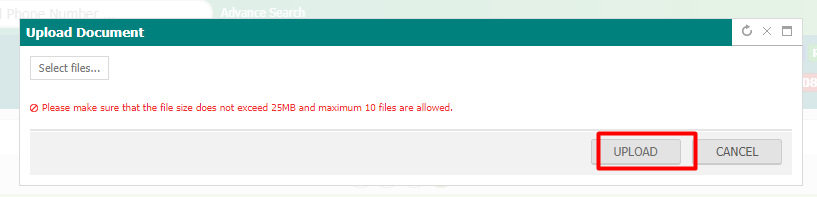


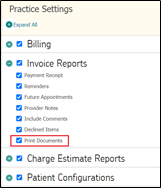
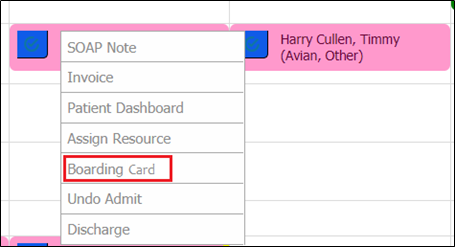
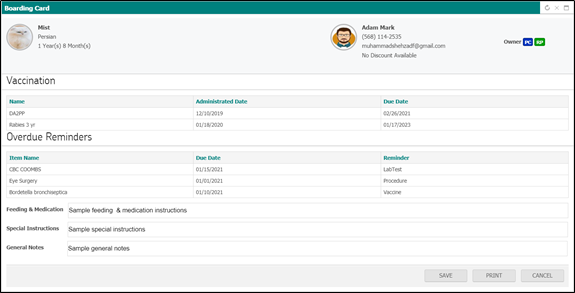
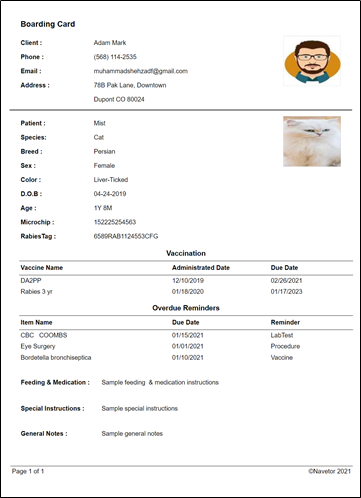
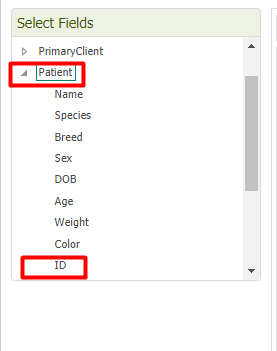
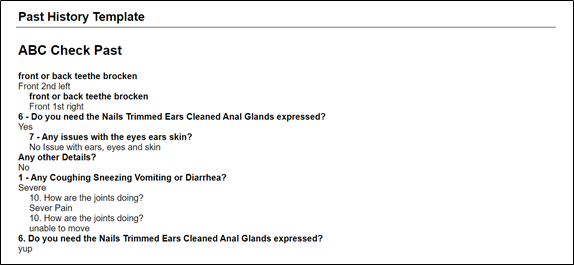
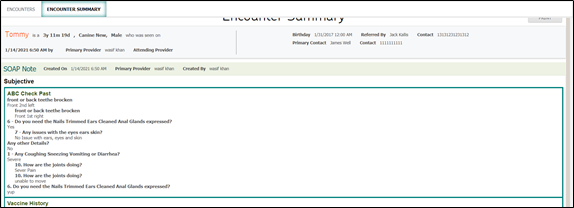

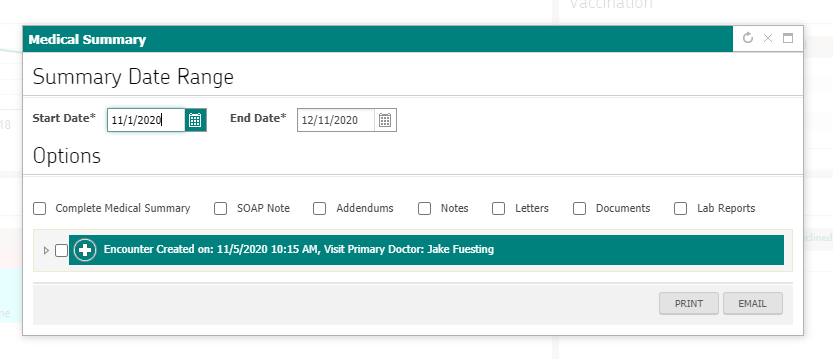
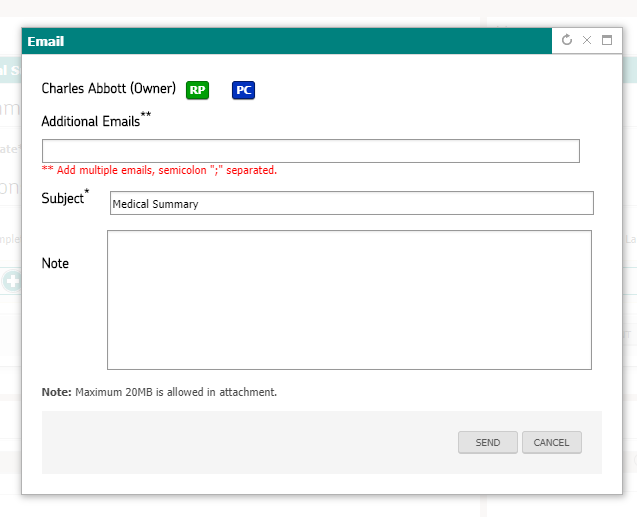


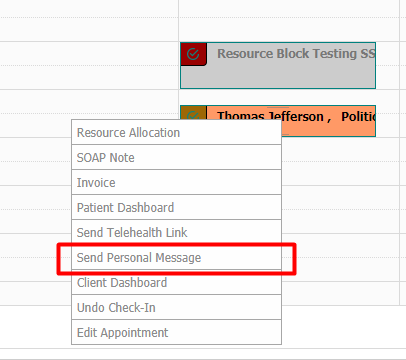
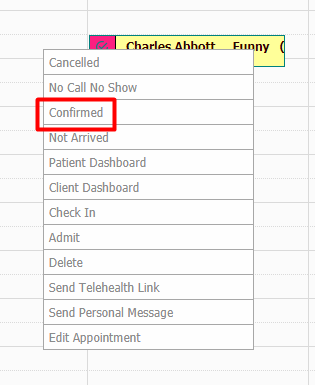
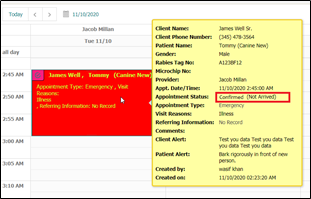
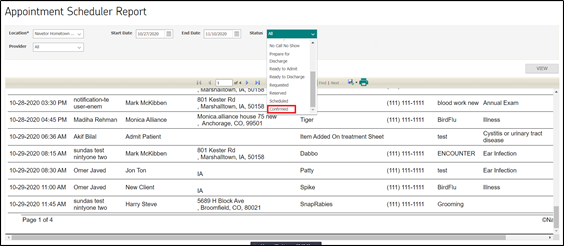
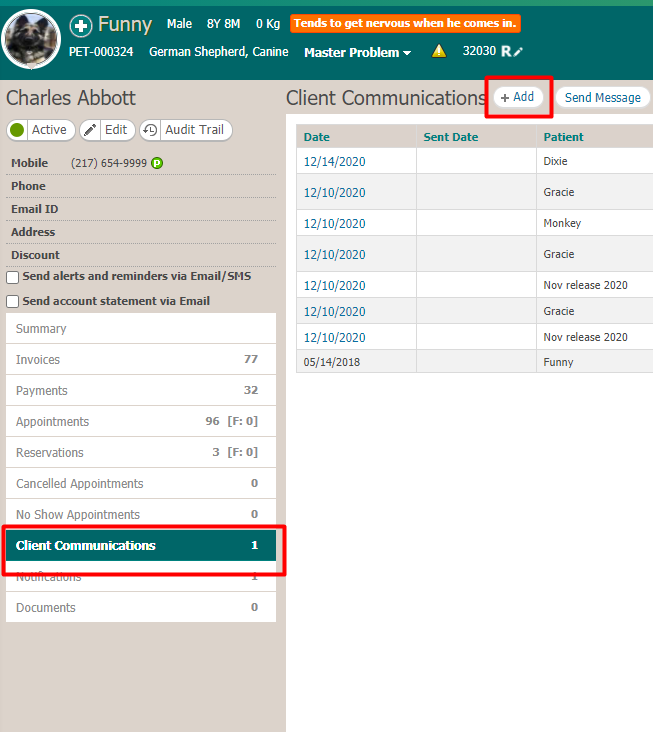
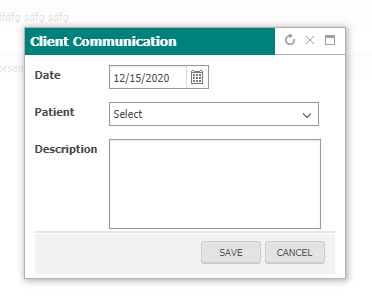

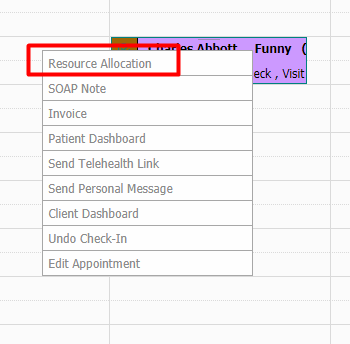
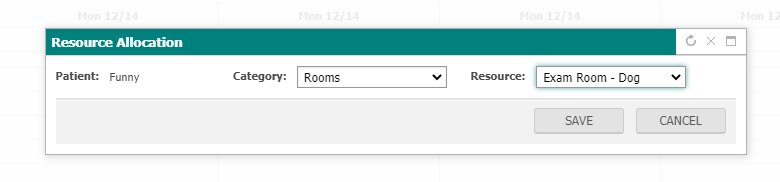
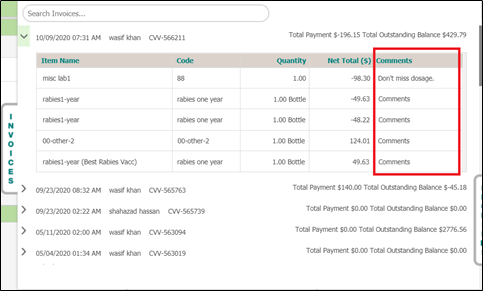
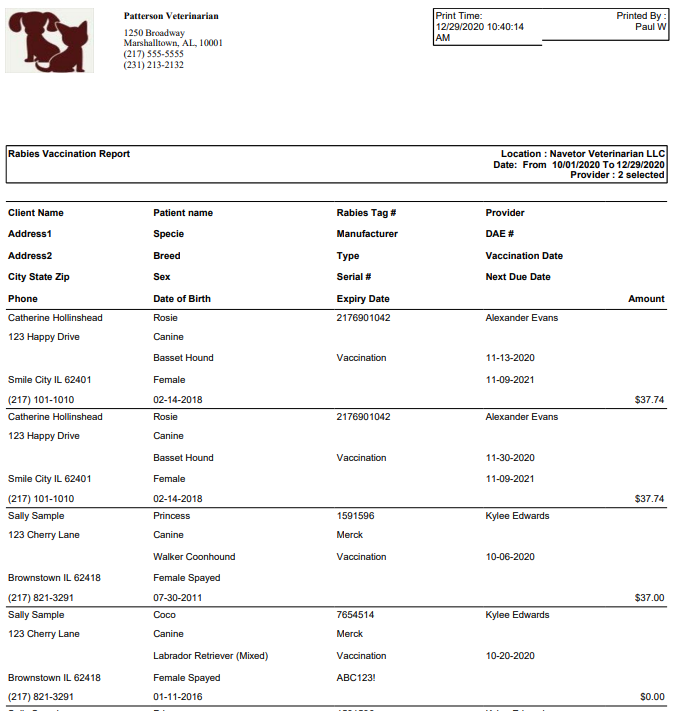
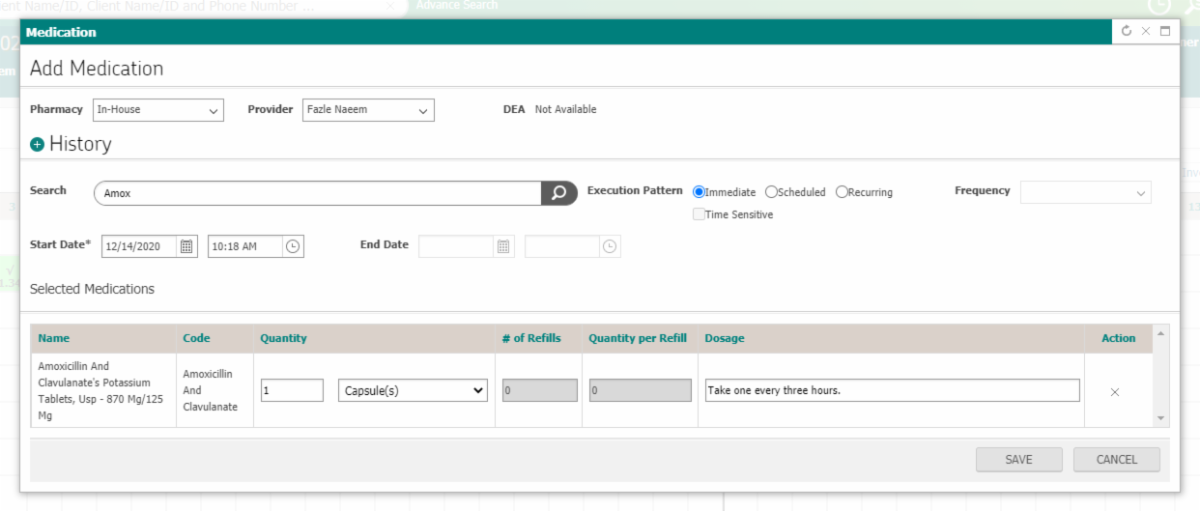
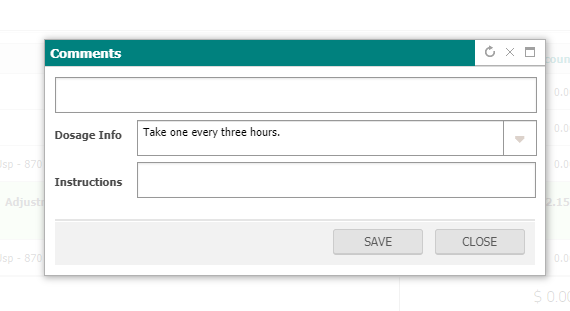
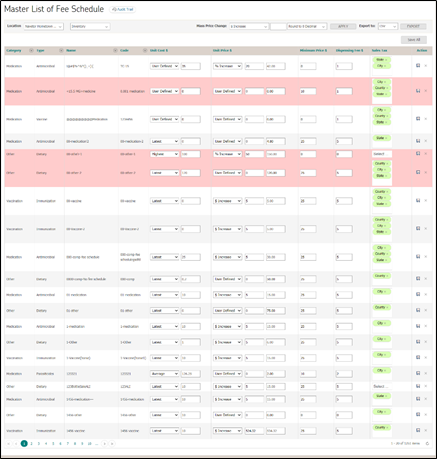
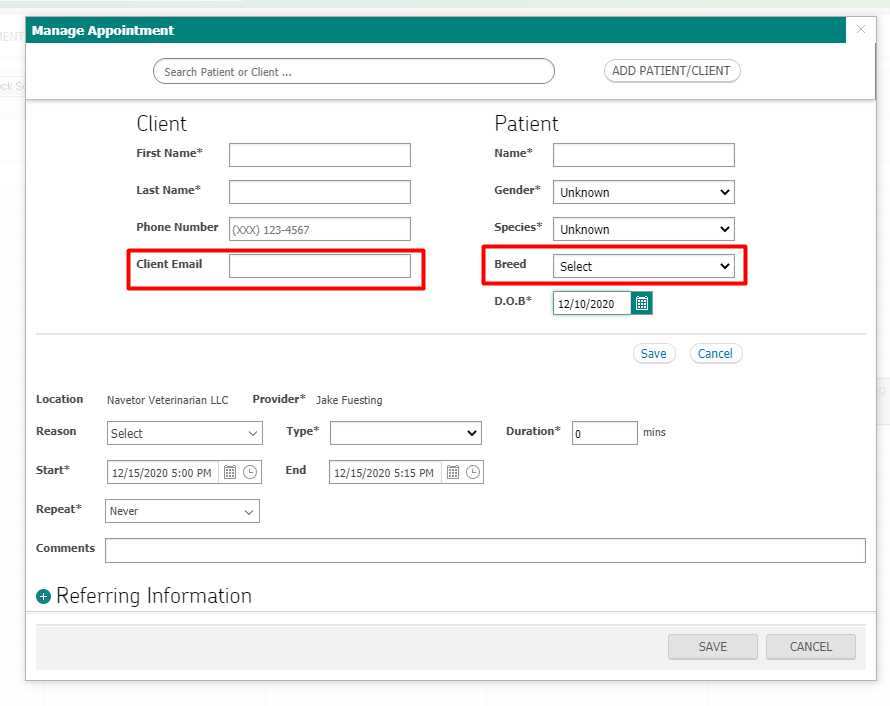

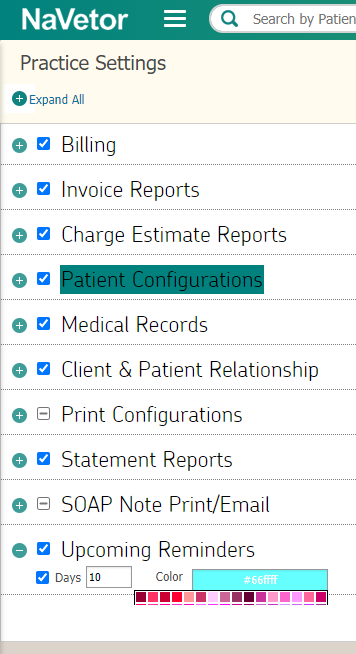

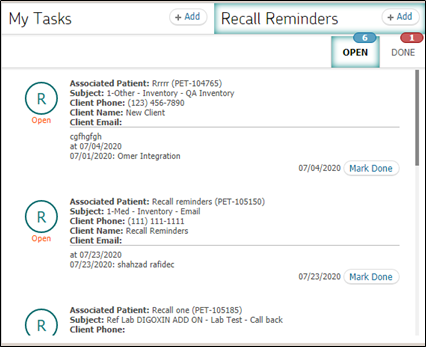
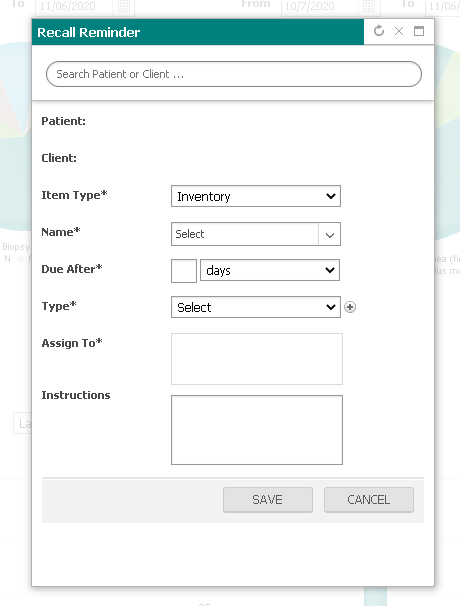
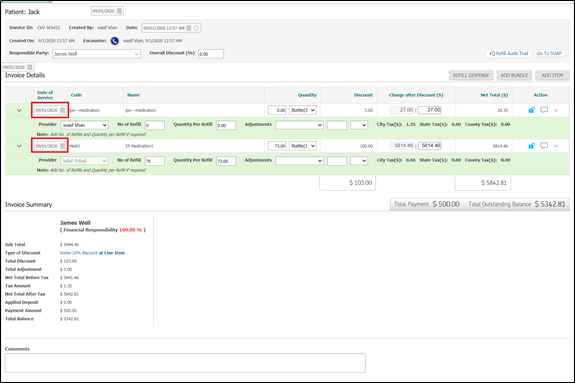
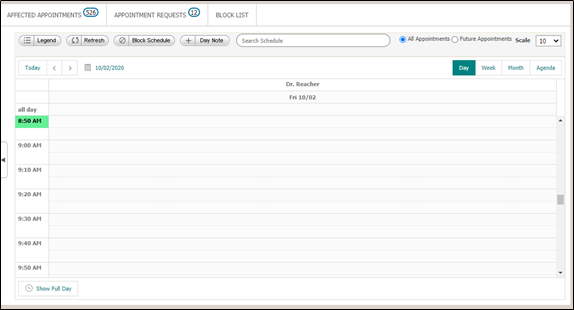
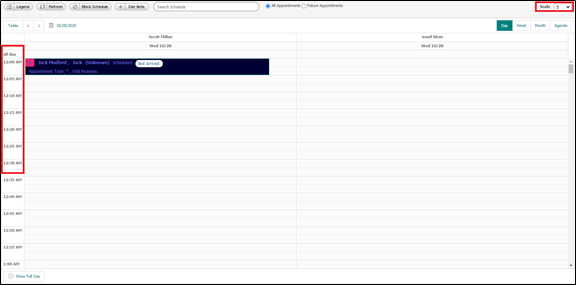
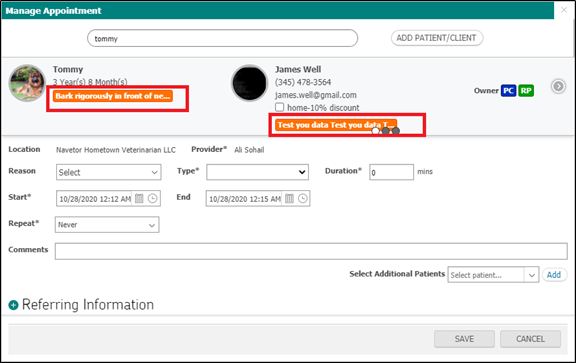
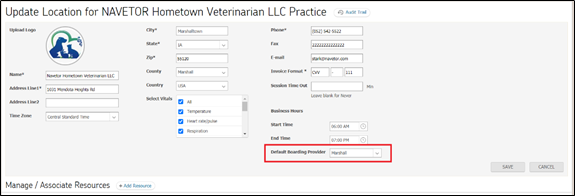
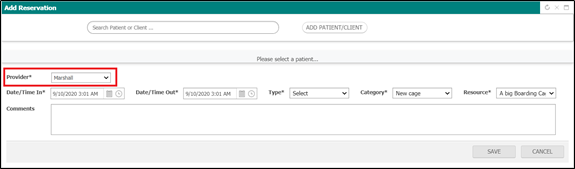
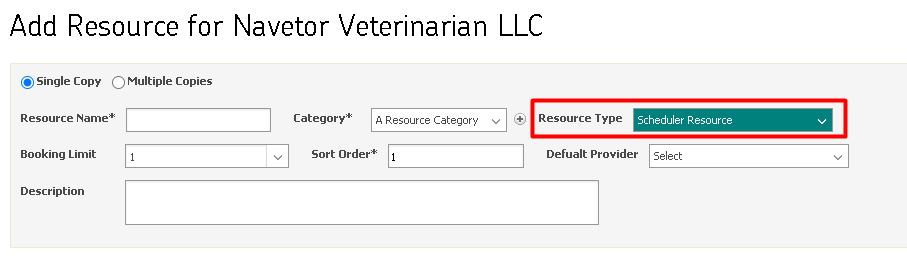

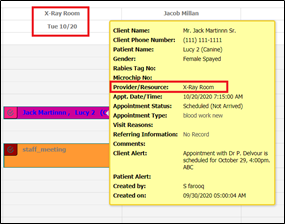
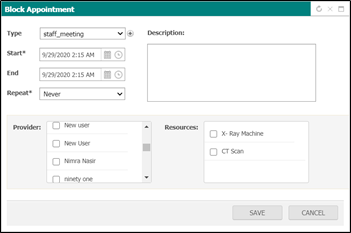
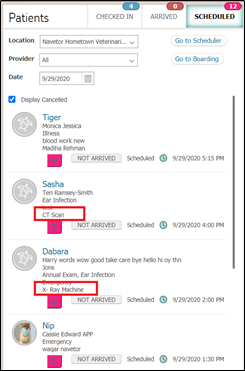
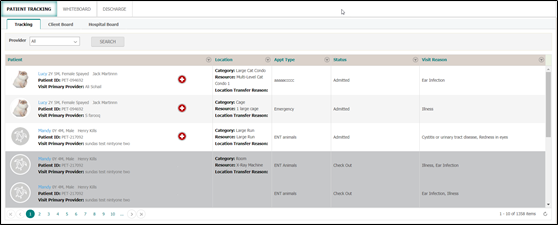
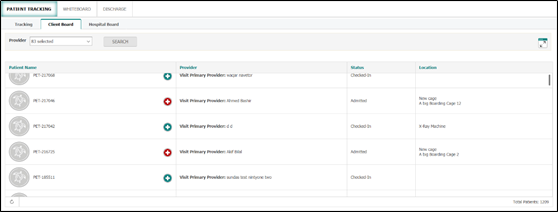
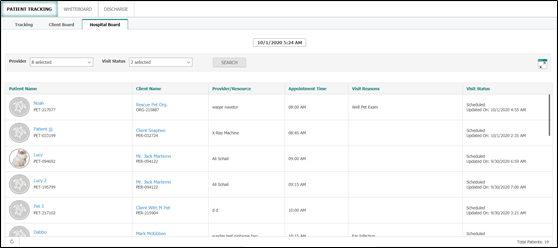
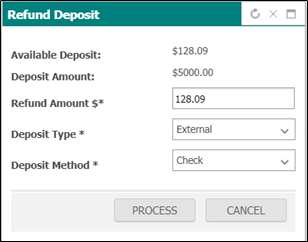
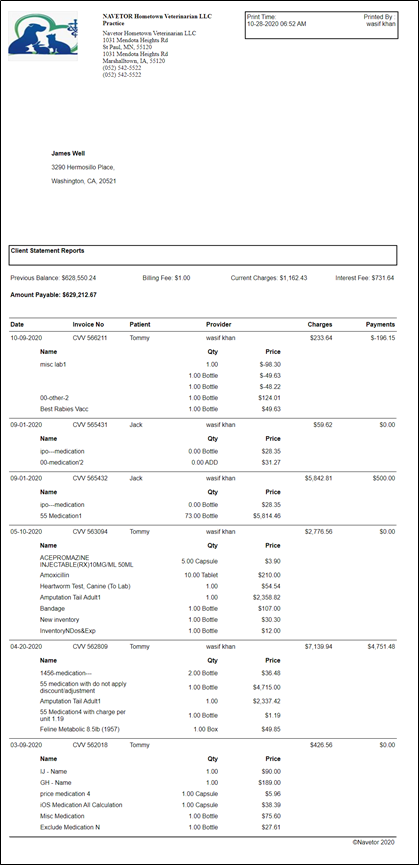
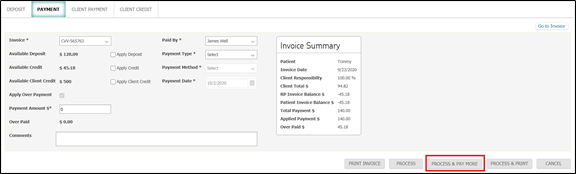
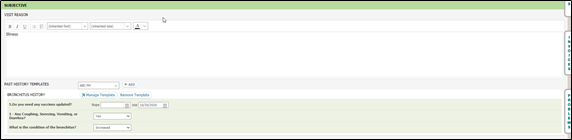
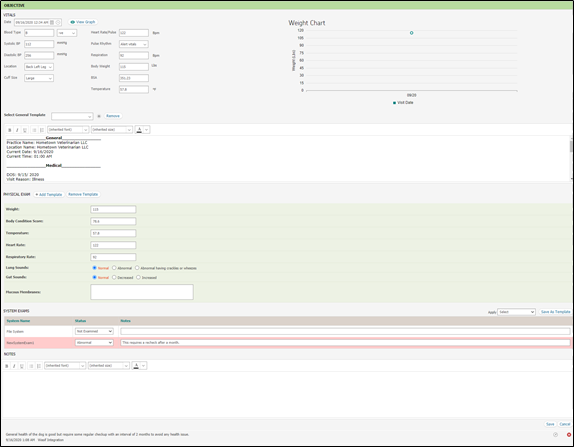

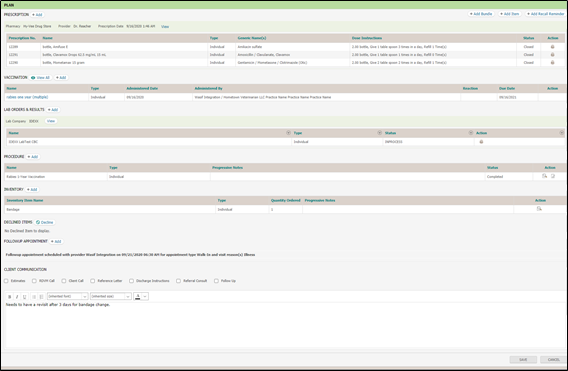
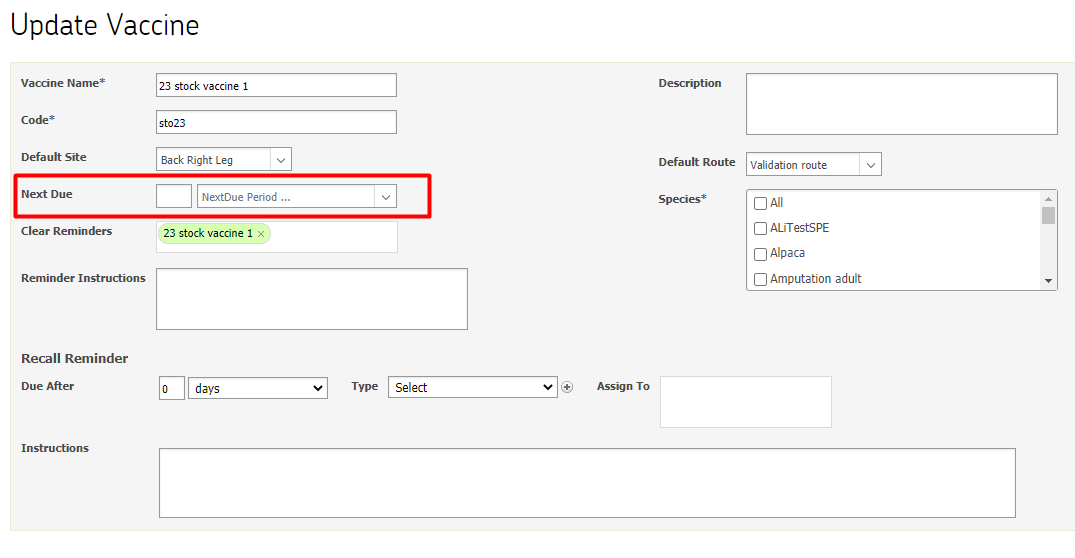


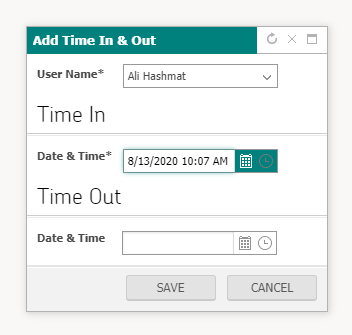
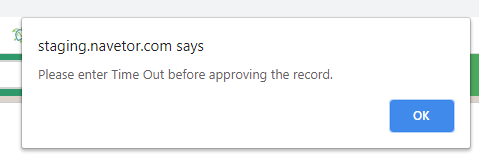

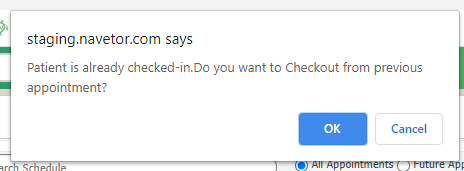
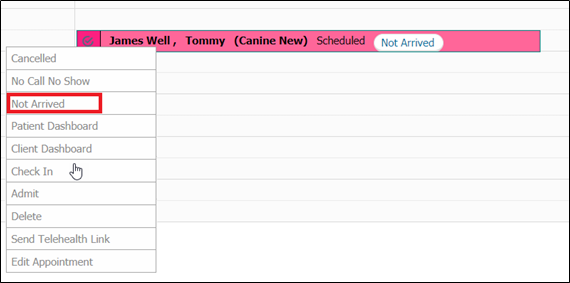


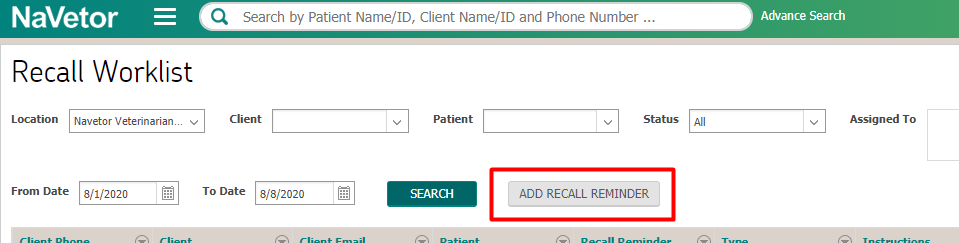

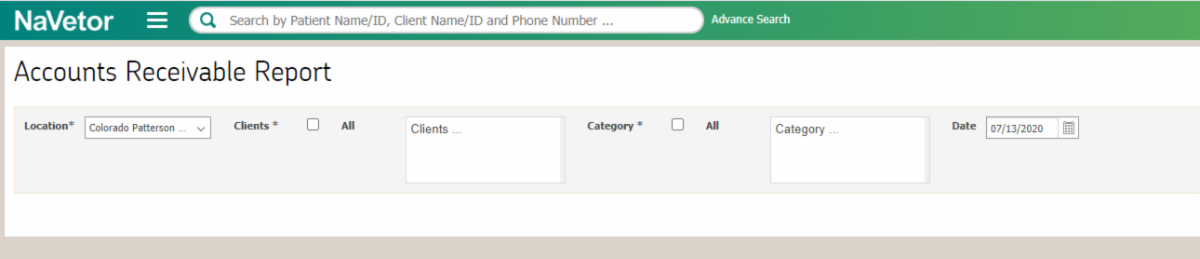
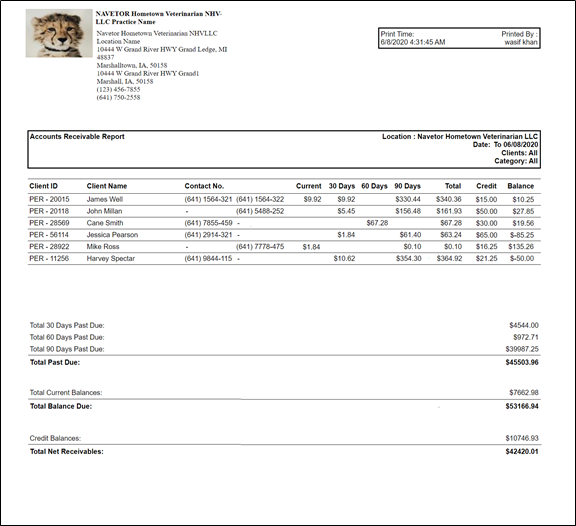
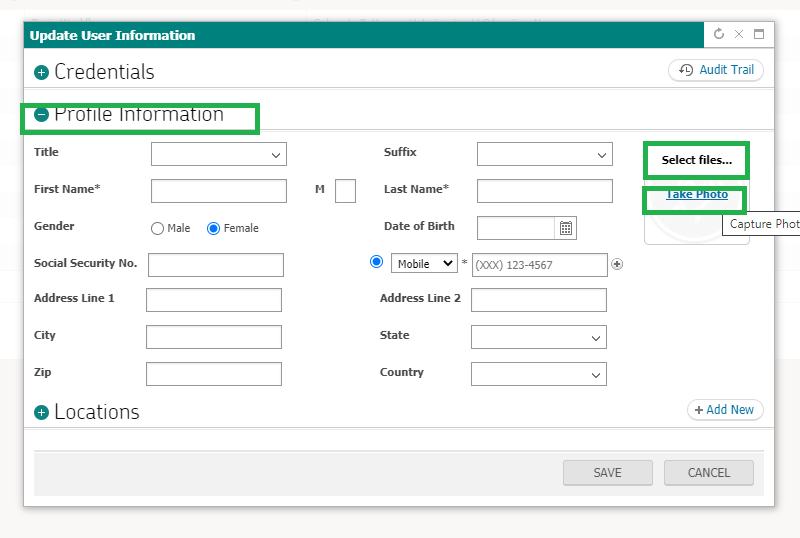
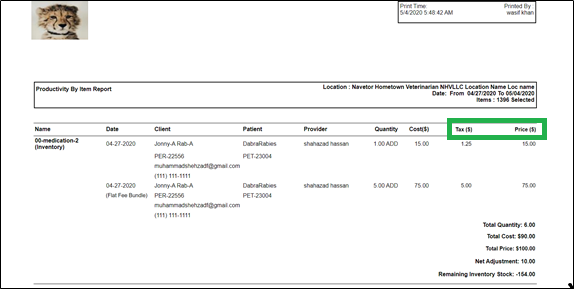
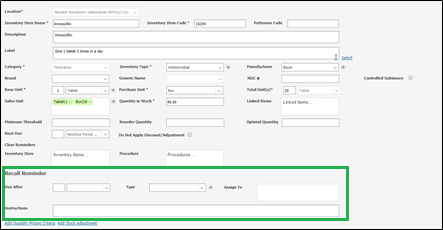
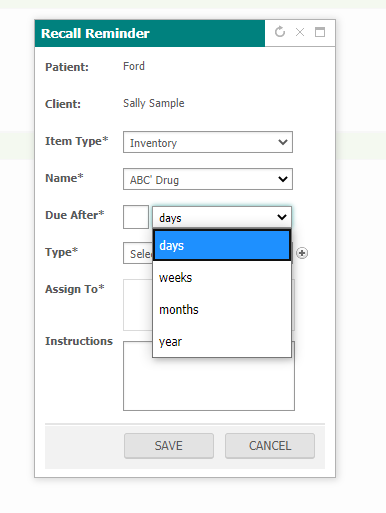
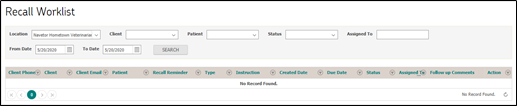
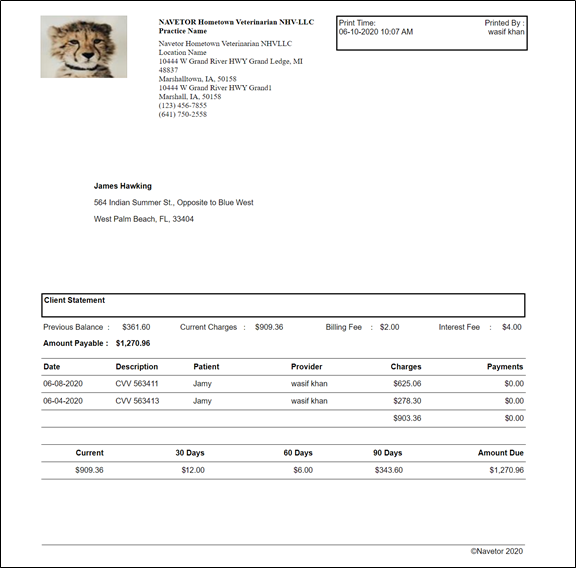
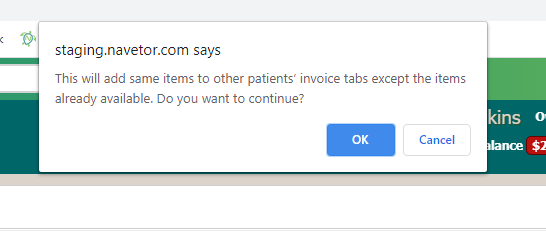


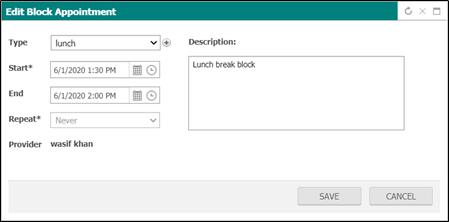
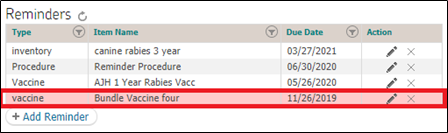
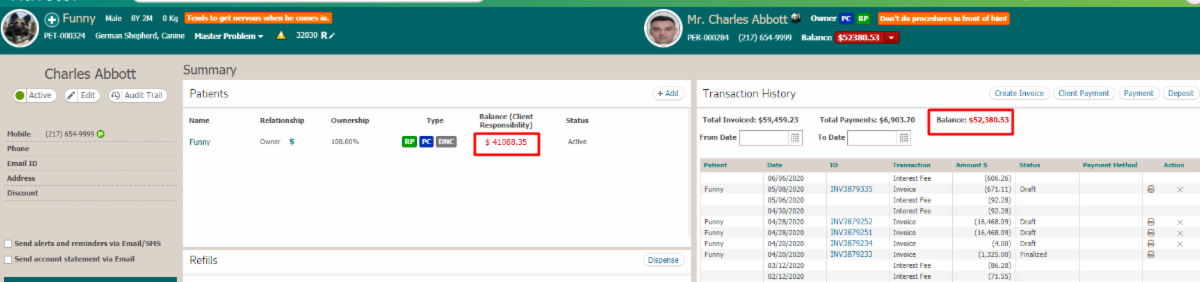
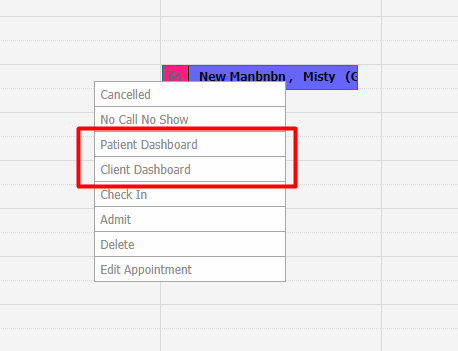
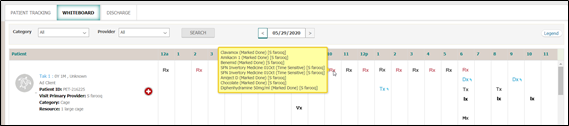
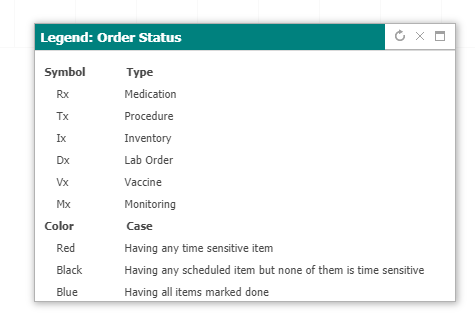
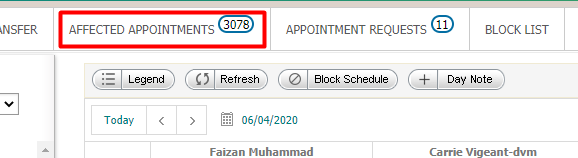
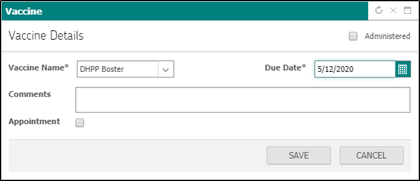
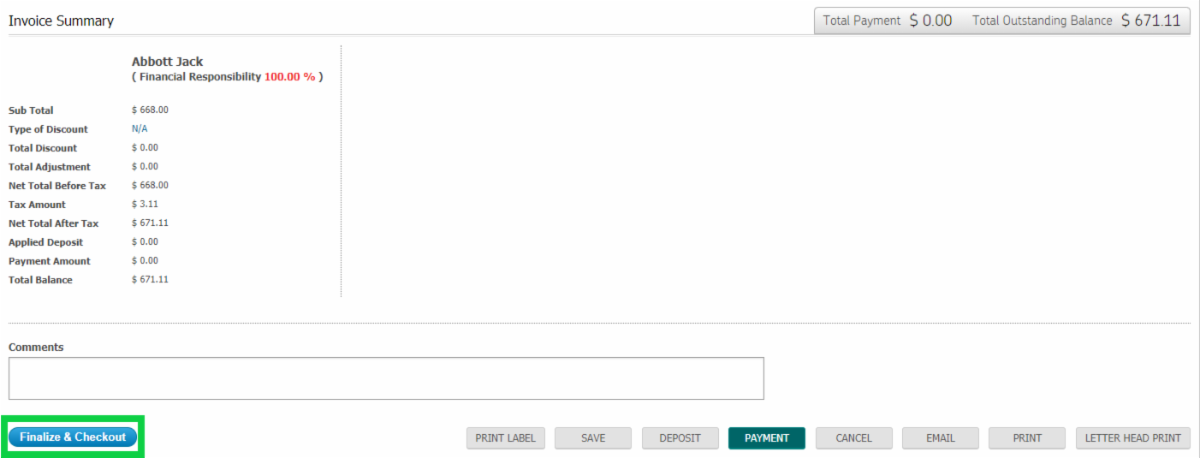
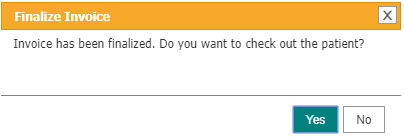
 Within Settings > Admin >> My Practice >>> Practice Settings, there are now additional options for Print Configurations. These will be displayed at the top of print-outs for invoices and reports.
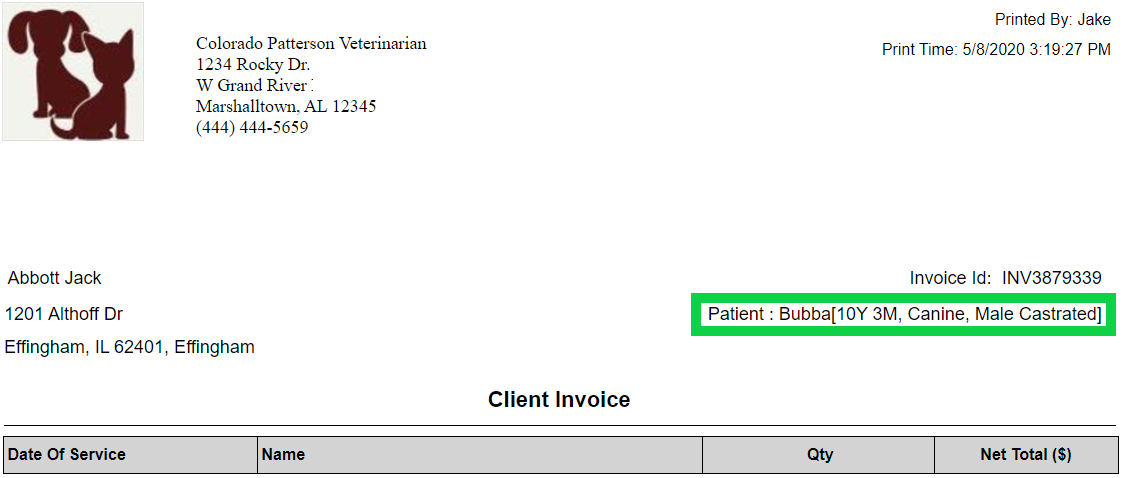
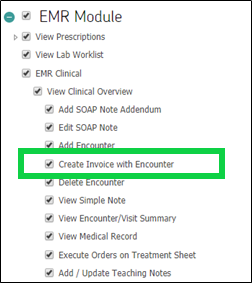
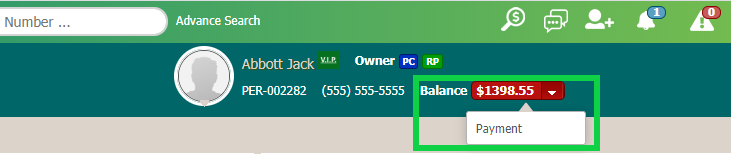
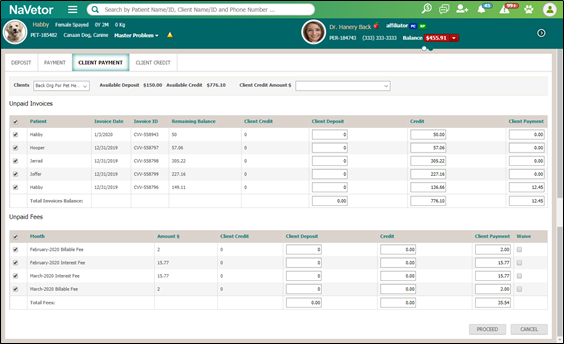


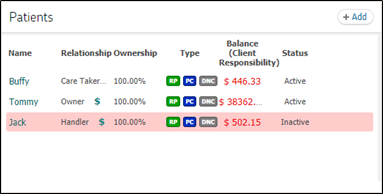
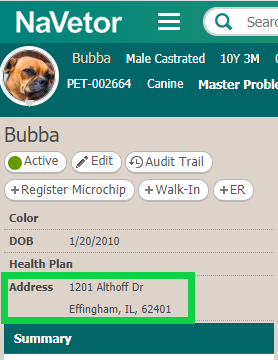 In the Patient Dashboard, the address for the patient will now appear on the left side of the screen, along with other pertinent information.

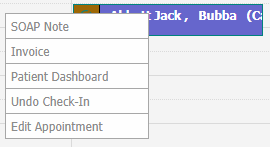
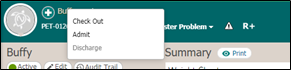
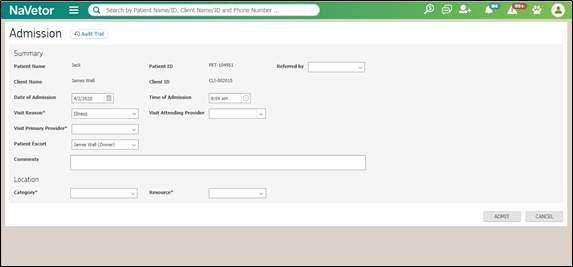
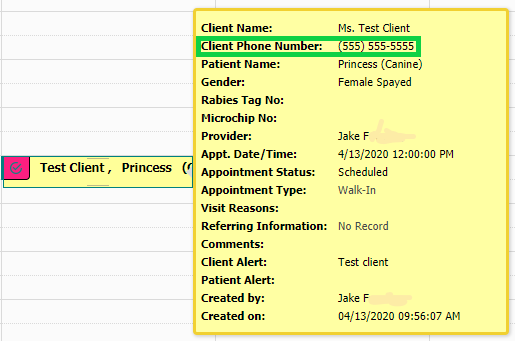

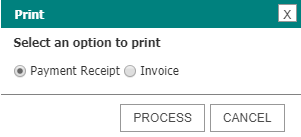

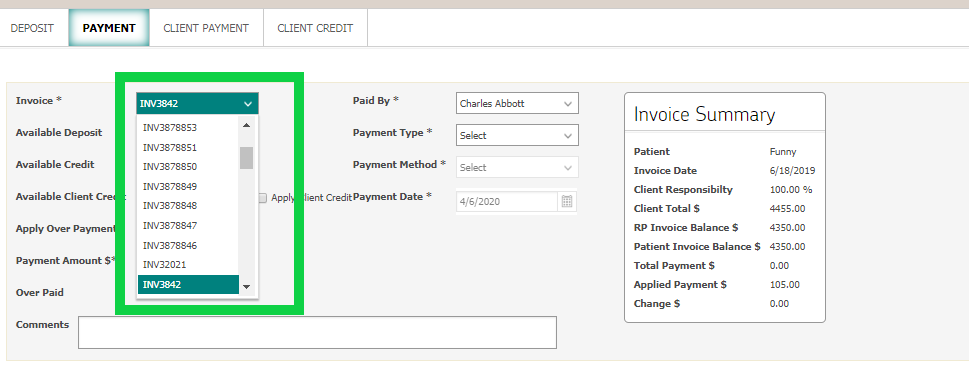

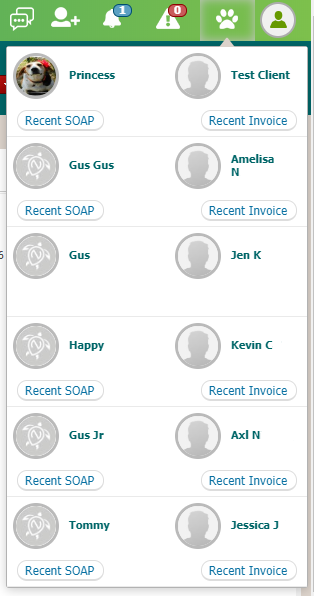
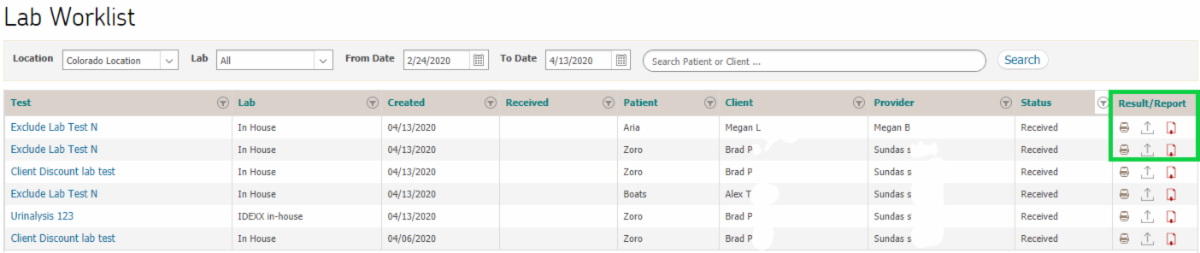
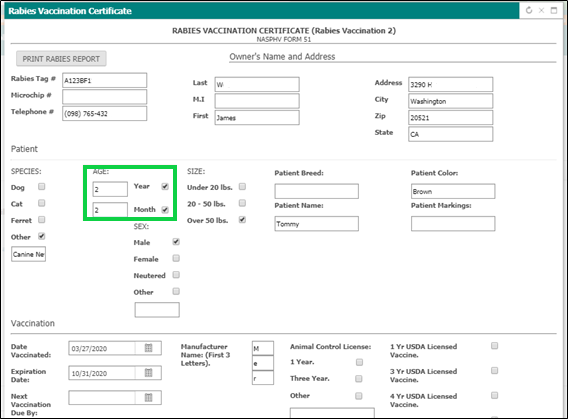
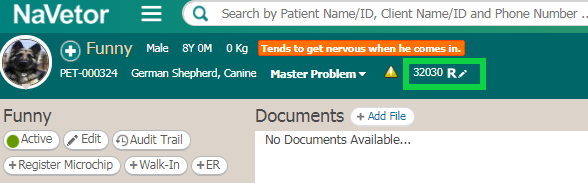
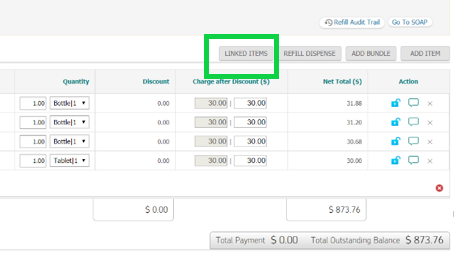
 You will notice when you create an estimate, that a LOW and HIGH button have been added. We are not totally finished with it yet, but we are working to give you the ability to utilize price and quantity ranges on estimates. We will keep you posted on when this will be ready!
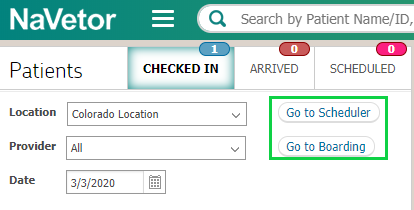
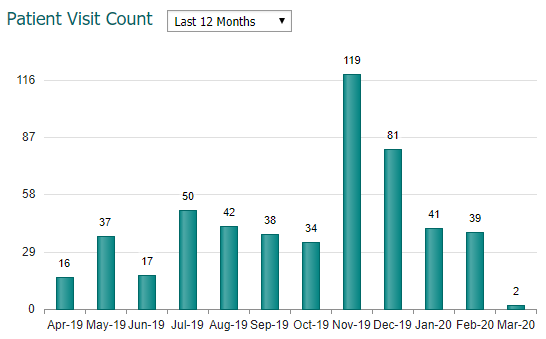
 On the right-hand side, you will now see a "My Tasks" section on the top, along with the "Announcements" section displayed on the bottom. The tasks will display the tasks assigned to you - the user logged into NaVetor. User will have the ability to add new tasks to themselves or others in the practice. All associated patients, subjects, and descriptions of the tasks will display. User is able to view all pending or completed tasks assigned and will have the option to mark pending tasks as done, which will move them to the completed area.
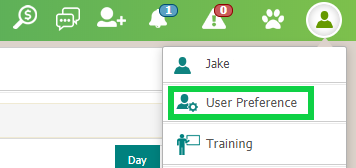


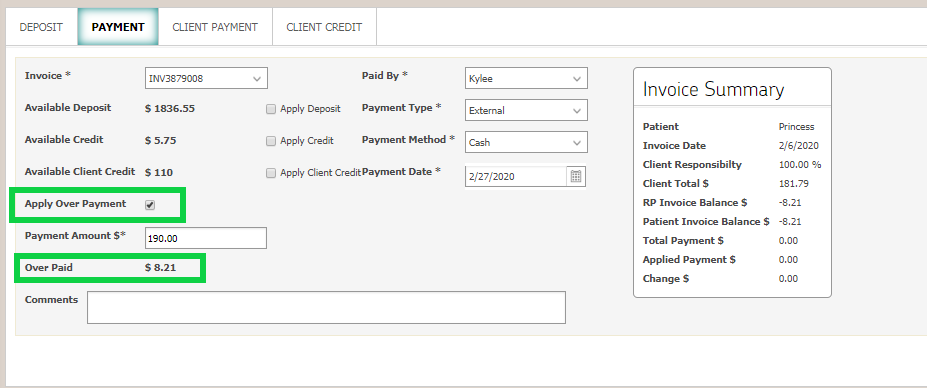
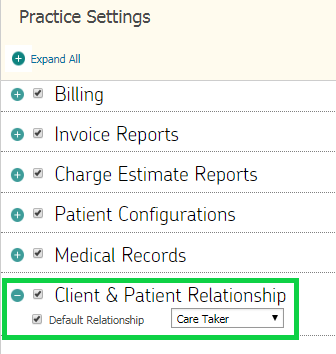

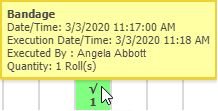
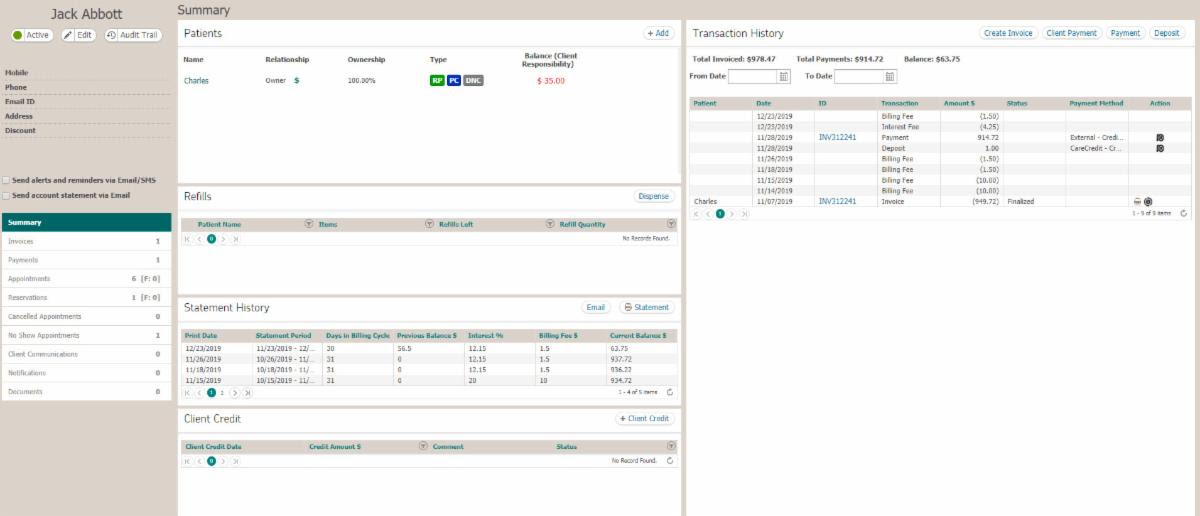


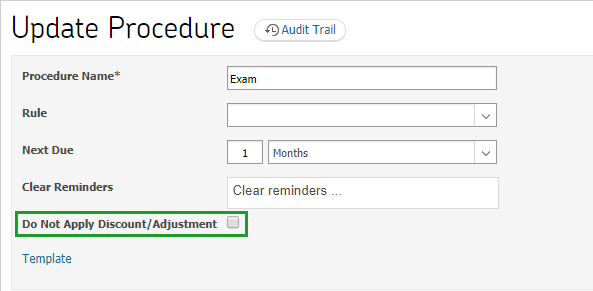


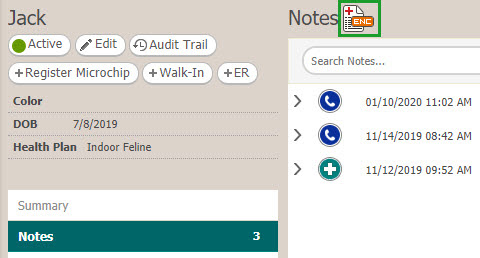
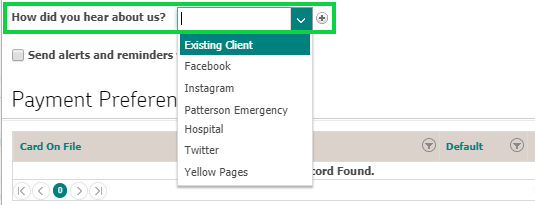
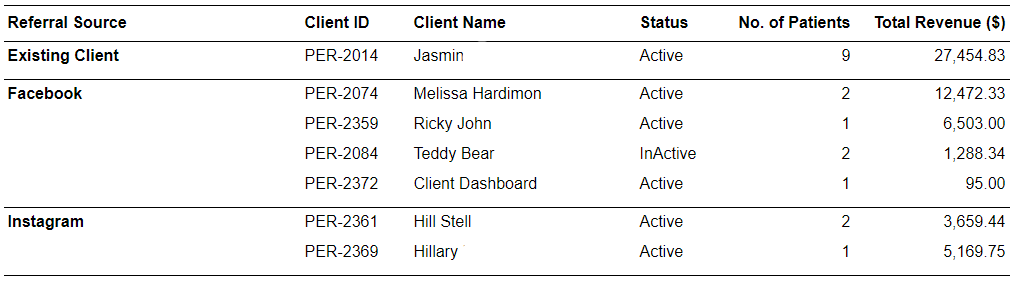
 When registering clients and patients, using the Client-Patient Registration icon in the banner, you will now be able to add additional patients! When you click on Save & Add, a new window will appear, giving you the ability to add another patient.
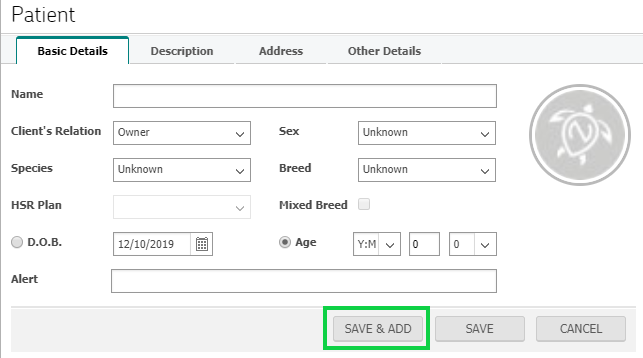
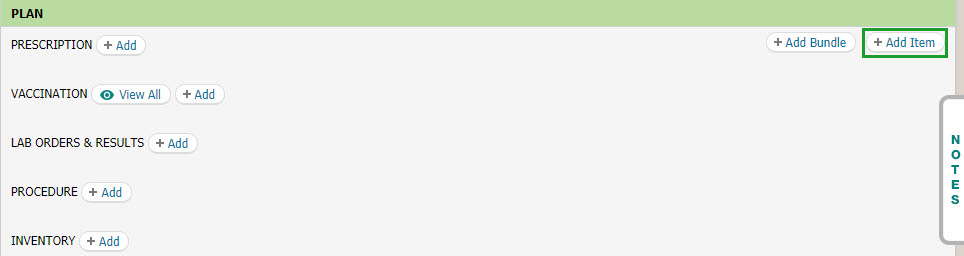


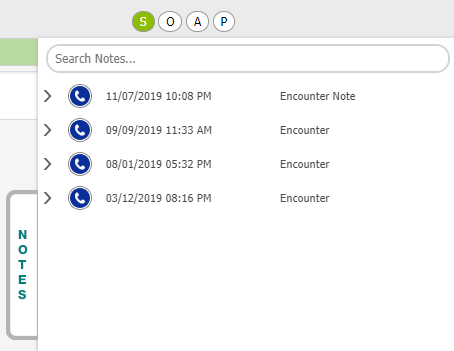
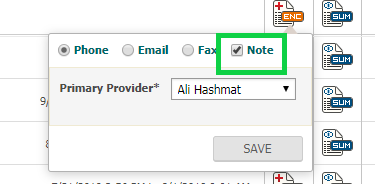
 On the Encounters Tab in Medical Records, there is now a number displayed, to indicate how many encounters have been created for the patient.
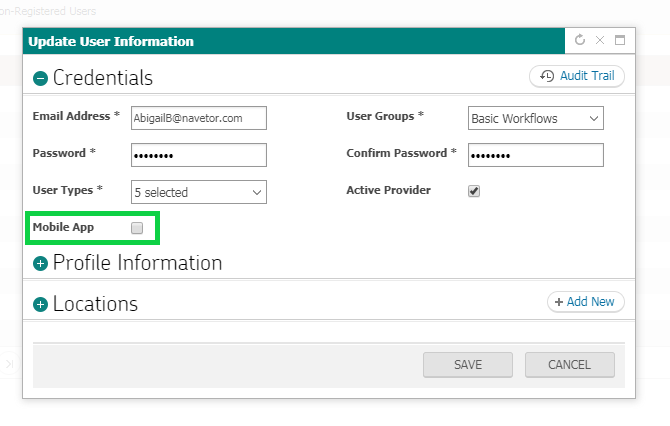


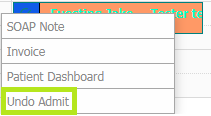
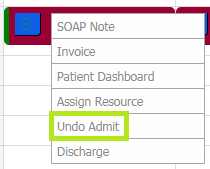
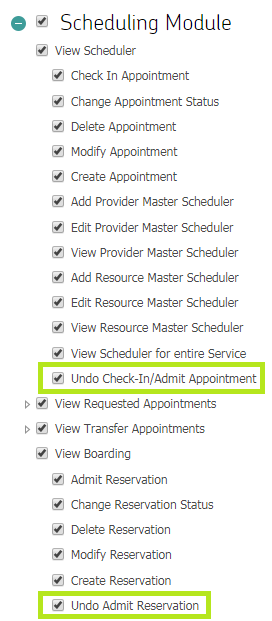
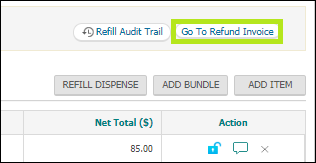


 This is a new report that will allow the practice to see what clients have either cancelled appointments or failed to show up.